Tutorial: Anomaly detection with Azure AI services
In this tutorial, you'll learn how to easily enrich your data in Azure Synapse Analytics with Azure AI services. You'll use Azure AI Anomaly Detector to find anomalies. A user in Azure Synapse can simply select a table to enrich for detection of anomalies.
This tutorial covers:
- Steps for getting a Spark table dataset that contains time series data.
- Use of a wizard experience in Azure Synapse to enrich data by using Anomaly Detector.
If you don't have an Azure subscription, create a free account before you begin.
Prerequisites
- Azure Synapse Analytics workspace with an Azure Data Lake Storage Gen2 storage account configured as the default storage. You need to be the Storage Blob Data Contributor of the Data Lake Storage Gen2 file system that you work with.
- Spark pool in your Azure Synapse Analytics workspace. For details, see Create a Spark pool in Azure Synapse.
- Completion of the pre-configuration steps in the Configure Azure AI services in Azure Synapse tutorial.
Sign in to the Azure portal
Sign in to the Azure portal.
Create a Spark table
You need a Spark table for this tutorial.
Create a PySpark notebook and run following code.
from pyspark.sql.functions import lit

df = spark.createDataFrame([
    ("1972-01-01T00:00:00Z", 826.0),
    ("1972-02-01T00:00:00Z", 799.0),
    ("1972-03-01T00:00:00Z", 890.0),
    ("1972-04-01T00:00:00Z", 900.0),
    ("1972-05-01T00:00:00Z", 766.0),
    ("1972-06-01T00:00:00Z", 805.0),
    ("1972-07-01T00:00:00Z", 821.0),
    ("1972-08-01T00:00:00Z", 20000.0),
    ("1972-09-01T00:00:00Z", 883.0),
    ("1972-10-01T00:00:00Z", 898.0),
    ("1972-11-01T00:00:00Z", 957.0),
    ("1972-12-01T00:00:00Z", 924.0),
    ("1973-01-01T00:00:00Z", 881.0),
    ("1973-02-01T00:00:00Z", 837.0),
    ("1973-03-01T00:00:00Z", 9000.0)
], ["timestamp", "value"]).withColumn("group", lit("series1"))

df.write.mode("overwrite").saveAsTable("anomaly_detector_testing_data")
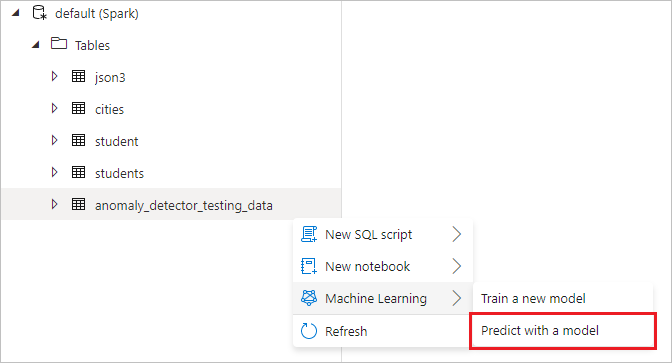
A Spark table named anomaly_detector_testing_data should now appear in the default Spark database.
Open the Azure AI services wizard
Right-click the Spark table created in the previous step. Select Machine Learning > Predict with a model to open the wizard.
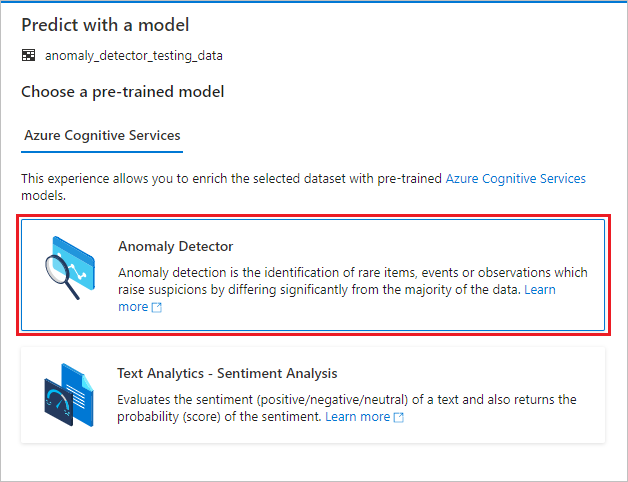
A configuration panel appears, and you're asked to select a pre-trained model. Select Anomaly Detector.
Configure Anomaly Detector
Provide the following details to configure Anomaly Detector:
Azure Cognitive Services linked service: As part of the prerequisite steps, you created a linked service to your Azure AI service. Select it here.
Granularity: The rate at which your data is sampled. Choose monthly.
Timestamp column: The column that represents the time of the series. Choose timestamp (string).
Time series value column: The column that represents the value of the series at the time specified by the Timestamp column. Choose value (double).
Grouping column: The column that groups the series. That is, all rows that have the same value in this column should form one time series. Choose group (string).
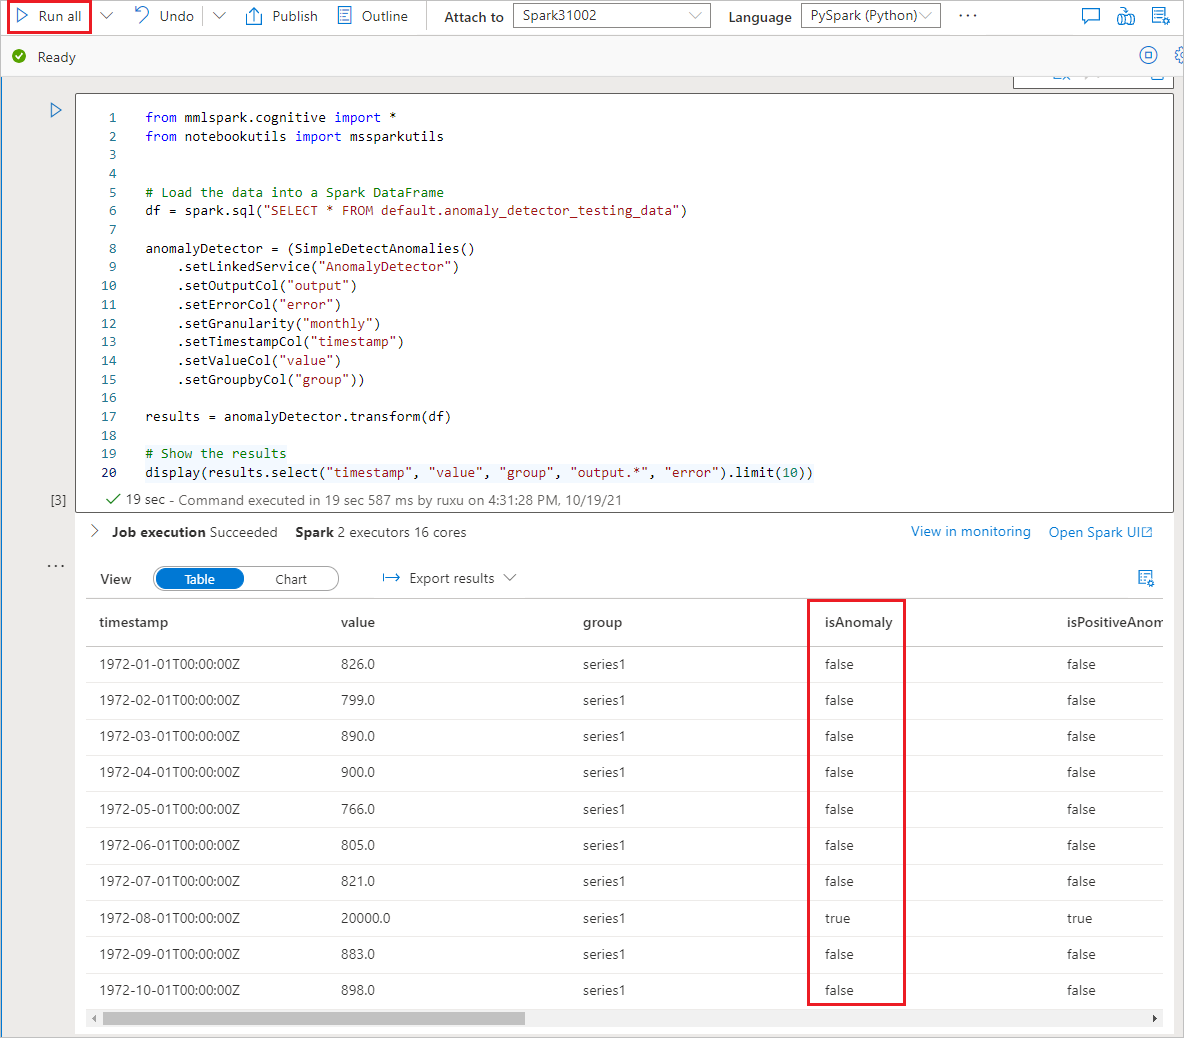
When you're done, select Open notebook. This will generate a notebook for you with PySpark code that uses Azure AI services to detect anomalies.

Run the notebook
The notebook that you just opened uses the SynapseML library to connect to Azure AI services. The Azure AI services linked service that you provided allow you to securely reference your Azure AI service from this experience without revealing any secrets.
You can now run all cells to perform anomaly detection. Select Run All. Learn more about Anomaly Detector in Azure AI services.
Next steps
Feedback
Coming soon: Throughout 2024 we will be phasing out GitHub Issues as the feedback mechanism for content and replacing it with a new feedback system. For more information see: https://aka.ms/ContentUserFeedback.
Submit and view feedback for