Manage Apache Spark configuration
In this tutorial, you will learn how to create an Apache Spark configuration for your synapse studio. The created Apache Spark configuration can be managed in a standardized manner and when you create Notebook or Apache spark job definition can select the Apache Spark configuration that you want to use with your Apache Spark pool. When you select it, the details of the configuration are displayed.
Create an Apache Spark Configuration
You can create custom configurations from different entry points, such as from the Apache Spark configuration page of an existing spark pool.
Create custom configurations in Apache Spark configurations
Follow the steps below to create an Apache Spark Configuration in Synapse Studio.
Select Manage > Apache Spark configurations.
Click on New button to create a new Apache Spark configuration, or click on Import a local .json file to your workspace.
New Apache Spark configuration page will be opened after you click on New button.
For Name, you can enter your preferred and valid name.
For Description, you can input some description in it.
For Annotations, you can add annotations by clicking the New button, and also you can delete existing annotations by selecting and clicking Delete button.
For Configuration properties, customize the configuration by clicking Add button to add properties. If you do not add a property, Azure Synapse will use the default value when applicable.
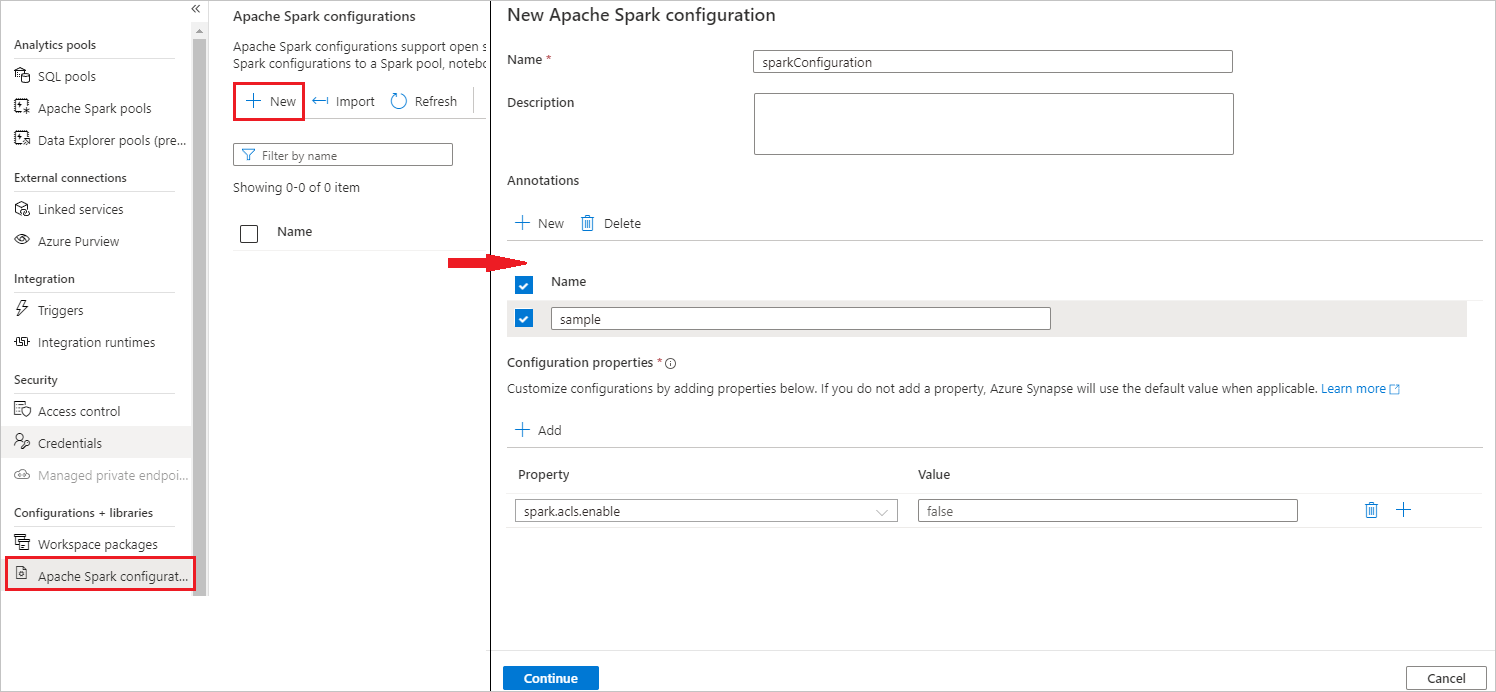
Click on Continue button.
Click on Create button when the validation succeeded.
Publish all
Note
Upload Apache Spark configuration feature has been removed, but Synapse Studio will keep your previously uploaded configuration.
Create an Apache Spark Configuration in already existing Apache Spark pool
Follow the steps below to create an Apache Spark configuration in an existing Apache Spark pool.
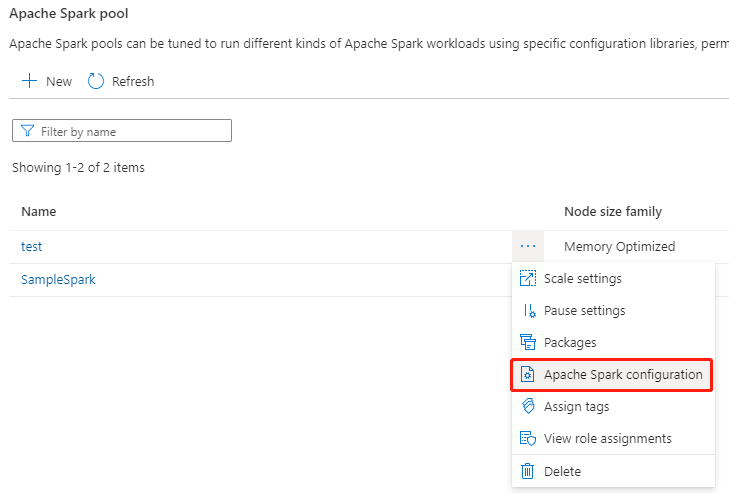
Select an existing Apache Spark pool, and click on action "..." button.
Select the Apache Spark configuration in the content list.
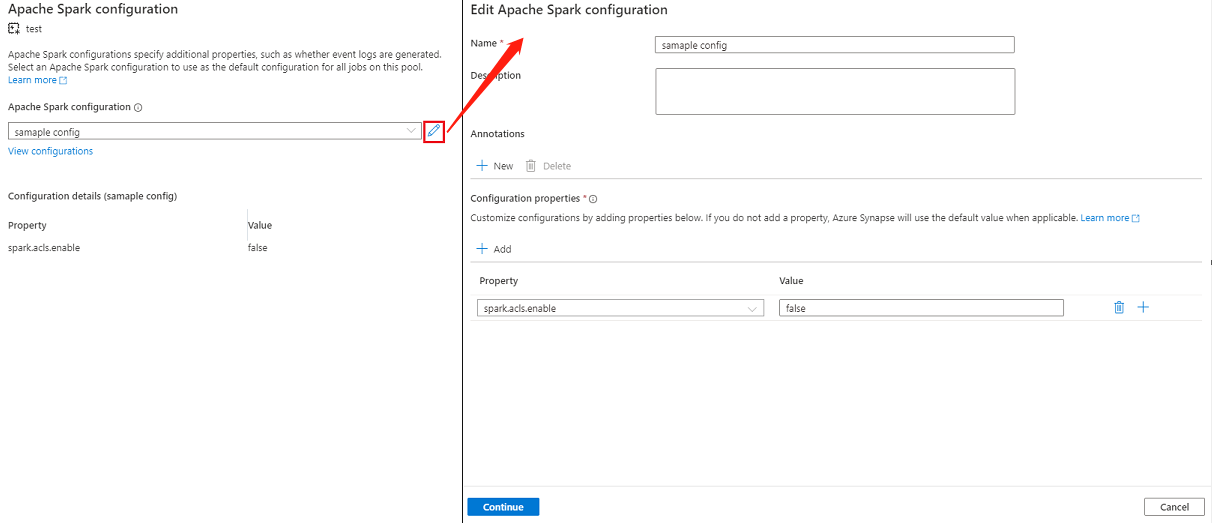
For Apache Spark configuration, you can select an already created configuration from the drop-down list, or click on +New to create a new configuration.
If you click +New, the Apache Spark Configuration page will open, and you can create a new configuration by following the steps in Create custom configurations in Apache Spark configurations.
If you select an existing configuration, the configuration details will be displayed at the bottom of the page, you can also click the Edit button to edit the existing configuration.
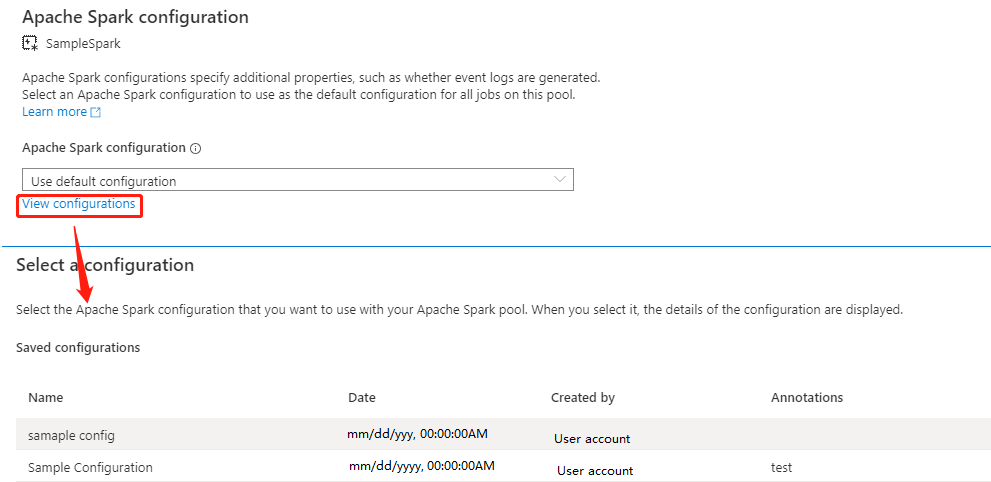
Click View Configurations to open the Select a Configuration page. All configurations will be displayed on this page. You can select a configuration that you want to use on this Apache Spark pool.
Click on Apply button to save your action.
Create an Apache Spark Configuration in the Notebook's configure session
If you need to use a custom Apache Spark Configuration when creating a Notebook, you can create and configure it in the configure session by following the steps below.
Create a new/Open an existing Notebook.
Open the Properties of this notebook.
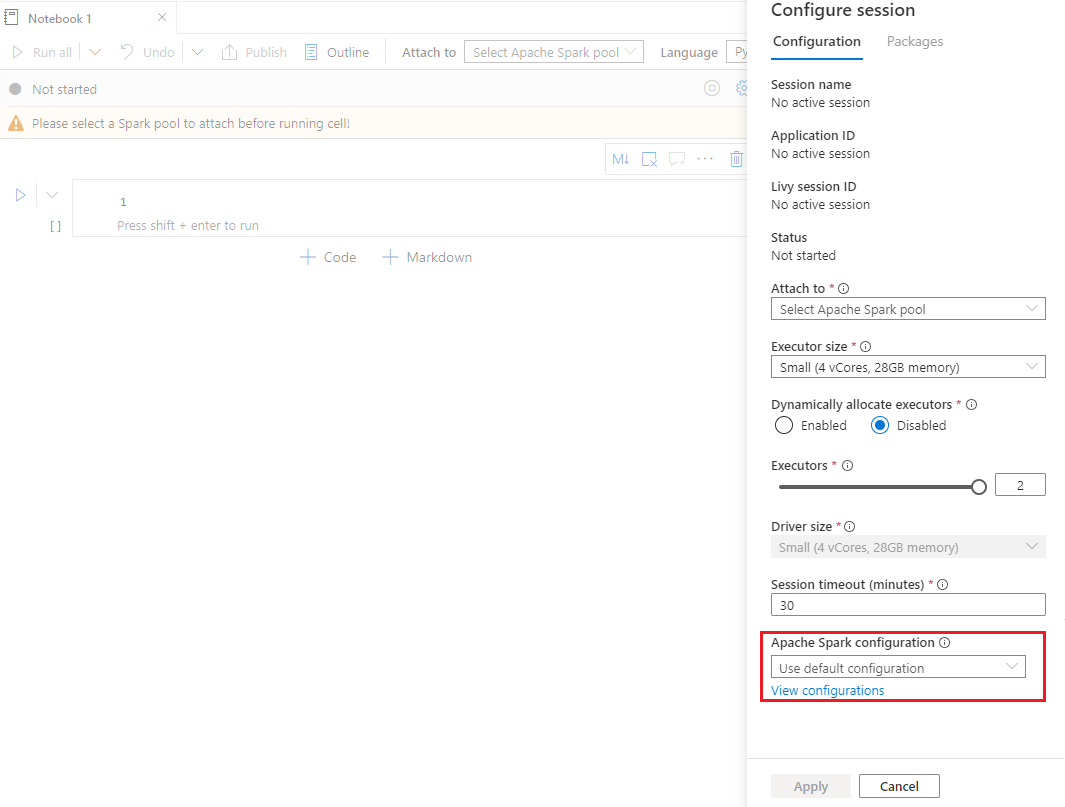
Click on Configure session to open the Configure session page.
Scroll down the configure session page, for Apache Spark configuration, expand the drop-down menu, you can click on New button to create a new configuration. Or select an existing configuration, if you select an existing configuration, click the Edit icon to go to the Edit Apache Spark configuration page to edit the configuration.
Click View Configurations to open the Select a Configuration page. All configurations will be displayed on this page. You can select a configuration that you want to use.
Create an Apache Spark Configuration in Apache Spark job definitions
When you are creating a spark job definition, you need to use Apache Spark configuration, which can be created by following the steps below:
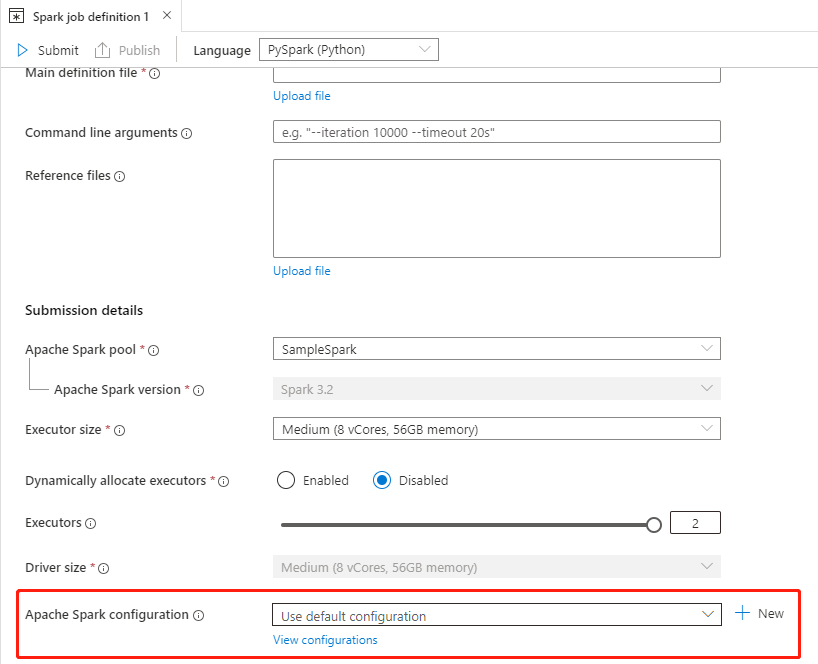
Create a new/Open an existing Apache Spark job definitions.
For Apache Spark configuration, you can click on New button to create a new configuration. Or select an existing configuration in the drop-down menu, if you select an existing configuration, click the Edit icon to go to the Edit Apache Spark configuration page to edit the configuration.
Click View Configurations to open the Select a Configuration page. All configurations will be displayed on this page. You can select a configuration that you want to use.
Note
If the Apache Spark configuration in the Notebook and Apache Spark job definition does not do anything special, the default configuration will be used when running the job.
Import and Export an Apache Spark configuration
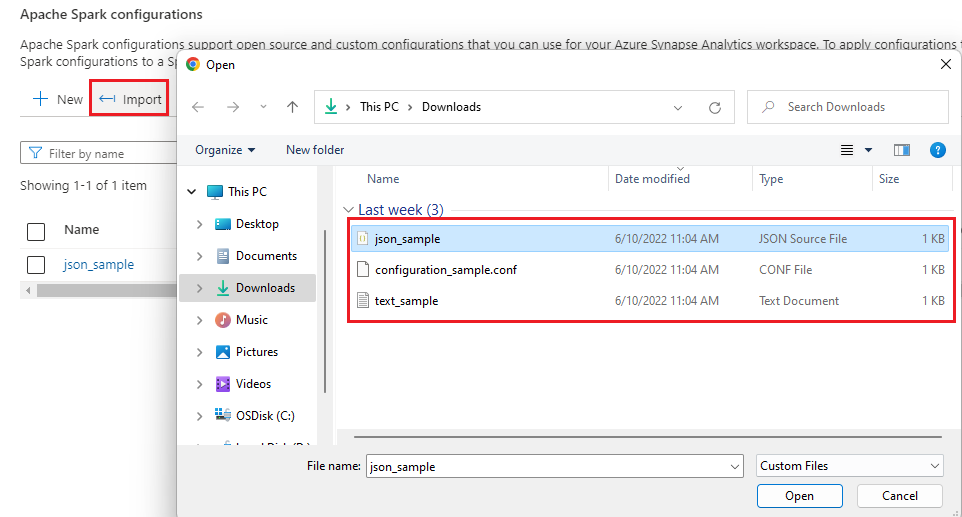
You can import .txt/.conf/.json config in three formats and then convert it to artifact and publish it. And can also export to one of these three formats.
Import .txt/.conf/.json configuration from local.
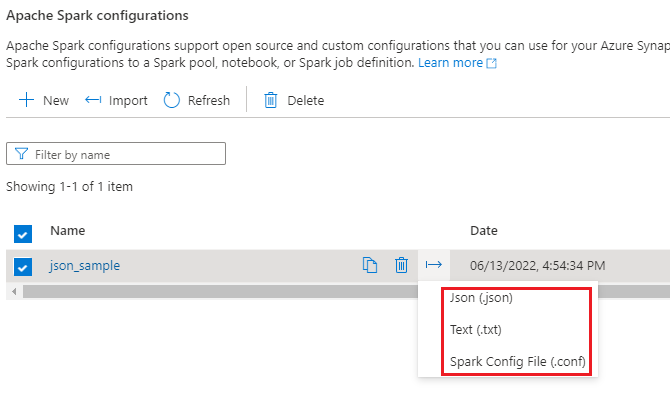
Export .txt/.conf/.json configuration to local.
For .txt config file and .conf config file, you can refer to the following examples:
spark.synapse.key1 sample
spark.synapse.key2 true
# spark.synapse.key3 sample2
For .json config file, you can refer to the following examples:
{
 "configs": {
   "spark.synapse.key1": "hello world",
  "spark.synapse.key2": "true"
 },
 "annotations": [
   "Sample"
 ]
}
Next steps
Feedback
Coming soon: Throughout 2024 we will be phasing out GitHub Issues as the feedback mechanism for content and replacing it with a new feedback system. For more information see: https://aka.ms/ContentUserFeedback.
Submit and view feedback for