Set up Micro Focus CICS BankDemo for Micro Focus Enterprise Developer 4.0 on Azure
When you set up Micro Focus Enterprise Server 4.0 and Enterprise Developer 4.0 on Azure, you can test deployments of IBM z/OS workloads. This article shows how to set up CICS BankDemo, a sample application that comes with Enterprise Developer.
CICs stands for Customer Information Control System, the transaction platform used by many of the online mainframe applications. The BankDemo application is great for learning how Enterprise Server and Enterprise Developer operate and how to manage and deploy an actual application complete with green screen terminals.
Note
Coming soon: Instructions for setting up Micro Focus Enterprise Server 5.0 on Azure VMs.
Prerequisites
A VM with Enterprise Developer. Keep in mind that Enterprise Developer has a complete instance of Enterprise Server on it for development and test purposes. This instance is the instance of Enterprise Server used for the demo.
SQL Server 2017 Express edition. Download and install it on the Enterprise Developer VM. Enterprise Server requires a database for the management of CICS regions, and the BankDemo application also uses a SQL Server database called BANKDEMO. This demo assumes you are using SQL Server Express for both databases. When installing, select the basic installation.
SQL Server Management Studio (SSMS). SSMS is used for managing the databases and running a T-SQL script. Download and install it on the Enterprise Developer VM.
Visual Studio 2019 with the latest service pack or Visual Studio Community, which you can download for free.
Rumba Desktop or another 3270 emulator.
Configure the Windows environment
After you install Enterprise Developer 4.0 on the VM, you must configure the instance of Enterprise Server that comes with it. To do that, you need to install a few additional Windows features as follows.
Use RDP to log on to the Enterprise Server 4.0 VM you created.
Click the Search icon next to the Start button and type Windows features. The Server Manager Add Roles and Features Wizard opens.
Select Web Server (IIS) Role, and then check the following options:
- Web Management Tools
- IIS 6 Management Compatibility (select all available features)
- IIS Management Console
- IIS Management Scripts and Tools
- IIS Management Service
Select World Wide Web Services, and check the following options:
Application Development Features:
- .NET Extensibility
- ASP.NET
- Common HTTP Features: Add all available features
- Health and Diagnostics: Add all available features
- Security:
- Basic Authentication
- Windows Authentication
Select Windows Process Activation Service and all its children.
For Features, check Microsoft .NET framework 3.5.1, and check the following options:
- Windows Communication Foundation HTTP Activation
- Windows Communication Foundation Non-HTTP Activation
For Features, check Microsoft .NET framework 4.6, and check the following options:
Named Pipe Activation
TCP Activation
TCP Port Sharing

When you have selected all the options, click Next to install.
After the Windows features, go to Control Panel > System and Security > Administrative Tools, and select Services. Scroll down and make sure the following services are running and set to Automatic:
- NetTcpPortSharing
- Net.Pipe Listener Adapter
- Net.tcp Listener Adapter
To configure IIS and WAS support, from the menu locate Micro Focus Enterprise Developer Command Prompt (64 bit) and run as Administrator.
Type wassetup –i and press Enter.
After the script runs, you can close the window.
Configure the local system account for SQL Server
Some Enterprise Server processes need to be able to sign in SQL Server and create databases and other objects. These processes use the local system account, so you must give sysadmin authority to that account.
Launch the SSMS and click Connect to connect to the local SQLEXPRESS Server using Windows Authentication. It should be available in the Server Name list.
On the left, expand the Security folder and select Logins.
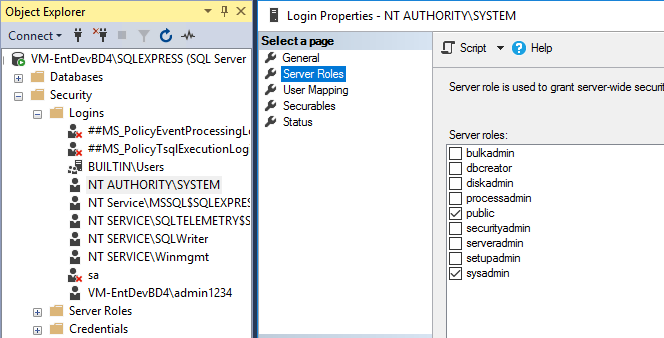
Select NT AUTHORITY\SYSTEM and select Properties.
Select Server Roles and check sysadmin.
Create the BankDemo database and all its objects
Open Windows Explorer and Navigate to C:\Users\Public\Documents\Micro Focus\Enterprise Developer\Samples\Mainframe\CICS\DotNet\BankDemo\SQL.
Copy the contents of BankDemoCreateAll.SQL file into your clipboard.
Open SSMS. On the right, click Server and select New Query.
Paste the contents of the clipboard into the New Query box.
Execute the SQL by clicking Execute from the Command tab above the query.
The query should run with no errors. When it is complete, you have the sample database for the BankDemo application.

Verify that the database tables and objects have been created
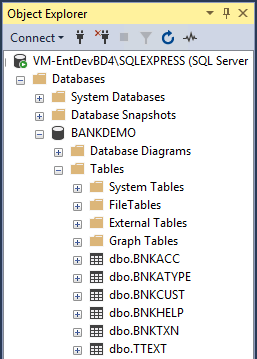
Right-click the BANKDEMO database and select Refresh.
Expand the Database and select Tables. You should see something like the following.
Build the application in Enterprise Developer
Open Visual Studio and sign in.
Under the File menu option, select Open Project/Solution, navigate to C:\Users\Public\Documents\Micro Focus\Enterprise Developer\Samples\Mainframe\CICS\DotNet\BankDemo, and select the sln file.
Take some time to examine the objects. COBOL programs are shown in Solution Explorer with the CBL extension along with CopyBooks (CPY) and JCL.
Right-click the BankDemo2 Project and select Set as Startup Project.
Note
The BankDemo Project makes use of HCOSS (Host Compatibility Option for SQL Server), which is not used for this demo.
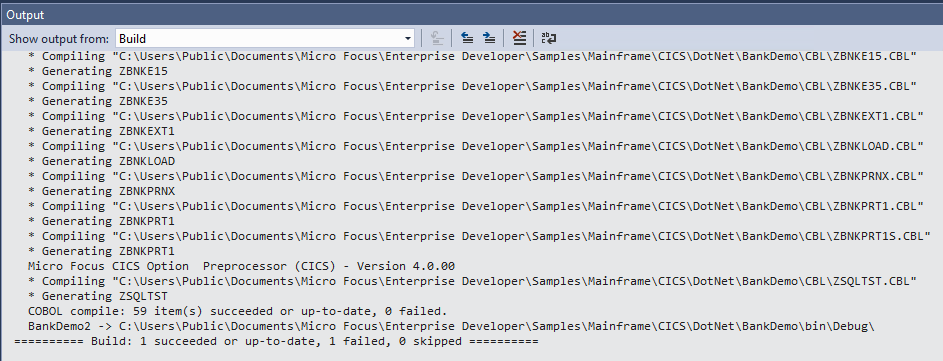
In Solution Explorer, right-click the BankDemo2 Project and select Build.
Note
Building at the solution level results in errors, as HCOSS has not been configured.
When the Project is built, examine the Output window. It should look like the image below.
Deploy the BankDemo application into the Region database
Open an Enterprise Developer command prompt (64 bit) as Administrator.
Navigate to the %PUBLIC%\Documents\Micro Focus\Enterprise Developer\samples\Mainframe\CICS\DotNet\BankDemo.
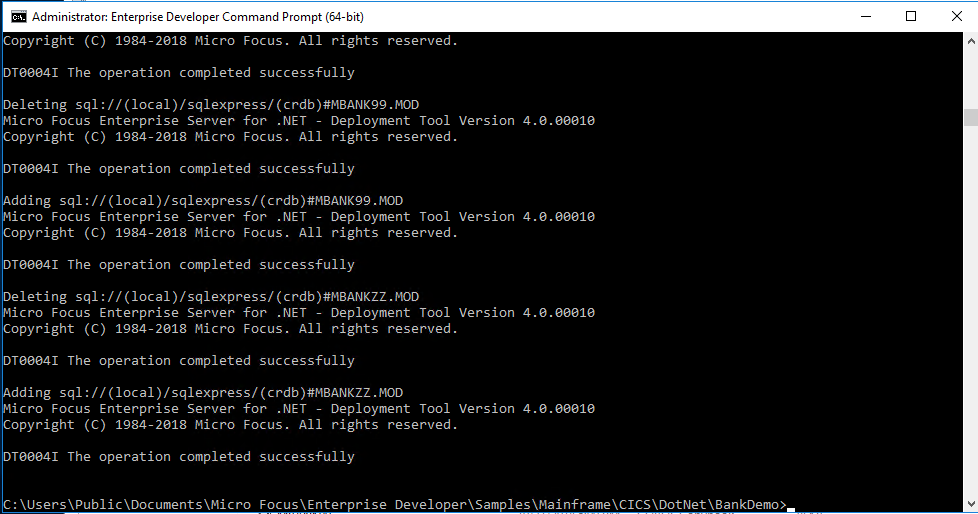
At the command prompt, execute bankdemodbdeploy and include the parameter for the database to deploy to, for example:
bankdemodbdeploy (local)/sqlexpress
Note
Make sure to use a forward slash (/) not a backward slash(\). This script runs for a while.
Create the BankDemo Region in Enterprise Administrator for .NET
Open the Enterprise Server for .NET Administration UI.
To start the MMC snap-in, from the Windows Start menu, choose Micro Focus Enterprise Developer > Configuration > Enterprise Server for .NET Admin. (For Windows Server, choose Micro Focus Enterprise Developer > Enterprise Server for .NET Admin).
Expand the Regions container in the left pane and then right-click CICS.
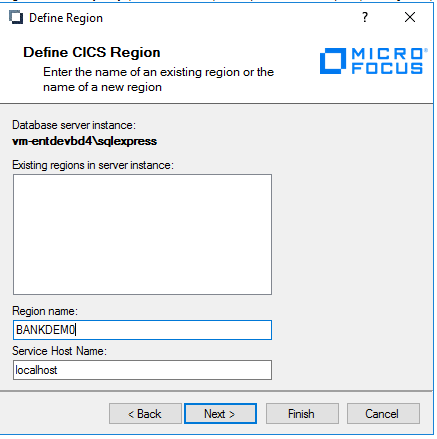
Select Define Region to create a new CICS Region called BANKDEMO, hosted in the (local) database.
Supply the database server instance, click Next, and then enter the region name BANKDEMO.
To select the region definition file for the cross-region database, locate region_bankdemo_db.config in C:\Users\Public\Documents\Micro Focus\Enterprise Developer\Samples\Mainframe\CICS\DotNet\BankDemo.
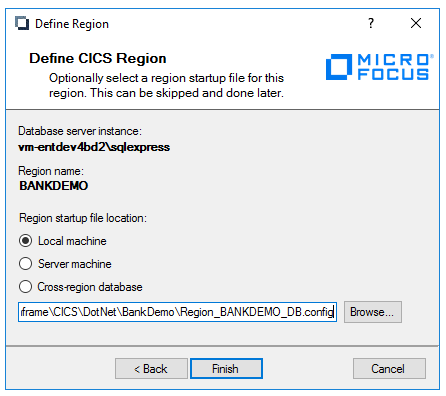
Click Finish.
Create XA Resource Definitions
In the left pane of the Enterprise Server for .NET Administration UI, expand System, and then XA Resource Definitions. This setting defines how the Region interoperates with Enterprise Server and the application databases.
Right-click on XA Resource Definitions and select Add Server Instance.
In the drop-down box, select Database Service Instance. It will be the local machine SQLEXPRESS.
Select the instance from under the XA Resource Definitions (machinename\sqlexpress) container and click Add.
Select Database XA Resource Definition and then type BANKDEMO for the Name and Region.
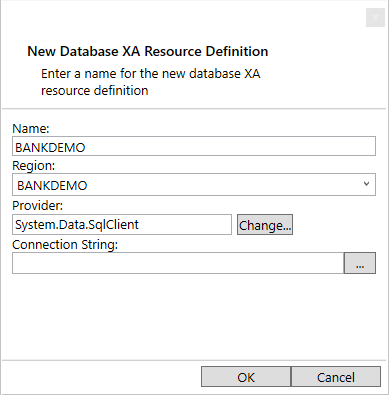
Click the ellipses (…) to bring up the Connection String wizard. For Server Name, type (local)\SQLEXPRESS. For Logon, select Windows Authentication. For database name, type BANKDEMO
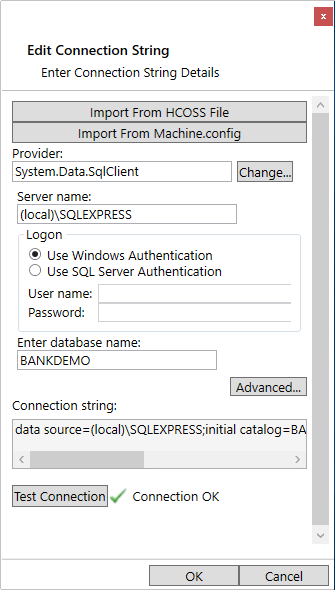
Test the connection.
Start the BANKDEMO Region
Note
The first step is important: You must set the Region to use the XA Resource Definition you just created.
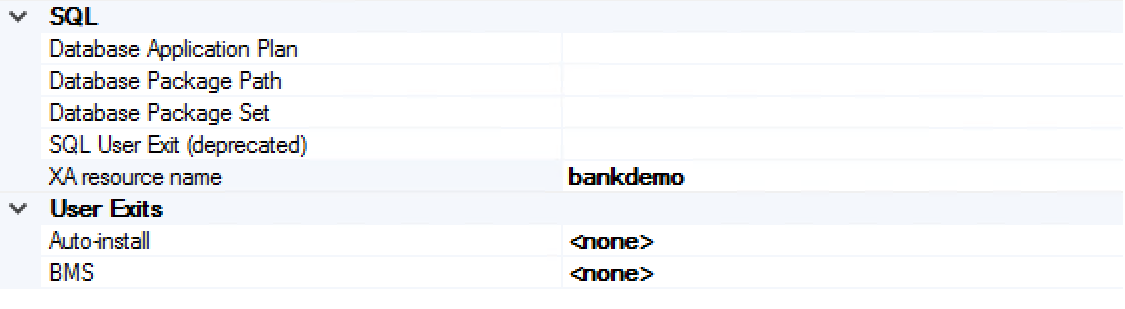
Navigate to the BANDEMO CICS Region under the Regions Container, and then select Edit Region Startup File from the Actions pane. Scroll down to the SQL properties and enter bankdemo for the XA resource name, or use the ellipsis to select it.
Click the Save icon to save your changes.
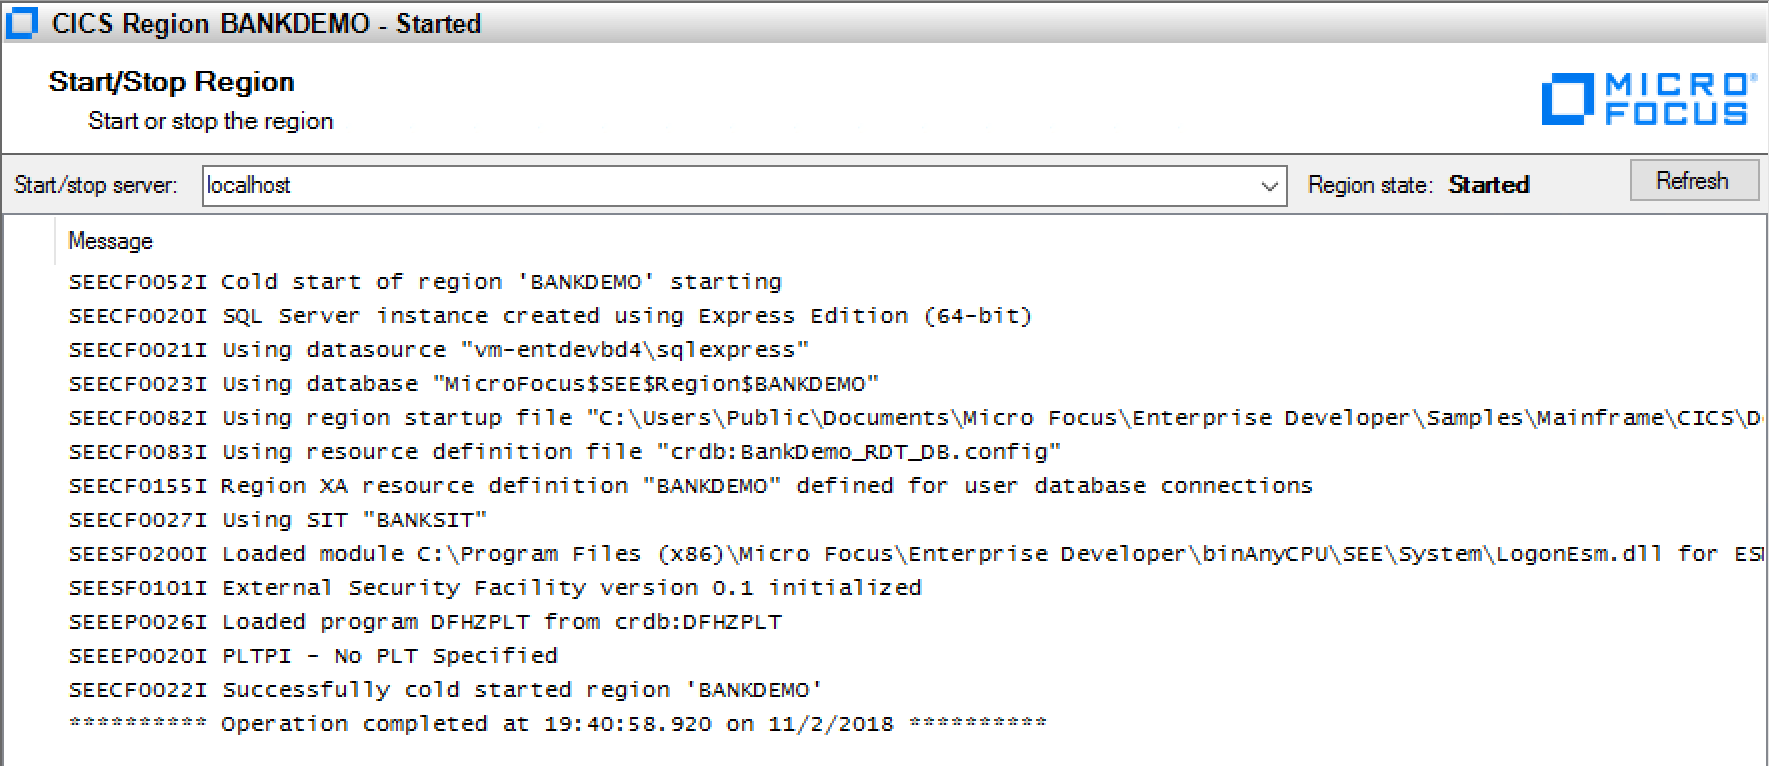
Right-click BANKDEMO CICS Region in the Console pane, and select Start/Stop Region.
In the bottom of the Start/Stop Region box that appears in the middle pane, select Start. After a few seconds, the region starts.
Create a listener
Create a listener for the TN3270 sessions that access the BankDemo application.
In the left pane, expand Configuration Editors and select Listener.
Click the Open File icon and select the seelistener.exe.config file. This file will be edited and is loaded every time Enterprise Server starts.
Notice the two Regions previously defined (ESDEMO and JCLDEMO).
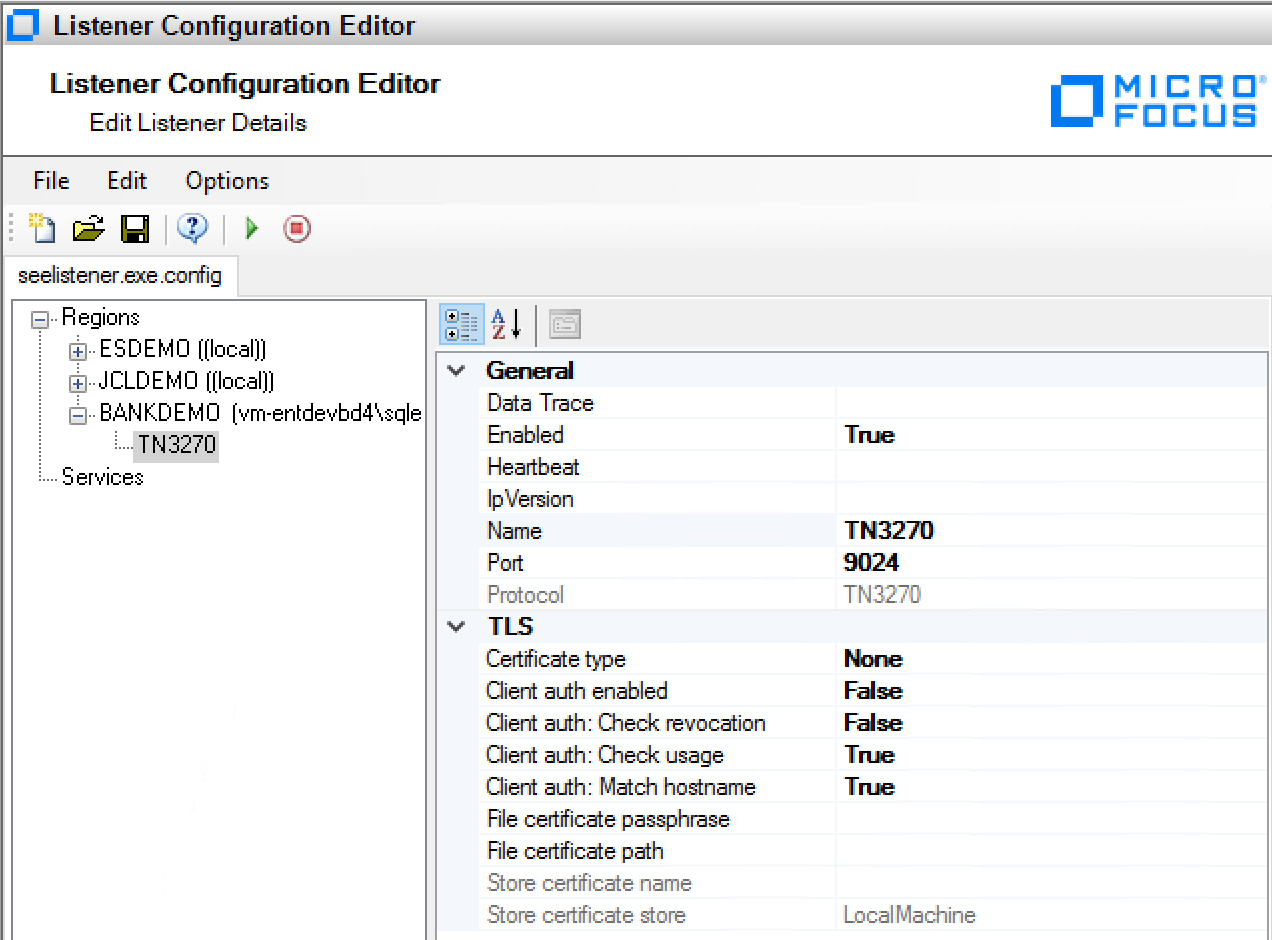
To create a new Region for BANKDEMO, right-click Regions, and select Add Region.
Select BANKDEMO Region.
Add a TN3270 channel by right-clicking BANKDEMO Region and selecting Add Channel.
For Name, enter TN3270. For Port, enter 9024. The ESDEMO application uses port 9230 so you need to use a different port.
To save the file, click the Save icon or choose File > Save.
To start the listener, click the Start Listener icon or choose Options > Start Listener.
Configure Rumba to access the BankDemo application
The final thing you need to do is configure a 3270 session using Rumba, a 3270 emulator. This step enables you to access the BankDemo application through the listener you created.
From the Windows Start menu, launch Rumba Desktop.
Under the Connections menu item, select TN3270.
Click Insert and type 127.0.0.1 for the IP address and 9024 for the user-defined port.
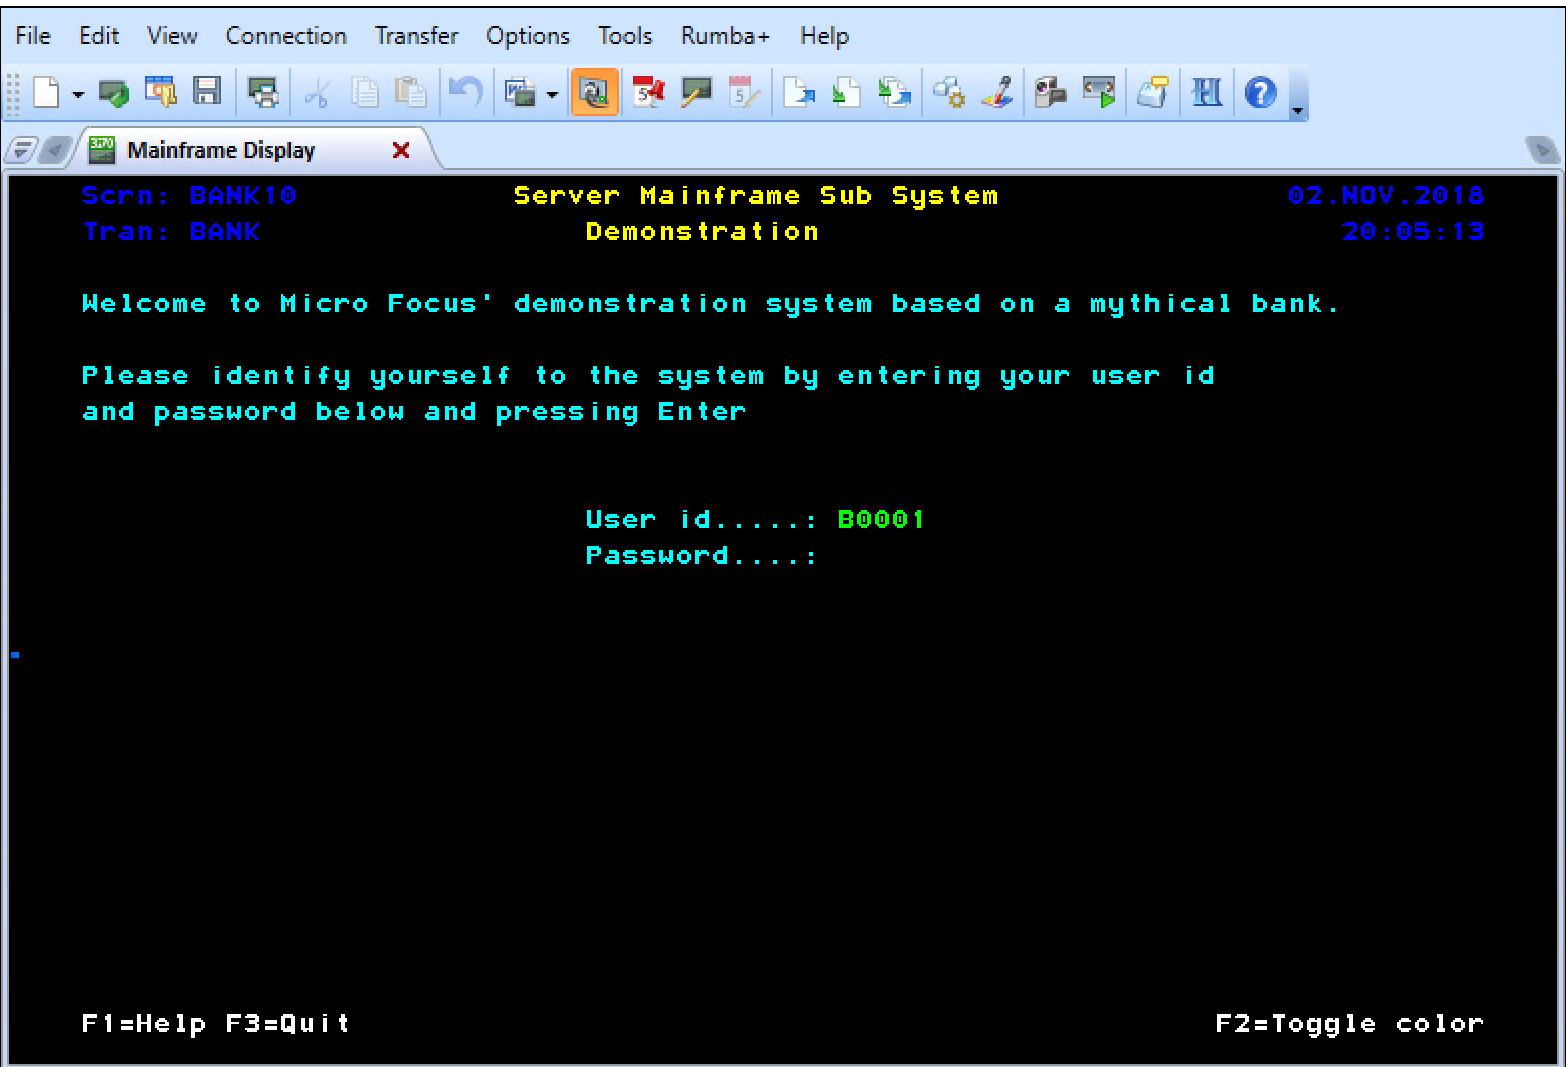
At the bottom of the dialog box, click Connect. A black CICS screen appears.
Type bank to display the initial 3270 screen for the BankDemo application.
For User ID, type B0001 and for the password, type anything. The first screen BANK20 opens.

Congratulations! You are now running a CICS application in Azure using Micro Focus Enterprise Server.
Next steps
Feedback
Coming soon: Throughout 2024 we will be phasing out GitHub Issues as the feedback mechanism for content and replacing it with a new feedback system. For more information see: https://aka.ms/ContentUserFeedback.
Submit and view feedback for