Create a virtual machine in Azure using VM templates on the VMware infrastructure
You can create a virtual machine in the Azure portal by using VM templates on the VMware infrastructure that your CloudSimple administrator has enabled for your subscription.
Sign in to Azure
Sign in to the Azure portal.
Create CloudSimple virtual machine
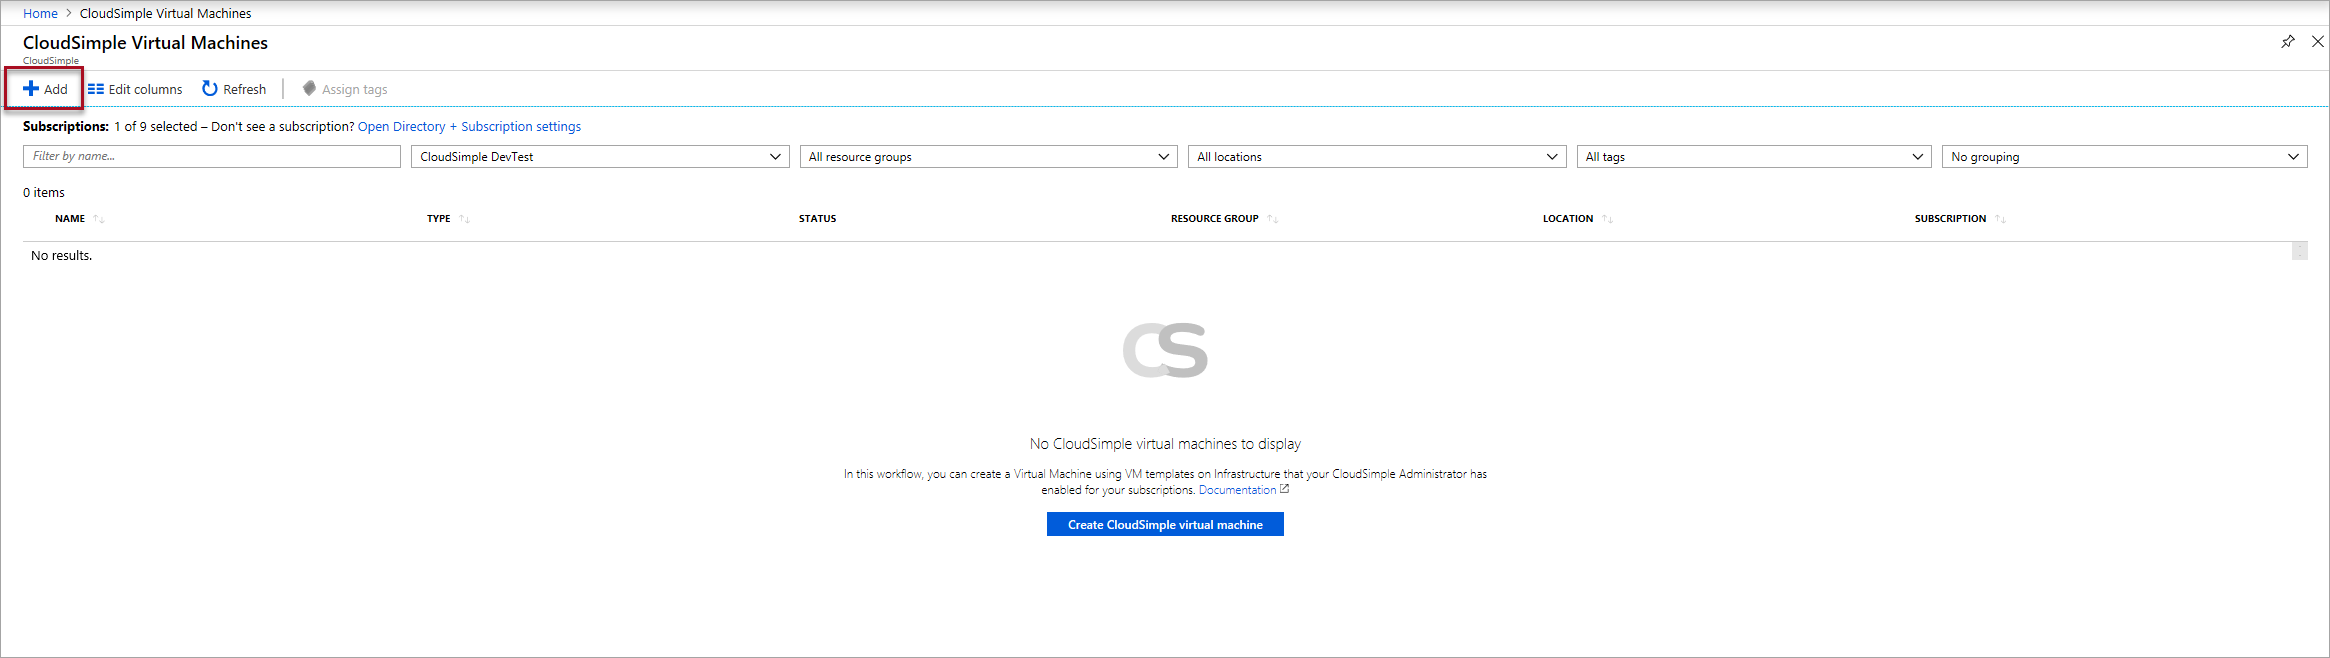
Select All services.
Search for CloudSimple Virtual Machines.
Click Add.
Enter basic information click Next:Size.
Note
CloudSimple virtual machine creation on Azure requires a VM template. This VM template should exist on your Private Cloud vCenter. Create a virtual machine on your Private Cloud from vCenter UI with desired operating system and configurations. Using instructions in Clone a Virtual Machine to a Template in the vSphere Web Client, create a template.
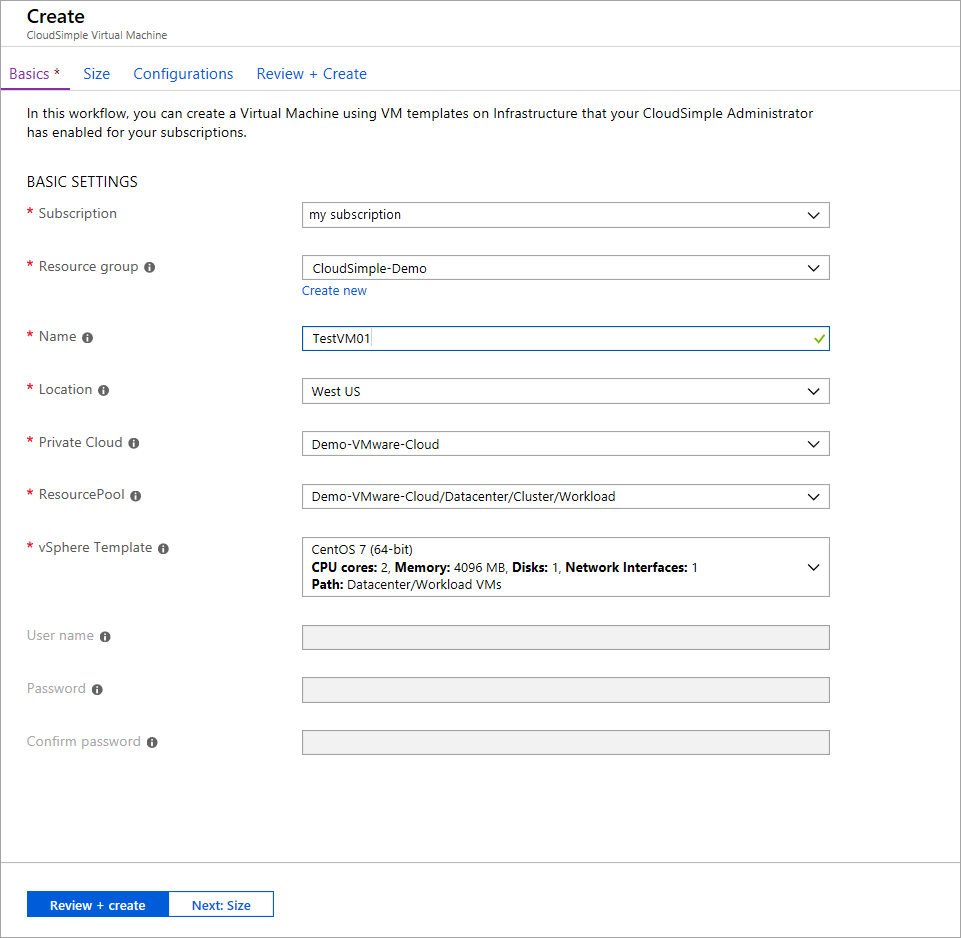
Field Description Subscription Azure subscription associated with your Private Cloud. Resource Group Resource group to which the VM will be assigned. You can select an existing group or create a new one. Name Name to identify the VM. Location Azure region in which this VM is hosted. Private Cloud CloudSimple Private Cloud where you want to create the virtual machine. Resource Pool Mapped resource pool for the VM. Select from the available resource pools. vSphere Template vSphere template for the VM. User name User name of the VM administrator (for Windows templates) Password
Confirm passwordPassword for the VM administrator (for Windows templates). Select the number of cores and memory capacity for the VM and click Next:Configurations. Select the checkbox if you want to expose full CPU virtualization to the guest operating system so that applications that require hardware virtualization can run on virtual machines without binary translation or paravirtualization. For more information, see the VMware article Expose VMware Hardware Assisted Virtualization.

Configure network interfaces and disks as described in the following tables and click Review + create.
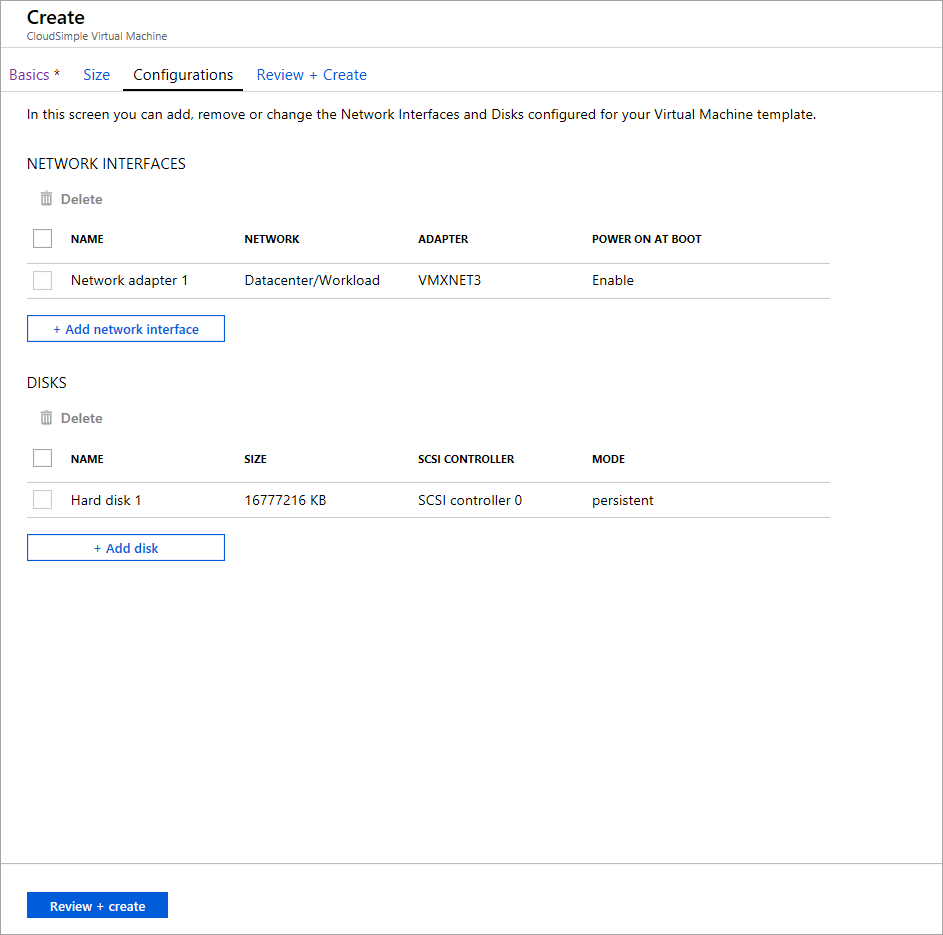
For network interfaces, click Add network interface and configure the following settings.
Control Description Name Enter a name to identify the interface. Network Select from the list of configured distributed port group in your Private Cloud vSphere. Adapter Select a vSphere adaptor from the list of available types configured for the VM. For more information, see the VMware knowledge base article Choosing a network adapter for your virtual machine. Power on at Boot Choose whether to enable the NIC hardware when the VM is booted. The default is Enable. For disks, click Add disk and configure the following settings.
Item Description Name Enter a name to identify the disk. Size Select one of the available sizes. SCSI Controller Select a SCSI controller for the disk. Mode Determines how the disk participates in snapshots. Choose one of these options:
- Independent persistent: All data written to the disk is written permanently.
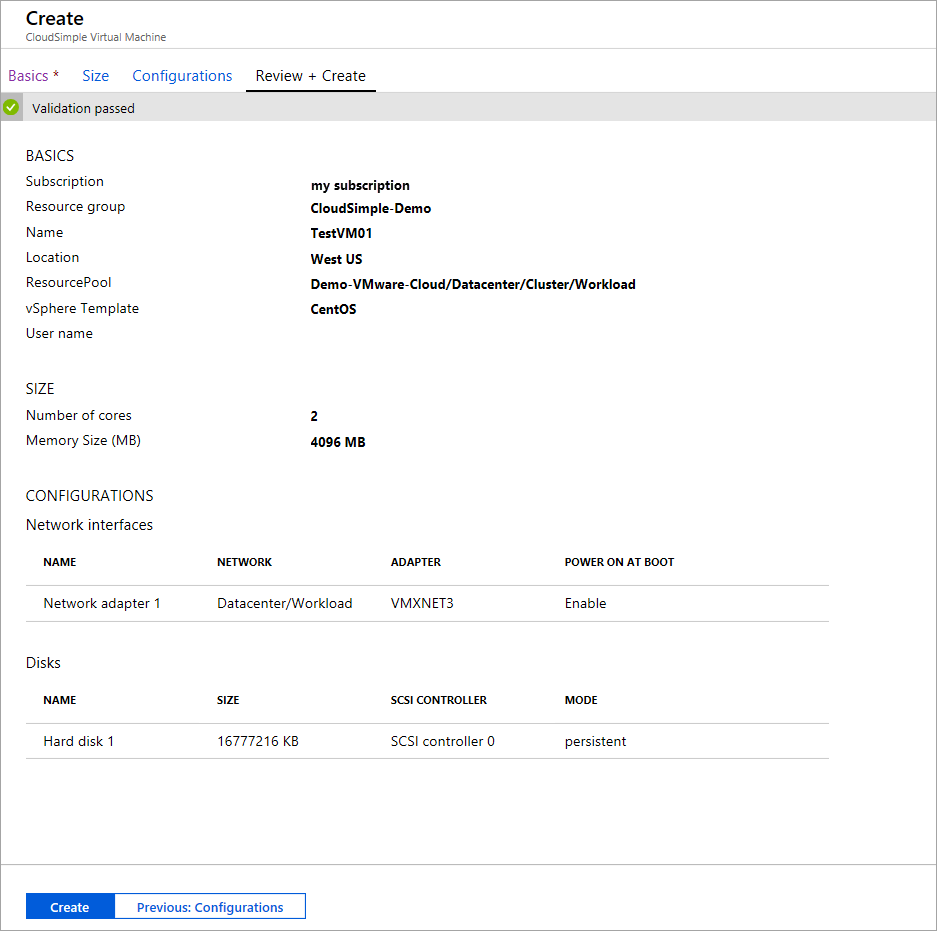
- Independent non-persistent: Changes written to the disk are discarded when you power off or reset the virtual machine. Independent non-persistent mode allows you to always restart the VM in the same state. For more information, see the VMware documentation.Once validation completes, review the settings and click Create. To make any changes, click the tabs at the top or click.
View list of CloudSimple virtual machines
Select All services.
Search for CloudSimple Virtual Machines.
Select the virtual machine on which your Private Cloud was created.

List of CloudSimple virtual machines includes virtual machines created from Azure portal. Virtual machines created on Private Cloud vCenter in the mapped vCenter resource pool will be shown in the list.