Set up vCenter on your Private Cloud for VMware vRealize Automation
You can set up a VMware vCenter server on your CloudSimple Private Cloud as an endpoint for VMware vRealize Automation.
Before you begin
Complete these tasks before configuring the vCenter server:
- Configure a Site-to-Site VPN connection between your on-premises environment and your Private Cloud.
- Configure DNS forwarding of on-premises DNS requests to the DNS servers for your Private Cloud.
- Submit a support request to create a vRealize Automation IaaS administrative user with the set of permissions that are listed in the following table.
| Attribute Value | Permission |
|---|---|
| Datastore | Allocate Space Browse Datastore |
| Datastore Cluster | Configure a Datastore Cluster |
| Folder | Create Folder Delete Folder |
| Global | Manage Custom Attributes Set Custom Attribute |
| Network | Assign Network |
| Permissions | Modify Permissions |
| Resource | Assign VM to Resource Pool Migrate Powered Off Virtual Machine Migrate Powered On Virtual Machine |
| Virtual Machine Inventory | Create from existing Create New Move Remove |
| Virtual Machine Interaction | Configure CD Media Console Interaction Device Connection Power Off Power On Reset Suspend Tools Install |
| Virtual Machine Configuration | Add Existing Disk Add New Disk Add or Remove Remove Disk Advanced Change CPU Count Change Resource Extend Virtual Disk Disk Change Tracking Memory Modify Device Settings Rename Set Annotation (version 5.0 and later) Settings Swapfile Placement |
| Provisioning | Customize Clone Template Clone Virtual Machine Deploy Template Read Customization Specs |
| Virtual Machine State | Create Snapshot Remove Snapshot Revert to Snapshot |
Install vRealize Automation in your on-premises environment
- Sign in to the vRealize Automation IaaS server appliance as the IaaS administrator that CloudSimple Support created for you.
- Deploy a vSphere Agent for the vRealize Automation endpoint.
Go to https://vra-url:5480/installer, where vra-url is the URL that you use to access the vRealize Automation administration UI.
Click the IaaS Installer to download the installer.
The naming convention for the installer file is setup_vra-url@5480.exe.Run the installer. On the Welcome screen, click Next.
Accept the EULA and click Next.
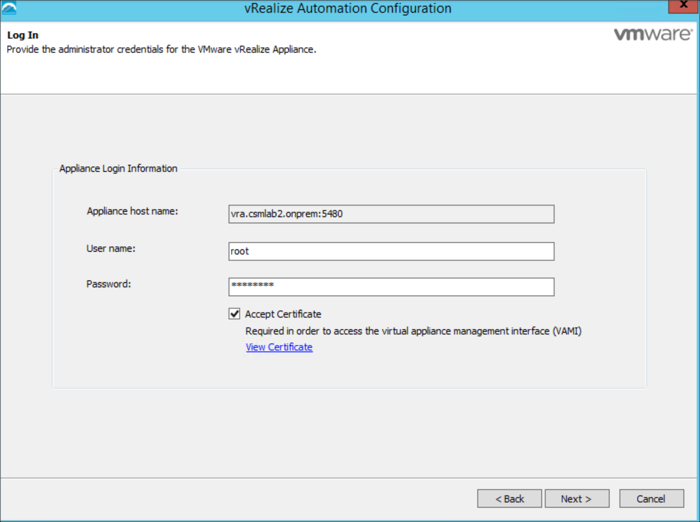
Provide the sign-in information, click Accept Certificate, and then click Next.
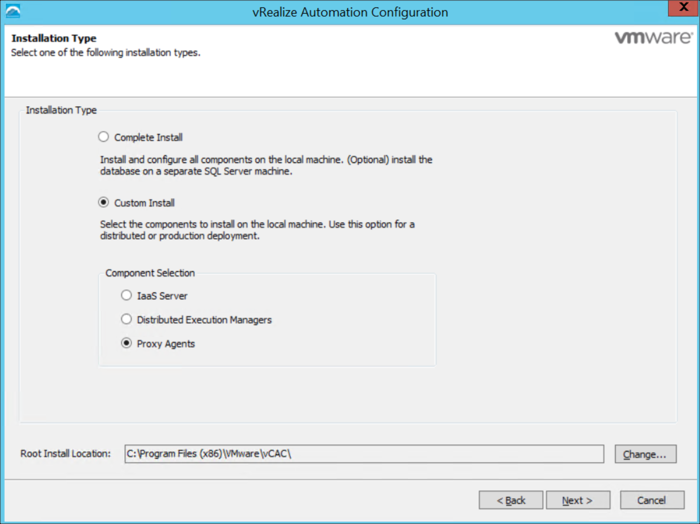
Select Custom Install and Proxy Agents and click Next.
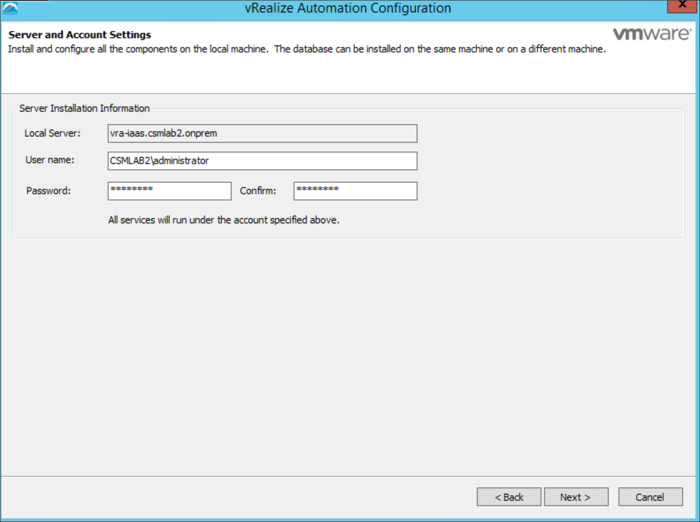
Enter the IaaS server sign-in information and click Next. If you are using Active Directory, enter the username in domain\user format. Otherwise, use user@domain format.
For the proxy settings, enter vSphere for Agent type. Enter a name for the agent.
Enter the IaaS server FQDN in the Manager Service Host and the Model Manager Web Service Host fields. Click Test to test the connection for each of the FQDN values. If the test fails, modify your DNS settings so that the IaaS server hostname is resolved.
Enter a name for vCenter server endpoint for the Private Cloud. Record the name for use later in the configuration process.
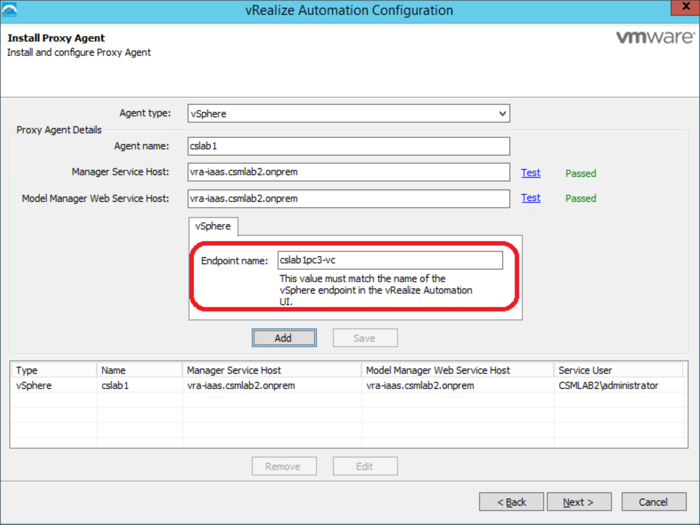
Click Next.
Click Install.
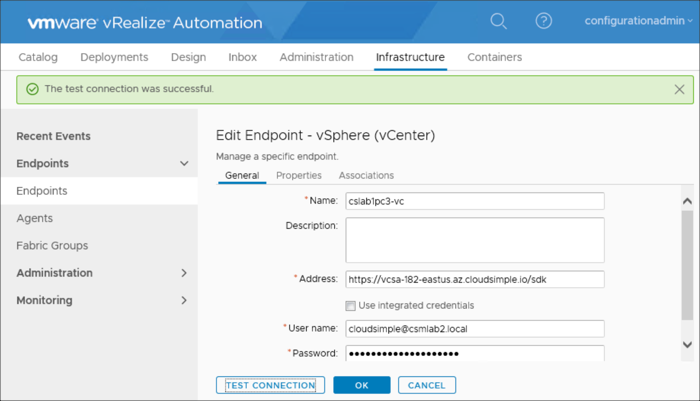
Configure the vSphere agent
- Go to https://vra-url/vcac and sign in as ConfigurationAdmin.
- Select Infrastructure > Endpoints > Endpoints.
- Select New > Virtual > vSphere.
- Enter the vSphere endpoint name that you specified in the previous procedure.
- For Address, enter the Private Cloud vCenter Server URL in the format https://vcenter-fqdn/sdk, where vcenter-fqdn is the name of the vCenter server.
- Enter the credentials for the vRealize Automation IaaS administrative user that CloudSimple Support created for you.
- Click Test Connection to validate the user credentials. If the test fails, verify the URL, account information, and endpoint name and test again.
- After a successful test, click OK to create the vSphere endpoint.
Verify the endpoint name
To identify the correct vCenter server endpoint name, do the following:
- Open a command prompt on the IaaS appliance.
- Change directory to C:\Program Files (x86)\VMware\vCAC\Agents\agent-name, where agent-name is the name you assigned to the vCenter server endpoint.
- Run the following command.
..\..\Server\DynamicOps.Vrm.VRMencrypt.exe VRMAgent.exe.config get
The output is similar to the following. The value of the managementEndpointName field is the endpoint name.
managementEndpointName: cslab1pc3-vc
doDeletes: true