Enable Microsoft Entra multifactor authentication (MFA) for VPN users
If you want users to be prompted for a second factor of authentication before granting access, you can configure Microsoft Entra multifactor authentication (MFA). You can configure MFA on a per user basis, or you can leverage MFA via Conditional Access.
- MFA per user can be enabled at no-additional cost. When you enable MFA per user, the user is prompted for second factor authentication against all applications tied to the Microsoft Entra tenant. See Option 1 for steps.
- Conditional Access allows for finer-grained control over how a second factor should be promoted. It can allow assignment of MFA to only VPN, and exclude other applications tied to the Microsoft Entra tenant. See Option 2 for steps.
Enable authentication
Navigate to Microsoft Entra ID -> Enterprise applications -> All applications.
On the Enterprise applications - All applications page, select Azure VPN.

Configure sign-in settings
On the Azure VPN - Properties page, configure sign-in settings.
Set Enabled for users to sign-in? to Yes. This setting allows all users in the AD tenant to connect to the VPN successfully.
Set User assignment required? to Yes if you want to limit sign-in to only users that have permissions to the Azure VPN.
Save your changes.

Option 1 - Per User access
Open the MFA page
Sign in to the Azure portal.
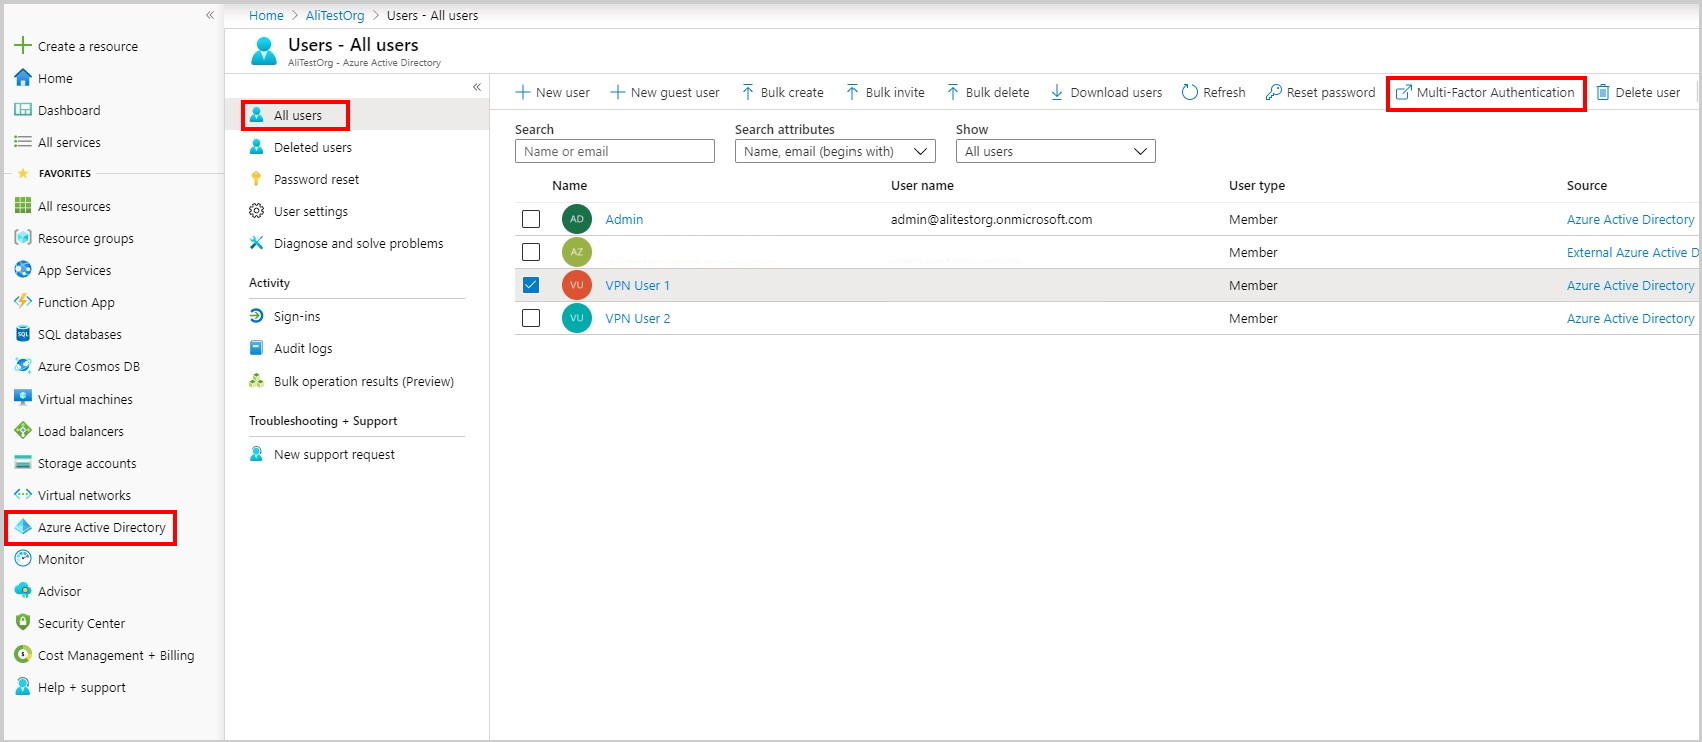
Navigate to Microsoft Entra ID -> All users.
Select Multi-Factor Authentication to open the multi-factor authentication page.
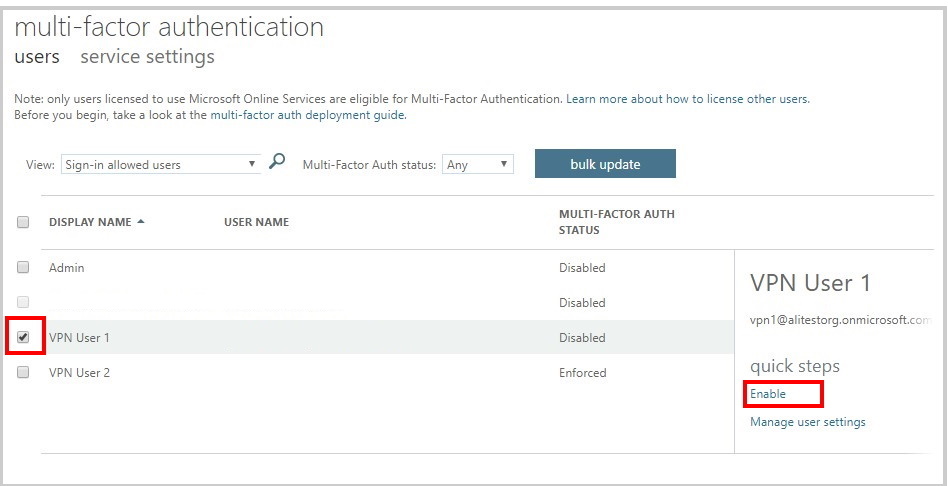
Select users
On the multi-factor authentication page, select the user(s) for whom you want to enable MFA.
Select Enable.
Option 2 - Conditional Access
Conditional Access allows for fine-grained access control on a per-application basis. In order to use Conditional Access, you should have Microsoft Entra ID P1 or P2 or greater licensing applied to the users that will be subject to the Conditional Access rules.
Navigate to the Enterprise applications - All applications page and click Azure VPN.
- Click Conditional Access.
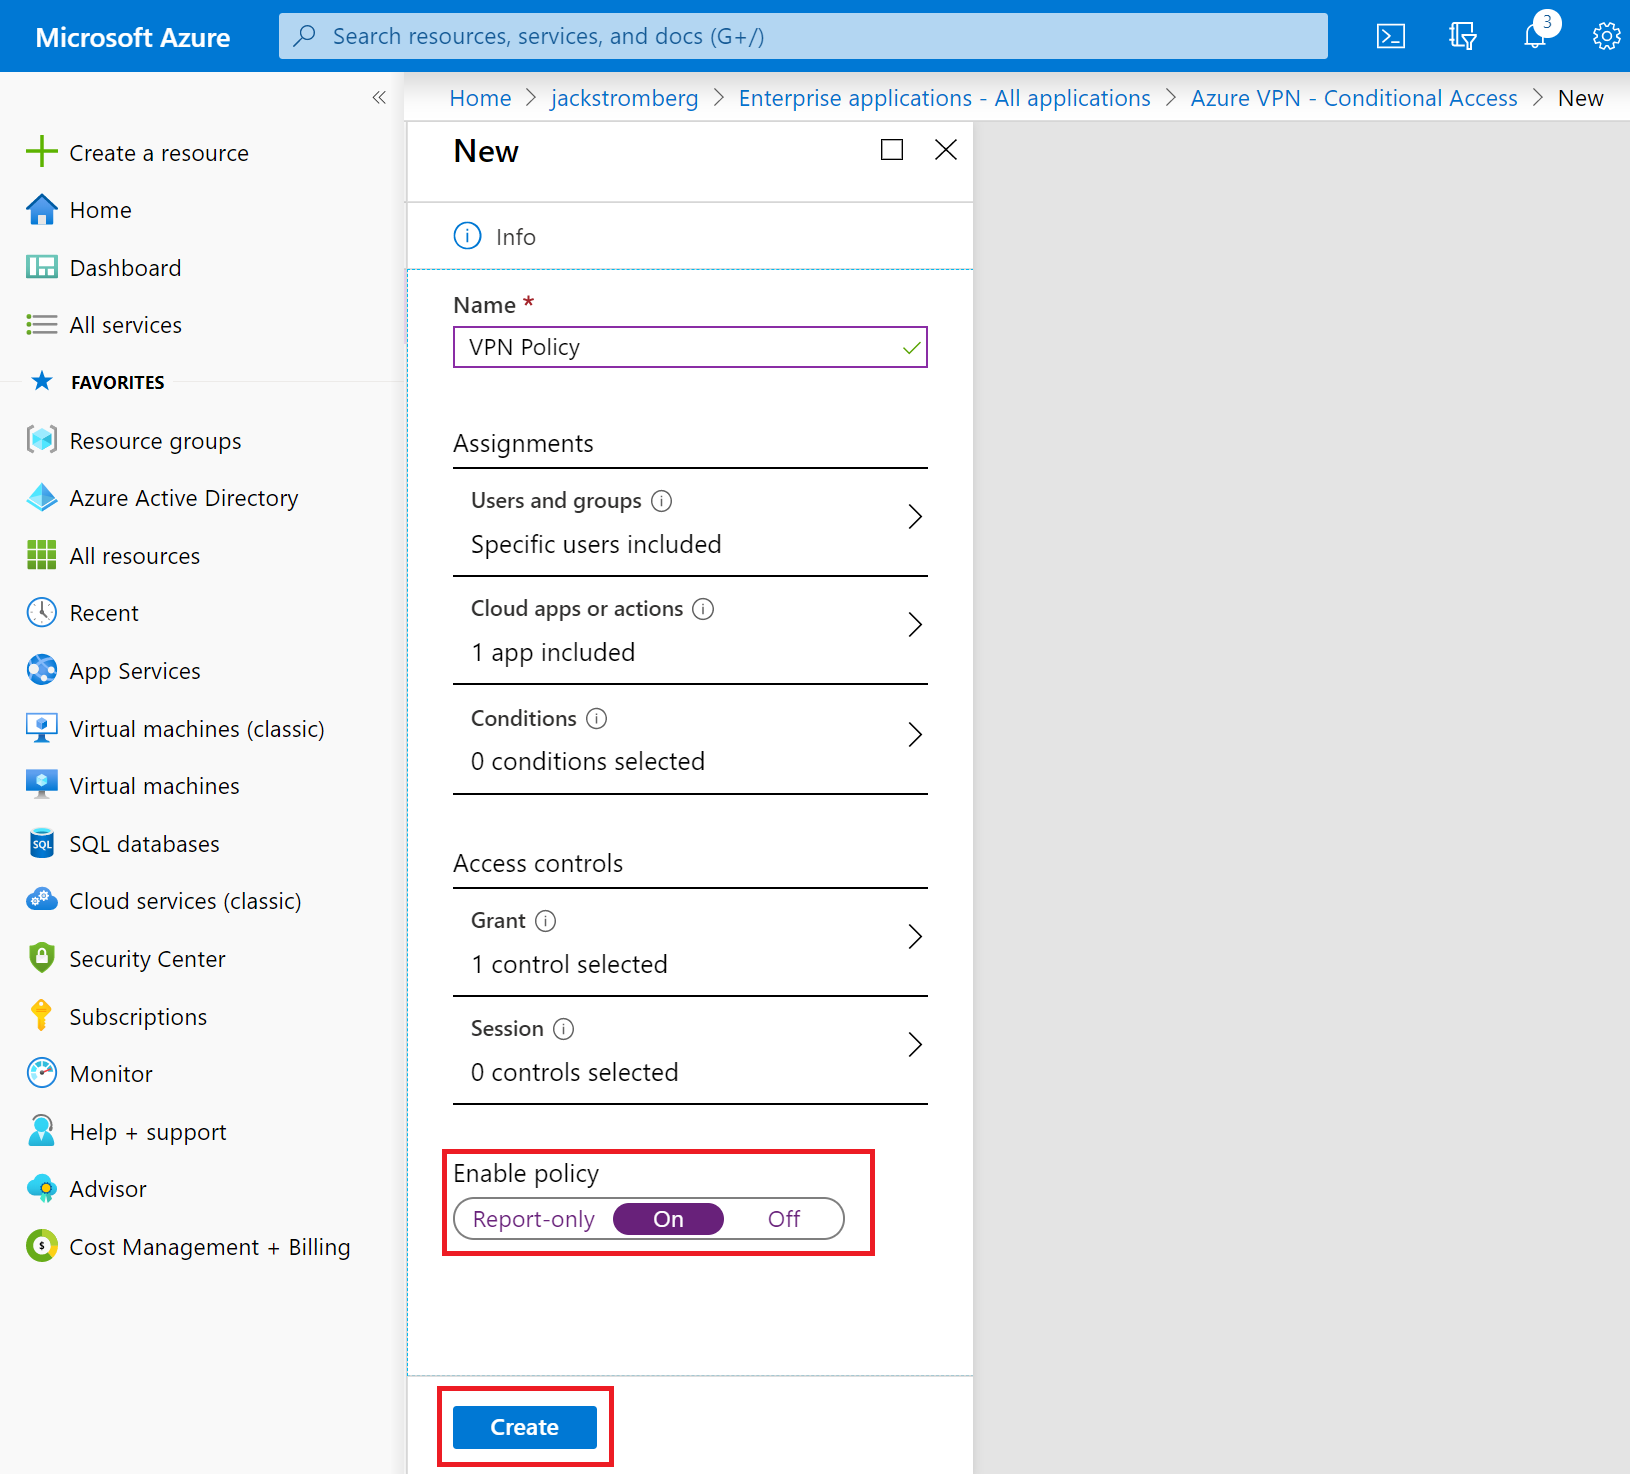
- Click New policy to open the New pane.
On the New pane, navigate to Assignments -> Users and groups. On the Users and groups -> Include tab:
- Click Select users and groups.
- Check Users and groups.
- Click Select to select a group or set of users to be affected by MFA.
- Click Done.

On the New pane, navigate to the Access controls -> Grant pane:
- Click Grant access.
- Click Require multi-factor authentication.
- Click Require all the selected controls.
- Click Select.

In the Enable policy section:
- Select On.
- Click Create.
Next steps
To connect to your virtual network, you must create and configure a VPN client profile. See Configure a VPN client for P2S VPN connections.
Feedback
Coming soon: Throughout 2024 we will be phasing out GitHub Issues as the feedback mechanism for content and replacing it with a new feedback system. For more information see: https://aka.ms/ContentUserFeedback.
Submit and view feedback for