Install and configure the Microsoft BizTalk Adapters for Enterprise Applications
Microsoft BizTalk Adapters for Enterprise Applications includes the following adapters:
Microsoft BizTalk Adapter for JD Edwards OneWorld
Microsoft BizTalk Adapter for JD Edwards EnterpriseOne
Microsoft BizTalk Adapter for PeopleSoft Enterprise
Microsoft BizTalk Adapter for TIBCO Rendezvous
Microsoft BizTalk Adapter for TIBCO Enterprise Message Service
Important
- Back up all data before you make any configuration changes.
- You must be experienced with the specific enterprise application before you make any configuration changes.
Supported versions & requirements
| Component | Requirements |
|---|---|
| Operating System | The adapter supports the same OS as BizTalk Server: |
| Supported enterprise system | |
| JD Edwards OneWorld XE |
|
| JD Edwards EnterpriseOne | The adapter calls the JD Edwards EnterpriseOne API that uses JDBC, which needs a driver for the database. If you install JD Edwards EnterpriseOne with a SQL database, you need MS-SQL drivers. Similarly if you installed JD Edwards EnterpriseOne with an Oracle database, you need Oracle drivers; or if you installed with a DB2 database, you need DB2 drivers. |
| PeopleSoft Enterprise |
|
| TIBCO Rendezvous |
|
| TIBCO Enterprise Message Service | Enterprise Message Service (EMS) version 5.x and above includes a client SDK (using the TIBCO EMS C# API). BizTalk Adapter for TIBCO EMS uses this to communicate with the server. |
JD Edwards OneWorld XE
This sections includes key information on using the Microsoft BizTalk Adapter for JD Edwards OneWorld XE with BizTalk Server.
Create the JAR Files
This section describes the requirements for JD Edwards OneWorld to work with Microsoft BizTalk Adapter for JD Edwards OneWorld.
JAR Files and the CLASSPATH
JD Edwards OneWorld JAR files must be available to the adapter. For instance, to connect to B7.3.3.3 Version, the following jar files are required. Depending on the server you connect, the jar file list may change:
- Connector.jar
- Kernel.jar
These files are located on a computer running JD Edwards OneWorld, at the following locations:
JD Edwards OneWorld XE_install_Directory\System\classes\Connector.jar
JD Edwards OneWorld XE_install_Directory\System\classes\Kernel.jar
You can copy these files to any location; however, you must specify the location of the JAR files in the CLASSPATH. The CLASSPATH must include both the full path of the file and the name of the JAR file (separated by a semicolon).
BizTalk Adapter for JD Edwards OneWorld provides the JDEJAccess JAR file for use with JD Edwards OneWorld. By default, the JDEJAccess.jar file is referenced from Program Files\Common Files\Microsoft BizTalk Adapters for Enterprise Applications\J.D. Edwards OneWorld(r)\classes\JDEJAccess.jar.
Note
You must verify the registration of the jdeinterop.ini file before you can use BizTalk Adapter for JD Edwards OneWorld. Make sure that you include a path to this file in the JDE Transport Property page when you create the send port in BizTalk Server. For a complete explanation, see "Customize the jdeinterop.ini File."
Create the BTSLIBinterop.jar File
Create the file, and confirm it can be accessed by the adapter. Use the following sample as a guide:
Create the BTSLIB.cmd file that contains the following code:
define library BTSLIB
login
library BTSLIB
interface JDEAdapter
import B5500900
build
logout
Run the following command:
GenJava /cmd .\BTSLIB.cmd
Verify your setup
Use a supported version, including service pack number (Supported Line-of-Business (LOB) and Enterprise systems). Service packs (ESUs and ASUs) update the system binaries. The prerequisite service pack provides the ASU/ESU menu choice for import.
Configure the jdeinterop.ini file to use the correct drive for logging, if it differs from drive C. For example, your JD Edwards OneWorld update can fail if the TEMP directory is out of space.
Determine whether you must add a configuration file for the left/right padding of the JD Edwards OneWorld fields.
Verify that your JAVA_HOME environment variable is pointing to your Java Development Kit (JDK) installation to enable the javac and java commands from any program on the computer.
Verify that the CLASSPATH environment variable is set. This enables BizTalk Adapter for JD Edwards OneWorld to locate the Kernel.jar and Connect.jar files.
The path of the JAR files is case sensitive.
Test the environment by typing the following command, which is case sensitive.
javap -s -p com.microsoft.jde.JDEJAccessThe command you give, javap, is the Java Class File Disassembler:
http://java.sun.com/j2se/1.3/docs/tooldocs/solaris/javap.htmlThe
javapcommand disassembles a class file. Its output depends on the options used. If no options are used, javap prints out the package, protected, and public fields and methods of the classes passed to it. javap prints its output to stdout.If there are no errors, all the Java files and their dependencies are in the CLASSPATH.
Set up the DNS resolution by configuring the local host file (C:\WINNT\system32\drivers\etc\hosts), with the server name of the JD Edwards OneWorld system.
Create and install the custom package
Install the BTSREL custom package to use BizTalk Adapter for JD Edwards OneWorld. This section describes:
- The JD Edwards OneWorld custom package-creation process
- How to create and install BTSREL
- The BTSREL objects created in JD Edwards OneWorld
Note
BTSREL.exe is a custom package (an automated software update, or ASU, in JD Edwards OneWorld terminology). It contains business functions to extract metadata. A custom package should be created for a specific configuration and version of JD Edwards OneWorld.
Define a custom package
A custom package is a post-release deliverable that provides software changes for specific purposes, such as regulatory changes or enhancements. These custom packages are created for specific functionality. For example, BTSREL is created to extract metadata. When the BTSREL custom package is installed, it updates selected modules in the JD Edwards OneWorld environment. To update, BTSREL objects must be merged into the appropriate JD Edwards OneWorld environment. For a detailed list of modules updated by BTSREL, see the list of modules.
Install the BTSREL custom package
Download BTSREL. Install it on the deployment server, and then deploy it to the enterprise server.
The existing BTSREL.exe package directly works with the B7333 version. For the package to work with the B7334 version, then:
Download and extract the contents of BTSREL.exe to your working folder.
Modify both the ReleaseLevelRequired and the Release values to B7334 in the Deployment.Inf file.
Run the Setup.
To install BTSREL, the following are required:
- Deployment server installation
- Installation Workbench
Install BTSREL on the deployment server
The custom package only works on a Windows operating system, and is used with the deployment server. It must be built on the deployment server, and then deployed to the enterprise server. The enterprise server is usually a production server, and can be on either a Windows or UNIX operating system.
Note
When applying the ASU to the JD Edwards OneWorld deployment server, verify that you are in Update mode. The Proof mode verifies that there are no bugs in the ASU, whereas Update mode is designated for when you apply the ASU.
Sign in to the deployment server as user JDE.
Create a new folder, named BTSREL, on the Deployment Server (root) /B7 folder.
Copy BTSREL.exe to the newly created BTSREL folder.
Run BTSREL.exe from the.../B7/BTSREL folder. The installation manager automatically starts.
In the setup window, select Next, and then select Finish. A message displays if the installation is successful.
Sign to the JDEPLAN environment as theJDE user on the JD Edwards OneWorld deployment server.
If the electronic software update (ESU) that includes SAR #4533357 is not installed on the system, select Software Updates from the System Installation Tools menu (GH9612).
Enter 02 for option 1 in the Processing Options panel.
If the ESU that includes SAR #4533357 has been installed on the system, select Application Software Update from the System Installation Tools menu (GH9612).
Install BTSREL on the JD Edwards OneWorld WorkBench
On the Work with Application Update screen, double-click the BTSREL update, and then select Next.
Double-click the environments where you want the update installed, and then select Next.
Check Unattended Workbench if you want the software update to run in unattended mode.
Select Backup if you want the backup of the specifications (so that the original specifications can be restored).
On the Work with Installation Plan screen, select the plan for the update you are installing, and then Select.
See the automatically generated PDFs for errors after the installation is finished.
Note
If errors occur, look in the JD Edwards OneWorld Software Update Guide for troubleshooting tips, or contact JD Edwards OneWorld directly.
Manually register the business function library using the steps included in "Manually register the business function library" in this section.
Uninstall the custom package
There is no requirement to uninstall the custom package. However, if you want to clean the system, you can uninstall in different ways. After you uninstall, rebuild the package using one of the following methods:
Use the JD Edwards OneWorld Deployment Server, Gh8612—P96470, on the ROW menu, select Update, and then select Uninstall.
Check out all the custom objects (BTSREL) to a client computer and delete them.
Apply a previous snapshot of database.
During the clean-up, verify any other modifications to the other objects of JD Edwards OneWorld.
Manually register the business function library
Because of a limitation of the JD Edwards OneWorld product packaging process, the custom Business Function Library DLL for BizTalk Adapter for JD Edwards OneWorld must be manually registered with JD Edwards OneWorld. This process consists of the following steps.
Step 1: Create the custom business function library
Using JD Edwards OneWorld Object Management Workbench (OMW), create the Custom Business Function Library. The following procedure must be performed on initial setup, and applies to all platforms.
Start the Object Management Workbench (fast path: "OMW" or menu selection: GH902 Object: P98220).
Select Add, and select the option for Business Function Library.
Enter the following information for the New Business Function Library Object:
- Name: ACBLIB
- Description: Microsoft DLL
- Product Code: 55
- Product System Code: 55
Select OK.
Step 2: Rebuild libraries from the deployment server
Complete the following steps on initial setup for each platform.
To start the BusBuild program in a standalone mode, select Start, select Run, and then select busbuild.exe.
Sign in to JD Edwards OneWorld in the pathcode (PY7333, PD7333, or DV7333).
In the Rebuild Libraries list, select the Build.
Step 3: Copy the Custom DLL
Copy the custom DLL from the pathcode directory to the parent package directories on the JD Edwards OneWorld deployment server and on the JD Edwards OneWorld Enterprise Server.
On the JD Edwards OneWorld XE Deployment Server
Copy ACBLIB.dll from DV7333\bin32 to DV7333\Packages\DV7333FA\bin32.
Copy ACBLIB.def, ACBLIB.dmp, and ACBLIB.mak from DV7333\obj folder to DV7333\Packages\DV7333FA\obj folder.
Copy ACBLIB.exp, ACBLIB.lib, and sACBLIB.lib from DV7333\lib32 folder to DV7333\Packages\DV7333FA\lib32 folder.
On the JD Edwards OneWorld Enterprise Server
After each directory and file is created, verify the authorization.
Create a directory ACBLIB under DV7333FA\obj\.
Create a directory ACBLIB under DV7333FA\source.
FTP b5500900.c from Deployment Server DV7333\source directory to DV7333FA\source\ACBLIB directory.
FTP b5500900.h from Deployment Server DV7333\include directory to DV7333FA\include directory.
Step 4: Build a Full Package
Because of a limitation of the JD Edwards package-build process, build a full package for the environments to which you applied the BTSREL update, or the update package build does not work correctly. See the JD Edwards documentation on how to build a full package build.
Note
When you apply JD Edwards OneWorld ASU/ESUs, the ASU/ESU does not typically create new library and business functions. Therefore, the process is simple: however, the BizTalk Adapter for JD Edwards OneWorld custom package creates a new library. Therefore, you must perform extra steps, such as manually create a directory and run a full package build.
Modules list
The BTSREL custom package creates the following objects in JD Edwards OneWorld. BTSREL contains business functions to extract metadata and custom functions to test the data types.
Note
There is a bug in the JD Edwards OneWorld update. If you don't have all the business and custom functions, verify that a full package build was completed, rather than an update package build.
If you are missing files from the list, for example, if you have everything below ACBTEST but nothing above it, you might be missing the Data Dictionary (DD) items. You can go to Work With Data Items and look for missing files.
If you are missing other items, such as ACBCHAR01, ACBDATE01, ADBINT01, ACBMATH01, and ACBSTR01, these are the Primary Data Elements. When you merge objects from planner to DEV, many reports run in the background. You can open the merge reports and look for errors. The reports should list all the items and indicate that they were completed without errors or warnings. With this verification, you can continue because all items are accounted for.
ACBCHAR01 - TEST CHAR TYPE 01
ACBCUST - ACB CUSTOMER ID
ACBDATE01 - TEST DATE TYPE 01
ACBDEF - ACB FUNCTION TYPE DEFINITION
ACBFCNT - ACB FUNCTION NAME LIST COUNT
ACBFUNC - ACB FUNCTION NAME LIST
ACBFUNCN - ACB FUNCTION NAME
ACBINT01 - TEST INTEGER TYPE 01
ACBLIB - CONTROL BROKER LIBRARY
ACBMATH01 - TEST MATH TYPE 01
ACBNEWS - ACB NEW STATUS
ACBORDER - ACB ORDER NUMBER
ACBPRC - ACB ITEM PRICE
ACBPROD - ACB PRODUCT ID
ACBQTY - ACB ITEM QUANTITY
ACBRES - ACB RESULT INDICATOR
ACBSTAT - ACB STATUS
ACBSTR01 - TEST STRING TYPE 01
ACBTEST - ACB TEST SCREEN
ACBTEST2 - ACB TEST SCREEN 2
ACBTEST3 - ACB TEST SCREEN 3
B5500900 - CONTROL BROKER SUPPORT MODULE
D5500900 - CONTROL BROKER DATA STRUCTURE
D5500900A - CONTROL BROKER DATA STRUCTURE
D5500900B - FETCH PRICE DATA STRUCTURE
D5500900C - GET CUSTOMER STATUS DATA STRUCTURE
D5500900D - SET CUSTOMER STATUS DATA STRUCTURE
D5500900E - UPDATE SALES ORDER STATUS DATA STRUCTURE
D5500900F - TEST INTEGER
D5500900G - TEST STRING
D5500900H - TEST DATE
D5500900I - TEST CHAR
D5500900J - TEST MATH NUMERIC
D5500900K - TEST DATE 2
Customize the jdeinterop.ini file
The JD Edwards OneWorld XE connector classes in Connector.jar and Kernel.jar require that you use the jdeinterop.ini configuration file. This file is defined by the JD Edwards OneWorld software and uses its terminology. The JD Edwards Interoperability Guide Release OneWorld may provide more information about the purpose and terminology of this file. There is a sample jdeinterop.ini file in <Adapter_Installation>\config\jde.
Update jdeinterop.ini to match the parameter values that you defined in the Transport Properties screen. Multiple JD Edwards OneWorld logical systems can share the same jdeinterop.ini file if their parameters are compatible. Generally, if two logical systems point to two different JD Edwards OneWorld computers, they need two different copies of jdeinterop.ini.
Note
The logging in jdeinterop.ini should be turned off, and the parameters for the various log files can safely be ignored.
The following table itemizes the settings found in the jdeinterop.ini file. The information is organized by section. For example [JDENET] and the sections are listed in the order that they appear in the JD Edwards OneWorld software.
jdeinterop.ini file settings
| Section | Parameter and Description |
|---|---|
| [JDENET] | EnterpriseServerTimeout. The time-out value for a request to the enterprise server in milliseconds. The default size is 120000. maxPoolSize. The JDENET socket connection pool size. The default size is 30. |
| [SERVER] | glossaryTextServer. The enterprise server and port that provide glossary text information. This is the server that returns text descriptions for errors. This is frequently the same host and port as the JD Edwards OneWorld application server. There may be more than one glossary server for different supported language encodings. For example, JDED:6010 or actsrv1:6009. The values must match those set in System Definition. codePage. The encoding scheme. The default is 1252. - 1252 English and Western European - 932 Japanese - 950 Traditional Chinese - 936 Simplified Chinese - 949 Korean |
| [LOGS] | log= c:\jas.log. Location of the log file. You can safely ignore this parameter. debuglog= c:\jasdebug.log. Location of debug log file. You can safely ignore this parameter. Debug. Determines whether JDENET debugging is on. The default is FALSE. |
| [DEBUG] | JobFile= c:\Interop.log. Location of error file. You can safely ignore this parameter. DebugFile= c:\InteropDebug.log. Location of debug file. You can safely ignore this parameter. log= c:\net.log. Location of log file. You can safely ignore this parameter. debugLevel= 0 - 12. Debug levels. You can safely ignore this parameter. This defines the level of tracing provided by the COM Connector and the Callobject component in the specified log file, in the COM server only. - 0 None. Logging is turned off and only errors are written to the JobFile. - 2 Errors (error messages) - 4 System Errors (exception messages) - 6 Warning Information - 8 Min Trace (Key operations. For example, Logon, Logoff, Business Function calls.) - 10 Troubleshooting Information (Help). - 12 Complete Debug Information (Logs everything) - By default, you do not have to turn on tracing, but tracing is useful when you are debugging your code. - NetTraceLevel=0. Trace levels. You can safely ignore this parameter. Defines the level of tracing provided by the ThinNet component in the specified log file, in the COM server only. The odd values are reserved for future levels to be added. - The following list describes debug levels even more: - 0 No trace - 1 Refers to the Record process ID, thread ID, and the available socket status when a new connection is added and the socket pool is searched. - 2 Includes the information in trace level 1 and also traces every call made in the connection manager class. - 3 Includes all information in trace level 2, and also traces getPort() calls and getHost() calls. |
| [INTEROP] | enterpriseServer. This value is the name of the host server. Make sure that this value is the same value that you enter in the Host Name field in the JDE Credentials section in System Definition in the Transport Properties dialog box. The default is JDED. port. This value is the port number that is used to exchange data. Make sure that this value is the same value that you enter in the Port Number field in the JD Edwards Credentials section in the Transport Properties, System Definition. For example, 6010 or 6009. The values must match those set in System Definition. inactive_timeout. The time-out value in milliseconds for a transaction in auto-commit mode. If the user is inactive for this period of time (in milliseconds), the interop server logs off the user. You can change this value to a shorter period of time. The default is 1200000. manual_timeout. The time-out value in milliseconds for a transaction in manual commit mode. The default is 120000. Repository. Points to the location of the directory that contains Connector.jar and Kernel.jar. On UNIX, this is a full path. |
| [CORBA] | You can safely ignore this parameter. Multithread. The setting can be ignored. Set to 1 for multithread support for CORBA. Objects= CORBA::Connector;CORBA::OneWorldVersion Defines the objects for the CORBA server to create at startup. Also replaces the -DIORFILENAME = command-line option, for example: CORBA::Connector=connector.ior. |
JD Edwards EnterpriseOne
This sections includes key information on using the Microsoft BizTalk Adapter for JD Edwards EnterpriseOne with BizTalk Server.
Execute a JD Edwards EnterpriseOne master business function
You can use the BizTalk Adapter for JD Edwards EnterpriseOne to invoke a JD Edwards EnterpriseOne master business function, such as Address Book, Purchase Order, or Sales Order. You can also use the adapter as part of an integration effort to connect JD Edwards EnterpriseOne with BizTalk Server.
Access data stored in JD Edwards EnterpriseOne
The adapter accepts XML messages to enable BizTalk Server applications to communicate and exchange transactions with JD Edwards EnterpriseOne using one of the following:
- Transmit Adapter, which uses a Static Solicit-Response Send port to send a message to JD Edwards EnterpriseOne and expects a response.
- Receive Adapter, which uses a Static One-Way Receive port to receive messages from JD Edwards EnterpriseOne.
Interoperability framework
JD Edwards EnterpriseOne provides for integration with systems through its interoperability framework. The adapter uses the JD Edwards EnterpriseOne framework, and takes advantage of various integration access methods to provide the greatest amount of flexibility and functionality.
BizTalk Adapter for JD Edwards EnterpriseOne supports the following integration access methods:
JD Edwards EnterpriseOne ThinNet API
JD Edwards EnterpriseOne XML
JD Edwards EnterpriseOne unedited transaction tables (Z tables)
The adapter uses the JD Edwards EnterpriseOne ThinNet API to communicate with the JD Edwards EnterpriseOne application. By using the ThinNet API, the adapter can invoke one master business function (MBF) in a single unit of work (UOW). When an MBF fails, the whole UOW fails. This prevents partial updates. The validation of data, business rules, and communications to the underlying database are handled by the JD Edwards EnterpriseOne application.
JD Edwards Outbound Processing Framework
In the outbound process, the event starts when a specific MBF is executed in the JD Edwards EnterpriseOne environment. The MBF writes the required information for the event into the appropriate interface table and then notifies the subsystem batch function (BF) that an event occurred. The subsystem BF then includes an entry about the event on the subsystem data queue.
The outbound subsystem retrieves the data queue entry and looks in the Data Export Control table for the external processes to notify. The outbound subsystem then calls the BizTalk Adapter for JD Edwards EnterpriseOne listener with notification. The listener passes the notification to the generator. The generator then uses the JD Edwards EnterpriseOne ThinNet API to retrieve the appropriate information from the interface table.
Set string justification in Jdearglist
To configure certain string arguments as right-justified and left padded in the J.D. Edwards EnterpriseOne jdearglist.txt file, you must know what business function you want to access; specifically, you must know which fields in the business function you want to call.
You must update the jdearglist.txt before you generate the bindings (schemas) in the orchestration. The instructions for updating the jdearglist.txt file outlined in the "Handling String Values" section.
If you receive a jdearglist.txt warning message in the log, its purpose is to inform you that the jdearglist.txt is missing. However, if you are running the SalesOrder or PurchaseOrder business function, you must have that file in your PATH or it does not work.
Understand jdeinterop.ini
The JD Edwards EnterpriseOne connector classes in Connector.jar and Kernel.jar require that you use a configuration file named jdeinterop.ini. This file is defined by the JD Edwards EnterpriseOne software and uses its terminology. For more information about the purpose and terminology of this file, see the JD Edwards Interoperability Guide. There is a sample jdeinterop.ini file in: Program Files\ Microsoft BizTalk Adapters for Enterprise Applications\ J.D. Edwards EnterpriseOne(r)\config.
It is not recommended that you edit this file manually because it interacts with the Transport Properties dialog box for the send port -- for example those fields marked as <configured by BizTalk>.
PeopleSoft Enterprise
This section includes key information on using the Microsoft BizTalk Adapter for PeopleSoft Enterprise with BizTalk Server.
Receive handler PeopleSoft requirements
The PeopleSoft Integration Broker must be able to communicate with BizTalk Server. The following could have already occurred in an existing PeopleSoft environment and you could reuse an existing node; therefore, you would not have to do anything except obtain the HTTP specifications from a PeopleSoft System Administrator. For detailed information, see the PeopleSoft documentation.
The following steps provide an overview to complete in PeopleSoft:
Set up the message, and make it active through the Application Designer.
Make a one-time change to the PeopleSoft integration.gateway.properties file.
Create and configure the gateway and nodes to activate HTTP:
- The node must be using some triggering method, for example, the LOCATION_SYNC mechanism.
- The node must use HTTP.
- The node must point to the host and port to which you are sending the event.
Send handler PeopleSoft requirements
BizTalk Adapter for PeopleSoft Enterprise consists of a custom component interface (CI) that provides access through a Java API. A custom CI object, GET_CI_INFO, is deployed in the PeopleSoft system using PeopleSoft Tools, to provide metadata information that is required by BizTalk Adapter for PeopleSoft Enterprise. For more information, refer to PeopleSoft documentation.
Uploading of the custom component interface is a one-time occurrence. This file, GET_CI_INFO.pc, is provided with the product and must be installed in the PeopleSoft system before you can use the adapter to browse CIs. You must have access to the PeopleSoft Application Designer; however, the Application Designer does not have to be anywhere near the BizTalk Server computer. You use the Application Designer to upload the custom CI into the PeopleSoft computer that you browse.
You must have access to the PeopleSoft computer because you must set the environment variable CLASSPATH (or set the information in the Transport Properties window) to point to the PeopleSoft PSJOA/psjoa.jar file.
Set environment variable and use component interface
For more information about PeopleSoft, see the PeopleSoft documentation.
Set ClassPath environment variable
Update JAVA_HOME
Set the JAVA_HOME variable to point to your JDK installation, for example:
set JAVA_HOME=C:\j2sdk1.4.2_06
Update CLASSPATH
To use component interfaces (PeopleSoft 8 only) you must update your CLASSPATH to include the PeopleSoft component interface jar file:
In Control Panel, open System.
On the Advanced tab, select Environment Variables, and then select CLASSPATH.
Add the path. For example, enter:
<PeopleSoft_Home>\web\PSJOA\psjoa.jarBizTalk Adapter for PeopleSoft Enterprise requires the psjoa.jar file. This is performed when you create a send port. For more information, see "Setting Transport Properties in PeopleSoft System" in the adapter documentation.
Note
Only have one of these directories in your PATH to make sure that BizTalk Adapter for PeopleSoft Enterprise picks up the correct DLLs. Failure to set up your environment correctly for the desired version of PeopleSoft could lead to errors that are difficult to trace.
Use component interfaces
Upload a Custom CI into PeopleSoft
BizTalk Adapter for PeopleSoft Enterprise requires a modification to the PeopleSoft application. To use component interfaces, you must upload a custom component interface, GET_CI_INFO, into PeopleSoft. You only have to import GET_CI_INFO during initial setup to use the adapter. The adapter uses GET_CI_INFO to obtain information about other existing component interfaces in PeopleSoft.
This section explains how to manually import a custom component interface that let you browse component interfaces in PeopleSoft. Note that the custom methods do not use or modify any properties of the component interface that it is installed in. To import the custom component interface, you can use one of the following methods:
Create a new component to import the custom methods.
Use an existing component that contains no keys, for example, INSTALLATION_RS.
The simple component interface must not contain keys. If you are not sure whether a particular component interface contains keys, you can run the following SQL statement using your SQL Query tool. It gives you a list of all the component interfaces in your application that have no keys.
select distinct BCNAME
from PSBCITEM bc1
where not exists
(select 1 from PSBCITEM bc2 where bc1.BCNAME = bc2.BCNAME and bc2.BCTYPE in (1, 2))
You can follow PeopleSoft documentation to create a unique simple component for storing BizTalk Adapter for PeopleSoft Enterprise custom methods. You can also clone one of the pre-existing component interfaces and use it to store the custom methods.
To verify that your GET_CI_INFO has no keys, run the PeopleTools Application Designer Component Interface Test tool.
Create a new component interface
Follow these steps to create a new component interface using the PeopleSoft, Application Designer:
Open the PeopleSoft Application Designer.
Enter a three-tier connection type, and then click OK. For example, select Application Server from the list.
In the Application Designer, on the File menu, select New.
In the New dialog box, select Component Interface, and then click OK.
Click Select.
From the list of all components, select any simple component. For example, select INSTALLATION_RS, or a new PeopleSoft component that you created.
The custom methods do not use or modify any properties of the component interface that it is installed in.
This simple component interface must not contain keys. If you are not sure whether a particular component interface contains keys, you can run the following SQL statement using your SQL Query tool. It gives you a list of all the component interfaces in your application that have no keys:
select distinct BCNAME from PSBCITEM bc1 where not exists (select 1 from PSBCITEM bc2 where bc1.BCNAME = bc2.BCNAME and bc2.BCTYPE in (1, 2))
Note
You can also follow PeopleSoft documentation to create a unique simple component for storing custom methods for BizTalk Adapter for PeopleSoft Enterprise.
To verify that your GET_CI_INFO has no keys, run the PeopleTools Application Designer Component Interface Test tool.
Check component interface
You have completed uploading the Microsoft BizTalk Adapter for PeopleSoft GET_CI_INFO into your PeopleSoft System. The GET_CI_INFO is a user-defined custom component interface. It contains user-defined methods. The GET_CI_INFO component interface lets you browse component interfaces in your PeopleSoft system using the Microsoft Adapter Wizard. You can locate and expand GET_CI_INFO to view its user-defined methods.
Note
For more information about user-defined methods, see "PeopleSoft: Component Interface User-Defined Methods" in the adapter documentation.
Set the component interface security
After you install the custom GET_CI_INFO PeopleSoft component interface on PeopleSoft, set the security settings for GetCINamespace, GetDetails, and GetCollections methods for BizTalk Adapter for PeopleSoft Enterprise. This is standard practice when you create custom components or user-defined methods.
Note
The following procedure describes how to configure security for all supported releases of PeopleSoft in all supported modes.
To configure security for the component interface
Point to PeopleTools, point to Security, point to Permissions & Roles, and then select Permission Lists.
In the Maintain Security window, click Search, select the relevant Permission List, and then click the appropriate list hyperlink.
In the Permission List pane on the right, click the right arrow next to the Sign-on Times tab to display the Component Interfaces tab.
Click the Component Interfaces tab.
Click the plus sign (+) to add a new row to the Component Interfaces list.
Select the GET_CI_INFO component interface, and then click Edit.
To set the methods to Full Access, click Full Access (All), and then click OK.
Scroll to the bottom of the Component Interfaces window, and then click Save.
Test the component interface
You have finished configuring security for the GET_CI_INFO component interface delivered with BizTalk Adapter for PeopleSoft Enterprise. Your PeopleSoft component interface is ready, and you can browse PeopleSoft component interfaces.
Follow these steps to test the component interface in the Application Designer.
To test the component interface
Start the PeopleSoft Application Designer.
On the File menu, point to Open, and then select Definition = Component Interface.
From the list of component interfaces, select GET_CI_INFO CI.
After you open GET_CI_INFO, right-click anywhere in the right pane of your component interface definition, and then select Test Component Interface.
The Component Interface Tester window opens. There should be no keys listed. If your GET_CI_INFO contains keys, or if there is another option for selection, return to the Application Designer, and eliminate all keys from GET_CI_INFO.
Install steps
Before you install, be sure BizTalk Server and all the software prerequisites for the adapters are installed. It is recommended that you close all applications before running Setup.
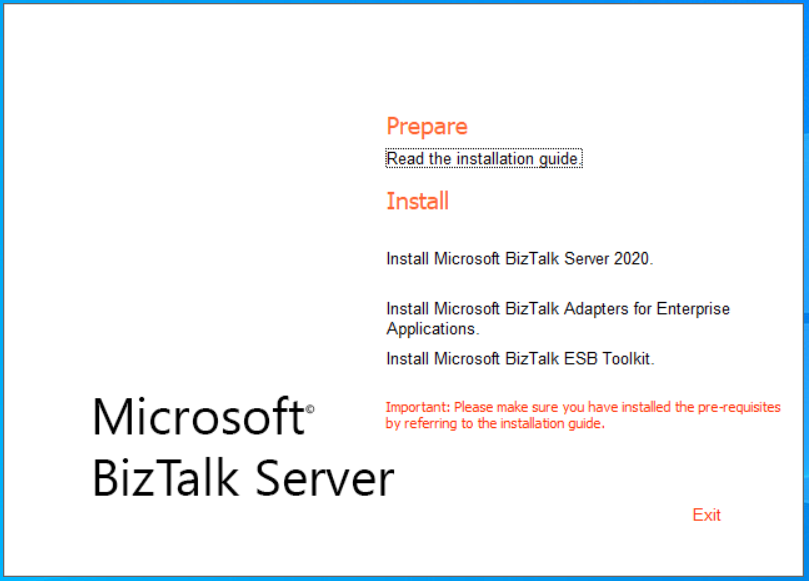
Run the BizTalk Server Setup.exe, and select Install Microsoft BizTalk Adapters for Enterprise Applications.
For BizTalk Server 2016 and older:
Run the BizTalk Server Setup.exe, select Install Microsoft BizTalk Adapters, and select Install Microsoft BizTalk Adapters for Enterprise Applications.Note
- You can also run a silent installation using the following command:
msiexec /i <msi\> /qn /l* <logfile\>-- where<logfile\>is optional, but is useful in the event of a failed installation. - The installation updates the PATH environment variable. To make sure that you are using the correct variables, close the installation command window to update your variables.
- You can also run a silent installation using the following command:
Accept the License Agreement, and select Next.
Enter your Customer Information, and select Next.
Select a Complete or Custom installation:
Complete: Installs all the Microsoft BizTalk Adapters for Enterprise Applications, all the program features, and is used for development and run time.
Custom: You choose the adapters and features that you want to install, and where they are installed.
To set the destination, select Browse, and set the installation path.
Select Next to continue.
Install, and select Finish when complete.
Important
You may encounter the following error during installation:
Error 1609. An error occurred while applying security settings. CREATOR OWNER is not a valid user or group
To work around this error, do the following, and run the installation again:
- Open a command prompt
- Type:
net user "CREATOR OWNER" /add. This creates a new user called CREATOR OWNER. - Type:
net localgroup Users /add. This creates a new group called Users.
To add the adapters to BizTalk Server, see "Add adapters to BizTalk Admin" in this topic.
Add adapters to BizTalk Admin
Note
If you install BizTalk in a multicomputer environment (runtime-only installation on one computer, and an administration tools-only installation on another computer), you should install the BizTalk Adapters for Enterprise Applications on both the computers.
Open the BizTalk Server Administration Console, expand Microsoft BizTalk Server, and then expand Platform Settings.
Right-click Adapters, select New, and then select Adapter.
Enter a name, such as PeopleSoft.
Select the name you entered from the Adapter list, and select OK.
Post-install - JD Edwards OneWorld
Microsoft BizTalk Adapter for JD Edwards OneWorld consists of a transmit adapter that interfaces supported databases and server systems to Microsoft BizTalk Server. The transmit adapter enables you to invoke a server system's call from BizTalk Server. The transmit adapter (the BizTalk Server Administration Send Handler) configuration specifies the location of the SQL database.
See the adapter documentation for information about how to use BizTalk Adapter for JD Edwards OneWorld and about the mapping between its model and the BizTalk Server model.
Single Sign-On
BizTalk Adapter for JD Edwards OneWorld provides support for Enterprise Single Sign-On (SSO). If you select to use SSO in the Transport Properties page, the credentials for the affiliate application in the SSO Credentials database are used. An affiliate application represents an application—a back-end that requires credentials.
Installed components
The adapter installation installs and registers the following components in the global assembly cache (GAC). You can verify the registration by opening the assembly folder in your explorer (<%WINDIR%>\assembly), or use the
gacutil /lfrom the Visual Studio command prompt:- Microsoft.BizTalk.Adapters.BizUtil.dll
- Microsoft.BizTalk.Adapters.JDEProperties.dll
- Microsoft.BizTalk.Adapters.CoreManagement.dll
- Microsoft.BizTalk.Adapters.CoreReceiver.dll
- Microsoft.BizTalk.Adapters.CoreTransmitter.dll
btsTask.exe installs and deploys the
Microsoft.BizTalk.Adapters.JDEProperties.dllfile to the GAC. The BizTalk Server deployment log results are in\Program Files\Microsoft BizTalk Adapters for Enterprise Applications\jdeDeploy.htmland jdeDeploy.xml.Adapter-specific files are installed in
Program FilesandProgram Files\Common Files.The
sdk\is installed inProgram Files\Microsoft BizTalk Adapters for Enterprise Applications\J.D. Edwards OneWorld(r).Program Files\Microsoft BizTalk Adapters for Enterprise Applications\JD Edwards OneWorld(r)\contains the following files:- classes\JDEJAccess.jar
- Config\ J.D. Edwards OneWorld(r) \BTSREL.exe
- Config\ J.D. Edwards OneWorld(r) \jdearglist.txt
- Config\ J.D. Edwards OneWorld(r) \jdeinterop.ini
Program Files\Common Files\Microsoft BizTalk Adapters for Enterprise Applications\Bin\contains the following files:- Microsoft.BizTalk.Adapters.JDEProperties.dll
- jdecba.dll
Post-install - JD Edwards EnterpriseOne
Microsoft BizTalk Adapter for JD Edwards EnterpriseOne contains a transmit adapter that interfaces with supported databases and server systems to BizTalk Server. The transmit adapter enables you to invoke a server system’s call from BizTalk Server.
BizTalk Adapter for JD Edwards EnterpriseOne provides support for Enterprise Single Sign-On (SSO). If you select to use SSO in the Transport Properties page, the credentials for the affiliate application in the SSO Credentials database are used. An affiliate application represents an application—a back-end that requires credentials.
Installed components
The adapter installation installs and registers the following components in the global assembly cache (GAC). You can verify the registration by opening the assembly folder in your explorer (<%WINDIR%>\assembly), or use the
gacutil /lfrom the Visual Studio command prompt:- Microsoft.BizTalk.Adapters.BizUtil.dll
- Microsoft.BizTalk.Adapters.JDEProperties.dll
- Microsoft.BizTalk.Adapters.CoreManagement.dll
- Microsoft.BizTalk.Adapters.CoreReceiver.dll
- Microsoft.BizTalk.Adapters.CoreTransmitter.dll
The adapter-specific files are installed in the
Program Files\Common Files\Microsoft BizTalk Adapters for Enterprise Applications\Binfolder. This folder contains the following files:- Jdecba.dll
- Microsoft.BizTalk.Adapters.JDEProperties.dll
The following files are installed in
Program Files\Microsoft BizTalk Adapters for Enterprise Applications\J.D. Edwards EnterpriseOne(r):- Bin\BTAJDEEnterpriseOneTrace.cmd
- Classes\JDEDynAccess.jar
- Config\btaJDEEnterpriseOneTrace.mof
- Config\jdearglist.txt
- Config\jdeinterop.ini
- Config\jdelog.properties
- Sdk
Post-install - PeopleSoft Enterprise
Microsoft BizTalk Adapter for PeopleSoft Enterprise contains a transmit adapter that interfaces supported databases and server systems to BizTalk Server. The transmit adapter enables you to invoke a server system’s call from BizTalk Server. The transmit adapter (the BizTalk Server Administration Send Handler) configuration specifies the location of the SQL database.
BizTalk Adapter for PeopleSoft Enterprise provides support for Enterprise Single Sign-On (SSO). If you select to use SSO in the Transport Properties page, the credentials for the affiliate application in the SSO Credentials database are used. An affiliate application represents an application—a back-end that requires credentials.
The adapter installation includes samples in the \sdk directory.
Installed components
The adapter installation installs and registers the following components in the global assembly cache (GAC). You can verify the registration by opening the assembly folder in your explorer (<%WINDIR%>\assembly), or use the
gacutil /lfrom the Visual Studio command prompt:- Microsoft.BizTalk.Adapters.BizUtil.dll
- Microsoft.BizTalk.Adapters.CoreManagement.dll
- Microsoft.BizTalk.Adapters.CoreReceiver.dll
- Microsoft.BizTalk.Adapters.CoreTransmitter.dll
Adapter-specific files are installed in
*Program FilesandProgram Files\Common Files. The following files are installed inProgram Files\Microsoft BizTalk Adapters for Enterprise Applications\PeopleSoft Enterprise (r)`:- bin\BTAPeopleSoftTrace.cmd
- config\btaPeopleSoftTrace.mof
- config\GET_CI_INFO.pc
- config\GET_CI_INFO.pc
- sdk\
Program Files\Common Files\Microsoft BizTalk Adapters for Enterprise Applicationscontains the following files:- bin\psosa.dll
- bin\Microsoft.BizTalk.Adapters.CoreManagement.dll
- bin\Microsoft.BizTalk.Adapters.CoreReceiver.dll
- bin\Microsoft.BizTalk.Adapters.CoreTransmitter.dll
Post-install overview - TIBCO Rendezvous
Microsoft BizTalk Adapter for TIBCO Rendezvous contains receive and transmit functionality that interface with supported databases and server systems to BizTalk Server.
The receive side listens for calls that are outbound from the server system.
The transmit side enables you to invoke a server system’s call from BizTalk Server.
See the adapter documentation for information about how to use Microsoft BizTalk Adapter for TIBCO Rendezvous and about the mapping between its model and the BizTalk Server model.
Installed components
The adapter installation installs and registers the following components in the global assembly cache (GAC). You can verify the registration by opening the assembly folder in your explorer (<%WINDIR%>\assembly), or use the
gacutil /lfrom the Visual Studio command prompt:- Microsoft.BizTalk.Adapters.TibcoRV
- Microsoft.BizTalk.Adapters.TibcoRV.Common
- Microsoft.BizTalk.Adapters.TibcoRV.Service
- Microsoft.BizTalk.Adapters.TibRV.Properties
- Microsoft.BizTalk.Adapters.TibcoEMS
- Microsoft.BizTalk.Adapters.TibcoEMS.Properties
- Microsoft.BizTalk.Adapters.TibcoRVManagement
- Microsoft.BizTalk.Adapters.TibcoRVReceiver
- Microsoft.BizTalk.Adapters.TibcoRVTransmitter
Adapter-specific files are installed in
Program FilesandProgram Files\Common Files. The following files are installed inProgram Files\Microsoft BizTalk Adapters for Enterprise Applications\ TIBCO(r) Rendezvous(r):- bin\BTATibcoRVTrace.cmd
- bin\mbaRV.exe
- bin\Microsoft.BizTalk.Adapters.TibcoRV.Common.dll
- bin\Microsoft.BizTalk.Adapters.TibcoRV.dll
- bin\Microsoft.BizTalk.Adapters.TibcoRV.Service.dll
- bin\Microsoft.BizTalk.Adapters.BizUtil.dll
- bin\Microsoft.BizTalk.Adapters.CoreManagement.dll
- bin\Microsoft.BizTalk.Adapters.CoreReceiver.dll
- bin\Microsoft.BizTalk.Adapters.CoreTransmitter.dll
- bin\Microsoft.BizTalk.Adapters.TibRV.Properties.dll
- Config\btaTibcoRVTrace.mof
- sdk\
Program Files\Common Files\Microsoft BizTalk Adapters for Enterprise Applicationscontains the following files:- bin\tibcorvcba.dll
- Microsoft.BizTalk.Adapters.CoreManagement.dll
- Microsoft.BizTalk.Adapters.CoreReceiver.dll
- Microsoft.BizTalk.Adapters.CoreTransmitter.dll
Add TIBCO.Rendezvous.dll to the GAC
BizTalk Adapter for TIBCO Rendezvous requires the TIBCO.Rendezvous.dll file. The minimum version that is required is 1.0.3036.23330 FileVersion, which is shipped with the product version 8.1. The adapter triggers an exception and logs an appropriate message if this assembly is not installed.
You must use late binding to load assemblies so that the TIBCO Rendezvous assemblies don't fail when a particular version of the TIBCO.Rendezvous.dll and TIBCO.Rendezvous.net module aren't on the target computer.
Runtime Component
Verify you have the TIBCO Rendezvous Runtime Component installed on your computer. The Runtime Component is the only component that you must install when you install TIBCO Rendezvous.
In a Visual Studio command prompt, change directories to the location of the TIBCO.Rendezvous.dll file. The path of this DLL in the default installation of TIBCO Rendezvous is C:\TIBCO\TIBRV\BIN\TIBCO.Rendezvous.dll.
At the command prompt, type the following:
C:\TIBCO\TIBRV\BIN > gacutil /i TIBCO.Rendezvous.dll
The TIBCO.Rendezvous.dll now shows GAC list. To view the list, in Control Panel, open Administrator Tools, open Microsoft .NET Framework Configuration, and then open Assembly Cache.
Post-install - TIBCO Enterprise Message Service
Microsoft BizTalk Adapter for TIBCO Enterprise Message Service (EMS) contains receive and transmit functionality that interface with supported databases and server systems to BizTalk Server.
The receive side listens for calls that are outbound from the server system.
The transmit side enables you to invoke a server system’s call from BizTalk Server.
See the adapter documentation for information about how to use BizTalk Adapter for TIBCO EMS and about the mapping between its model and the BizTalk Server model.
Installed components
The adapter installation installs and registers the
Microsoft.BizTalk.Adapters.TibcoEMS.dllfile in the global assembly cache (GAC). You can verify the registration by opening the assembly folder in your explorer (<%WINDIR%>\assembly), or use thegacutil /lfrom the Visual Studio command prompt.Adapter-specific files are installed in
Program FilesandProgram Files\Common Files. The following files are installed underProgram Files\Microsoft BizTalk Adapters for Enterprise Applications\TIBCO(r) Enterprise Message Service(TM):- bin\BTATibcoEMSTrace.cmd
- Microsoft.BizTalk.Adapters.TibcoEMS.dll
- Config\btaTibcoEMSTrace.mof
- sdk\
Program Files\Common Files\Microsoft BizTalk Adapters for Enterprise Applications\binfolder contains the following files:Microsoft.BizTalk.Adapters.CoreManagement.dll
Microsoft.BizTalk.Adapters.CoreReceiver.dll
Microsoft.BizTalk.Adapters.CoreTransmitter.dll
Note
You must use late binding to load assemblies so that the TIBCO EMS assemblies do not fail when a particular version of the TIBCO.EMS.dll is not present on the target computer.
Add TIBCO.EMS.dll API to the GAC
BizTalk Adapter for TIBCO EMS requires that you add the TIBCO.EMS.dll to the GAC. BizTalk Adapter for TIBCO EMS triggers an exception and logs an appropriate message if this assembly is not installed.
Copy the TIBCO EMS C#API to your BizTalk computer.
In a Visual Studio command prompt, change directories to the location of the C# API file.
In a Visual Studio command prompt, type the following:
C:\\<TIBCO EMS Folder\>bin> gacutil /i TIBCO.EMS.dllThe TIBCO.EMS.dll now shows in the C:\Windows\assembly listing. Or, in Control Panel, open Administrator Tools > Microsoft .NET Framework > Assembly Cache to view the GAC list.
Limitations
BizTalk Adapter for TIBCO EMS uses TIBCO.EMS.dll to communicate with the server. The following are limitations when you use the TIBCO.EMS.dll:
Message compression, which enables the TIBCO EMS client to send messages in a compressed form to EMS, is not available.
Encryption of messages between the adapter and the server is not available. The TIBCO.EMS.dll does not allow for SSL encryption using the OpenSSL libraries but the Adapters support the SLL with Tibco.EMS.dll with ProductVersion 5.0 and above.
Administration API for EMS is not supported.
Adapter tracing
Enable tracing
The file name used with Windows tracing is up to the administrator. The application writes to the operating system, which ignores all logs until you want the logs for a particular back-end system. You do this by running a separate BizTalk Adapters for Enterprise Applications command file. One of the arguments for that command is the name of the file that is used to capture the trace information. For more information, see "Use Windows trace event" (in this topic).
Trace files install to \Program Files\Microsoft BizTalk Adapters for Enterprise Applications\.
- bin\BTATrace.cmd
- config\btaTrace.mof
Use Windows trace event
The adapters log error, warning, and information messages to the Windows Event Viewer. You can view additional tracing messages by using the Event Tracing for Windows (ETW) tool. When ETW is enabled, it creates an *.etl file to receive the messages. This file is in binary format and must be converted to be read. To do this, you must have a consumer application available to interpret the *.etl file, for example, Windows tracerpt.exe or tracedmp.exe.
ETW components
Event Tracing for Windows has three components:
Controller application: Activates and deactivates a provider. For example, tracelog.exe or logman.exe.
You set your PATH environment variable to point to the location of tracelog.exe. This makes sure that BTA<Adapter Name>Trace calls can locate tracelog.exe in the system. By default, BTA<Adapter Name>Trace searches the current path.
Note
tracelog.exe is available from the Microsoft SDK and is compatible with the commands provided by Microsoft BizTalk Adapters for Enterprise Applications. To use logman.exe, see the logman documentation.
Consumer application: Reads logged events.
For the consumer application to be able to read the event in the .etl file, Event Tracing for Windows must dump them into that file. Typically this is done when the controller deactivates the tracing.
To use the consumer application without deactivating the trace, the controller must activate the trace with the real-time option, <Real time> = -rt.
Provider: Used to provide the event.
Each adapter includes five different providers. They are registered in Windows Management Instrumentation (WMI). To find the registered providers in the root\WMI\EventTrace path, you can use tools such as WMI CIM Studio.
The five providers enable you to log different kinds of messages:
- Receiver Logging Provider: The <Trace element> switch is - receiver.
- Receiver CastDetails Provider: The <Trace element> switch is - castDetailsReceive.
- Transmitter Logging Provider: The <Trace element> switch is - transmitter.
- Transmitter CastDetails Provider: The <Trace element> switch is - castDetailsTransmit.
- Management Logging Provider: The <Trace element> switch is - management.
To use ETW, run the command for the specific adapter: BTA<Adapter Name\>Trace.cmd. You use this command as follows:
BTA<Adapter Name>Trace <Trace element> -start [-cir <MB>|
    -seq <MB>] [-rt] logfile
BTA<Adapter Name>Trace <Trace element> -stop
Where:
<Trace element> (required) is the kind of provider. The options are:
-castDetailsTransmit
-transmitter
-castDetailsReceive
-receiver
-management
-start, -stop: Activate or deactivate the provider.
-cir <MB>: Size and kind of file. -cir is a circular file. <MB>: Size in megabytes.
-seq <MB>: Size and kind of file. -seq is a sequential file. <MB>: Size in megabytes.
-rt: Set the real-time mode on.
Logfile: Name of the log file (c:\rtlog.etl is the default).
For example:
BTAXXXTrace -transmitter -start -cir 10 -rt c:\log\mylog.etl
BTAXXXTrace -transmitter -stop
Note
You use the tracerpt.exe command to format the .etl files.
Next steps
Feedback
Coming soon: Throughout 2024 we will be phasing out GitHub Issues as the feedback mechanism for content and replacing it with a new feedback system. For more information see: https://aka.ms/ContentUserFeedback.
Submit and view feedback for