Walkthrough: Create a traditional Windows Desktop application (C++)
This walkthrough shows how to create a traditional Windows desktop application in Visual Studio. The application you create uses the Windows API to display "Hello, Windows desktop!" in a window. You can use the code that you develop in this walkthrough as a pattern to create Windows desktop applications.
The Windows API (also known as the Win32 API, Windows Desktop API, and Windows Classic API) is a C-language-based framework for creating Windows applications. It has been used to create Windows applications for decades. More advanced and easier-to-program frameworks have been built on top of the Windows API. For example, MFC, ATL, the .NET frameworks. Even the most modern Windows Runtime code for UWP and Store apps written in C++/WinRT uses the Windows API underneath. For more information about the Windows API, see Windows API Index.
Important
The Build the code section at the end of this document shows the complete code. This walkthrough covers the various pieces of code that go into a Windows app, but you won't code as you go because some details are omitted in the code snippets to focus on the most important parts. You can copy the complete code and paste it into your project at the end.
Prerequisites
A computer that runs Microsoft Windows 7 or later versions. We recommend Windows 11 or later for the best development experience.
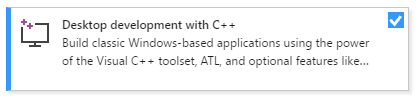
A copy of Visual Studio. For information on how to download and install Visual Studio, see Install Visual Studio. When you run the installer, make sure that the Desktop development with C++ workload is checked. Don't worry if you didn't install this workload when you installed Visual Studio. You can run the installer again and install it now.
A basic understanding of using the Visual Studio IDE. If you've used Windows desktop apps before, you can probably keep up. For an introduction, see Visual Studio IDE feature tour.
An understanding of enough of the fundamentals of the C++ language to follow along. Don't worry, we don't do anything too complicated.
Create a Windows desktop project
Follow these steps to create your first Windows desktop project. Per the note at the beginning of this walkthrough, the completed code is available in the Build the code section at the end of the walkthrough. Go ahead and follow the steps to create the project, but hold off pasting the following sections of code until the end, when the complete application code is presented. Some details are omitted in the code snippets to focus on the most important parts. You can copy the complete code and paste it into your project at the end.
To simplify the explanation. To see the documentation for your preferred version of Visual Studio, use the Version selector control. It's located at the top of the table of contents on this page.
To create a Windows desktop project in Visual Studio
From the main menu, choose File > New > Project to open the Create a New Project dialog box.
At the top of the dialog, set Language to C++, set Platform to Windows, and set Project type to Desktop.
From the filtered list of project types, choose Windows Desktop Wizard then choose Next. In the next page, enter a name for the project, for example, DesktopApp.
Choose the Create button to create the project.
The Windows Desktop Project dialog now appears. In the Application type dropdown, make sure you select Desktop application (.exe). Since we're making a Windows application, choosing Console Application results in a project that won't build given the code we're going to use. Then, under Additional options, select Empty project. Choose OK to create the project.
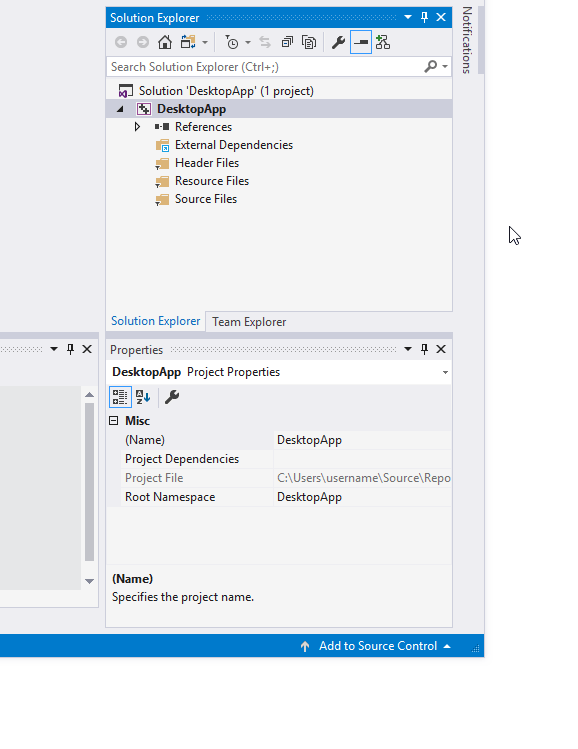
In Solution Explorer, right-click the DesktopApp project, choose Add, and then choose New Item.
The animation shows right-clicking on the project name in Solution Explorer, choosing Add in the menu that appears, and then choosing New Item.
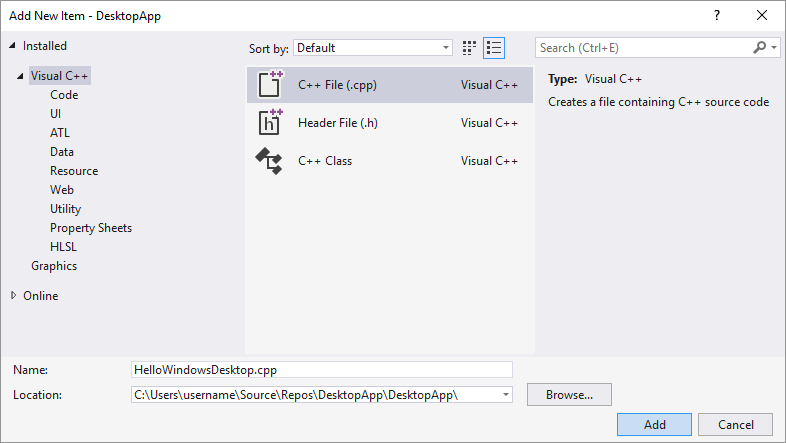
In the Add New Item dialog box, select C++ File (.cpp). In the Name box, type a name for the file, for example, HelloWindowsDesktop.cpp. Choose Add.
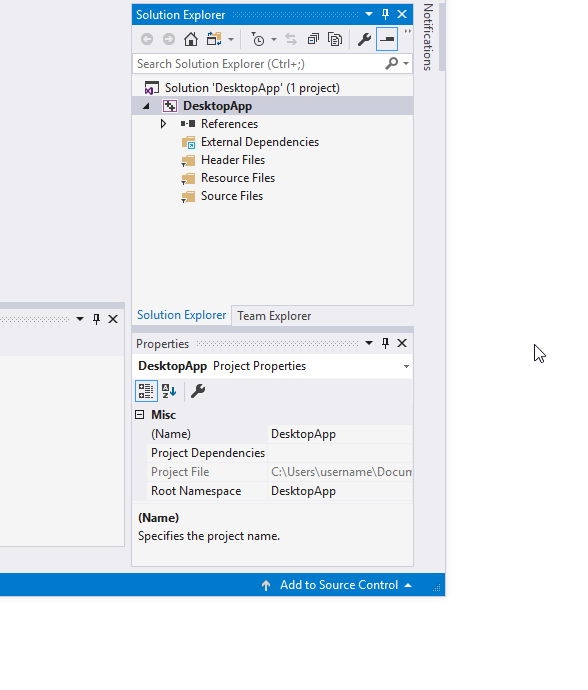
Your project is now created and your source file is opened in the editor.
To create a Windows desktop project in Visual Studio 2017
On the File menu, choose New and then choose Project.
In the New Project dialog box, in the left pane, expand Installed > Visual C++, then select Windows Desktop. In the middle pane, select Windows Desktop Wizard.
In the Name box, type a name for the project, for example, DesktopApp. Choose OK.

In the Windows Desktop Project dialog, under Application type, select Windows application (.exe). Under Additional options, select Empty project. Make sure Precompiled Header isn't selected. Choose OK to create the project.
In Solution Explorer, right-click the DesktopApp project, choose Add, and then choose New Item.
The animation shows right-clicking on the project name in Solution Explorer, choosing Add in the menu that appeared, and then choosing New Item.
In the Add New Item dialog box, select C++ File (.cpp). In the Name box, type a name for the file, for example, HelloWindowsDesktop.cpp. Choose Add.
Your project is now created and your source file is opened in the editor.
To create a Windows desktop project in Visual Studio 2015
On the File menu, choose New and then choose Project.
In the New Project dialog box, in the left pane, expand Installed > Templates > Visual C++, and then select Win32. In the middle pane, select Win32 Project.
In the Name box, type a name for the project, for example, DesktopApp. Choose OK.

On the Overview page of the Win32 Application Wizard, choose Next.

On the Application Settings page, under Application type, select Windows application. Under Additional options, uncheck Precompiled header, then select Empty project. Choose Finish to create the project.
In Solution Explorer, right-click the DesktopApp project, choose Add, and then choose New Item.
The animation shows right-clicking on the project name in Solution Explorer, choosing Add in the menu that appears, and then choosing New Item.
In the Add New Item dialog box, select C++ File (.cpp). In the Name box, type a name for the file, for example, HelloWindowsDesktop.cpp. Choose Add.

Your project is now created and your source file is opened in the editor.
The code
Next, learn how to create the code for a Windows desktop application in Visual Studio.
Where code starts running in a Windows desktop application
Just as every C application and C++ application must have a
mainfunction as its starting point, every Windows desktop application must have aWinMainfunction.WinMainhas the following syntax.int WINAPI WinMain( _In_ HINSTANCE hInstance, _In_opt_ HINSTANCE hPrevInstance, _In_ LPSTR lpCmdLine, _In_ int nCmdShow );For information about the parameters and return value of this function, see WinMain entry point.
Note
What are all those extra words, such as
WINAPI, orCALLBACK, orHINSTANCE, or_In_? The traditional Windows API uses typedefs and preprocessor macros extensively to abstract away some of the details of types and platform-specific code, such as calling conventions,__declspecdeclarations, and compiler pragmas. In Visual Studio, you can use the IntelliSense Quick Info feature to see what these typedefs and macros define. Hover your mouse over the word of interest, or select it and press Ctrl+K, Ctrl+I for a small pop-up window that contains the definition. For more information, see Using IntelliSense. Parameters and return types often use SAL Annotations to help you catch programming errors. For more information, see Using SAL Annotations to Reduce C/C++ Code Defects.Windows desktop programs require
<windows.h>. You'll also frequently see#include <tchar.h>. That's to make it easier to write an app that can work with eithercharorwchar_t. The way it works is that you instead use theTCHARmacro in your code, which resolves ultimately towchar_tif theUNICODEsymbol is defined in your project, otherwise it resolves tochar. If you always build with UNICODE enabled, you don't needTCHARand can just usewchar_tdirectly. For more information, see Using generic-text mappings. The following code shows theses two#includestatements at the top of the file.#include <windows.h> #include <tchar.h>Along with the
WinMainfunction, every Windows desktop application must also have a window-procedure function. This function is called aWndProc, but you can give it whatever name you like in your code.WndProchas the following syntax.LRESULT CALLBACK WndProc( _In_ HWND hWnd, _In_ UINT message, _In_ WPARAM wParam, _In_ LPARAM lParam );In this function, you write code to handle messages that the application receives from Windows when events occur. For example, if a user chooses an OK button in your application, Windows sends a message to you. You write code inside a
WndProcfunction that does whatever work is appropriate. It's called handling an event. You only handle the events that are relevant for your application.For more information, see Window Procedures.
Add functionality to the WinMain function
In the
WinMainfunction, you need to capture some basic information about your main window. You do that by filling out a structure of typeWNDCLASSEX. The structure contains information about the window such as the application icon, the background color of the window, the name to display in the title bar, among other things. Importantly, it contains a function pointer to your window procedure that handles the messages that Windows sends to your app. The following example shows a typicalWNDCLASSEXstructure:WNDCLASSEX wcex; wcex.cbSize = sizeof(WNDCLASSEX); wcex.style = CS_HREDRAW | CS_VREDRAW; wcex.lpfnWndProc = WndProc; wcex.cbClsExtra = 0; wcex.cbWndExtra = 0; wcex.hInstance = hInstance; wcex.hIcon = LoadIcon(wcex.hInstance, IDI_APPLICATION); wcex.hCursor = LoadCursor(NULL, IDC_ARROW); wcex.hbrBackground = (HBRUSH)(COLOR_WINDOW+1); wcex.lpszMenuName = NULL; wcex.lpszClassName = szWindowClass; wcex.hIconSm = LoadIcon(wcex.hInstance, IDI_APPLICATION);For information about the fields of the structure above, see
WNDCLASSEX.Once you have the
WNDCLASSEXstructure filled out, you register it with Windows so that it knows about your window and how to send messages to it. Use theRegisterClassExfunction and pass the window class structure as an argument. The_Tmacro is used because we use theTCHARtype per the discussion about Unicode above. The following code shows how to register the window class.if (!RegisterClassEx(&wcex)) { MessageBox(NULL, _T("Call to RegisterClassEx failed!"), _T("Windows Desktop Guided Tour"), NULL); return 1; }Next you create a window using the
CreateWindowExfunction.static TCHAR szWindowClass[] = _T("DesktopApp"); static TCHAR szTitle[] = _T("Windows Desktop Guided Tour Application"); // The parameters to CreateWindowEx explained: // WS_EX_OVERLAPPEDWINDOW : An optional extended window style. // szWindowClass: the name of the application // szTitle: the text that appears in the title bar // WS_OVERLAPPEDWINDOW: the type of window to create // CW_USEDEFAULT, CW_USEDEFAULT: initial position (x, y) // 500, 100: initial size (width, length) // NULL: the parent of this window // NULL: this application does not have a menu bar // hInstance: the first parameter from WinMain // NULL: not used in this application HWND hWnd = CreateWindowEx( WS_EX_OVERLAPPEDWINDOW, szWindowClass, szTitle, WS_OVERLAPPEDWINDOW, CW_USEDEFAULT, CW_USEDEFAULT, 500, 100, NULL, NULL, hInstance, NULL ); if (!hWnd) { MessageBox(NULL, _T("Call to CreateWindowEx failed!"), _T("Windows Desktop Guided Tour"), NULL); return 1; }This function returns an
HWND, which is a handle to a window. A handle is somewhat like a pointer. Windows uses it to keep track of the windows you create. For more information, see Windows Data Types.At this point, the window has been created, but we still need to tell Windows to make it visible. That's what this code does:
// The parameters to ShowWindow explained:
// hWnd: the value returned from CreateWindow
// nCmdShow: the fourth parameter from WinMain
ShowWindow(hWnd,
   nCmdShow);
UpdateWindow(hWnd);
The displayed window is just a blank rectangle because you haven't yet implemented the
WndProcfunction. The application isn't yet handling the messages that Windows is now sending to it.To handle the messages, we first add what's called a message loop to listen for the messages that Windows sends. When the application receives a message, this loop dispatches it to your
WndProcfunction to be handled. The message loop resembles the following code:MSG msg; while (GetMessage(&msg, NULL, 0, 0)) { TranslateMessage(&msg); DispatchMessage(&msg); } return (int) msg.wParam;For more information about the structures and functions in the message loop, see
MSG,GetMessage, TranslateMessage, andDispatchMessage.A basic
WinMainfunction that creates the application's main window, and listens for messages that Windows sends your app, would resemble the following code:int WINAPI WinMain(HINSTANCE hInstance, HINSTANCE hPrevInstance, LPSTR lpCmdLine, int nCmdShow) { WNDCLASSEX wcex; wcex.cbSize = sizeof(WNDCLASSEX); wcex.style = CS_HREDRAW | CS_VREDRAW; wcex.lpfnWndProc = WndProc; wcex.cbClsExtra = 0; wcex.cbWndExtra = 0; wcex.hInstance = hInstance; wcex.hIcon = LoadIcon(wcex.hInstance, IDI_APPLICATION); wcex.hCursor = LoadCursor(NULL, IDC_ARROW); wcex.hbrBackground = (HBRUSH)(COLOR_WINDOW+1); wcex.lpszMenuName = NULL; wcex.lpszClassName = szWindowClass; wcex.hIconSm = LoadIcon(wcex.hInstance, IDI_APPLICATION); if (!RegisterClassEx(&wcex)) { MessageBox(NULL, _T("Call to RegisterClassEx failed!"), _T("Windows Desktop Guided Tour"), NULL); return 1; } // Store instance handle in our global variable hInst = hInstance; // The parameters to CreateWindowEx explained: // WS_EX_OVERLAPPEDWINDOW : An optional extended window style. // szWindowClass: the name of the application // szTitle: the text that appears in the title bar // WS_OVERLAPPEDWINDOW: the type of window to create // CW_USEDEFAULT, CW_USEDEFAULT: initial position (x, y) // 500, 100: initial size (width, length) // NULL: the parent of this window // NULL: this application dows not have a menu bar // hInstance: the first parameter from WinMain // NULL: not used in this application HWND hWnd = CreateWindowEx( WS_EX_OVERLAPPEDWINDOW, szWindowClass, szTitle, WS_OVERLAPPEDWINDOW, CW_USEDEFAULT, CW_USEDEFAULT, 500, 100, NULL, NULL, hInstance, NULL ); if (!hWnd) { MessageBox(NULL, _T("Call to CreateWindow failed!"), _T("Windows Desktop Guided Tour"), NULL); return 1; } // The parameters to ShowWindow explained: // hWnd: the value returned from CreateWindow // nCmdShow: the fourth parameter from WinMain ShowWindow(hWnd, nCmdShow); UpdateWindow(hWnd); // Main message loop: MSG msg; while (GetMessage(&msg, NULL, 0, 0)) { TranslateMessage(&msg); DispatchMessage(&msg); } return (int) msg.wParam; }
Handle messages in the WndProc function
To handle messages that the application receives, you implement a
switchstatement in yourWndProcfunction.An important message to handle is
WM_PAINT. The application receives aWM_PAINTmessage when part of its displayed window must be updated. The event can occur when a user moves a window in front of your window and moves it away again. It receives this message the first time your window is displayed, giving you a chance to display your application UI. Your application finds out about these events when Windows sends them. When the window is first displayed, all of it must be updated.To handle a
WM_PAINTmessage, first callBeginPaint, then handle all the logic to lay out the text, buttons, and other controls in the window. Then callEndPaint. For this application, the code betweenBeginPaint()andEndPaint()displaysHello, Windows desktop!in the window you created inWinMain(). In the following code, theTextOutfunction displays the text at the specified location in the window.PAINTSTRUCT ps; HDC hdc; TCHAR greeting[] = _T("Hello, Windows desktop!"); switch (message) { case WM_PAINT: hdc = BeginPaint(hWnd, &ps); // Here your application is laid out. // For this introduction, we just print out "Hello, Windows desktop!" // in the top left corner. TextOut(hdc, 5, 5, greeting, _tcslen(greeting)); // End application-specific layout section. EndPaint(hWnd, &ps); break; }In the preceding code,
HDCis a handle to a device context which is associated with the window's client area. You use it when drawing in the window to refer to its client area. Use theBeginPaintandEndPaintfunctions to prepare for and complete the drawing in the client area.BeginPaintreturns a handle to the display device context used for drawing in the client area;EndPaintends the paint request and releases the device context.An application typically handles many other messages. For example,
WM_CREATEis sent when a window is first created, andWM_DESTROYwhen the window is closed. The following code shows a basic but completeWndProcfunction:LRESULT CALLBACK WndProc(HWND hWnd, UINT message, WPARAM wParam, LPARAM lParam) { PAINTSTRUCT ps; HDC hdc; TCHAR greeting[] = _T("Hello, Windows desktop!"); switch (message) { case WM_PAINT: hdc = BeginPaint(hWnd, &ps); // Here your application is laid out. // For this introduction, we just print out "Hello, Windows desktop!" // in the top left corner. TextOut(hdc, 5, 5, greeting, _tcslen(greeting)); // End application specific layout section. EndPaint(hWnd, &ps); break; case WM_DESTROY: PostQuitMessage(0); break; default: return DefWindowProc(hWnd, message, wParam, lParam); break; } return 0; }
Build the code
As promised, the complete code for the working application follows.
To build this example
Delete all the code in HelloWindowsDesktop.cpp in the editor. Copy this example code and paste it into HelloWindowsDesktop.cpp:
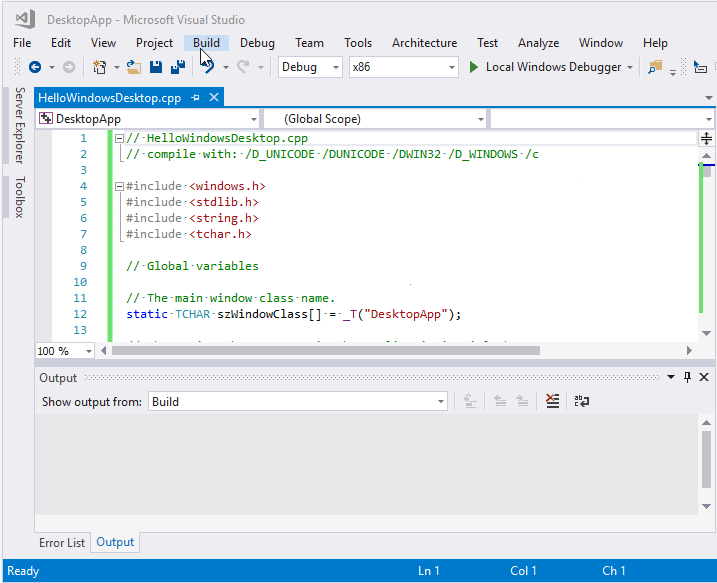
// HelloWindowsDesktop.cpp
// compile with: /D_UNICODE /DUNICODE /DWIN32 /D_WINDOWS /c

#include <windows.h>
#include <stdlib.h>
#include <string.h>
#include <tchar.h>

// Global variables

// The main window class name.
static TCHAR szWindowClass[] = _T("DesktopApp");

// The string that appears in the application's title bar.
static TCHAR szTitle[] = _T("Windows Desktop Guided Tour Application");

// Stored instance handle for use in Win32 API calls such as FindResource
HINSTANCE hInst;

// Forward declarations of functions included in this code module:
LRESULT CALLBACK WndProc(HWND, UINT, WPARAM, LPARAM);

int WINAPI WinMain(
   _In_ HINSTANCE hInstance,
   _In_opt_ HINSTANCE hPrevInstance,
   _In_ LPSTR     lpCmdLine,
   _In_ int       nCmdShow
)
{
   WNDCLASSEX wcex;

   wcex.cbSize = sizeof(WNDCLASSEX);
   wcex.style          = CS_HREDRAW | CS_VREDRAW;
   wcex.lpfnWndProc    = WndProc;
   wcex.cbClsExtra     = 0;
   wcex.cbWndExtra     = 0;
   wcex.hInstance      = hInstance;
   wcex.hIcon          = LoadIcon(wcex.hInstance, IDI_APPLICATION);
   wcex.hCursor        = LoadCursor(NULL, IDC_ARROW);
   wcex.hbrBackground  = (HBRUSH)(COLOR_WINDOW+1);
   wcex.lpszMenuName   = NULL;
   wcex.lpszClassName  = szWindowClass;
   wcex.hIconSm        = LoadIcon(wcex.hInstance, IDI_APPLICATION);

   if (!RegisterClassEx(&wcex))
   {
      MessageBox(NULL,
         _T("Call to RegisterClassEx failed!"),
         _T("Windows Desktop Guided Tour"),
         NULL);

      return 1;
   }

   // Store instance handle in our global variable
   hInst = hInstance;

   // The parameters to CreateWindowEx explained:
   // WS_EX_OVERLAPPEDWINDOW : An optional extended window style.
   // szWindowClass: the name of the application
   // szTitle: the text that appears in the title bar
   // WS_OVERLAPPEDWINDOW: the type of window to create
   // CW_USEDEFAULT, CW_USEDEFAULT: initial position (x, y)
   // 500, 100: initial size (width, length)
   // NULL: the parent of this window
   // NULL: this application does not have a menu bar
   // hInstance: the first parameter from WinMain
   // NULL: not used in this application
   HWND hWnd = CreateWindowEx(
      WS_EX_OVERLAPPEDWINDOW,
      szWindowClass,
      szTitle,
      WS_OVERLAPPEDWINDOW,
      CW_USEDEFAULT, CW_USEDEFAULT,
      500, 100,
      NULL,
      NULL,
      hInstance,
      NULL
   );

   if (!hWnd)
   {
      MessageBox(NULL,
         _T("Call to CreateWindow failed!"),
         _T("Windows Desktop Guided Tour"),
         NULL);

      return 1;
   }

   // The parameters to ShowWindow explained:
   // hWnd: the value returned from CreateWindow
   // nCmdShow: the fourth parameter from WinMain
   ShowWindow(hWnd,
      nCmdShow);
   UpdateWindow(hWnd);

   // Main message loop:
   MSG msg;
   while (GetMessage(&msg, NULL, 0, 0))
   {
      TranslateMessage(&msg);
      DispatchMessage(&msg);
   }

   return (int) msg.wParam;
}

//  FUNCTION: WndProc(HWND, UINT, WPARAM, LPARAM)
//
//  PURPOSE:  Processes messages for the main window.
//
//  WM_PAINT    - Paint the main window
//  WM_DESTROY  - post a quit message and return
LRESULT CALLBACK WndProc(HWND hWnd, UINT message, WPARAM wParam, LPARAM lParam)
{
   PAINTSTRUCT ps;
   HDC hdc;
   TCHAR greeting[] = _T("Hello, Windows desktop!");

   switch (message)
   {
   case WM_PAINT:
      hdc = BeginPaint(hWnd, &ps);

      // Here your application is laid out.
      // For this introduction, we just print out "Hello, Windows desktop!"
      // in the top left corner.
      TextOut(hdc,
         5, 5,
         greeting, _tcslen(greeting));
      // End application-specific layout section.

      EndPaint(hWnd, &ps);
      break;
   case WM_DESTROY:
      PostQuitMessage(0);
      break;
   default:
      return DefWindowProc(hWnd, message, wParam, lParam);
      break;
   }

   return 0;
}
On the Build menu, choose Build Solution. The results of the compilation appear in the Output window in Visual Studio.
The animation shows clicking the save all button, then choosing Build > Build Solution from the main menu.
To run the application, press F5. A window with the text "Hello, Windows desktop!" should appear.

Congratulations! You've built a traditional Windows desktop application.
See also
Feedback
Coming soon: Throughout 2024 we will be phasing out GitHub Issues as the feedback mechanism for content and replacing it with a new feedback system. For more information see: https://aka.ms/ContentUserFeedback.
Submit and view feedback for