How to add a form to a project (Windows Forms .NET)
Add forms to your project with Visual Studio. When your app has multiple forms, you can choose which is the startup form for your app, and you can display multiple forms at the same time.
Add a new form
Add a new form with Visual Studio.
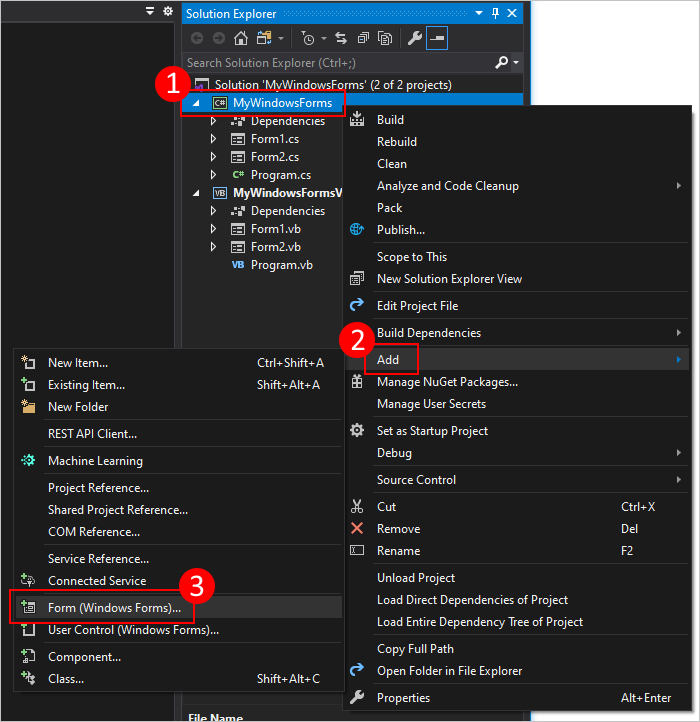
In Visual Studio, find the Project Explorer pane. Right-click on the project and choose Add > Form (Windows Forms).
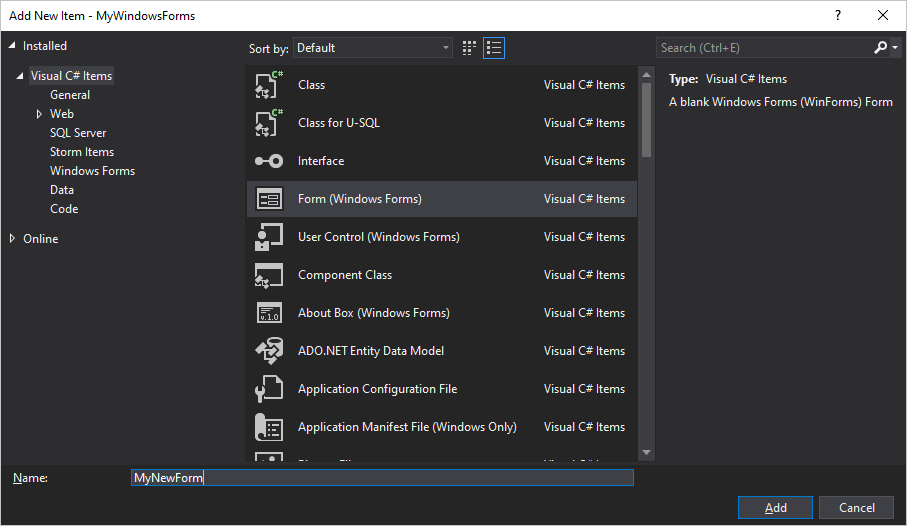
In the Name box, type a name for your form, such as MyNewForm. Visual Studio will provide a default and unique name that you may use.
Once the form has been added, Visual Studio opens the form designer for the form.
Add a project reference to a form
If you have the source files to a form, you can add the form to your project by copying the files into the same folder as your project. The project automatically references any code files that are in the same folder or child folder of your project.
Forms are made up of two files that share the same name: form2.cs (form2 being an example of a file name) and form2.Designer.cs. Sometimes a resource file exists, sharing the same name, form2.resx. In in the previous example, form2 represents the base file name. You'll want to copy all related files to your project folder.
Alternatively, you can use Visual Studio to import a file into your project. When you add an existing file to your project, the file is copied into the same folder as your project.
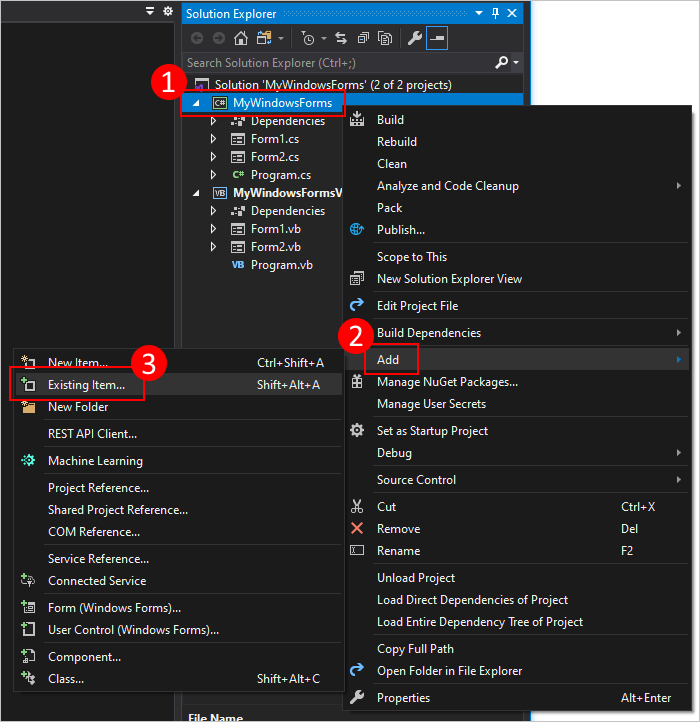
In Visual Studio, find the Project Explorer pane. Right-click on the project and choose Add > Existing Item.
Navigate to the folder containing your form files.
Select the form2.cs file, where form2 is the base file name of the related form files. Don't select the other files, such as form2.Designer.cs.
See also
.NET Desktop feedback
Feedback
Coming soon: Throughout 2024 we will be phasing out GitHub Issues as the feedback mechanism for content and replacing it with a new feedback system. For more information see: https://aka.ms/ContentUserFeedback.
Submit and view feedback for