Upgrade a .NET Framework Windows Forms desktop app to .NET 8
This article describes how to upgrade a Windows Forms desktop app to .NET 8 using the Upgrade Assistant. Even though Windows Forms runs on .NET, a cross-platform technology, Windows Forms is still a Windows-only framework. The following Windows Forms-related project types can be upgraded with the .NET Upgrade Assistant:
- Windows Forms project
- Control library
- .NET library
Prerequisites
- Windows Operating System.
- Download and extract the demo app used with this article.
- Visual Studio 2022 version 17.8 or later to target .NET 8.
- .NET Upgrade Assistant extension for Visual Studio.
Upgrade the dependencies first
If you're upgrading multiple projects, start with projects that have no dependencies. In the Matching Game sample, the MatchingGame project depends on the MatchingGame.Logic library, so MatchingGame.Logic should be upgraded first.
Tip
Be sure to have a backup of your code, such as in source control or a copy.
Use the following steps to upgrade a project in Visual Studio:
Right-click on the MatchingGame.Logic project in the Solution Explorer window and select Upgrade:

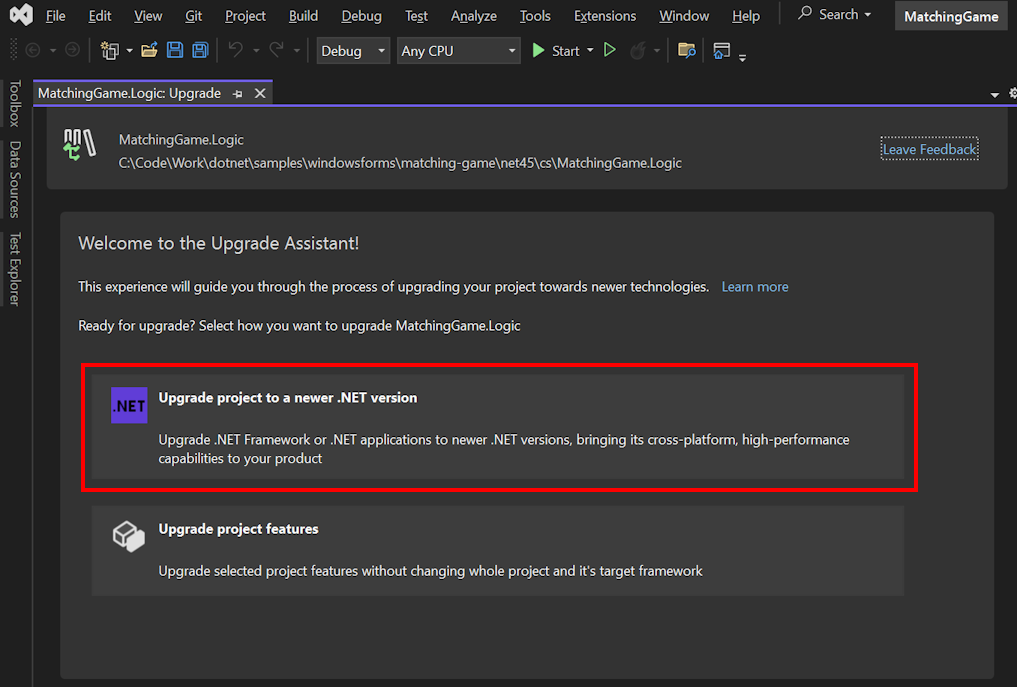
A new tab is opened that prompts you to choose which type of upgrade you want to perform.
Select Upgrade project to a newer .NET version.
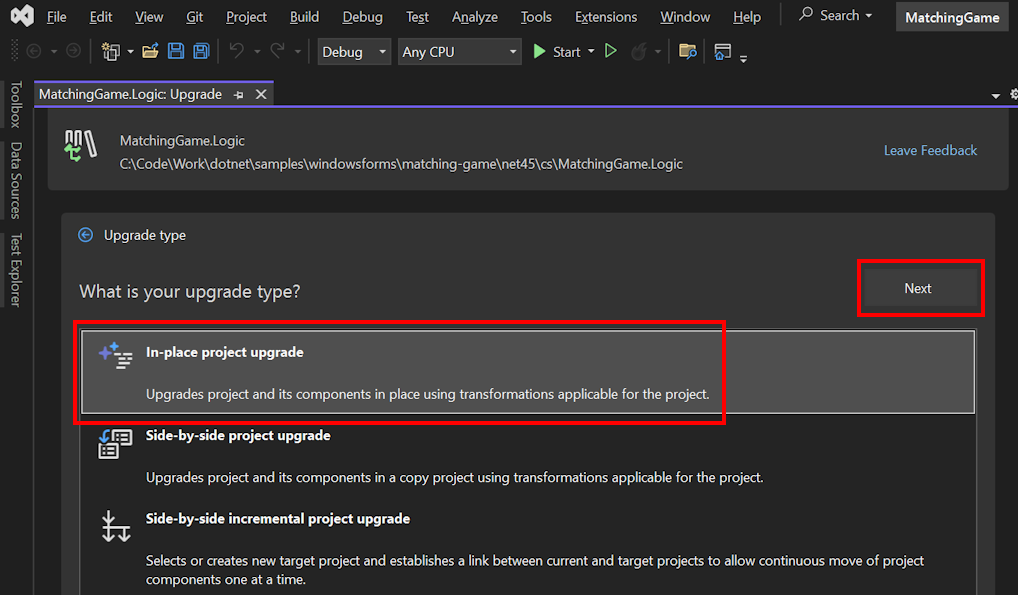
Select In-place project upgrade.
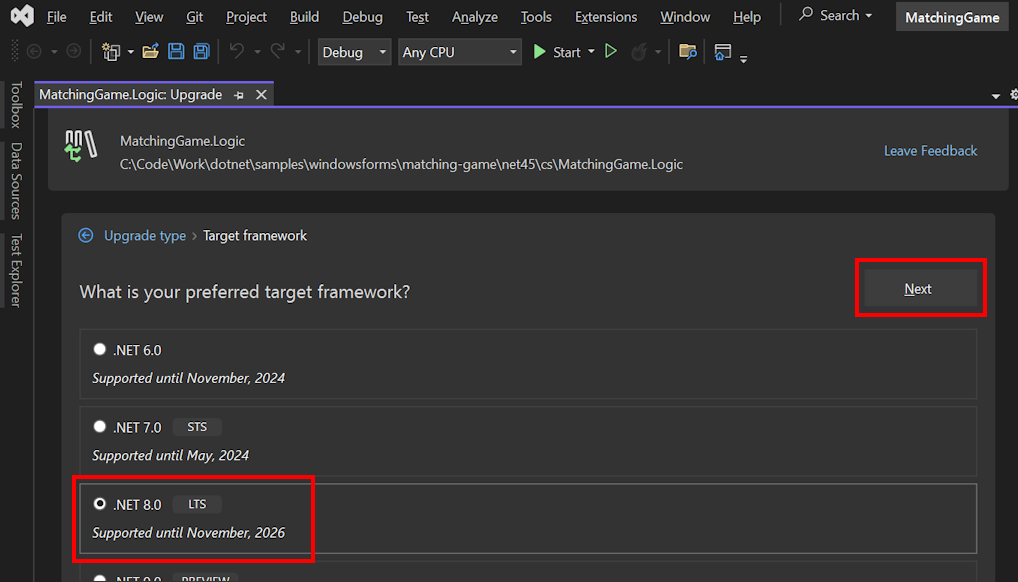
Next, select the target framework. Based on the type of project you're upgrading, you're presented with different options. .NET Standard 2.0 can be used by both .NET Framework and .NET. This is a good choice if the library doesn't rely on a desktop technology like Windows Forms. However, the latest .NET releases provide many language and compiler improvements over .NET Standard.
Select .NET 8.0 and then select Next.
A tree is shown with all of the artifacts related to the project, such as code files and libraries. You can upgrade individual artifacts or the entire project, which is the default. Select Upgrade selection to start the upgrade.
When the upgrade is finished, the results are displayed:
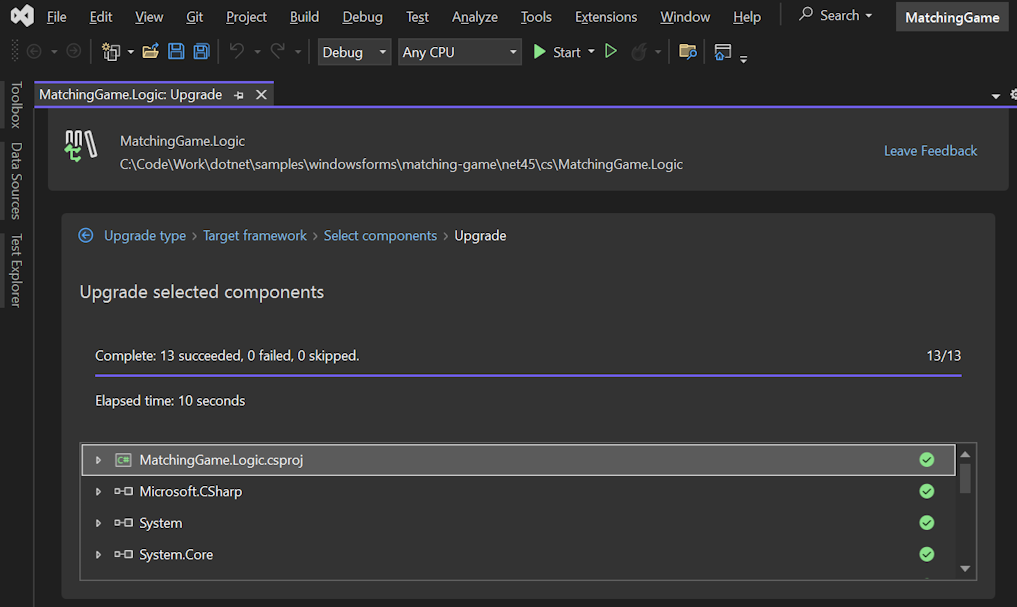
Artifacts with a solid green circle were upgraded while empty green circles were skipped. Skipped artifacts mean that the upgrade assistant didn't find anything to upgrade.
Now that the app's supporting library is upgraded, upgrade the main app.
Upgrade the main project
Once all of the supporting libraries are upgraded, the main app project can be upgraded. With the example app, there's only one library project to upgrade, which was upgraded in the previous section.
- Right-click on the MatchingGame project in the Solution Explorer window and select Upgrade:
- Select Upgrade project to a newer .NET version.
- Select In-place project upgrade as the upgrade mode.
- Select .NET 8.0 for the target framework and select Next.
- Leave all of the artifacts selected and select Upgrade selection.
After the upgrade is complete, the results are shown. Notice how the Windows Forms project has a warning symbol. Expand that item and more information is shown about that step:
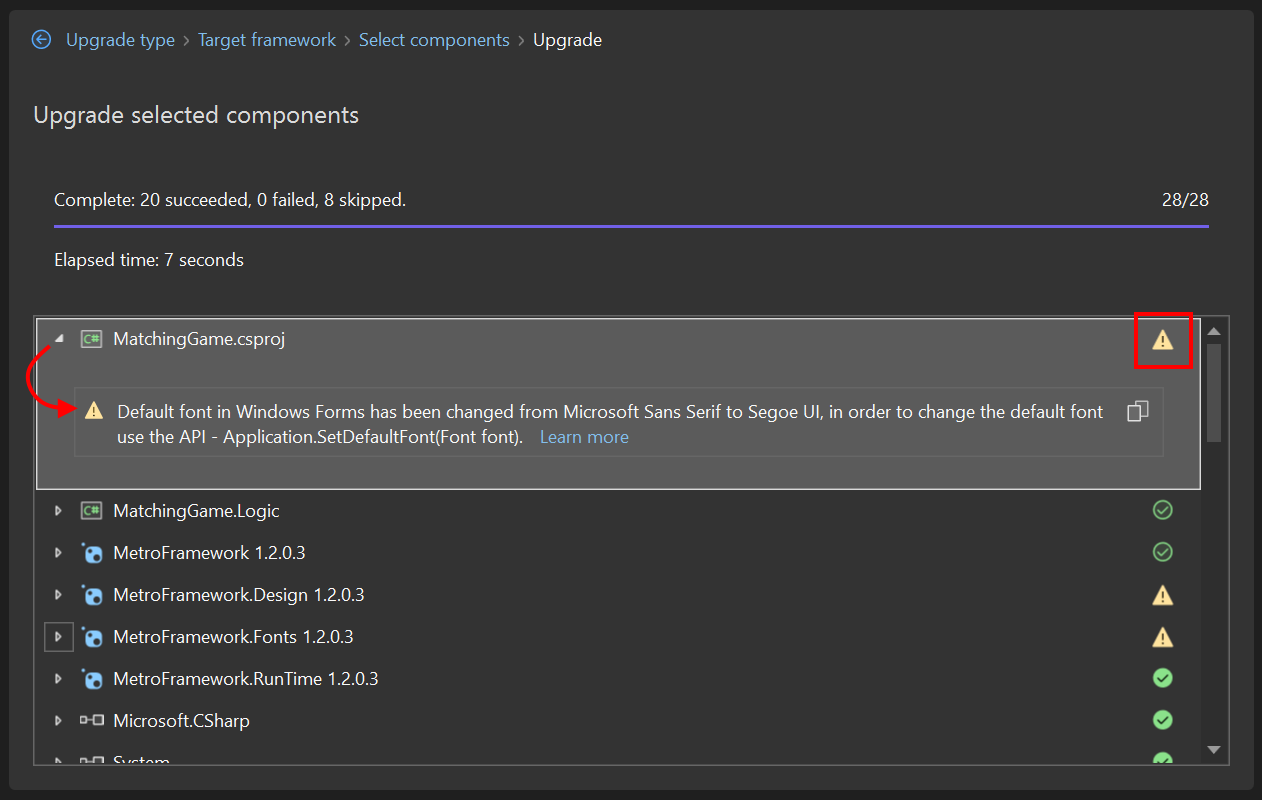
Notice that the project upgrade component mentions that the default font has changed. Because the font may affect control layout, you need to check every form and custom control in your project to ensure the UI is arranged correctly.
Generate a clean build
After your main project is upgraded, clean and compile it.
- Right-click on the MatchingGame project in the Solution Explorer window and select Clean.
- Right-click on the MatchingGame project in the Solution Explorer window and select Build.
If your application encountered any errors, you can find them in the Error List window with a recommendation how to fix them.
The Windows Forms Matching Game Sample project is now upgraded to .NET 8.
Related content
Porting from .NET Framework to .NET.
The porting guide provides an overview of what you should consider when porting your code from .NET Framework to .NET. The complexity of your projects dictates how much work you'll do after the initial migration of the project files.
Modernize after upgrading to .NET from .NET Framework.
The world of .NET has changed a lot since .NET Framework. This link provides some information about how to modernize your app after you've upgraded it.
.NET Desktop feedback
Feedback
Coming soon: Throughout 2024 we will be phasing out GitHub Issues as the feedback mechanism for content and replacing it with a new feedback system. For more information see: https://aka.ms/ContentUserFeedback.
Submit and view feedback for