How to: Enable and disable automatic binding redirection
When you compile desktop apps in Visual Studio that target .NET Framework 4.5.1 and later versions, binding redirects may be automatically added to the app configuration file to override assembly unification. Binding redirects are added if your app or its components reference more than one version of the same assembly, even if you manually specify binding redirects in the configuration file for your app. The automatic binding redirection feature affects desktop apps that target .NET Framework 4.5.1 or a later version. If you haven't explicitly enabled or disabled autogenerated binding redirection and you upgrade an existing project, the feature is automatically enabled.
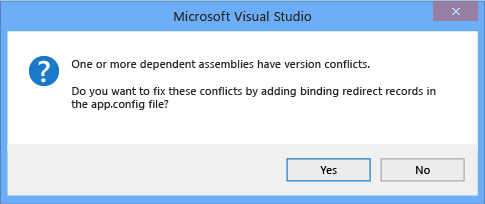
For web apps, when Visual Studio encounters a binding conflict, it prompts you to add a binding redirect to resolve the conflict.
You can enable automatic binding redirection for existing apps that target previous versions of .NET Framework (4.5 and earlier). You can disable this feature if you want to manually author binding redirects.
Important
Starting with Visual Studio 2022, Visual Studio no longer includes .NET Framework components for .NET Framework 4.0 - 4.5.1 because these versions are no longer supported. Visual Studio 2022 and later versions can't build apps that target .NET Framework 4.0 through .NET Framework 4.5.1. To continue building these apps, you can use Visual Studio 2019 or an earlier version.
Disable automatic binding redirects in desktop apps
Automatic binding redirects are enabled by default for Windows desktop apps that target .NET Framework 4.5.1 and later versions. The binding redirects are added to the output configuration (app.config) file when the app is compiled. The redirects override the assembly unification that might otherwise take place. The source app.config file is not modified. You can disable this feature by modifying the project file for the app or by deselecting a checkbox in the project's properties in Visual Studio.
Disable through project properties
If you have Visual Studio 2017 version 15.7 or later, you can disable autogenerated binding redirects in the project's property pages.
Right-click the project in Solution Explorer and select Properties.
On the Application page, uncheck the Auto-generate binding redirects option.
If you don't see the option, you'll need to manually disable the feature in the project file.
Press Ctrl+S to save the change.
Disable manually in the project file
Open the project file for editing using one of the following methods:
- In Visual Studio, select the project in Solution Explorer, and then choose Open Folder in File Explorer from the shortcut menu. In File Explorer, find the project (.csproj or .vbproj) file and open it in Notepad.
- In Visual Studio, in Solution Explorer, right-click the project and choose Unload Project. Right-click the unloaded project again, and then choose Edit [projectname.csproj].
In the project file, find the following property entry:
<AutoGenerateBindingRedirects>true</AutoGenerateBindingRedirects>Change
truetofalse:<AutoGenerateBindingRedirects>false</AutoGenerateBindingRedirects>
Enable automatic binding redirects manually
You can enable automatic binding redirects in existing apps that target older versions of .NET Framework, or in cases where you're not automatically prompted to add a redirect. If you're targeting a newer version of .NET Framework but do not get automatically prompted to add a redirect, you'll likely get build output that suggests you remap assemblies.
Open the project file for editing using one of the following methods:
- In Visual Studio, select the project in Solution Explorer, and then choose Open Folder in File Explorer from the shortcut menu. In File Explorer, find the project (.csproj or .vbproj) file and open it in Notepad.
- In Visual Studio, in Solution Explorer, right-click the project and choose Unload Project. Right-click the unloaded project again, and then choose Edit [projectname.csproj].
Add the following element to the first configuration property group (under the <PropertyGroup> tag):
<AutoGenerateBindingRedirects>true</AutoGenerateBindingRedirects>The following shows an example project file with the element inserted:
<?xml version="1.0" encoding="utf-8"?>
<Project ToolsVersion="12.0" DefaultTargets="Build" xmlns="http://schemas.microsoft.com/developer/msbuild/2003">
  <Import Project="$(MSBuildExtensionsPath)\$(MSBuildToolsVersion)\Microsoft.Common.props" Condition="Exists('$(MSBuildExtensionsPath)\$(MSBuildToolsVersion)\Microsoft.Common.props')" />
  <PropertyGroup>
    <Configuration Condition=" '$(Configuration)' == '' ">Debug</Configuration>
    <Platform Condition=" '$(Platform)' == '' ">AnyCPU</Platform>
    <ProjectGuid>{123334}</ProjectGuid>
    ...
    <AutoGenerateBindingRedirects>true</AutoGenerateBindingRedirects>
  </PropertyGroup>
  ...
</Project>
Compile your app.
Enable automatic binding redirects in web apps
Automatic binding redirects are implemented differently for web apps. Because the source configuration (web.config) file must be modified for web apps, binding redirects are not automatically added to the configuration file. However, Visual Studio notifies you of binding conflicts, and you can add binding redirects to resolve the conflicts. Because you're always prompted to add binding redirects, you don't need to explicitly disable this feature for a web app.
To add binding redirects to a web.config file:
In Visual Studio, compile the app, and check for build warnings.

If there are assembly binding conflicts, a warning appears. Double-click the warning, or select the warning and press Enter.
A dialog box that enables you to automatically add the necessary binding redirects to the source web.config file appears.
See also
Feedback
Coming soon: Throughout 2024 we will be phasing out GitHub Issues as the feedback mechanism for content and replacing it with a new feedback system. For more information see: https://aka.ms/ContentUserFeedback.
Submit and view feedback for