Configure task management
This article describes how to configure task management features in Microsoft Dynamics 365 Commerce.
Before Dynamics 365 Commerce managers and employees can use the task management features in Commerce, task management must be configured. Configuration steps include granting permissions to managers and employees, distributing permissions to point of sale (POS) clients, setting up POS notifications, and configuring the Tasks tile on the home page of a POS application.
Configure permissions for store managers
Every worker in a given store can view all tasks that are assigned to that store. They can also update the status of the tasks that are assigned to them. However, personas such as store managers must have task management permissions to manage tasks that are assigned to the store and to create single-purpose tasks.
To configure task management permissions for store managers, follow these steps.
- Go to Retail and Commerce > Employees > Permission groups.
- Select a specific permission group (for example, Manager), and then select Edit.
- On the Permissions FastTab, set the Allow task management option to Yes.
- On the Notifications FastTab, add the Task management operation, and enter a value in the Display order field. For example, enter 2 if the Order fulfillment operation already has a Display order value of 1.
Note
If a non-manager persona must have task management permissions in the POS, you can grant permission to the individual. Alternatively, you can create a new permission group for non-managers and set the Allow task management option to Yes.
The following illustration shows how to configure task management permissions for store managers.

Configure permissions for employees
Employees must have permissions to create task lists, manage assignment criteria, and configure the recurrence of any task list. To configure these permissions, you assign employees to the Retail task manager role.
To configure permissions for an employee, follow these steps.
- Go to Retail and Commerce > Employees > Users.
- Select an employee.
- On the User's roles FastTab, select Assign roles.
- In the Assign roles to user dialog box, select the Retail task manager role, and then select OK.
Distribute permissions to POS clients
Before employees can use POS clients, permissions must be distributed and synced to those clients.
To distribute permissions to POS clients, follow these steps.
- Go to Retail and Commerce > Retail and Commerce IT > Distribution schedule.
- Select the 1060 (Staff) distribution schedule, and then select Run now.
- Select the 1070 (Channel configuration) distribution schedule, and then select Run now.
Configure POS notifications for tasks
Task management must be configured so that notifications are available in the POS application.
To configure POS notifications for tasks, follow these steps.
- Go to Retail and Commerce > Channel setup > POS setup > POS > POS operations.
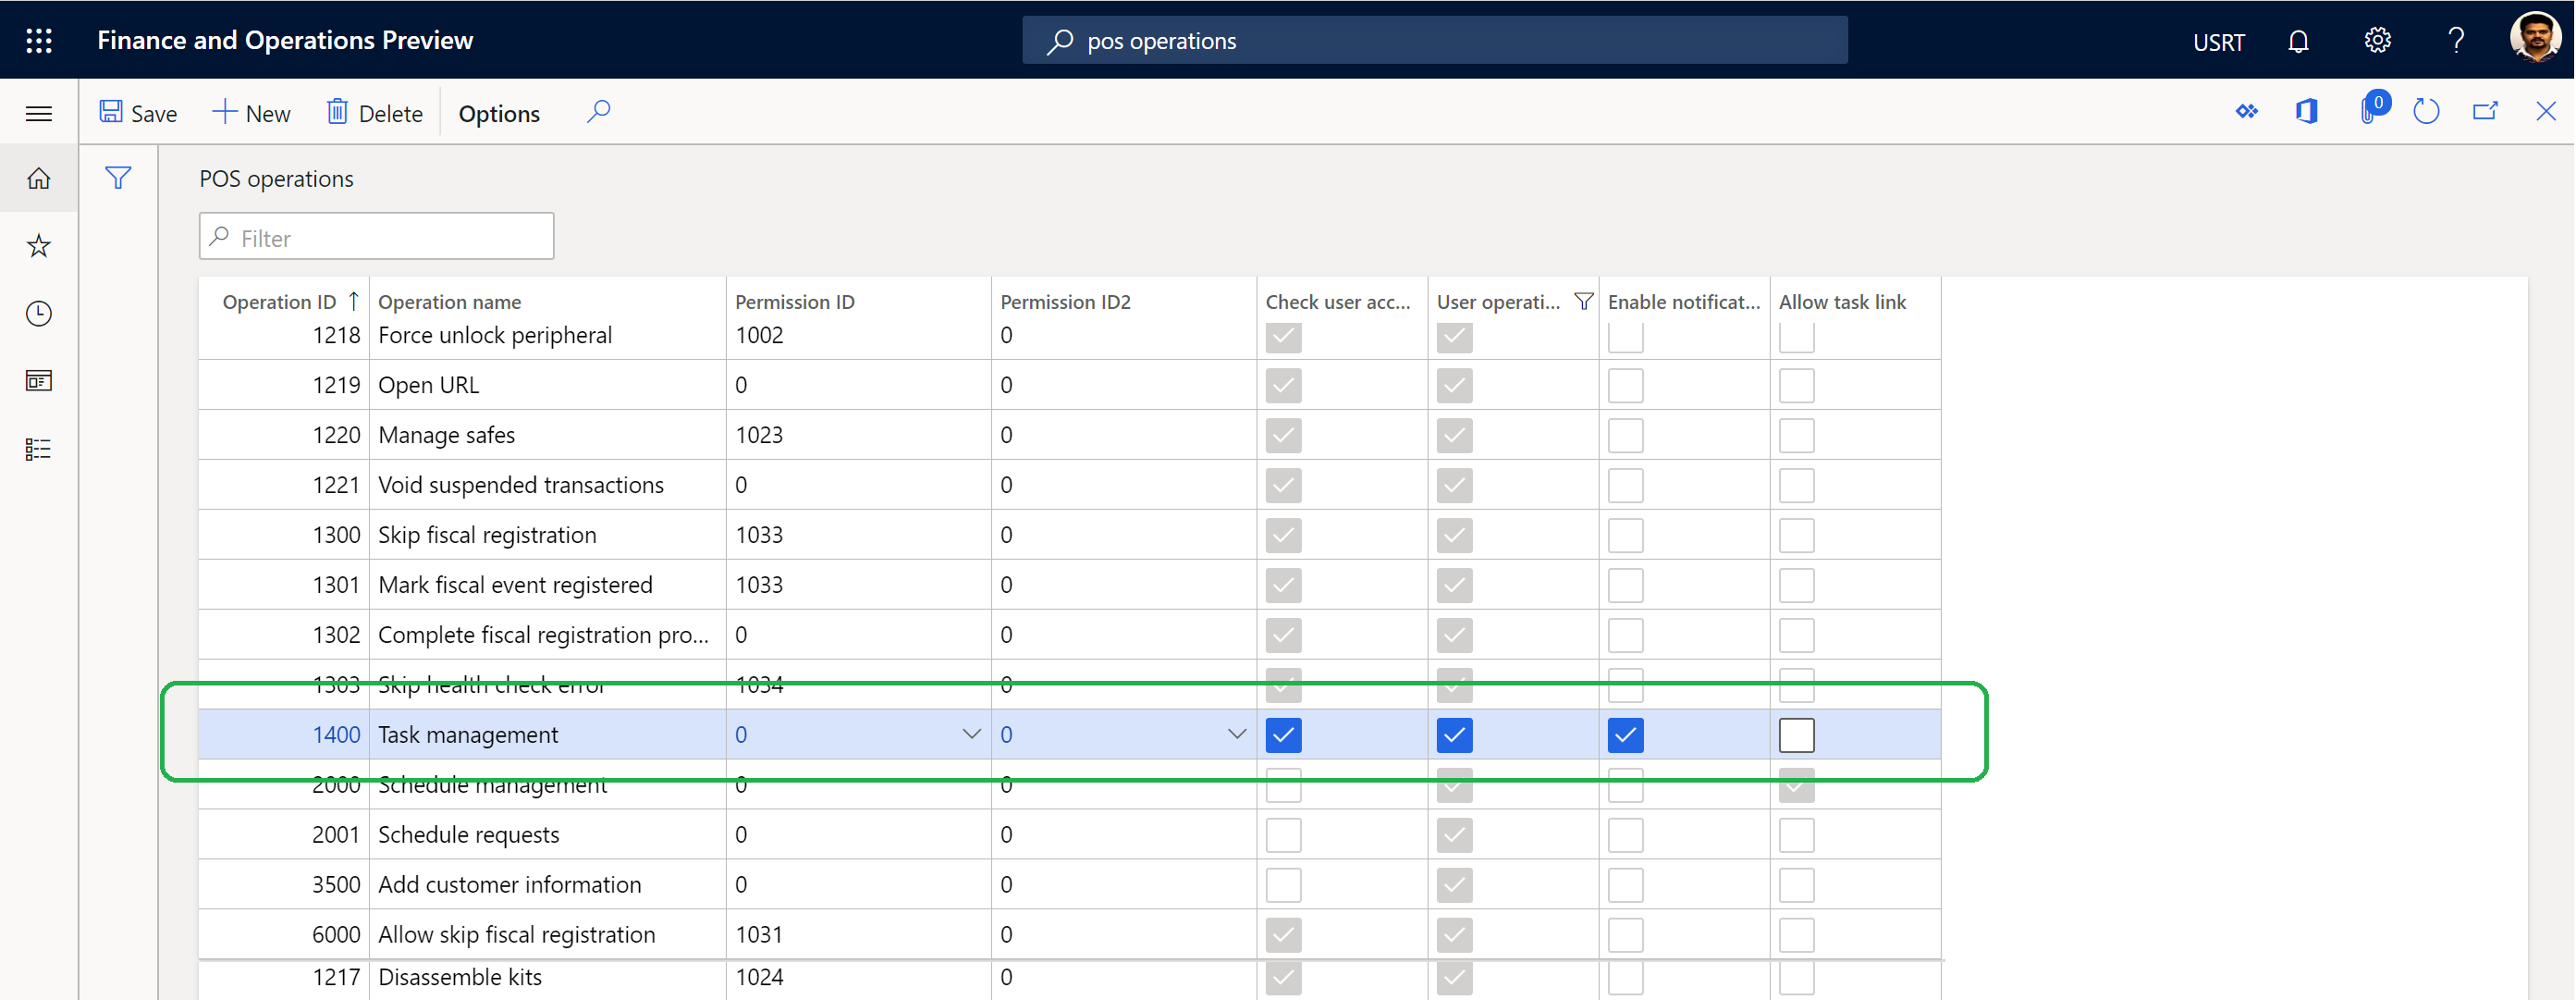
- Find operation 1400 (Task management), and select the Enable notifications check box for it.
The following illustration shows the Task management operation on the POS operations page.
For more information about how to configure POS notifications, refer to the Show order notifications in the point of sale (POS) article.
Note
When you save your changes, the following warning message will be displayed: Operation parameter will not be enabled in button grid designer for operation ID equal or less than 4000. If you are creating custom operation and want to pass parameter from the button grid designer, then use operation ID greater than 4000. Select Close to close the dialog.
Configure the Tasks tile on a POS application home page
Before you configure the Tasks tile on the home page of a POS application, see Screen layouts for the point of sale (POS) for information about how to configure and add new buttons to a POS screen layout.
To configure the Tasks tile on a POS application home page, follow these steps.
- Go to Retail and Commerce > Channel setup > POS setup > POS > Screen layouts.
- Select a screen layout, select a layout size, and select a button grid.
- On the Button grids FastTab, select Designer to edit the selected button grid.
- Add a Tasks tile to the appropriate section of the home page.
The following illustration shows an example of a Tasks tile on a POS home page.

Additional resources
Create task lists and add tasks
Feedback
Coming soon: Throughout 2024 we will be phasing out GitHub Issues as the feedback mechanism for content and replacing it with a new feedback system. For more information see: https://aka.ms/ContentUserFeedback.
Submit and view feedback for