Create task lists and add tasks
This article describes how to create task lists and add tasks to them in Microsoft Dynamics 365 Commerce.
A task defines a specific piece of work or an action that someone must complete on or before a specified due date. In Dynamics 365 Commerce, a task can include detailed instructions and information about a contact person. It can also include links to back-office operations, point of sale (POS) operations, or site pages, to help improve productivity and provide the context that the task owner requires to complete the task efficiently.
A task list is a collection of tasks that must be completed as part of a business process. For example, there might be a task list that a new worker must complete during onboarding, a task list for cashiers who work evening shifts, or a task list that must be completed to prepare the store for an upcoming holiday season. In Commerce, every task list that has a target date can be assigned to any number of stores or employees, and it can be configured to recur.
Both managers and workers can create task lists in Commerce back office, and then assign them to a set of stores.
Create a task list
Before you start the process of creating a task list, make sure you complete the configurations in the Configure task management article. To create a task list, follow these steps.
- Go to Retail and Commerce > Task management > Task management administration.
- Select New, and then enter values in the Name, Description, and Owner fields.
- Select Save.
Add tasks to a task list
To add tasks to a task list, follow these steps.
- On the Tasks FastTab of an existing task list, select New to add a task.
- In the Create a new task dialog box, in the Name field, enter a name for the task.
- In the Due data offset from target date field, enter a positive or negative integer value. For example, enter -2 if the task should be completed two days before the task list's due date.
- In the Notes field, enter detailed instructions.
- In the Contact person field, enter the name of a subject matter expert that the task owner can contact if the task owner needs help.
- In the Task link field, enter a link, based on the nature of the task.
Tip
Although you can use the Assigned to field to assign tasks to someone while you're creating a task list, we recommend that you avoid assigning tasks during task list creation. Instead, assign the tasks after the list is instantiated for individual stores.
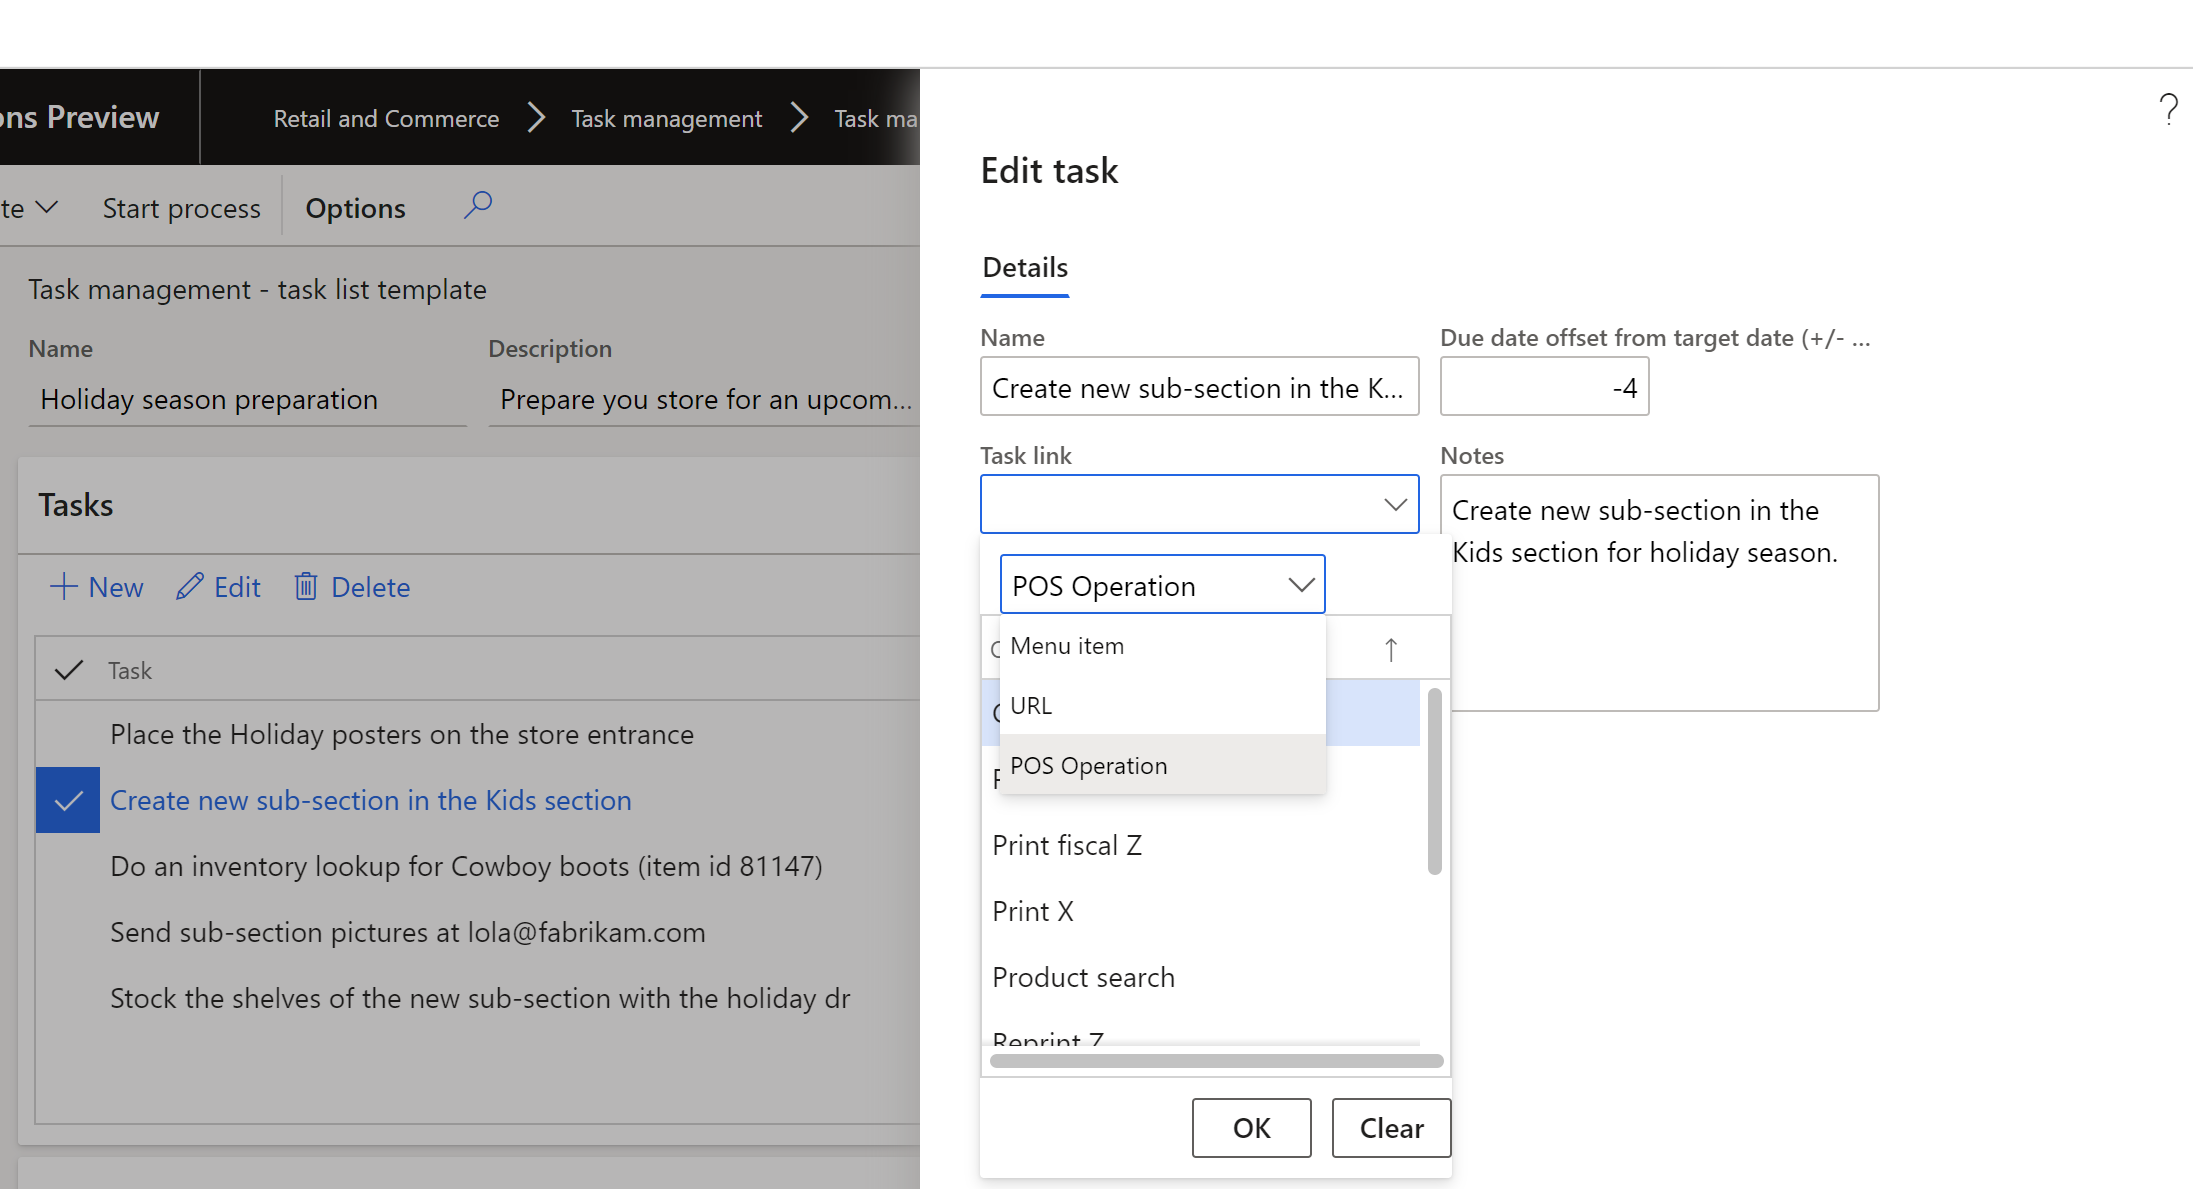
Use task links to help improve worker productivity
Commerce lets you link tasks to specific POS operations, such as running a sales report, viewing an online training video for new employee orientation, or performing a back-office operation. This feature helps task owners get the information that they need to complete a task efficiently.
To add task links while you create a task, follow these steps.
On the Tasks FastTab of an existing task list, select Edit.
In the Edit task dialog box, in the Task link field, select one or more of the following options:
- Select Menu item to configure a back-office operation, such as "Product kits."
- Select POS Operation to configure a POS operation, such as "Sales reports."
- Select URL to configure an absolute URL.
The following illustration shows the selection of task links in the Edit task dialog box.
Configure a POS operation so that it can be linked to a task
To configure a POS operation so that it can be linked to a task, follow these steps.
- Go to Retail and Commerce > Channel setup > POS setup > POS > POS operations.
- Select Edit, find the POS operation, and then select the Enable Task Management check box for it.
Additional resources
Feedback
Coming soon: Throughout 2024 we will be phasing out GitHub Issues as the feedback mechanism for content and replacing it with a new feedback system. For more information see: https://aka.ms/ContentUserFeedback.
Submit and view feedback for