Walkthrough 7: Configure agent scripting in agent applications
Agent scripting in Unified Service Desk helps to guide your agents during customer interaction. This walkthrough demonstrates how to create a simple agent script that helps the agents quickly create a new case for an account or browse existing cases from the agent application. The agent script created in this walkthrough is invoked when the agent pulls up an account record to view, which is displayed in a session in the Unified Service Desk client. The script provides the following three options:
Create a case for the current account
Display existing cases for the current account
Close the session
Prerequisites
You must have completed Walkthrough 1: Build a simple agent application for Unified Interface Apps and Walkthrough 4: Display a model-driven app (Unified Interface apps) record in a session in your agent application. The configurations that you completed in those walkthroughs are required in this walkthrough.
This walkthrough assumes that you’ll be using the same user credential that you used in walkthrough 1 to sign in to the agent application. If a different user will be testing the application, you must assign the user to Contoso Configuration. More information: Walkthrough 1: Build a simple agent application for Unified Interface Apps
You must know be familiar with the following concepts in Unified Service Desk:
Agent Scripting type of hosted control and how to configure agent scripts. More information: Agent Scripting (Hosted Control) and Guide customer interactions with agent scripts
How to configure Action calls
How to configure window navigation rules. More information: Use window navigation rules in Unified Service Desk
Filter access using Unified Service Desk configuration. More information: Manage access using Unified Service Desk configuration
In This Walkthrough
Step 1: Create an Agent Scripting type of hosted control
Step 2: Create hosted controls to display the new case form and existing cases
Step 3: Create an agent script task
Step 5: Add the answer and action calls for displaying existing cases
Step 6: Add the answer and action calls for closing the session
Step 7: Create an action call to display the agent script
Step 8: Display the agent script when the account record is displayed in a session
Step 9: Add the controls to the configuration
Step 1: Create an Agent Scripting type of hosted control
An instance of the Agent Scripting type of hosted control must be available in your agent application to display agent scripts.
Sign in to Unified Service Desk Administrator.
Select Hosted Controls under Basic Settings.
Select + New.
On the New Hosted Control page, specify the following values:
Field Value Name Contoso Agent Scripting USD Component Type Agent Scripting Display Group WorkflowPanel Select Save.
Step 2: Create hosted controls to display the new case form and existing cases
In this step, you’ll create two hosted controls of Unified Interface Page type to display the new case creation form and existing cases for the current account.
On the hosted controls page, select + New.
On the New Hosted Control page, specify the following values:
Field Value Name Contoso new case form Display Name New Case USD Component Type Unified Interface Page Allow Multiple Pages No Application is Global Not checked Display Group MainPanel Select Save.
On the hosted controls page, select + New to create another hosted control.
On the New Hosted Control page, specify the following values:
Field Value Name Contoso existing cases for an account Display Name Cases for [[$Context.name]]
Note: We are using the replacement parameter to dynamically display the name of the current account from the execution context as the hosted control display name.USD Component Type Unified Interface Page Allow Multiple Pages No Application is Global Not checked Display Group MainPanel Select Save.
Step 3: Create an agent script task
Create an agent script task to display when an account record is displayed in a session.
Sign in to Unified Service Desk Administrator.
Select Agent Scripts under Basic Settings.
Select + New.
On the New Agent Script Task page, specify the following values:
Field Value Name Contoso: Welcome to Account Session Start Task No ScriptText Welcome [[$Context.name]]. My name is [[$User.firstname]]. Is this call regarding a new or an existing service request?
Note: We are using replacement parameters to dynamically display the account name and the current agent’s name to the agent at runtime.Instructions Based on the customer response, select one of the tasks below. Select Save to create the agent script.
Step 4: Add the answer, action call, and window navigation rule for creating a case from the agent script
In this step, you’ll create answer, action call, and window navigation rule for displaying a new case form with some prepopulated values from the currently active account record.
In the Answers area of the agent script task that you created in step 4, select Add Existing Agent Script Answer to create answer. The Lookup Records pane is displayed.
Select the search icon, and then select + New Agent Script Answer.
On the New Agent Script Answer page, specify the following values:
Field Value Name Contoso: New case Answer Text Create a case Linked Task Contoso: Welcome to Account Session Order 1 Select Save.
Next, add an action call to this answer to display a new case form for the account when the agent selects this answer. Select the Related tab, and then select Actions.
On the next page, select Add Existing Action Call. The Lookup records pane is displayed.
Select the search icon in the search box, and then select + New Action Call to create an action call.
On the New Action Call page, specify the following values:
Field Value Name Contoso Action Call: Create Case Order 1 Hosted Control Contoso new case form Action New_CRM_Page Data LogicalName=incident
customerid=EntityReference([[$Context.InitialEntity]],[[$Context.Id]])
customeridname=[[$Context.name]]
primarycontactid=[[$Context.primarycontactid.id]+]
primarycontactidname=[[$Context.primarycontactid.name]+]
Note: The new case form will be populated with the current account record data to help the agent quickly create a case for the customer.Select Save.
Select the back button on the browser to go back to the Contoso: New case page.
Select Add Existing Action Call. The Lookup records pane is displayed.
Type the name of the action call. Select the record from the search results, and then select Add.
Next, create a window navigation rule to display the new case form. Go to Settings > Unified Service Desk.
Select Window Navigation Rules.
Select + New.
On the New Window Navigation Rule page, specify the following values.
Field Value Name Contoso New Case for Account Session Rule Order 20 From Contoso new case form Entity incident Route Type In Place Destination Tab Action In Place Hide Command Bar No Hide Navigation Bar Yes Select Save.
Step 5: Add the answer and action calls for displaying existing cases
In this step, add answer and action calls for displaying existing cases for the current account.
In the Answers area of the Contoso: Welcome to Account Session agent script, select + Add Existing Agent Script Answer to create an answer.
Select the search icon, and then select + New Agent Script Answer.
On the New Agent Script Answer page, specify the following values.
Field Value Name Contoso: Existing cases Answer Text Display existing cases Linked Task Contoso: Welcome to Account Session Order 2 Select Save.
Next, add an action call to this answer to display the existing cases for the current account. Select the Related tab, and then select Actions.
On the next page, select Add Existing Action Call.
Select the search icon in the search box, and then select + New Action Call to create an action call.
On the New Action Call page, specify the following values:
Field Value Name Contoso Action Call: Display Existing Cases Order 1 Hosted Control Contoso existing cases for an account Action AssociatedView Data etn=[[$Context.InitialEntity]]
id=[[$Context.Id]]
navitemid=navServiceSelect Save.
Add another action call to set the focus on the new case form. Repeat Steps 6 and 7, and specify the following values:
Field Value Name Contoso Action Call: Set Focus on Existing Cases Order 2 Hosted Control Contoso Global Manager Action ShowTab Data Contoso existing cases for an account Select Save.
Select the back button on the browser to go back to the Contoso: New case page.
Select Add Existing Action Call. The Lookup records pane is displayed.
Type the name of the action call. Select the record from the search results, and then select Add.
Select Save.
Step 6: Add the answer and action calls for closing the session
In this step, add answer and action calls for closing the current session.
In the Answers area of the Contoso: Welcome to Account Session agent script, select + Add Existing Agent Script Answer to create an answer.
Select the search icon, and then select + New Agent Script Answer.
On the New Agent Script Answer page, specify the following values.
On the New Agent Script Answer page, specify the following values:
Field Value Name Contoso: Close session Answer Text Close session Linked Task Contoso: Welcome to Account Session Order 3 Select Save.
Next, add an action call to this answer to close the session. Select the Related tab, and then select Actions.
On the next page, select Add Existing Action Call.
Select the search icon in the search box, and then select + New Action Call to create an action call.
On the New Action Call page, specify the following values:
Field Value Name Contoso Action Call: Close Session Hosted Control Contoso Session Tab
Note: The Contoso Session Tab hosted control was created in Walkthrough 4: Display a model-driven app (Unified Interface apps) record in a session in your agent application.Action CloseSession Data sessionid=[[$Context.SessionId]] Select Save.
Select the back button on the browser to go back to the Contoso: New case page.
Select Add Existing Action Call. The Lookup records pane is displayed.
Type the name of the action call. Select the record from the search results, and then select Add.
Select Save.
Step 7: Create an action call to display the agent script
In this step, create an action call to display the agent script.
Sign in to Unified Service Desk Administrator.
Select Action Calls under Basic Settings.
Select + New.
On the New Action Call page, specify the following values.
Field Value Name Contoso Action Call: Load Agent Script Hosted Control Contoso Agent Scripting Action GoToTask Data Contoso: Welcome to Account Session Select Save.
Step 8: Display the agent script when the account record is displayed in a session
In this step, add the action call created in the previous step to the PageReady event on the Contoso Account Session hosted control so that after it’s loaded, the action call is executed to load the agent script. The Contoso Account Session hosted control was created in Walkthrough 4: Display a model-driven app (Unified Interface apps) record in a session in your agent application.
Sign in to Unified Service Desk Administrator.
Select Hosted Controls under Basic Settings.
Search for the Contoso Account Session hosted control, and select it to open the hosted control definition.
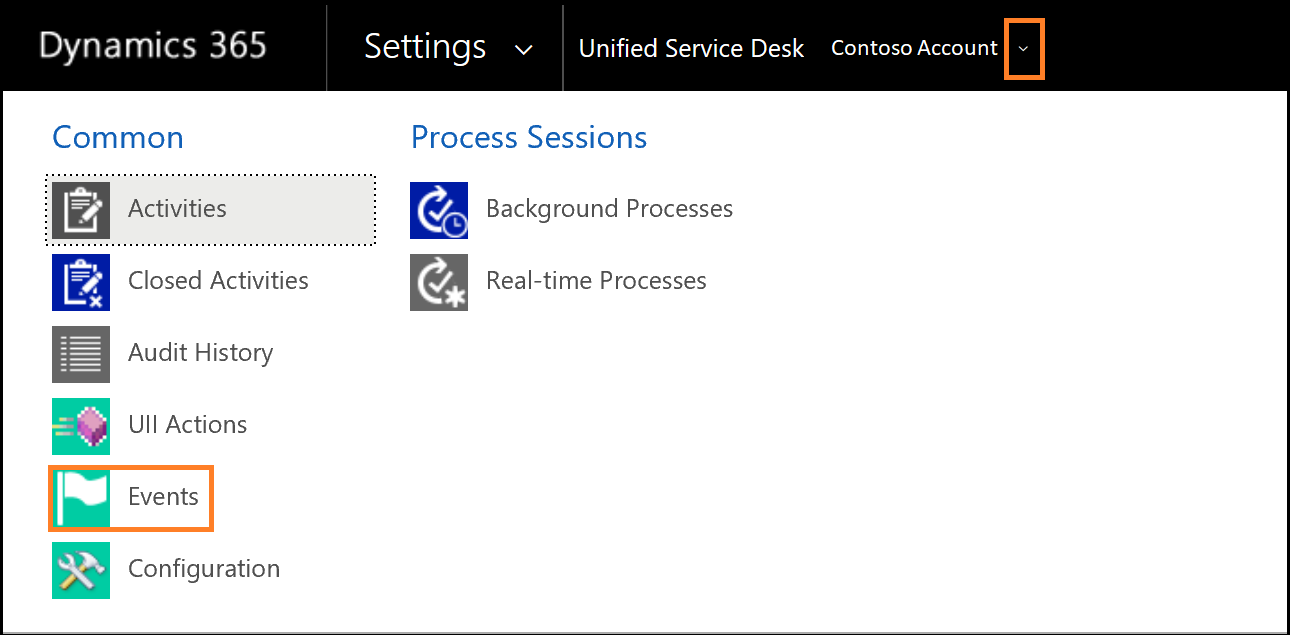
Select the Related tab, and then select Events.

On the events page, select PageReady.
On the PageReady page, select + Add Existing Action Calls.
Type Contoso Action Call: Load Agent Script in the search box.Select action call from the list, and then select Add.
Select Save.
Step 9: Add the controls to the configuration
In this step, add the action calls, agent script, hosted controls, and window navigation rule that you configured in this walkthrough to Contoso Configuration to display these controls to the user who is assigned to the configuration. Contoso Configuration was created in Walkthrough 1: Build a simple agent application for Unified Interface Apps.
Add the following to Contoso Configuration.
| Control name | Control type |
|---|---|
| Contoso Action Call: Create Case | Action call |
| Contoso Action Call: Display Existing Cases | Action Call |
| Contoso Action Call: Set Focus on Existing Cases | Action Call |
| Contoso Action Call: Close Session | Action Call |
| Contoso Action Call: Load Agent Script | Action Call |
| Contoso: Welcome to Account Session | Agent Script |
| Contoso Agent Scripting | Hosted Control |
| Contoso new case form | Hosted Control |
| Contoso existing cases for an account | Hosted Control |
| Contoso New Case for Account Session Rule | Window navigation rule |
To add a control to the configuration:
Sign in to Unified Service Desk Administrator.
Select Configuration under Advanced Settings.
Select Contoso Configuration to open the definition.
Select the Hosted Controls, Events and Action Calls tab.
Select the ellipsis (...) in the Action Calls section, and then select Add Existing Action Call. The Lookup Records pane is displayed.
Type the name of the action call mentioned in the above table in the search box. The action calls are displayed in the search results. Select the record from the list, and then select Add.
Select the ellipsis (...) in the Hosted Controls section, and then select Add Existing Hosted Control. The Lookup Records pane is displayed.
Type the name of the hosted control mentioned in the above table in the search box. The hosted controls are displayed in the search results. Select the record from the list, and then select Add.
Select the Toolbars, Window Navigation Rules and Entity Searches tab.
Select the ellipsis (...) in the Window Navigation Rules section, and then select Add Existing Window Navigation Rule. The Lookup Records pane is displayed.
Type the name of the Window Navigation Rule mentioned in the above table in the search box. The rule is displayed in the search results. Select the record from the list, and then select Add.
Select the Session Lines, Agent Scripts and Scriptlets tab.
Select the ellipsis (...) in the Agent Scripts section, and then select Add Existing Agent Script. The Lookup Records pane is displayed.
Type the name of the agent script mentioned in the above table in the search box. The agent scripts are displayed in the search results. Select the record from the list, and then select Add.
Select Save.
Step 10: Test the application
Start the Unified Service Desk client application, and sign in to the Dynamics 365 instance where you configured Unified Service Desk by using the same user credentials that is assigned to Contoso Configuration in Walkthrough 1: Build a simple agent application for Unified Interface Apps. For information about connecting to Dataverse instance using the Unified Service Desk client application, see Connect to CRM instance using the Unified Service Desk client
Select the down arrow next to the SEARCH button in the toolbar, and then select Account to display the account records from your model-driven app.
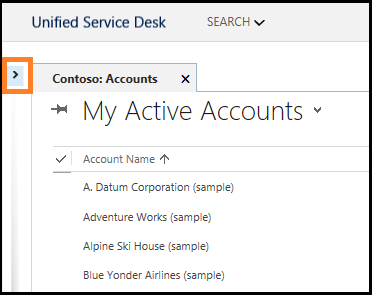
Select the expander to display the left pane.

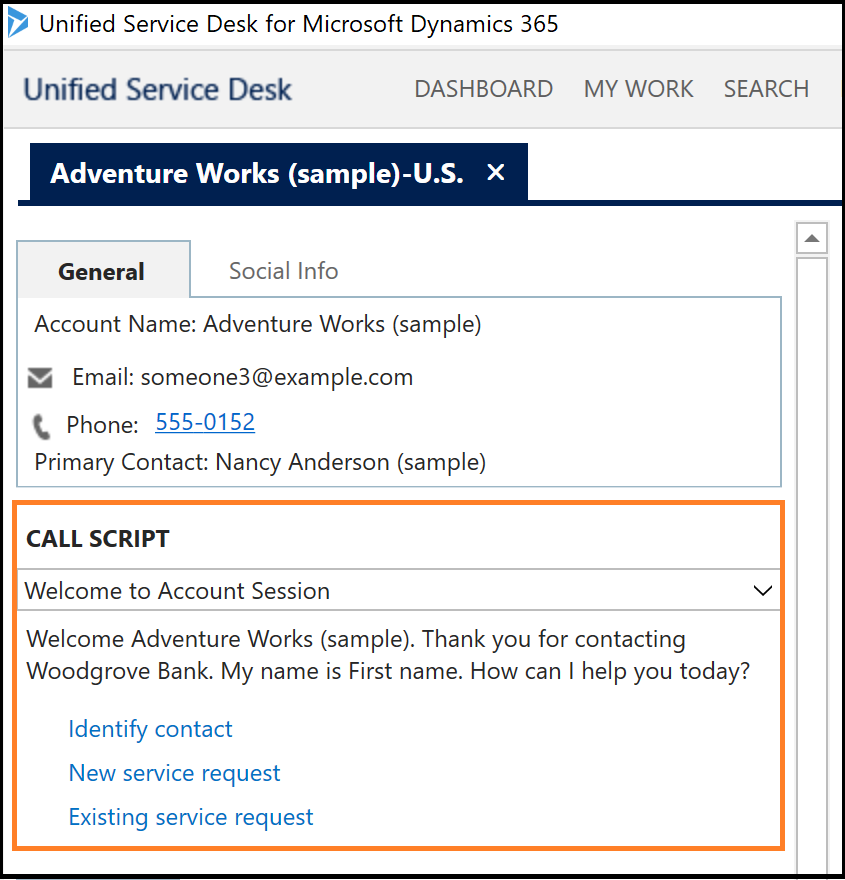
Select on any of the account records to display the respective account information in a session. In the left pane, the Contoso: Welcome to Account Session agent script appears.

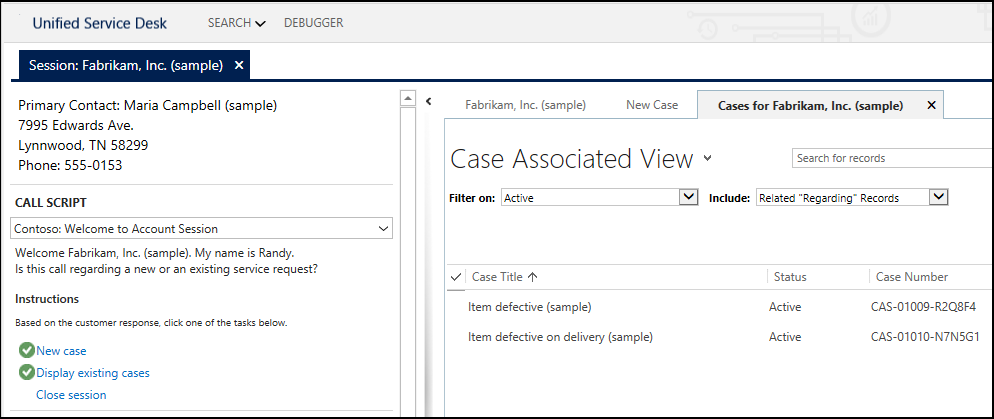
In the agent script:
- Select New case to open a new case form with pre-populated values (in the red box) from the current account record.

- Select Display existing cases to display the associated cases for the current account record.

- Select Close session to close the current session.
Conclusion
In this walkthrough, you learned how to configure a simple agent script to guide your call center agents. Unified Service Desk allows you to create more complex scripts with branching logic that contain child answers and actions. You also learned how to filter access to Unified Service Desk controls using configuration.
See also
Support for Unified Interface Apps in Unified Service Desk
Unified Interface Page (Hosted Control)
Unified Service Desk and Unified Interface Configuration Walkthroughs
Walkthrough 1: Build a simple agent application for Unified Interface Apps
Walkthrough 2: Display an external webpage in your agent application
Walkthrough 3: Display model-driven app (Unified Interface apps) records in your agent application
Walkthrough 5: Display enhanced session information by displaying session name and overview data
Walkthrough 6: Configure the Debugger hosted control in your agent application
Feedback
Coming soon: Throughout 2024 we will be phasing out GitHub Issues as the feedback mechanism for content and replacing it with a new feedback system. For more information see: https://aka.ms/ContentUserFeedback.
Submit and view feedback for