Create a new environment
After your organization purchased a license for Dynamics 365 Customer Insights, the global administrator of the Microsoft 365 tenant receives an email that invites them to create an environment.
After the first environment is created, the global administrator of the Microsoft 365 tenant can add users from their organization as administrators. These administrators can then manage users and environments.
Important
In most cases, installing Customer Insights - Data should be done through Power Platform admin center.
Use the environments creation experience in Customer Insights - Data for the following scenarios:
- Use your own Azure Data Lake Storage Account AND Azure Private Link
- Enable data sharing between your own Data Lake Storage Account and Microsoft Dataverse
- Create a copy of an existing environment configuration
Prerequisites
- Administrator permissions in Customer Insights - Data.
To install Customer Insights - Data on an existing Dataverse environment:
- A global administrator role is set up in the Dataverse environment.
- Verify if the Dataverse environment is associated to certain security groups and make sure you're added to those security groups.
- A Dataverse license is assigned to you to get Read-Write access mode. Unlicensed administrators get Administrative access mode only.
- Customer Insights - Data isn't already installed. Learn how to delete an existing environment.
To create a new Dataverse environment when installing Customer Insights - Data:
- You have the required license and role in Power Platform.
- Your Power Platform admin hasn't disabled the creation of Dataverse environments for everyone except admins.
Create an environment in Customer Insights - Data
We recommend to use the consolidated environment manager for Customer Insights to create new environment by default.
Open the environment picker and select + New.

Follow the guided experience outlined in the following sections to provide all required information for a new environment.
Step 1: Provide basic information
Choose whether you want to create an environment from scratch or copy data from another environment. Copying data from another environment requires extra steps.
Provide the following details:
- Name: Name for this environment. This field is already filled in if you've copied an existing environment, but you can change it.
- Type: Type of environment: production or sandbox. Sandbox environments don't allow scheduled data refresh and are intended for pre-implementation and testing. Sandbox environments use the same primary audience as the production environment that's currently selected.
- Region: Region into which the service is deployed and hosted. To use your own Azure Data Lake Storage account install on an existing Microsoft Dataverse organization, all environments must be in the same region.
Select Next.
Step 2: Configure data storage
Choose where to store the data:
- Customer Insights storage: Data storage is managed automatically. It's the default option and unless there are specific requirements to store data in your own storage account, we recommend using this option.
- Azure Data Lake Storage Gen2: Your own Azure Data Lake Storage account to store the data so you have full control where the data is stored. Follow the steps in Use your own Azure Data Lake Storage account.
Select Next.
Step 3: Choose Dataverse environment
Select an existing Dataverse environment that doesn't already have a Customer Insights - Data environment installed on it.Learn more about the the required permissions.
If you chose to use your own Azure Data Lake storage in the previous step, you can enable data sharing with Dataverse to use it with business applications based on Dataverse or model-driven applications in Power Apps.
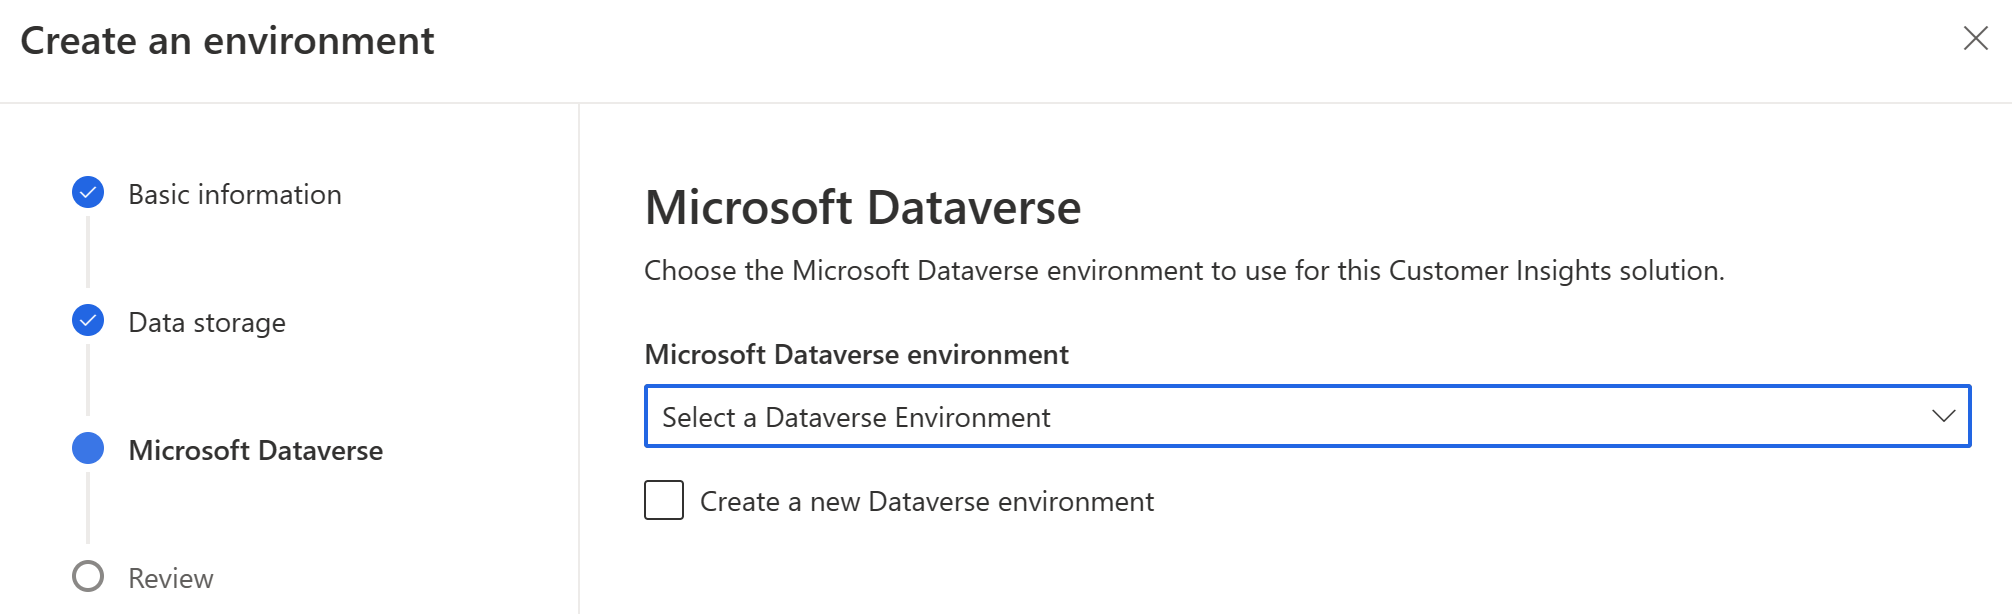
Choose an existing Dataverse environment from the drop-down that you want to install Customer Insights - Data. To create a new environment, go to the Power Platform admin center and create it. Then, refresh the list of environments and select the newly created environment.
If you're using your own Data Lake Storage account:
- Select Enable data sharing with Dataverse.
- Enter the Permissions identifier. To get the permission identifier, enable data sharing with Dataverse from your own Azure Data Lake Storage.
Select Next.
Step 4: Finalize the settings
Review the specified settings. When everything looks complete, select Create to set up the environment.
To change some of the settings later, see Manage environments.
Work with your new environment
Review the following articles to help you get started:
Get started in minutes with a single CSV file.
Note
Currently, this feature is available for customers in the United States only.
Ingest several of your data sources and run them through the data unification process to get unified customer profiles.
Enrich the unified customer profiles or run predictive models.
Create segments to group customers and measures to review KPIs.
Set up connections and exports to process subsets of your data in other applications.