Add inspections to work orders
Field Service inspections are digital forms that technicians use to quickly and easily answer a list of questions as part of a work order. The list of questions can include safety protocols, pass-and-fail tests for a customer asset, an interview with a customer, or other audits and assessments.
With a drag-and-drop interface, inspections are easy to create, and are easier for technicians to fill out compared to paper forms. Inspection answers are stored in Microsoft Dataverse, making it easy to report on results and fit inspections into your automated business processes.

Inspections in Field Service also provide:
- Offline support: Technicians can view and fill out inspections on their mobile phones or tablets without internet access. Answers are synced when connectivity is restored (cellular or WiFi).
- Customer assets: Inspections can be associated with assets, allowing users to see a history of all inspections for a particular piece of equipment.
- Version management: Administrators can continuously update and publish inspections to accommodate changing processes and evolving business needs.
Inspections are easy to create and use, involving the following steps:
- Administrator creates an inspection template.
- Administrator associates the published inspection to a Service Task Type.
- Dispatcher adds the Service Task Type to a Work Order.
- Technician completes the inspection.
- View the inspection results.
In this article, we'll walk through an example of setting up an inspection using a maintenance checklist on a customer asset.
For a guided walkthrough, check out the following video.
Prerequisites
Dynamics 365 version 9.1.0000.15015+.
Knowledge of work order incident types and service tasks is encouraged.
Field Service-Administrator role to create inspection templates and associate them to service task types.
Field Service-Dispatcher role to add service tasks with inspections to work orders.
Field Service-Resource role to view work orders they're assigned to, along with work order service tasks and the related inspections.
Create inspection
First, create an inspection that can be reused and added to multiple work orders.
In Field Service, change to the Settings area.
Go to Work Orders > Inspection Templates and select New.
Provide a Name for the inspection and add an optional description.
Question types
Add a question to the inspection by double-clicking or dragging-and-dropping a question type from the right side.
Textbox: Allows technicians to enter text from their keyboard for a free form response. There's an option in the advanced panel to make the text box bigger to allow for multiline responses. In early access opt-in release, a text box can be input with a default value and can also be made as read-only.
Checkbox, radiogroup, dropdown: Allows technicians to choose an answer from predefined options. The question types Checkbox, Radiogroup, and Dropdown are similar, except the Checkbox question type is multi-select, whereas Radiogroup and Dropdown allow for a single answer. The difference between Radiogroup and Dropdown is cosmetic and should be used based on desired user experience.
Entity lookup: Allows technicians to choose a Dynamics 365 record. In the inspection designer interface, admins must select an entity and a field to display. For a chosen entity, the Name field and mandatory fields are the entity attributes that can be displayed in the lookup. When the user types, up to the first 50 records that start with the search string will appear in the dropdown. This may not contain all matches. Continue to add to the search string until the matching result starts showing on top. Entity lookup respects security roles of signed-in user, meaning some entities and records may not be displayed.
- Add filters to review the records displayed in the entity-lookup options. For example, an entity-lookup inspection question that's created for the bookable resource record type. You can filter the list of bookable resources to ones with the resource type set to User to remove subcontractors and machines from the list.
Number: Restricts input to numeric value or returns an error. Typically represents a measurement or numeric rating value.
Date Time: Allows technicians to enter a date and time.
File: Allows technicians to upload a file, take picture, or choose multiple pictures from their camera roll.
Barcode scan: Allows technicians to populate the field with the barcode number by scanning a barcode with their device's camera. Choose "Textbox" question type, then select Barcode for input type in the Advanced section.
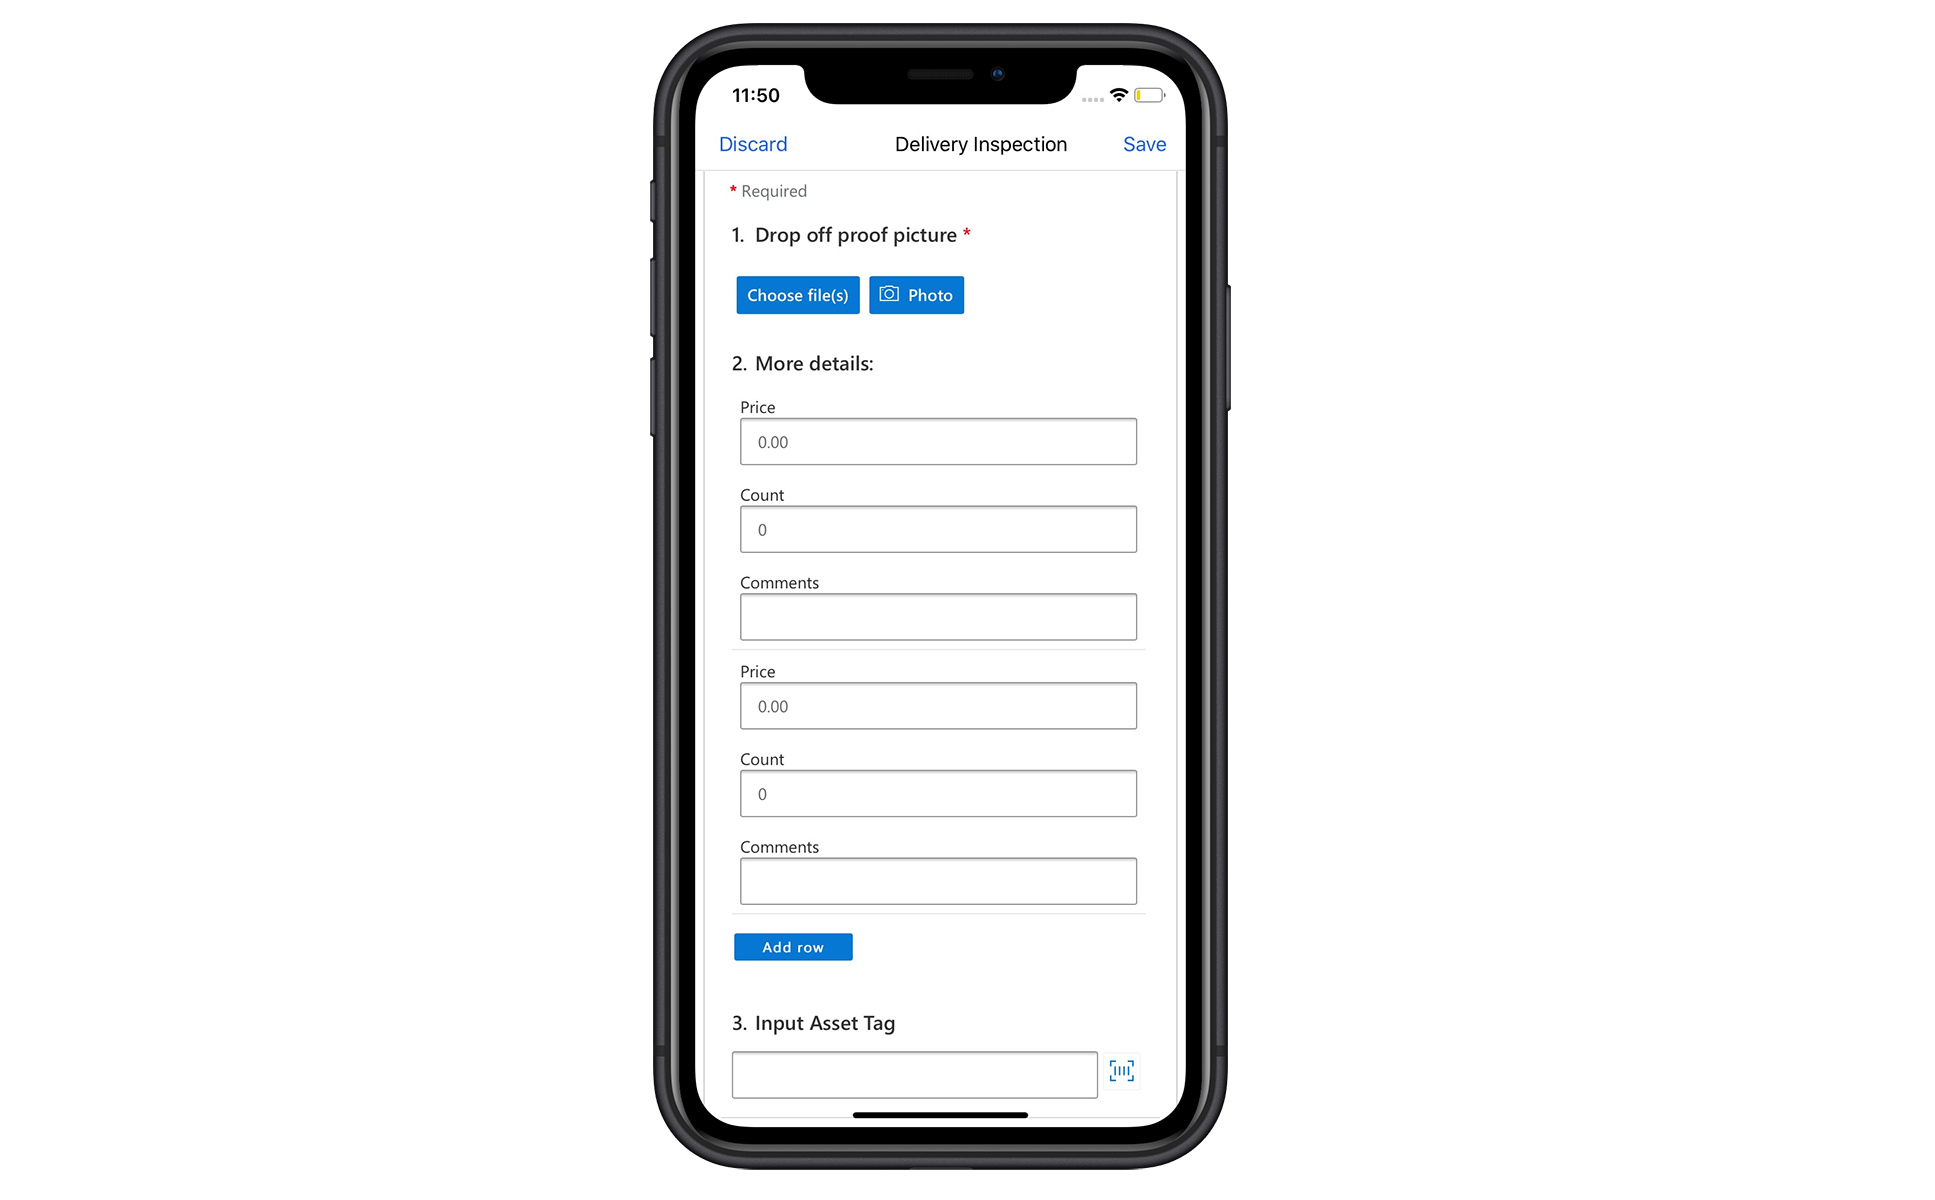
Matrix (Dynamic): Adds a grid of questions. More rows can be added dynamically while performing the inspection. See the following screenshot for an example.
Use the Required toggle to make the inspection question mandatory.
By selecting the Gear icon, you can add more details for an inspection question.
Compact question view
Before selecting an individual question, go to the advanced pane to edit the look and feel of the inspection.
Inspection creators can show or hide the title and description of the inspection when inspection performers are viewing it. Also, the auto numbering of the questions can be disabled to assign custom numbering.
Layout density options:
Comfortable layout displays answer areas underneath questions.
Compact layout displays answer areas to the right of questions as seen in the following screenshot. Use the preview pane to see the layout from an end user's perspective.
Pages
Add pages to your inspection in order to:
- Group questions together to organize them in a logical way by type, phase, and so on.
- Make it easier to add logic to multiple questions at one time. For more information, see the section on branching and conditional logic further into this article.
Select the page dropdown in the top left of the designer to add one or more pages. Then add a page title and a page description, if needed.
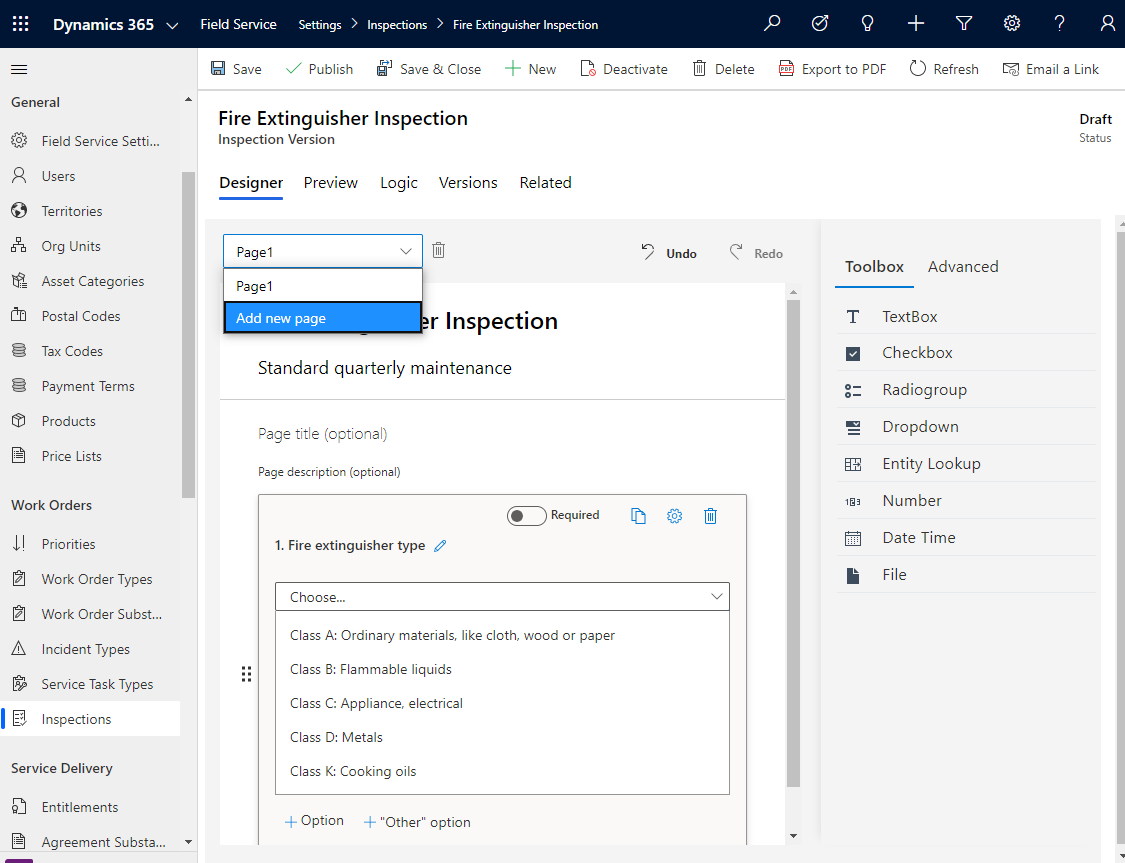
Review and publish
Use the Preview section to see the inspection from a technician's perspective.
Note
Once you publish the inspection, you can't edit it in the preview version.
Make sure you also finalize the name of the template. You can't change it after the template is published. To use a different name for a template, create a copy and change the name before publishing the copy.
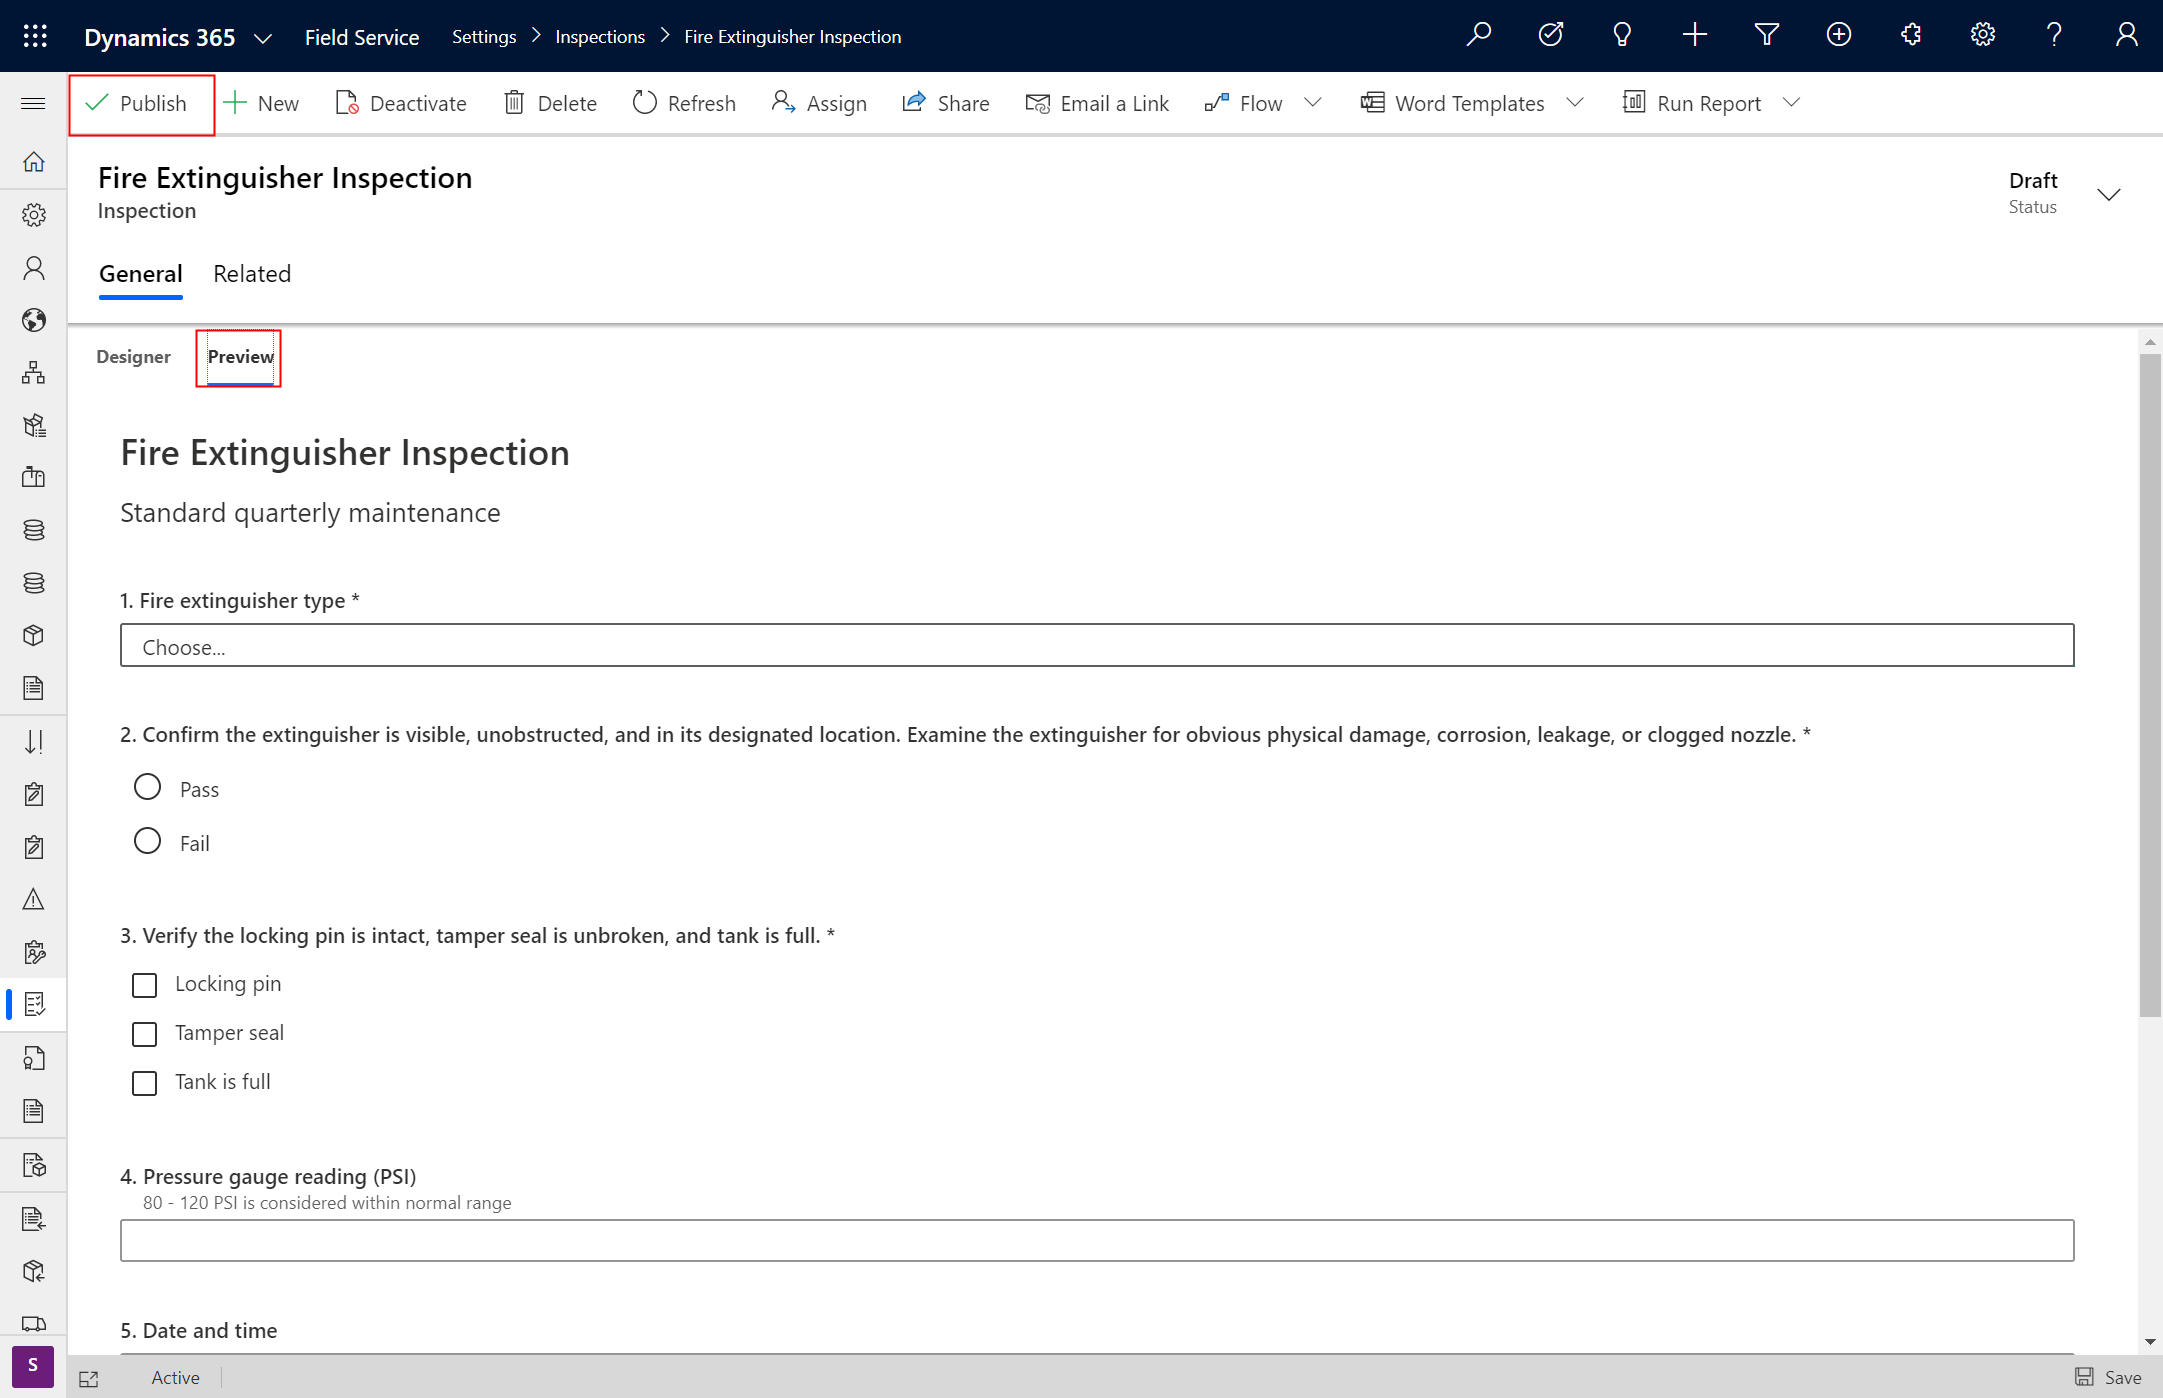
When finished creating the inspection, select Publish at the top.
Associate inspection to service task type
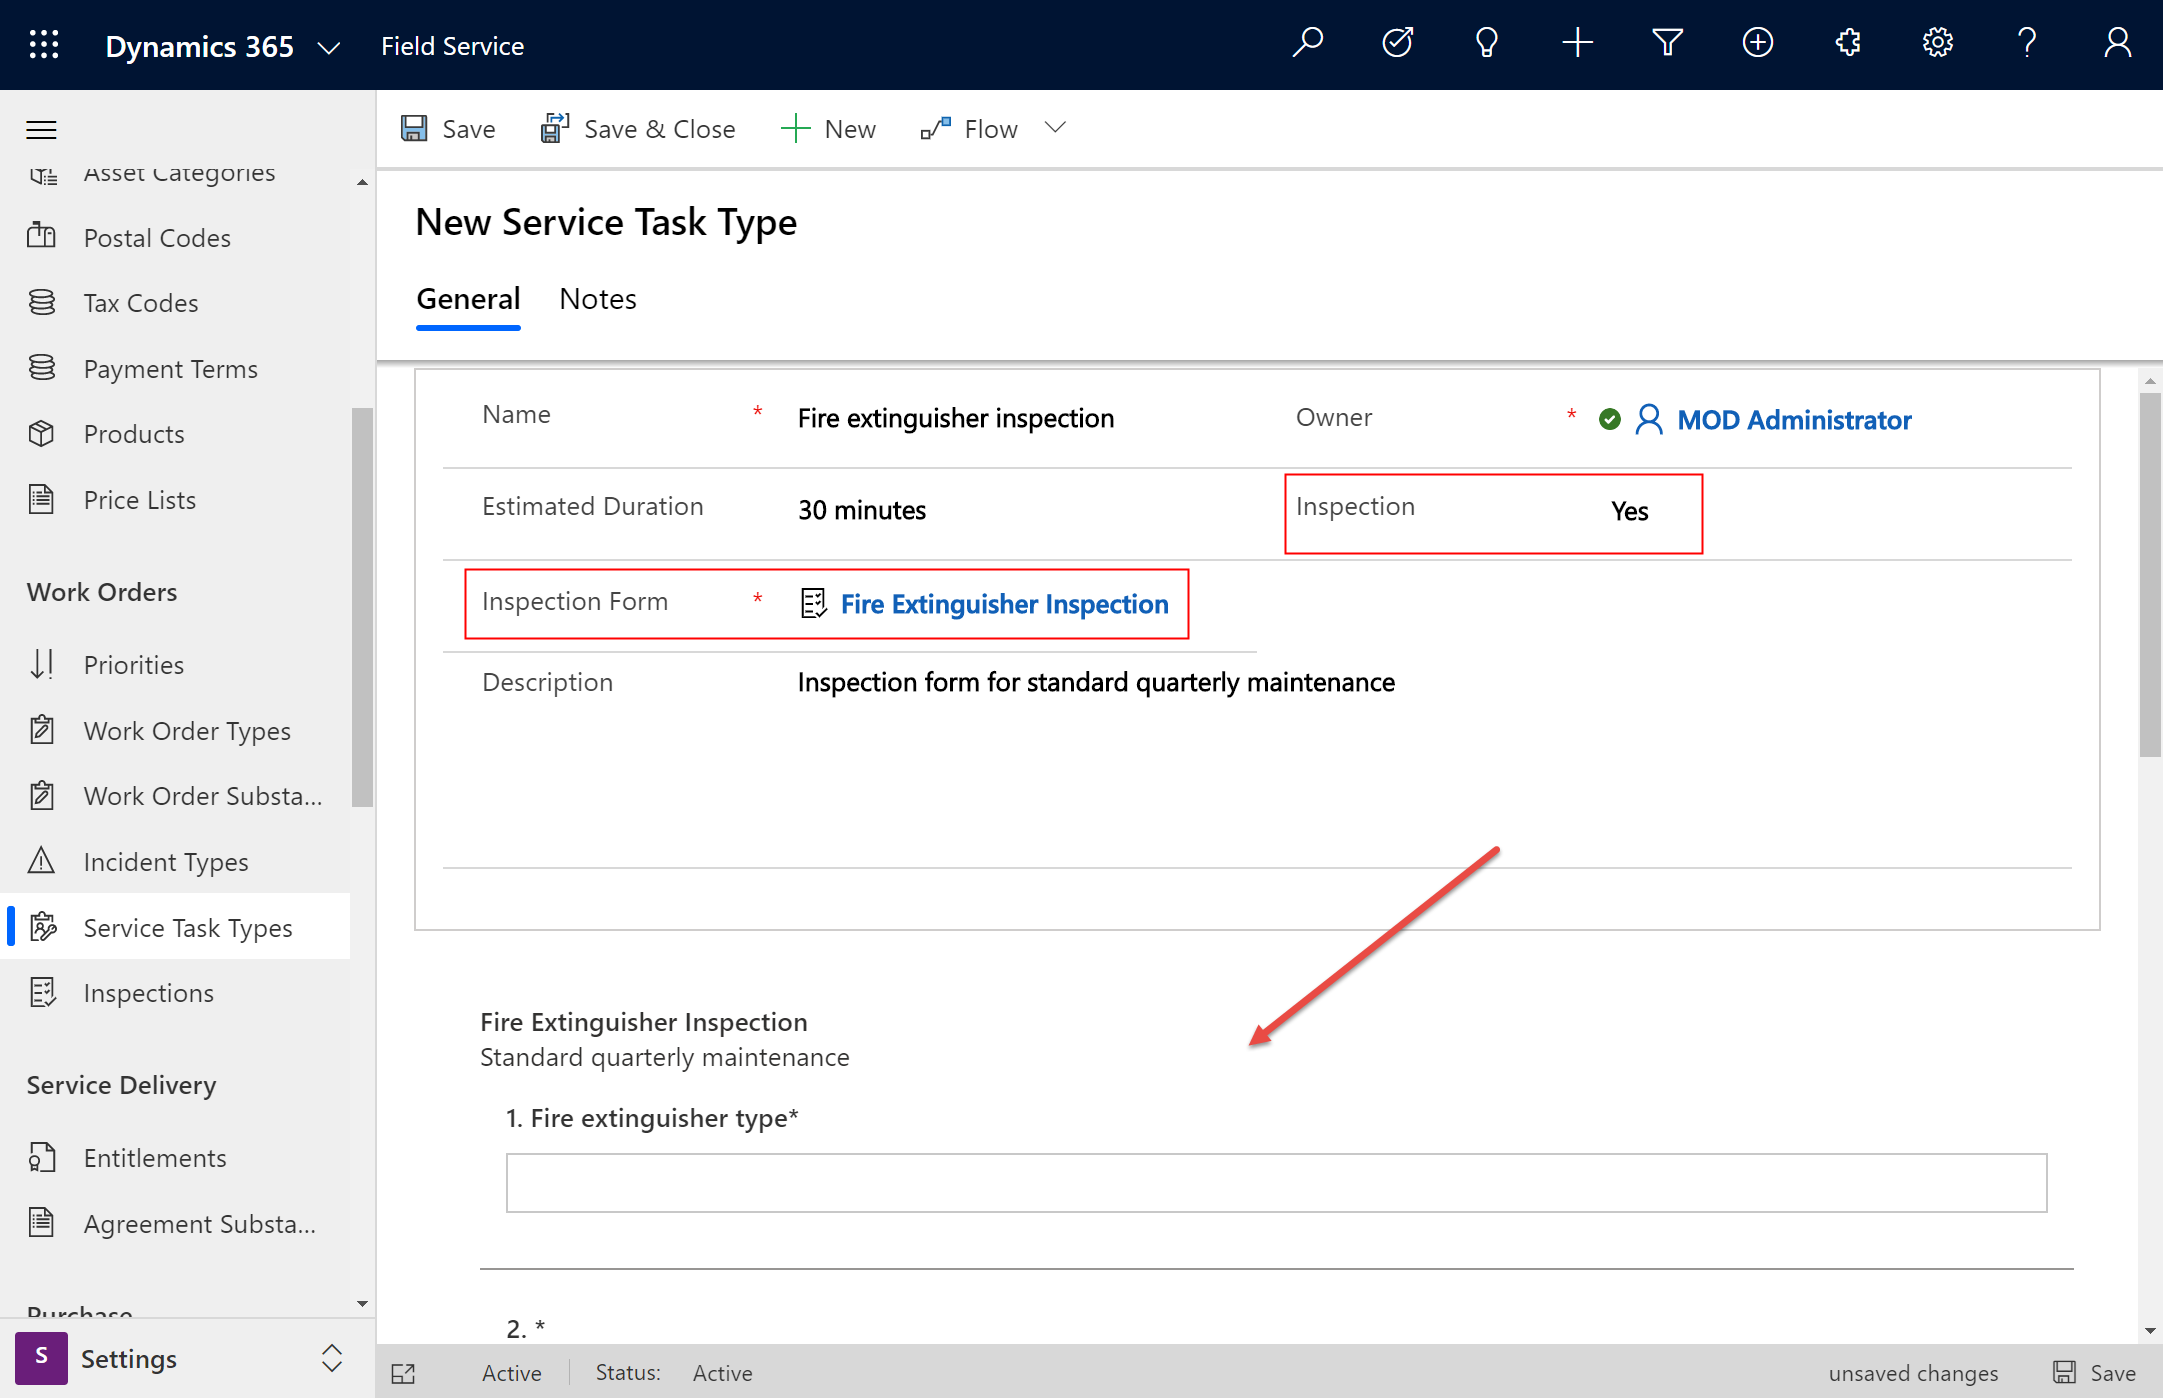
Next, associate the inspection to a Service Task Type. This association is necessary because inspections aren't added directly to work orders; they're added as part of Work Order Service Tasks.
In the same Settings section, go to Service Task Types.
Select an existing service task type or create a new one.
Set Has Inspection to Yes.
In the Inspection field, select the inspection you created.
The inspection form will appear below.
It's common to add service task types to incident types in order to bundle work together. However, it isn't required because you can add individual service tasks to work orders as we'll see later on.

Add inspection to work order
After creating a work order, go to the Service Tasks section and add the Work Order Service Task you created that has an associated inspection.
Then Save. The inspection can't be filled out until the Work Order Service Task is saved.
Alternatively, your inspection service task can be added to the work order via a work order incident type.
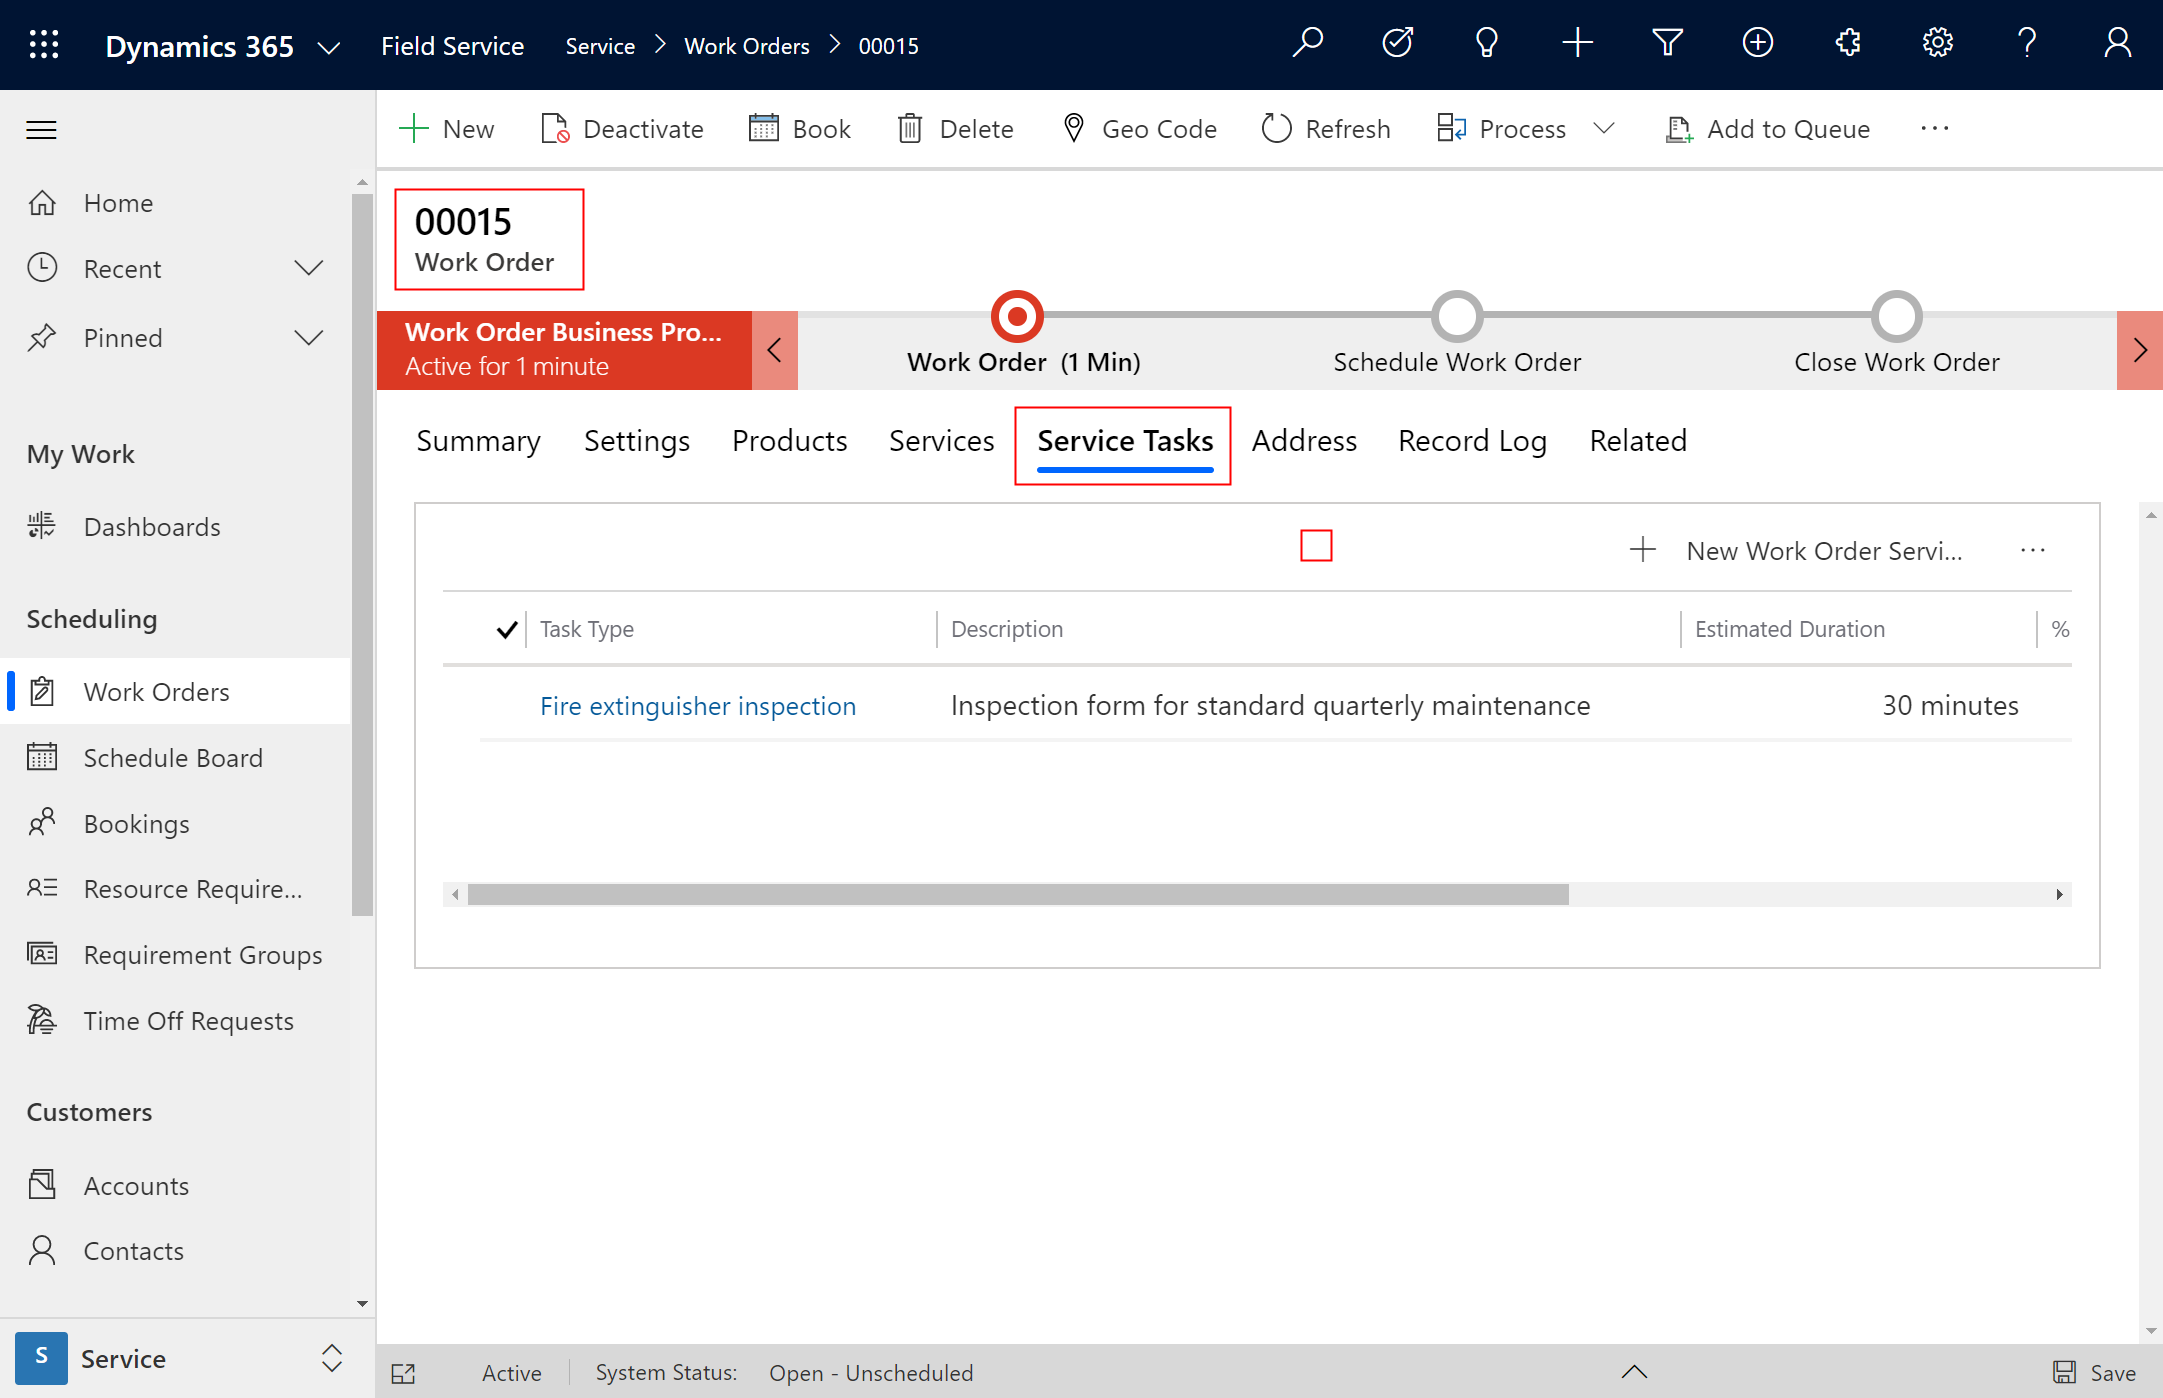
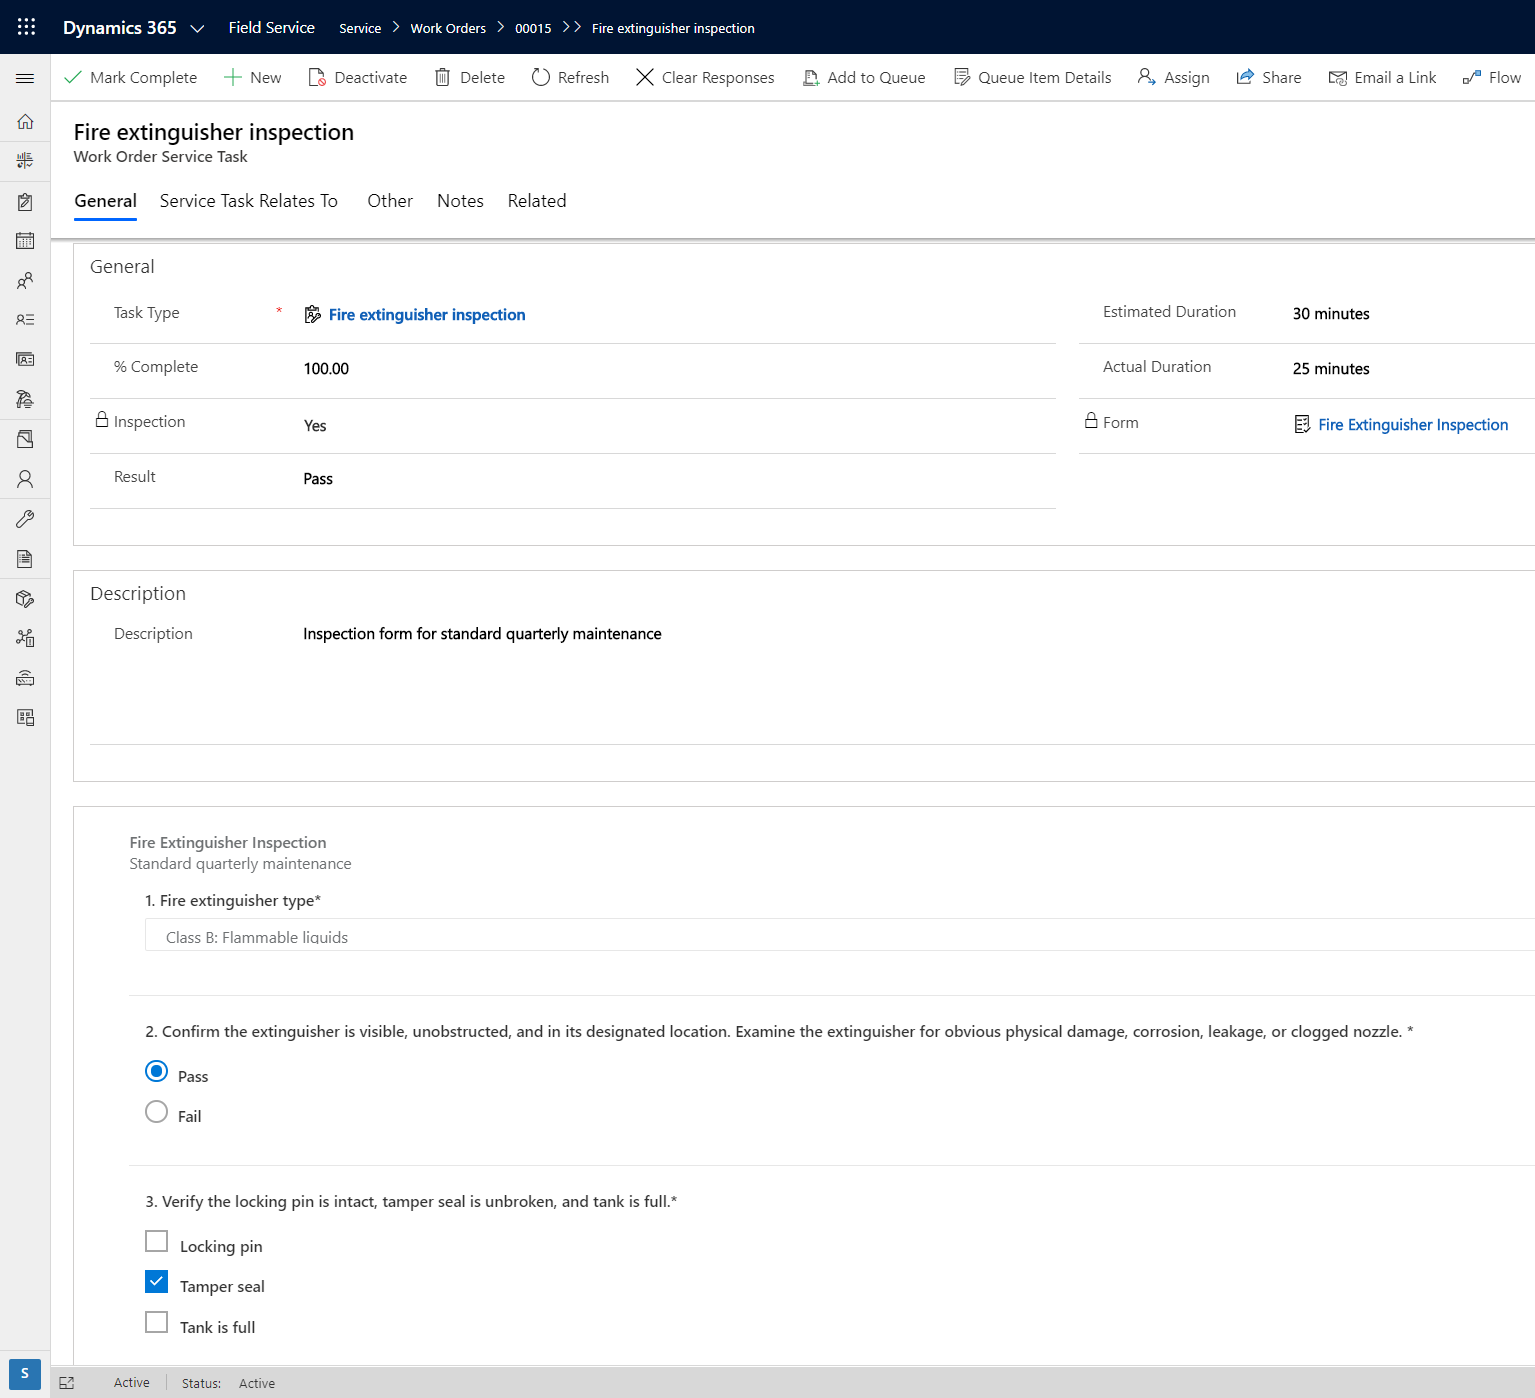
An inspection completed by a technician will be visible on the bottom of the work order service task form.
Perform inspections on mobile
You can view and complete inspections on the Dynamics 365 Field Service mobile app.
Sign in and go to the assigned work order.
Select the Work Order Service Task that has the related inspection.
Find the inspection form and enter answers.
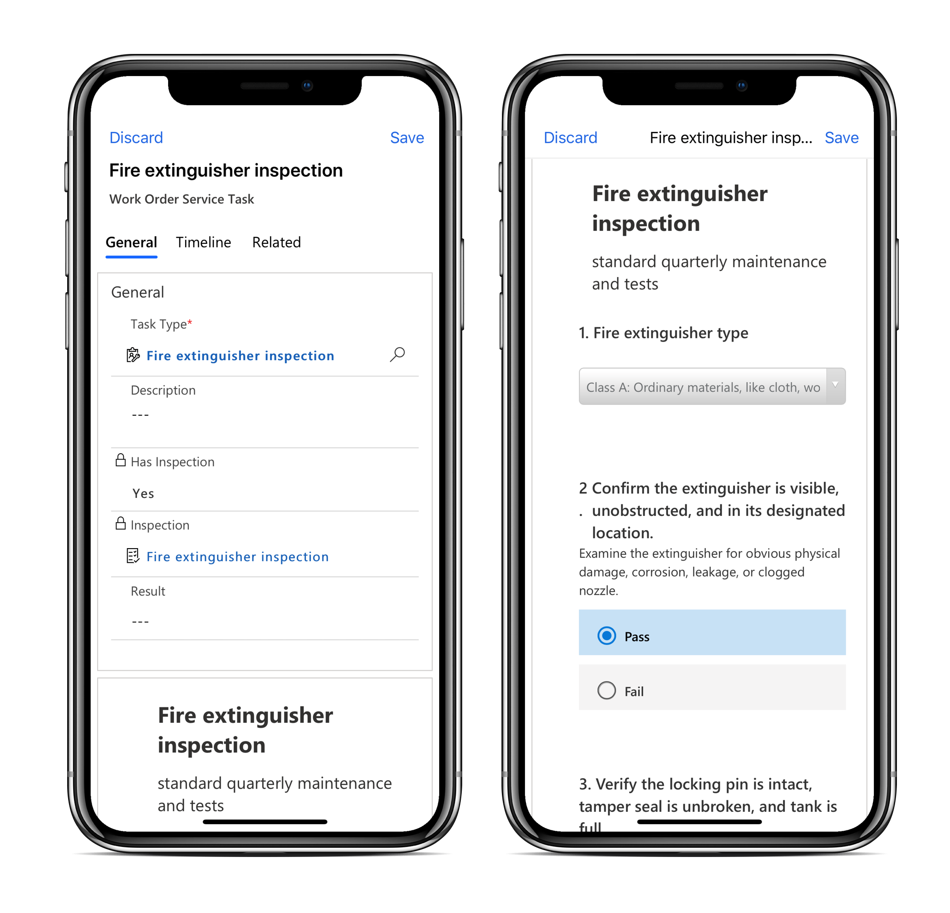
Technicians can upload files, take pictures, or upload pictures from the phone's camera roll. When uploading a file or image, select the caption icon to add a comment. File attachments are limited to 3 MB per file. Administrators can increase this limit.
When finished, select Mark Complete or set Complete % to 100.
Enter a Result to report on the overall inspection:
- Pass
- Fail
- Partial Success
- NA
Actual Duration: Enter an actual duration the work order service task took to complete that can be compared to estimated duration.
If an inspection question is required, the technician won't be able to mark Complete or set % Completed to 100 until it's answered.
Clear Responses: If needed, a technician can select More > Clear Responses to start over, and permanently delete all responses for this service task inspection.
Note
Only single responses are supported and a technician can't fill out the same inspection twice for a single work order service task. If the responses are cleared or answered again, the original responses are deleted, and only the latest responses are saved.
View responses
Back in Dynamics 365, a dispatcher will see inspection responses.
Additional notes
Inspections can't be exported and imported to other environments.
Inspections can't be embedded into Power Apps portals.
Known issues
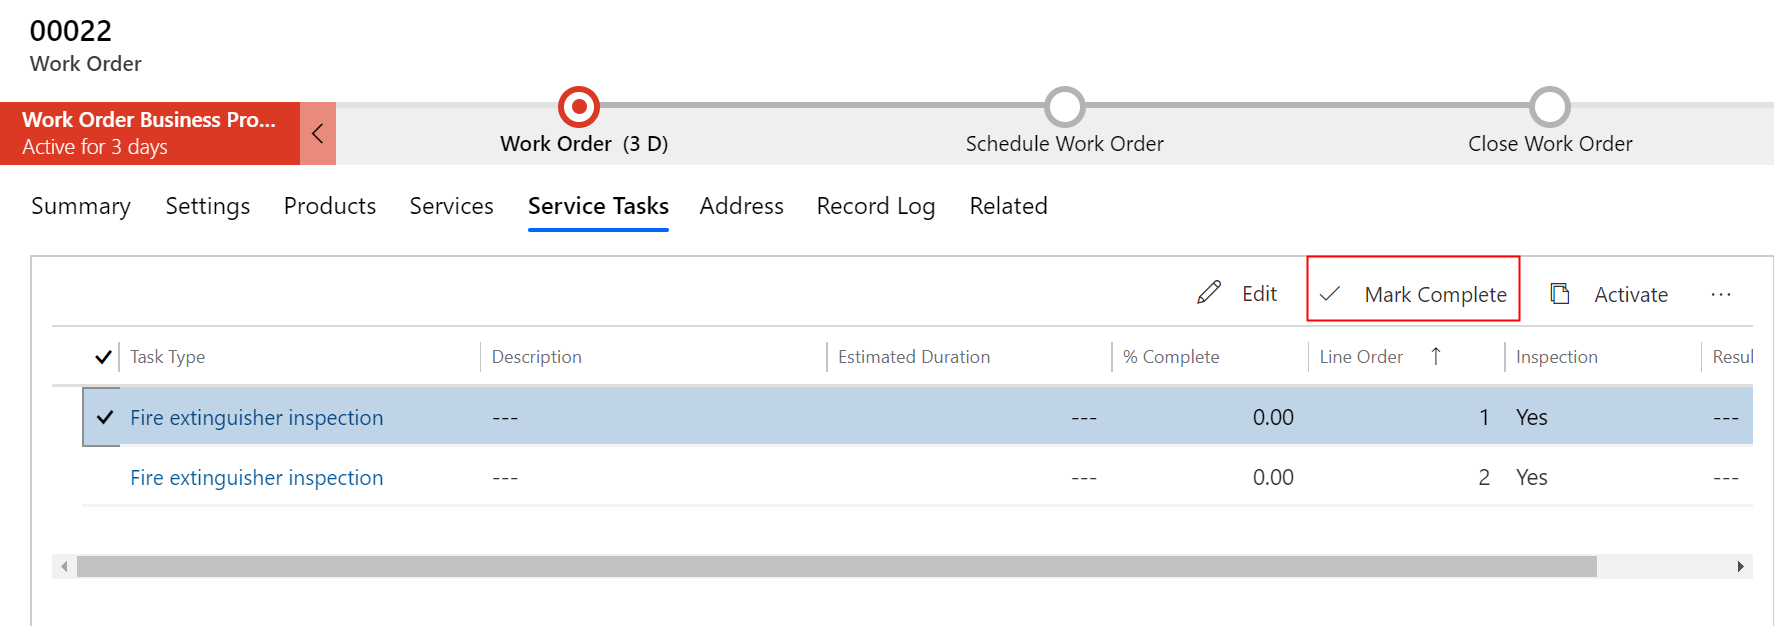
- Marking a work order service task as complete from the grid view doesn't work unless the work order service task is opened at least once.
Dispatcher can't delete individual attachments in an inspection response. The out-of-the-box Field Service-Dispatcher role doesn't have ability to delete inspection attachments; they can, however, Clear responses and Clear files, which will clear all attachments. If a dispatcher wants to be able to delete individual attachments from an inspection, they'll need to be given delete privileges for the Notes entity.
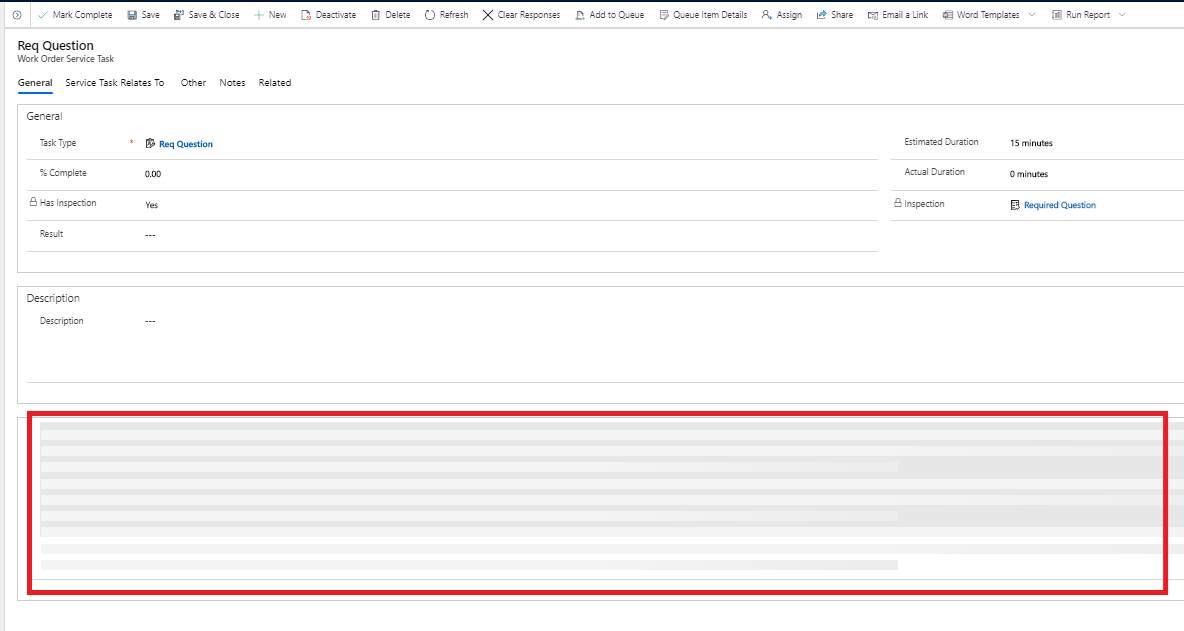
If a resource has trouble seeing an inspection on the work order service task form (as seen in the following screenshot), deactivate and reactivate the related bookable resource booking.
Inactive inspections and work order service tasks aren't available in offline mode.
The question type "Entity lookup" shows inactive records.
If an inspection contains a large (50+) number of files, users may encounter errors while loading the inspection form.
Users may encounter errors when adding a large number of files in a single upload. This issue is more likely to happen when the files are large and/or the network signal is poor. We recommend splitting large uploads in smaller chunks, where each upload doesn't exceed a total size of 40 MB.
Avoid trailing blank pages without questions in an inspection as this can cause deserialization errors in out-of-box flows.
Field Service inspections or Power Apps inspections
Here are a few reasons customers choose to use Field Service inspections.
- Offline support: Technicians can view and fill out inspections on their mobile phones or tablets without internet access. Inspections and answers are stored locally on the mobile device and then synced to the server when connectivity is restored (cellular or WiFi).
- Version management: Administrators can easily republish or change inspections to accommodate changing processes and evolving business needs.
- Easier to create and use: Field Service inspections require no further training and are designed to be easy to use. Power Apps inspections need extensive knowledge of the Power Apps platform and may require coding.
- More scalable: If your organization has many different inspections, it's easier to create Field Service inspections with a drag-and-drop interface and with dynamic branching. Power Apps inspections require creating new entities and forms for each inspection, which is more time consuming.
- Better integrated with Dynamics 365: Field Service inspections are built into the work order and asset servicing capabilities.
Field Service inspections or work order service tasks
Compared to work order incident types and service tasks, inspections have more benefits:
- Easier to create: Administrators can quickly create an inspection with a drag-and-drop interface without needing to create new entities and fields.
- Easier to fill out: Technicians can quickly enter responses for each inspection question and save all of them at once. Work order service task records have to be opened and completed one-by-one.
- More flexible and robust: Field Service inspections have many question formats and validation options, such as multi-option select, mandatory fields, images, attachments, and more.
Feedback
Coming soon: Throughout 2024 we will be phasing out GitHub Issues as the feedback mechanism for content and replacing it with a new feedback system. For more information see: https://aka.ms/ContentUserFeedback.
Submit and view feedback for