Use the schedule board in Field Service
This article discusses the main features and concepts of the schedule board for dispatchers and other users.
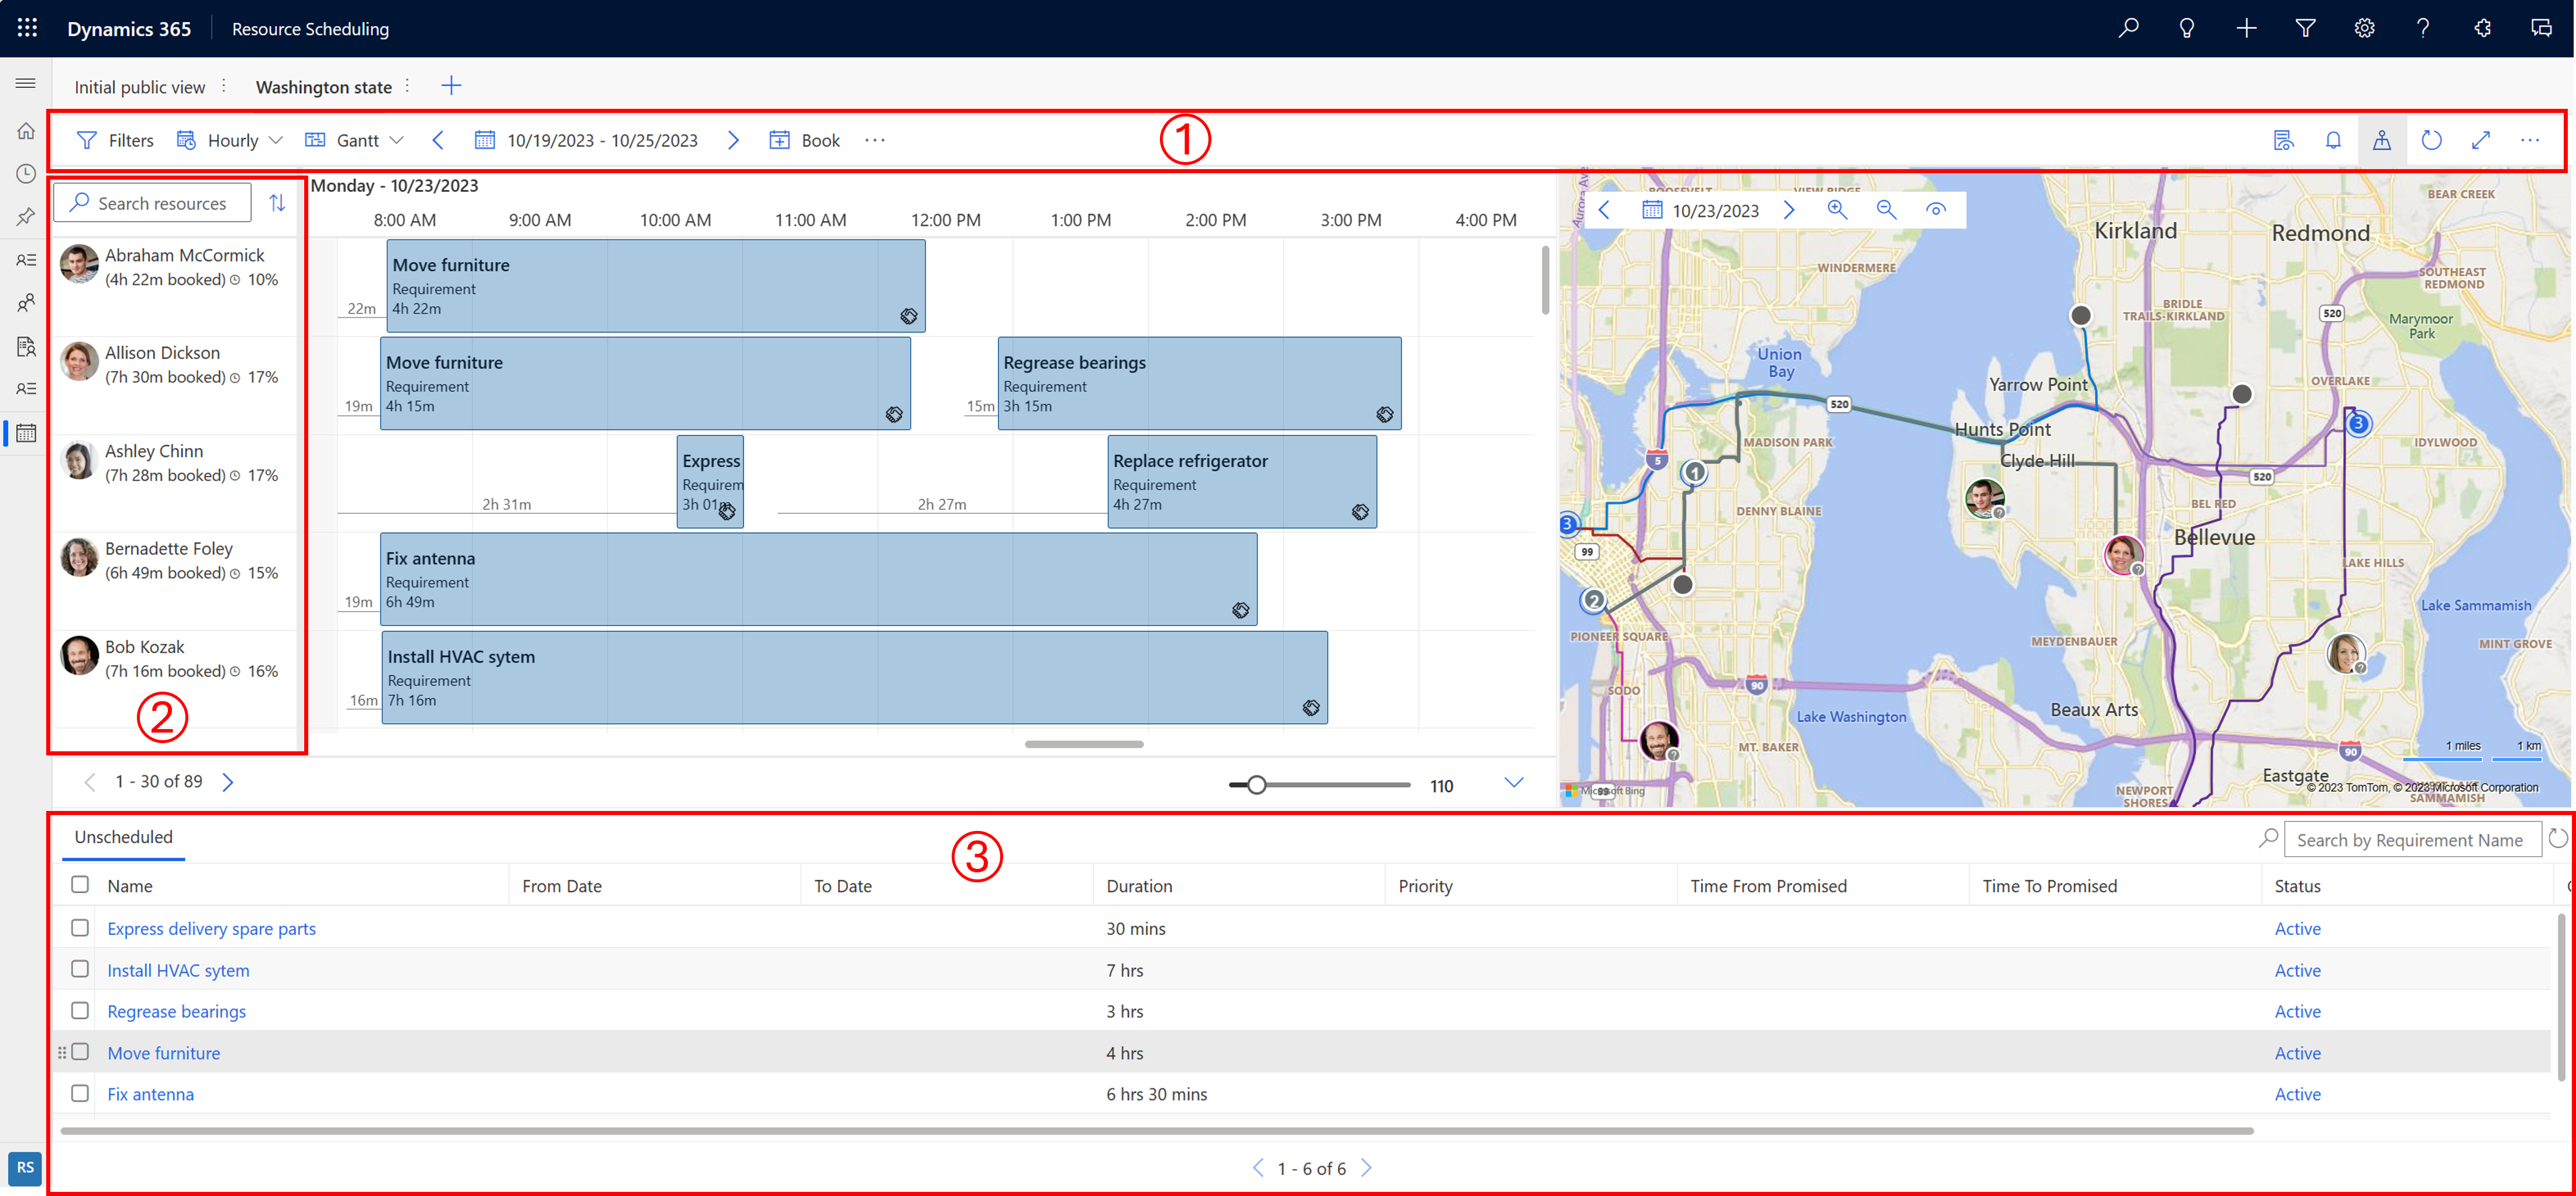
| Number | Area |
|---|---|
| 1 | Actions area |
| 2 | Resource list |
| 3 | Requirement pane |
Actions area
Filters
Apply filters to define which resources show on the schedule board. You can configure the board settings so filters also apply to requirements.
Filter values are pulled from the Bookable Resource entity.
Select the ellipsis (…) > Select Resources to choose a subset of all resources for the schedule board. Applying filters then only filters the selected resources.
To make the applied filter configuration the default for all schedule boards, select … > Save as default.
Select Reset to default to remove all applied filters. The list of selected resources resets when you remove the resources from the selection.
You always have to select Apply to see the changes on the schedule board.
Time scale
Switch between hourly, daily, weekly, and monthly view on the board. Choose the weekly or monthly views to see scheduled jobs at a higher level.
View type
- Gantt: A Gantt chart is a type of bar chart that illustrates a schedule. It's commonly used in show activities displayed against time. The position and length of an activity reflects the start date, duration, and end date.
- List: Shows resources in a list. Expanding a resource shows the selected time granularity in the selected time frame. You can change columns in the list.
Date range
Set the time frame that shows on the board. Use the arrows to move between time frames.
Book
Book a requirement manually. Select a requirement and a resource, start date/time, end date/time, booking status, and booking method.
Move bookings
Select Show more schedule board actions (…) > Move bookings to move bookings of a specific status to a different day. Moving bookings preserves times and other parameters.
Print schedule board
Select Show more schedule board actions (…) > Print schedule board to open the print settings where you can set schedule range, pagination, paper format, and orientation. Select Print open the system print options.
Contextual details
To see more details about the selected booking, resource, or requirement, open the details pane.
Booking alerts
To see your active booking alerts or create new alert, select the bell icon. For more information, see Create and view booking alerts
Map view
To see resources and requirements on a map, select the Map view icon.
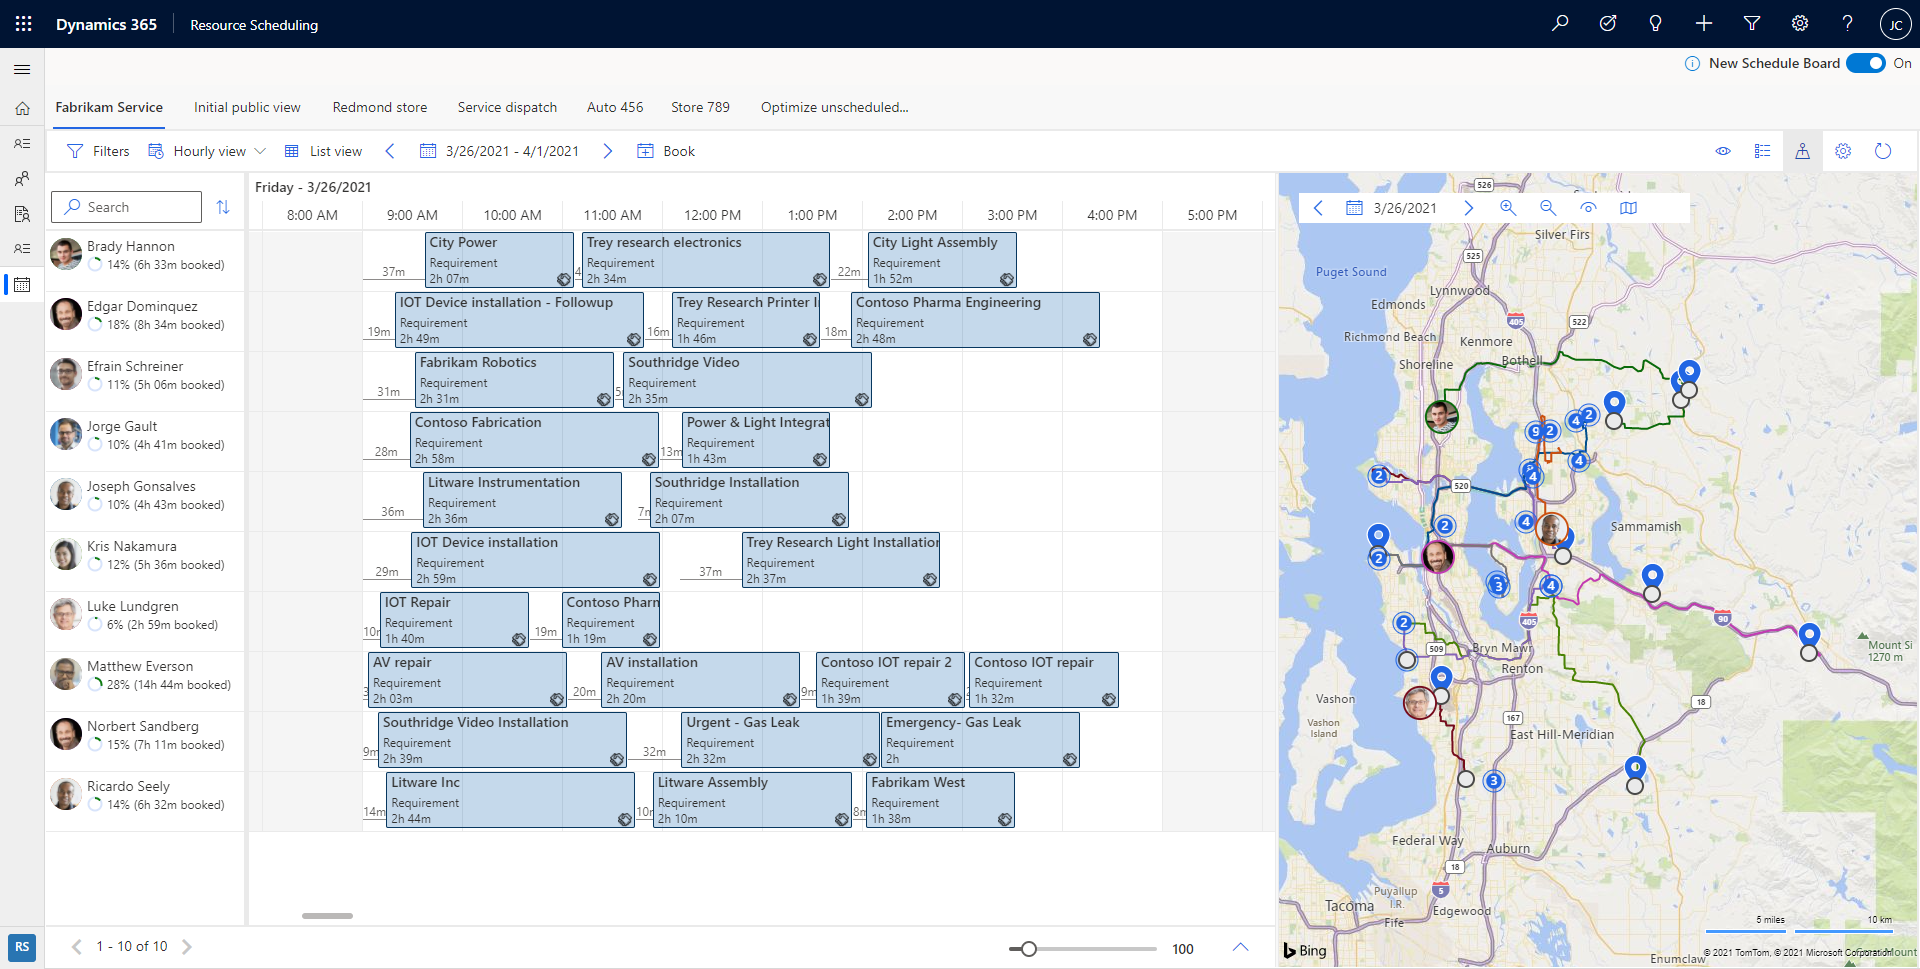
On the map view, select a resource to see their planned route. The numbers indicate in which order requirements are scheduled to a resource.
Change the date to see the map for a different day. Zoom out of the map, to see grouped requirements and resources. Quickly identify areas with unscheduled jobs and start scheduling these jobs to the nearest resources. Select View settings to set which items show on the map.
You can drag an unscheduled requirement pin from the map to the resource timeline and schedule it to that resource. You can also drag the resource route to a nearby unscheduled requirement to schedule it and add it to the resource route.
On each resource pin associated with a user, there is an indicator icon in the lower-right corner representing how long ago the resource's location has been detected. Green indicates that the user has logged on and been detected since the start of the current day, while a grey question mark indicates that the location was last detected yesterday or earlier.
Refresh board
The schedule board refreshes automatically if there are changes in the start date, end date, resource assignment, or status of a booking. Automated refresh only considers changes to bookings in the current week.
Select Refresh to manually refresh the schedule board.
Focus mode
Focus on the details of the schedule board and hide all other navigation items.
Select the Focus mode icon to change to full screen mode.
Legend
View all color codes and icons for status, priority, timeline, and travel time. Select the ellipsis (…) > Legend.
Board view settings
Select the ellipsis (…) > Scheduler settings to open the board view settings. For more information about board view settings, see Configure the schedule board tab settings.
Resource list
Right-click a resource's name and to show more options about the resource.
- Choose View resource card to see details like the resource's skills and roles. From here, you can also initiate a message, email, or phone call.
- Choose Get driving directions to get the driving directions for a work day.
Requirement pane
Select a single requirement from the requirement pane and select Find availability to launch the schedule assistant.
The schedule assistant lists available and matching resources that you can book for the requirement.
Bookings on the timeline
You can move a booking to a resource on the current schedule board tab, or change the start date/time, or both
Right-click the booking on th schedule board and select Move to. Reassign the booking to any resource on the current schedule board tab, or change the start date and the start time of the booking. To assign the booking to a resource that doesn't show on this schedule board, select the filter icon in the resource field and change the filter from Resources on this tab to All resources. Select Update to apply the changes.
Create a new schedule board tab
To create a new schedule board tab, select New schedule board tab (+) in the tab list on the schedule board.
Enter the relevant details about your new schedule board and select Add.
Automated scheduling with Resource Scheduling Optimization
The following features are only available for organizations using the Resource Scheduling Optimization Add-in for Dynamics 365 Field Service.
The default optimization goal is the default for optimization requests. You can change the optimization goal for each schedule board.
Get resource suggestions or book them directly
In the requirements pane, select one or more requirements.
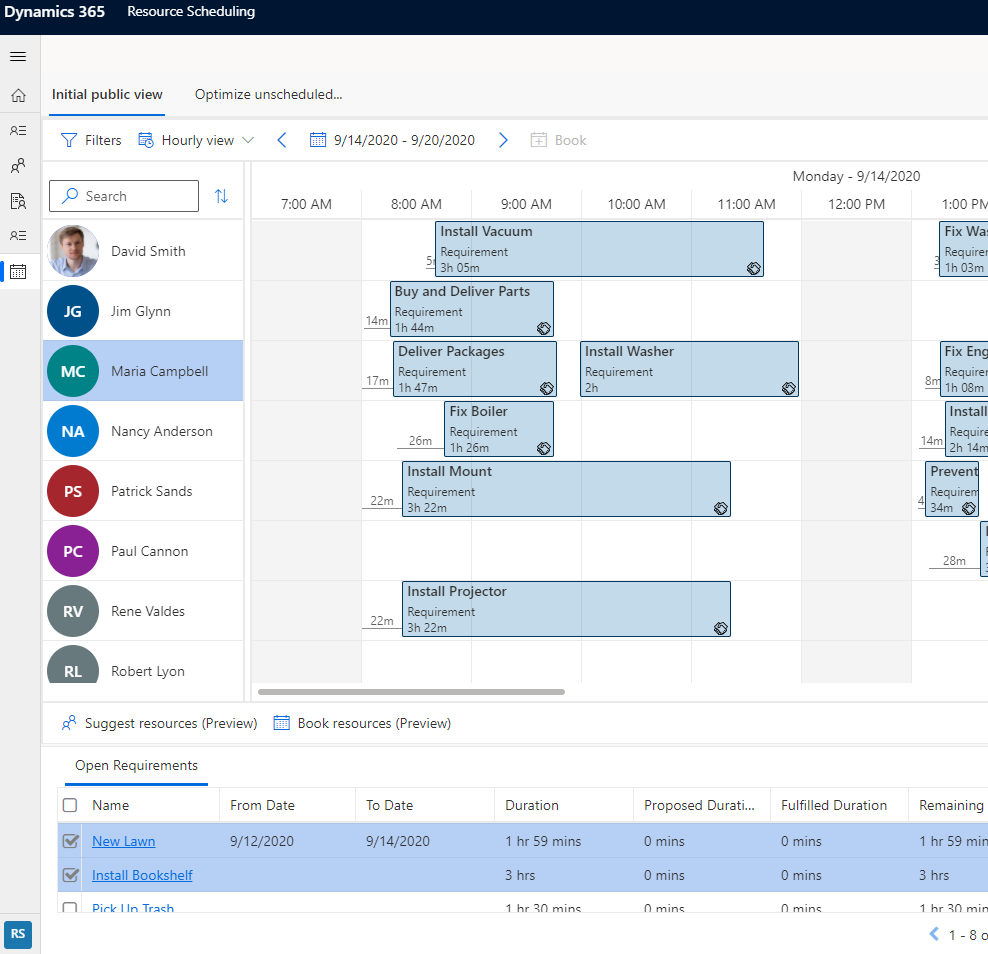
Select Suggest resources (Preview) to get suggestions from Resource Scheduling Optimization about which resources to book.
Select Book resources (Preview) to let the system find the optimal resources and book directly.
Optimization the schedule of a singe resource
After a resource's planned schedule has changed due to cancellations or emergency work, you can use Resource Scheduling Optimization for reoptimization. To optimize only a resource's schedule, right-click a resource on the schedule board and select Optimize schedule. For more information, see Single resource optimization with Resource Scheduling Optimization.
Feedback
Coming soon: Throughout 2024 we will be phasing out GitHub Issues as the feedback mechanism for content and replacing it with a new feedback system. For more information see: https://aka.ms/ContentUserFeedback.
Submit and view feedback for