Run multi-user testing by using the Performance SDK
This article explains how to run multi-user testing by using Microsoft Visual Studio, the Performance software development kit (SDK), and the Task recorder test scripts.
Important
Visual Studio 2019 is the last version of Visual Studio that includes web performance and load testing features and will be deprecated in the future. We suggest using Apache JMeter for performance testing. For more information, see JMeter.
JMeter is owned by Apache, and therefore isn't supported by Microsoft. However, the following series of blog posts provides some helpful tips for using JMeter with Dynamics 365 finance and operations apps.
- Part 1 - Dynamics 365 finance and operations apps performance testing with JMeter - Introduction
- Part 2 - Dynamics 365 finance and operations apps performance testing with JMeter - Execution
- Part 3 – Dynamics 365 finance and operations apps performance testing with JMeter - Result Analysis
- Part 4 – Dynamics 365 finance and operations apps performance testing with JMeter - Tips and Troubleshooting
Prerequisites
Before you complete the steps in this article, verify that the following prerequisites are met:
- You have Visual Studio Enterprise edition in a development environment. Enterprise edition is required to create load tests. If you're deploying your development box as a cloud-hosted environment through Microsoft Dynamics Lifecycle Services (LCS), be sure to select the appropriate Visual Studio version to deploy.
- The Visual Studio web performance and load testing tools are installed as described in Install the load testing component.
- You have a tier-2 or higher sandbox environment that has the same release (application version and platform update) as your development environment.
- You've configured your development environment by following the steps in Single-user testing with Task recorder and the Performance SDK.
- C# performance testing classes have been generated for your end-to-end (E2E) scenarios, and you can run a single-user test by following the steps in Single-user testing with Task recorder and the Performance SDK.
Configure a development environment for multi-user testing
The following configurations must be set up on the development machine that is used to locally host the testing controller and agent.
Note
For all Microsoft-managed sandboxes and sandboxes of the self-service type, Microsoft will generate the certificate for your environment and preconfigure it.
Create an environmental variable that is named TestRoot, and point it to the PerfSDK folder by running the following cmdlet in Windows PowerShell.
[ENVIRONMENT]::SETENVIRONMENTVARIABLE("TESTROOT", "K:\PERFSDK\PERFSDKLOCALDIRECTORY", "USER")To verify the variable, run the following command in Windows PowerShell.
[ENVIRONMENT]::GETENVIRONMENTVARIABLE("TESTROOT", "USER") | Write-HostIn LCS, open the Environment details page for your target sandbox environment.
On the Environment details page, the Maintain menu includes two new commands:
- Download RSAT certificate
- Regenerate RSAT certificate
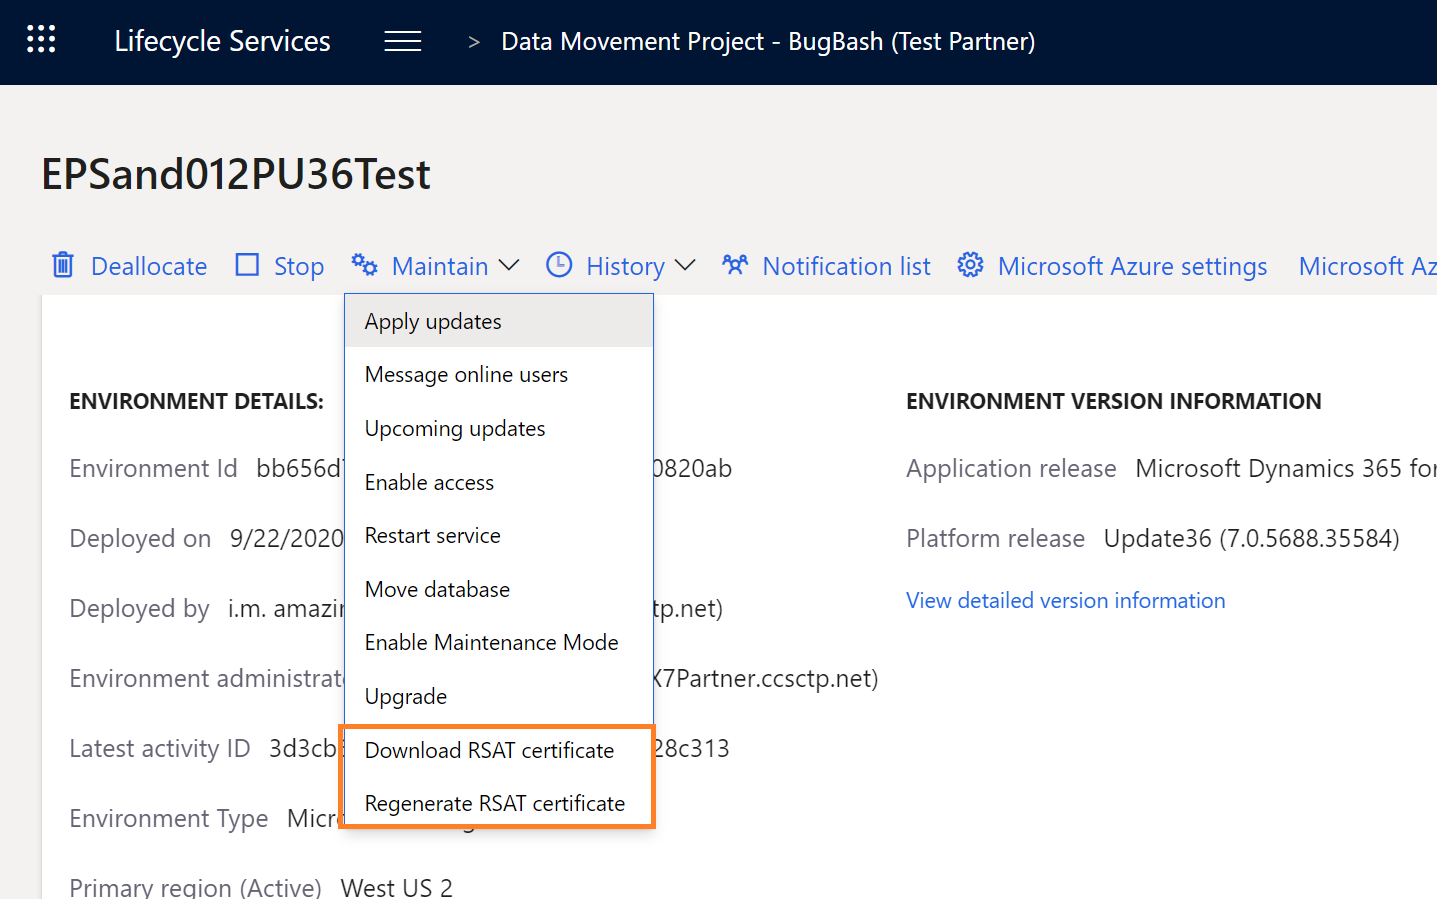
Select Download RSAT certificate to retrieve the certificate bundle as a zip file.
You're warned that a clear-text password will be shown on screen. Select Yes to continue.
Copy the clear-text password, because you will need it later.
After the zip file is downloaded, unzip it. Inside, you should find a certificate (.cer) file and a personal information exchange (.pfx) file.
Double-tap (or double-click) the certificate (.cer) file to open it, and then select Install. Install this certificate on your local machine, and then browse to the Personal store. Repeat this process for the local machine location, and browse specifically to the Trusted Root Certification Authorities store.
Double-tap (or double-click) the personal information exchange (.pfx) file to open it, and then select Install. Install this certificate on your local machine, enter the password that you copied in step 5, and then browse to the Personal store. Repeat this process for the local machine location, enter the password that you copied in step 5, and browse specifically to the Trusted Root Certification Authorities store.
Double-tap (or double-click) the certificate file to open it. On the Details tab, scroll down until you find the Thumbprint section. Select Thumbprint, and copy the ID in the text box. Save this thumbprint to update the CloudEnvironment.config thumbprint for the Performance SDK.
Note
Microsoft will automatically rotate the certificate before it expires. At that time, you must download a new version of the certificate. For self-service environments, the certificate will be rotated every 60 days, during a downtime window that is closest to the expiry. Downtime windows include customer-initiated package deployment, and database movement operations that target the environment.
Prepare the PerfSDKSample solution for multi-user testing
Follow these steps to prepare the sample solution for performance testing. You can find the sample solution in the Performance SDK folder in your development environment. By default, the folder is at K:\PerfSDK\PerfSDKLocalDirectory.
Run the following cmdlets with elevated permissions to verify that the certificate that you installed earlier is correctly installed, and that the thumbprint that you saved earlier is in the Personal store on the local machine.
cd Cert:\LocalMachine\My
Get-ChildItem | Where-Object { $_.Subject -like "CN=127.0.0.1" }
The following illustration shows a sample result. Make sure that the thumbprint that you saved earlier is in the list.

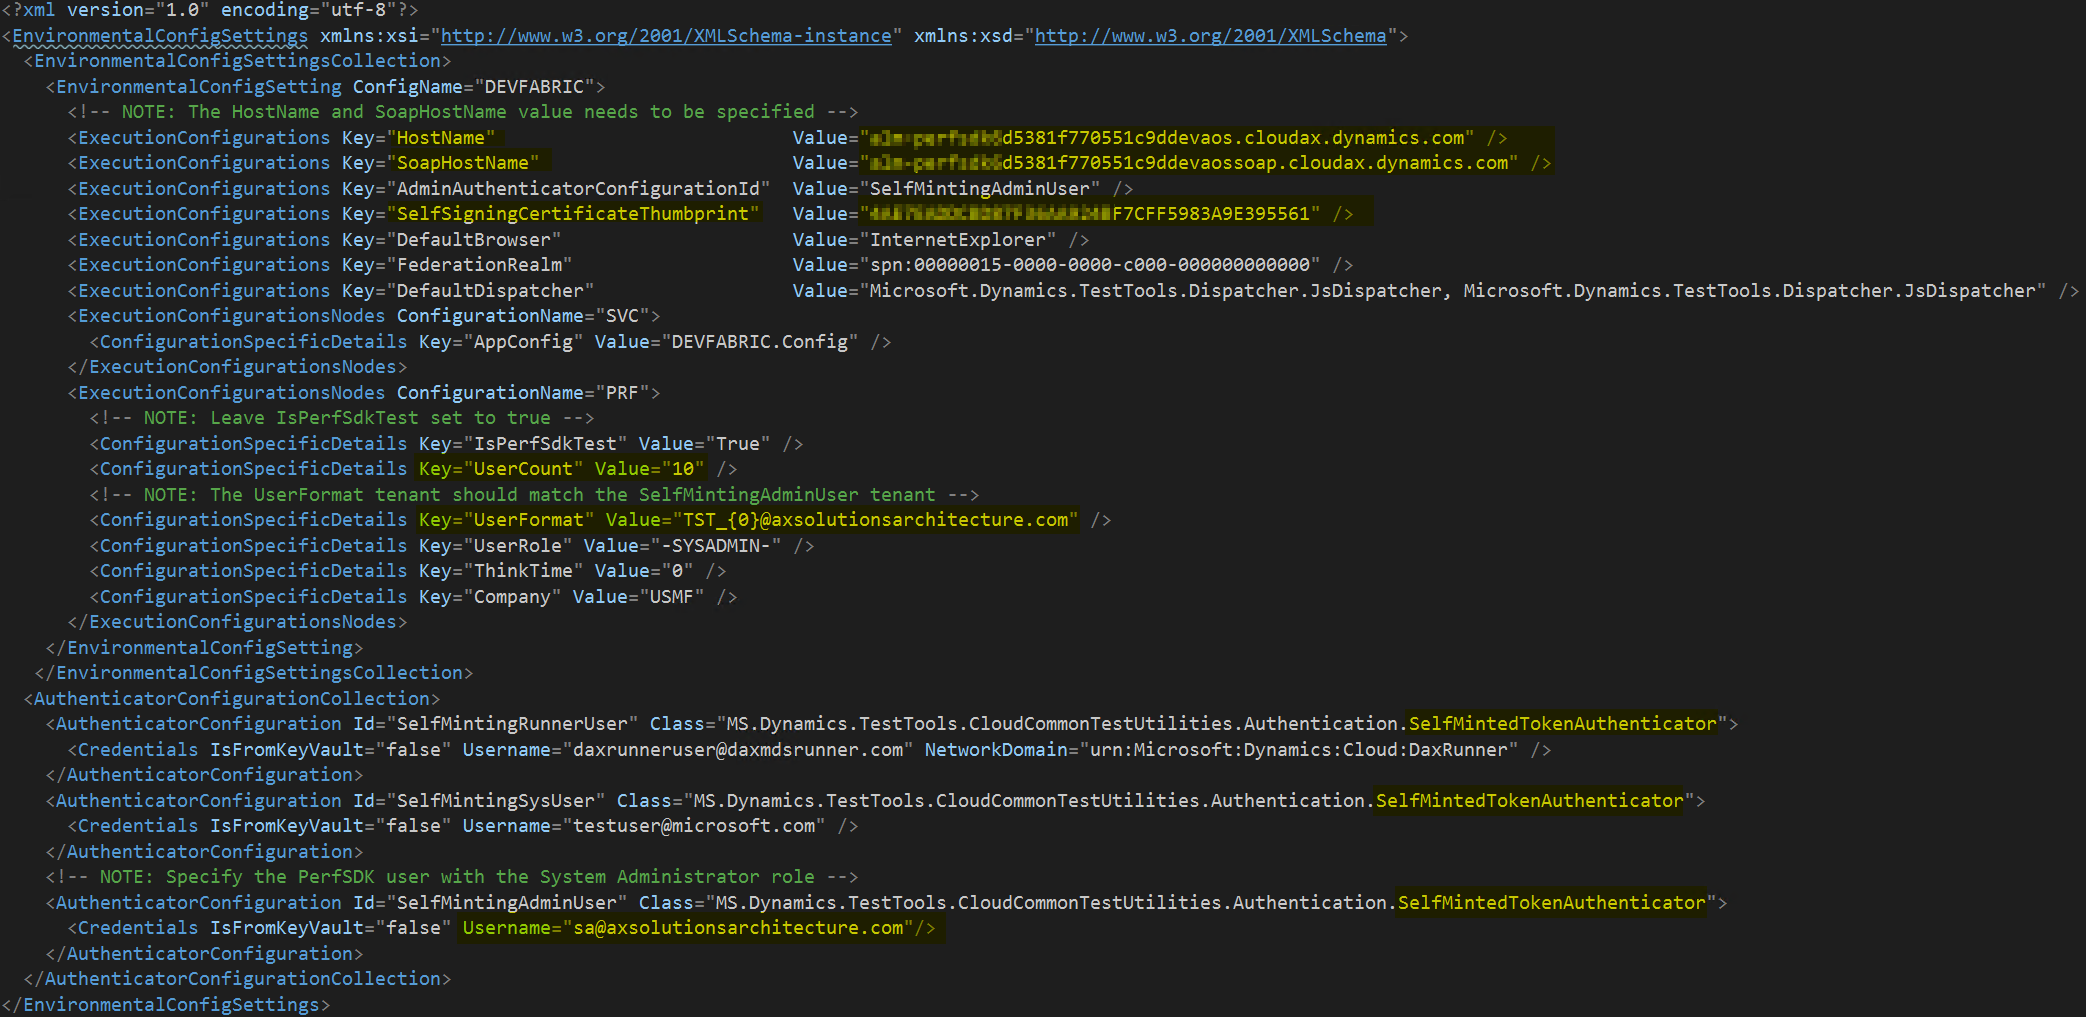
Update the CloudEnvironment.config configuration file in the Performance SDK folder to describe the targeted environment. As part of this update, follow these steps:
- Verify that the settings for HostName and SOAPHostName match your tier-2 or higher sandbox environment.
- Add the thumbprint that you saved earlier as the value for SelfSigningCertificateThumbprint. If the entry is missing from your configuration file, you can add it as shown in the illustration that follows.
- Update the setting of UserCount so that it matches the number of test users in your case.
- Update the setting of UserFormat so that it matches your naming convention for test users.
- In each AuthenticatorConfiguration element under the AuthenticatorConfigurationCollection element, replace MS.Dynamics.TestTools.CloudCommonTestUtilities.Authentication.SelfMintedTokenAadAuthenticator with MS.Dynamics.TestTools.CloudCommonTestUtilities.Authentication.SelfMintedTokenAuthenticator.
- Comment out the AzureActiveDirectoryConfiguration and KeyVaultConfigurations elements.
Note
If your finance and operations apps were deployed in 21Vianet, be sure to specify
NetworkDomain="https://sts.chinacloudapi.cn/"for SelfMintingSysUser and SelfMintingAdminUser.The result should resemble the following example.
Rename the vsonline.testsettings file local.testsettings.
Open the local.testsettings file in Visual Studio, and modify it by following these steps:
In the Test Settings dialog box, on the General tab, in the Test run Location field group, select the Run tests using local computer or a test controller option.
On the Deployment tab, select the Enable deployment checkbox, and then use the Add Directory button to add the bin\debug folder to the Additional files and directories to deploy field.

On the Hosts tab, in the Run tests in 32 bits or 64 bits process field, select Run test in 64 bits process on 64 bits machine.
Select Apply, and then close the Test Settings dialog box.
Open your project configuration, and modify it by setting Target Framework to .NET Framework 4.6.2.
Note
Whenever you use the Microsoft Dynamics 365 Add-in to generate a C# performance test from a task recording, it will reload the project in Visual Studio instead of reopening the whole solution. Be sure to reload the solution before you run any load tests, to ensure that the test settings file is visible.
Modify the performance test sources
Follow these steps for each generated performance test in your solution.
Add the following statement at the top in the using directives section.
using MS.Dynamics.TestTools.UIHelpers.Core;Modify the TestSetup method by replacing the whole body with the following lines.
private DispatchedClient Client;
private UserContext _userContext;
private TimerProvider timerProvider;
[TestInitialize]
public void TestSetup()
{
    if (this.TestContext != null)
    {
        timerProvider = new TimerProvider(this.TestContext);
    }
    SetupData();
    Client = new DispatchedClientHelper().GetClient();
    Client.ForceEditMode = false;
    Client.Company = WellKnownCompanyID.USMF.ToString();
    Client.Open();
}
Modify the TestCleanup method so that it resembles the following example.
public void TestCleanup()
{
    Client.Close();
    Client.Dispose();
    Client = Null;
}
Build your solution.
Add a test to the load test mix
Follow these steps to add a performance test to the test mix.
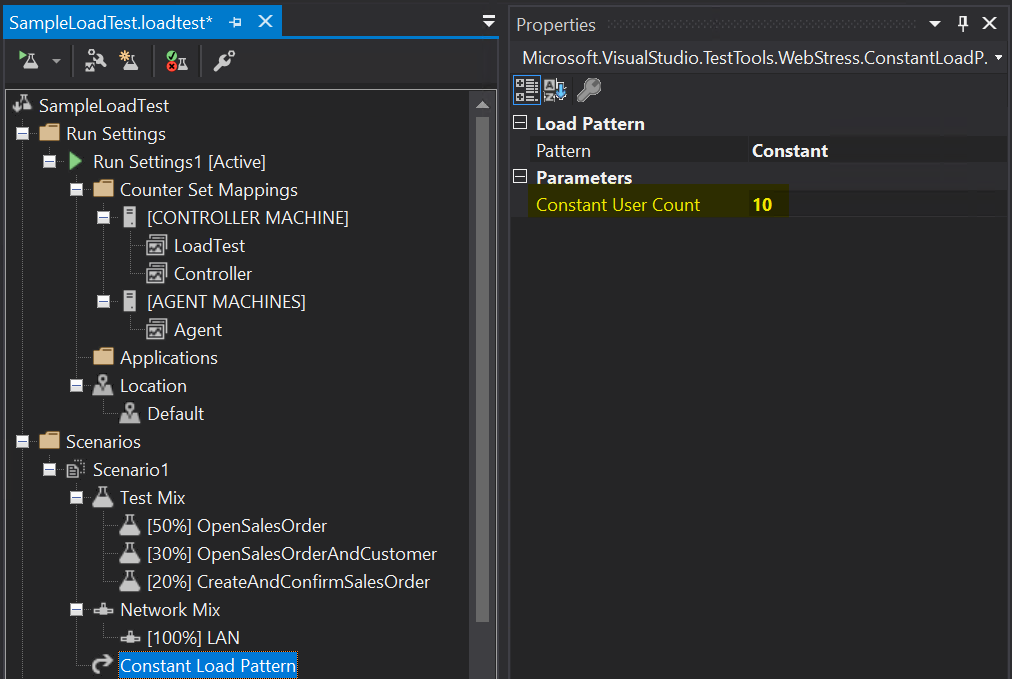
Open the SampleLoadTest.loadtest file, and find the Test Mix node.
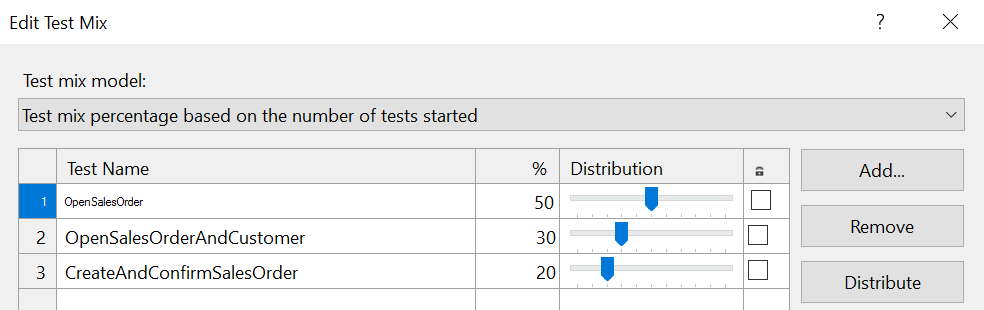
Select and hold (or right-click) the Test Mix node, and then select Edit Test Mix.
In the Edit Test Mix dialog box, select Add to add your tests to the mix.
In the Run Settings node, modify the properties, and update the Timing fields for Run Settings1. These fields include Warm-up Duration, Run Duration, and Cool-down Duration.
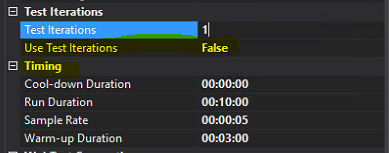
In the Scenarios node, be sure to update the Load Pattern property, and set the Constant User Count parameter to the total number of users that you want to use to run the test.
Create test users
Test users must be added to the target environment. The naming pattern must match the pattern that is specified in the CloudEnvironment.config configuration file. You can either manually create the users in a Microsoft Dynamics 365 environment or use the MS.Dynamics.Performance.CreateUsers.exe console application in the Performance SDK folder.
If you manually create the users, make sure that the System Administrator security role is assigned to each user.
We recommend that you use the console application to create the users, because it reads the configuration files and calls the appropriate service endpoints.
Run multi-user testing by using a local test controller
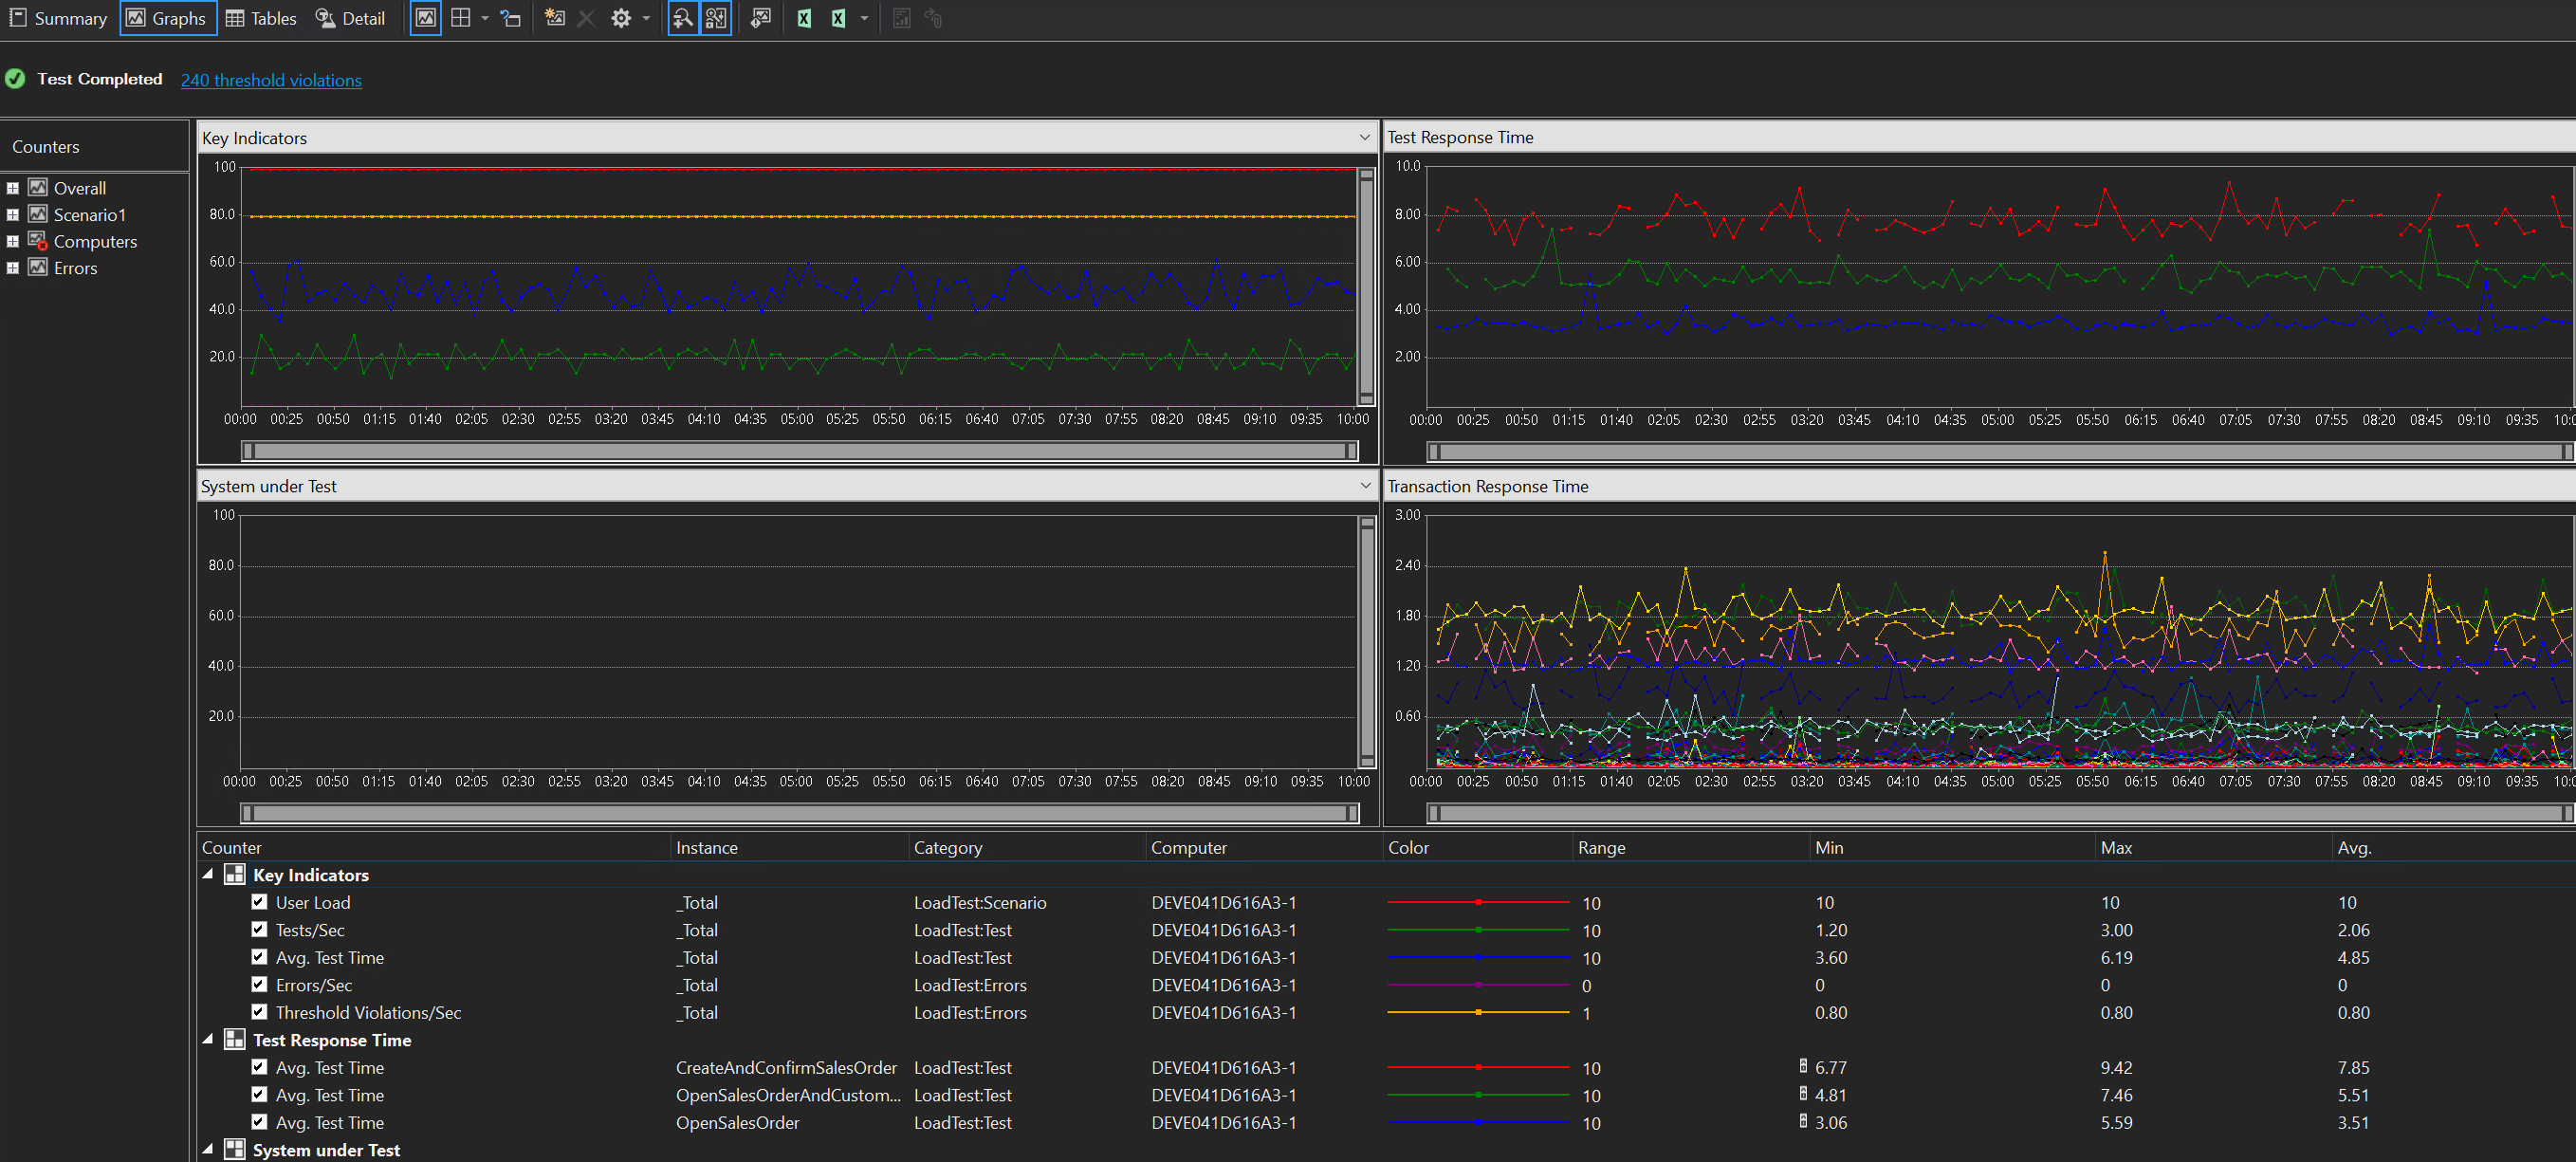
In the Visual Studio project, open the SampleLoadTest.loadtest file, and select Run Load Test.
Review the test output.
Troubleshooting
For more information about single-user or multi-user testing that uses the Performance SDK, see Troubleshooting guide for single-user or multi-user testing with the Performance SDK.
Feedback
Coming soon: Throughout 2024 we will be phasing out GitHub Issues as the feedback mechanism for content and replacing it with a new feedback system. For more information see: https://aka.ms/ContentUserFeedback.
Submit and view feedback for