Regression Suite Automation Tool installation and configuration
This article contains information about how to install and configure the Regression suite automation tool (RSAT).
Prerequisites
Test environment (Prerequisite)
Your test environment must be running Platform update 15 or newer. The Regression suite automation tool must have access to your test environment via a web browser.
Excel
You need Microsoft Excel installed to edit test parameters.
Azure DevOps (Prerequisite)
You must have an Azure DevOps project to store and manage your test cases, test plans, and test case results. You need an Azure DevOps Test Manager or Test Plans license. For example, if you have a Visual Studio Enterprise subscription, you already have a license to Test Plans. For more information, see Pricing for Azure DevOps Services or Pricing for Azure DevOps Server.
Certificate-based or user-based authentication
RSAT is designed to be installed on any Windows 10 or later computer and connect remotely via a web browser to an environment.
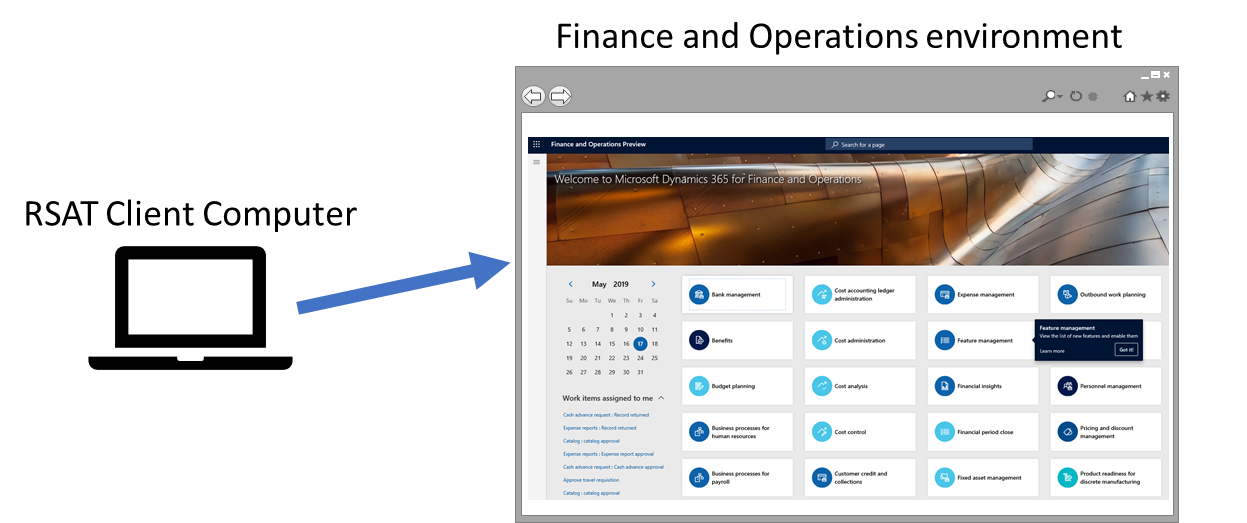
To enable secure authentication, RSAT must authenticate access with the Dynamics 365 finance and operations apps environment that's being tested. There are two options for authenticating access: certificate-based authentication and user-based authentication.
Certificate-based authentication requires that a certificate is installed on the RSAT client computer. The RSAT settings dialog box lets you automatically create and install the authentication certificate. You must also configure the virtual machine (VM) to trust the connection. Follow the instructions in the next sections to install and configure RSAT.
User-based authentication requires some setup steps. For more information, see User-based authentication.
Installation
Installer
Download the .msi file from the Regression Suite Automation Tool Download to your machine and double-click it to run the installer.
Note
If you're using Azure DevOps Server, download and install version 1.210.48249.4 or later.
Selenium and Browser Drivers
RSAT requires Selenium and web browser driver libraries. RSAT prompts you if needed libraries are missing and automatically installs them for you. Select Yes when you see the following (or similar) messages.
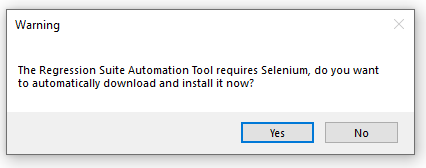
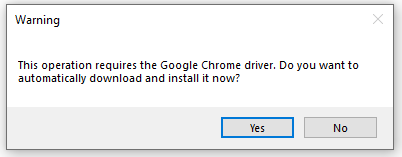
RSAT uses Selenium 3.13.1. The web driver library and browser-specific drivers are downloaded to C:\Program Files (x86)\Regression Suite Automation Tool\Common\External\Selenium.
Configuration
Open RSAT from your desktop.
Select the Settings tab on the upper left to configure RSAT.
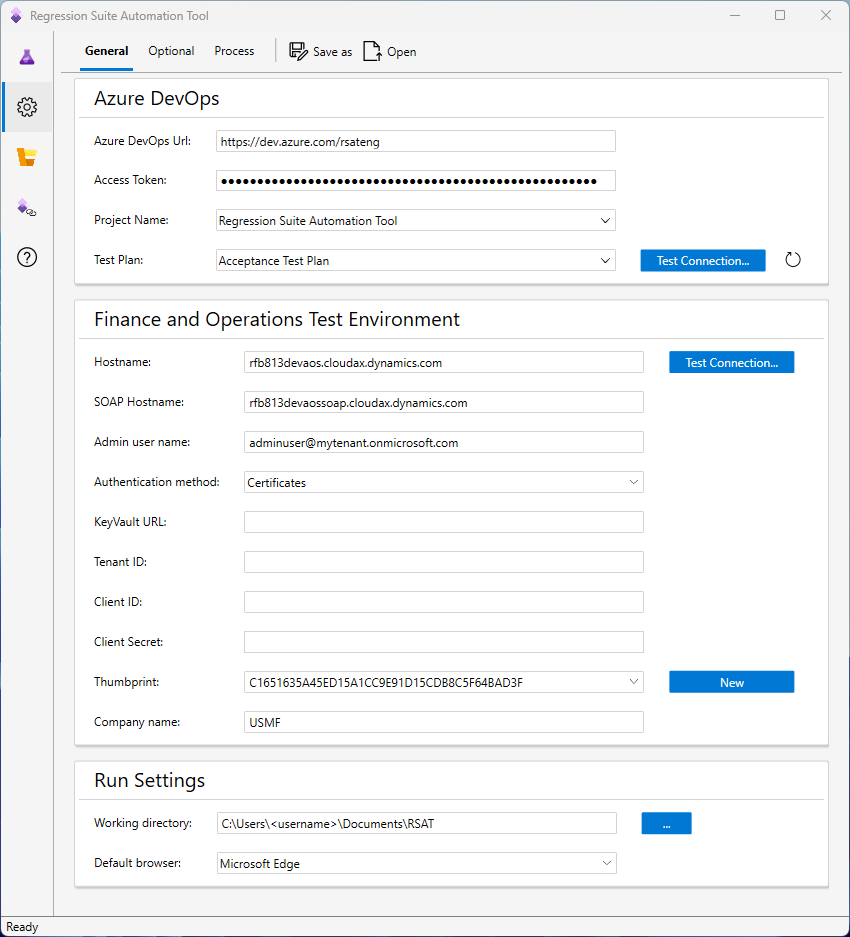
General settings
These settings are required.
Azure DevOps (General settings)
Configure your connection to the Azure DevOps project and test plan.
Azure DevOps URL – This is the URL of your Azure DevOps organization. For example,
https://yourAzureDevOpsUrlHere.visualStudio.com.Note
If you're using Azure DevOps Server, add /DefaultCollection to the end of your Azure DevOps URL.
Access Token – The access token that allows the tool to connect to Azure DevOps. You need to create a personal access token or use an existing one that you have saved. We recommend that you create this with scope selected as Full Access. For more information, see Authenticate access with personal access tokens.
Project Name – The name of your Azure DevOps project. RSAT automatically detects project names and test plans available based on the Azure DevOps URL specified. You can then select the Test Project and Test Plan.
Test Plan – The Azure DevOps test plan that contains your test cases. For more information, see Create test plans and test suites.
Select Test Connection to test your connection to Azure DevOps.
Test environment (General settings)
Configure your connection to the test environment.
Hostname – The hostname of the test environment, such as myhost.cloudax.dynamics.com. Don't include the https:// or http:// prefix.
SOAP Hostname – The SOAP hostname of the test environment.
- If your test environment is a user acceptance testing (UAT) or higher-tier sandbox environment that has no Remote Desktop access, the SOAP hostname is equal to the hostname.
- For demo and development environments (also known as one-box environments), add a soap suffix to the hostname. For example, if your hostname is
myhost.cloudax.dynamics.com, usemyhost.soap.cloudax.dynamics.comas the SOAP hostname. - If you don't know the SOAP hostname of your test environment, you can find it in the web.config file for the AOS server in Infrastructure.SoapServicesUrl.
Admin User Name – The email address of an admin user in the test environment. The admin user name must be the email address of a user who belongs to the System Administrator role on the finance and operations test environment that RSAT is connecting to. The user account (email address) must also belong to the same tenant as the test environment. For example, if your test environment's default tenant is contoso.com, the admin user must end with @constoso.com.
Authentication method – Select the method for authenticating access to the hostname. The options are Certificate and User-Based. Both options include steps to complete. The Microsoft-recommended method is user-based authentication, and there are plans to remove the option for certificate-based authentication in Dynamics 365 finance and operations apps.
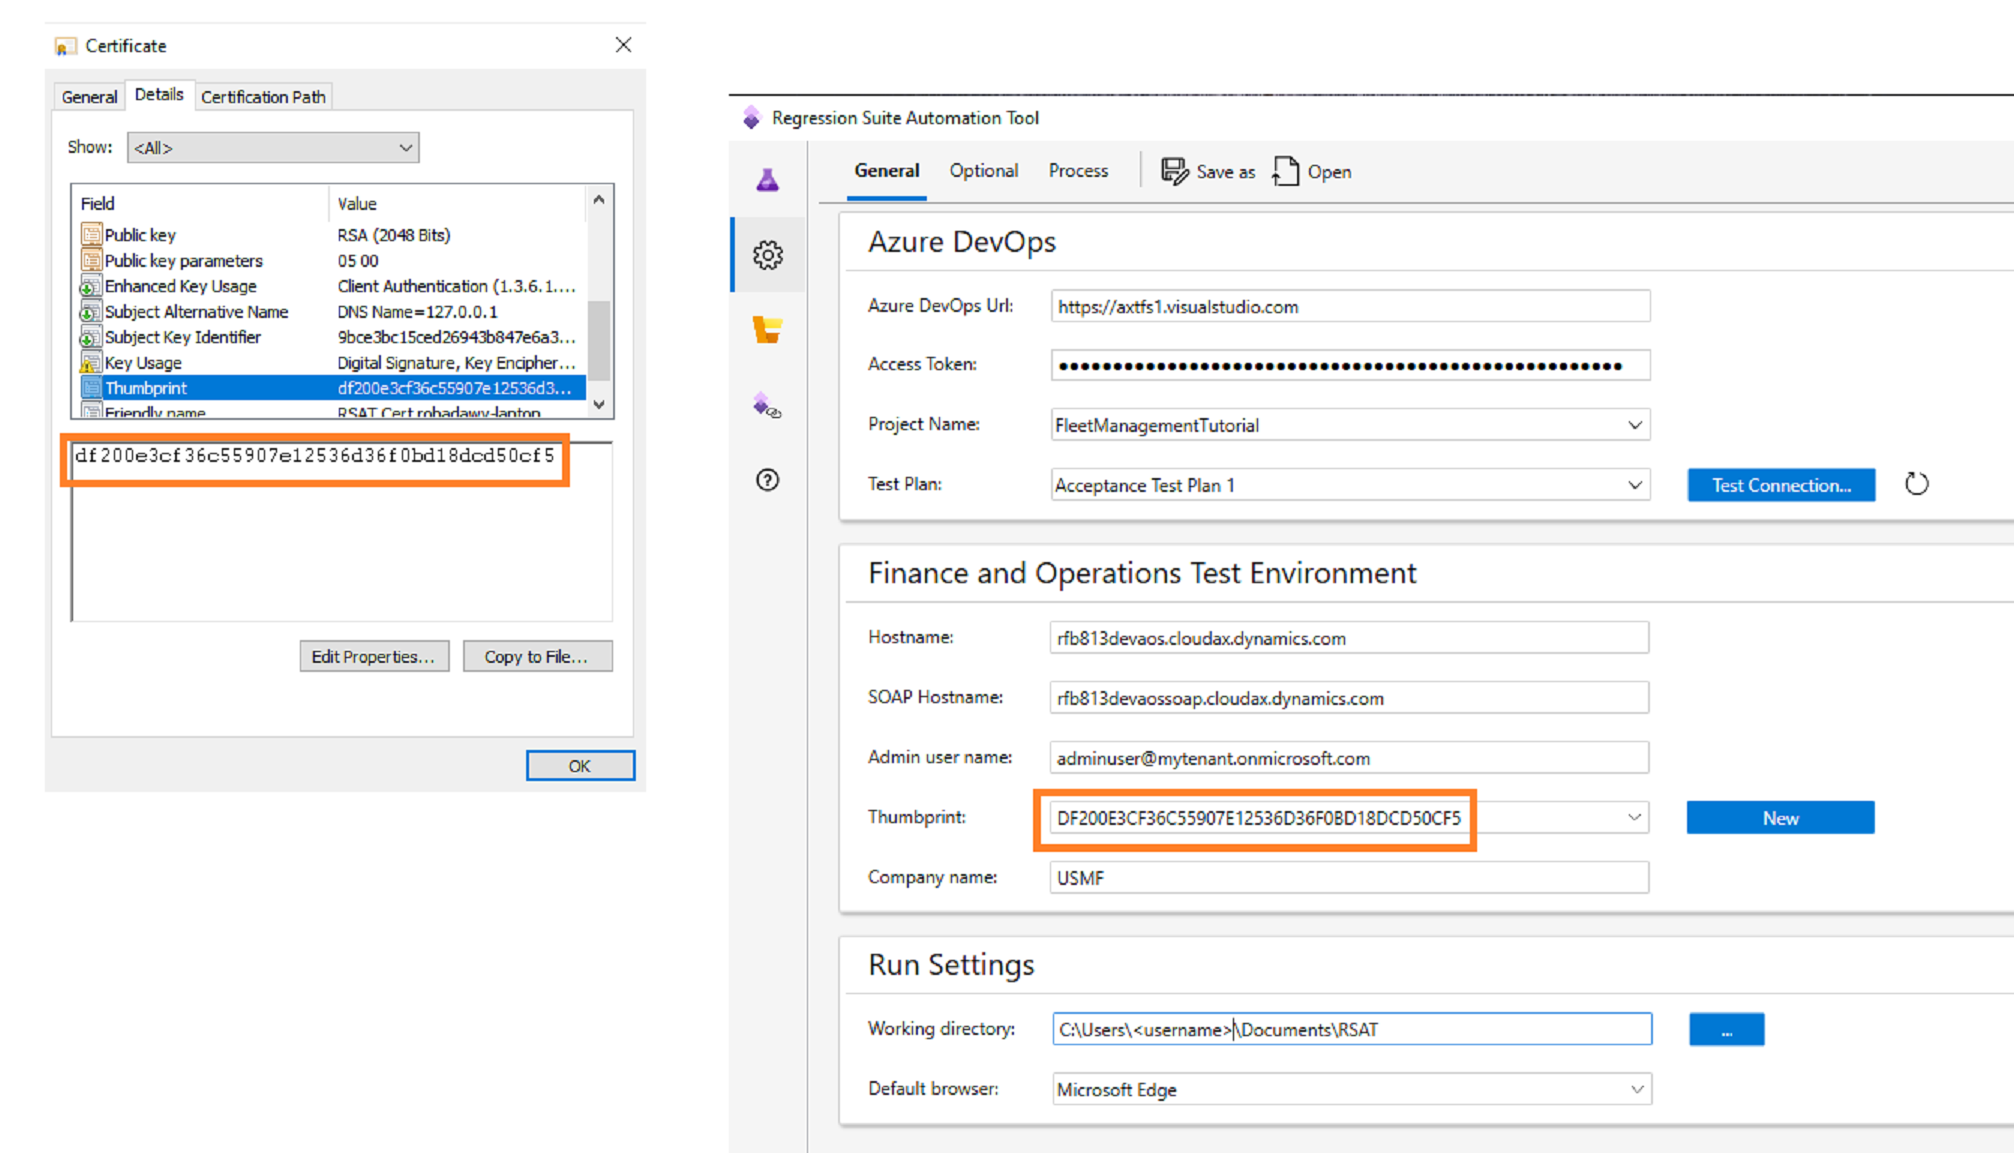
Thumbprint – The thumbprint of the authentication certificate that you're using. If you don't have Remote Desktop Protocol (RDP) access to your environment, follow the steps later in this article to download the certificate from Lifecycle Services and paste the thumbprint here. Otherwise, if you do have RDP access to the environment, follow these steps to generate a self-signed certificate.
Select New to create and install a new authentication certificate. When prompted, place the .cer file somewhere so you have it saved for your records.
When the process is completed, the new certification is installed in the local machine's trusted root store.
The thumbprint of the newly created certificate is automatically inserted on this form. Copy this thumbprint, you use it in the next section to configure the AOS to trust the connection.
KeyVault URL, Tenant ID, Client ID, Client Secret – These fields are used when you configure user-based authentication. For information about how to set up user-based authentication, see User-based authentication.
Company name – Specify a company name to use as your default company during creation of Excel parameters files. It can be changed later by editing an Excel file.
Run setting
Configure your local settings.
- Working directory - Folder location for storing test automation files, including Excel test data files. For example: C:\Temp\RegressionTool.
- Default browser - Select the browser to use for test execution. RSAT supports (the new) Microsoft Edge, Microsoft Internet Explorer, and Google Chrome. We recommend Microsoft Edge, which you can download from Introducing the new Microsoft Edge.
Select Ok to apply your settings and close the dialog box. Select Cancel to cancel your changes and close the dialog. The Save As and Open buttons allow you to save your settings for reuse later. Select Save As to save your current settings into a configuration file on your computer. Select Open to restore your settings from a configuration file.
Optional settings
Select the Optional tab to configure optional settings.
Test Run Prefix – RSAT reports test run results to Azure DevOps. Test runs are named using the following convention: <Run ID> <Prefix> <Test Suite>. Use this setting to set the <Prefix>.
Test Run Timeout – The time-out (in minutes) of a test run. All active windows are closed and pending test cases fail when this time-out is reached.
Test Action Timeout – The time-out (in minutes) of individual test steps. When a test step times out, the test case fails.
Pause between steps – The number of seconds to pause between test steps during automated execution of a test case. The default value is 0 (zero). Set this value to force a pause during test execution, for auditing or investigative purposes. You can also specify a pause for an individual test case by changing the Pause between steps (Seconds) parameter on the General tab of the Excel parameter file for the test case.
Fail test on first validation error – By default, if a test case has multiple validation steps, and there's a validation failure, the test case stops running when the first failure occurs. The test case is then marked as failed. If you want test cases to continue to run until all validations are completed, clear this option. The test case can then evaluate all validations.
Fail test on Infolog error - Check this option to force test cases to fail when an error is encountered in the finance and operations Infolog during test case execution.
Abort test suite execution on failure – By default, a test suite run continues even if one of the test cases fails. If you check this setting, the test run is aborted if a test case fails. All the remaining test cases have a status of Not Executed.
Enable local file validation rules - Check this setting to validate whether your test cases are ready for execution. See Validate readiness of test automation files for more details.
Enable upload to Azure DevOps - To prevent accidental upload to Azure DevOps (therefore overriding project-wide recordings and automation files), you can uncheck this setting. This is especially useful when RSAT is deployed on a client machine for execution purposes only, and you want to prevent users from making permanent changes to the test cases.
Cloud provider – Select the provider of the cloud tenant of your test environment. Supported providers are Global (Public cloud) and China (Sovereign cloud).
Important
The Cloud provider setting is required, and the selected value must be China if your finance and operations apps were deployed in 21Vianet.
Configure the test environment to trust the connection
The following subsections are relevant only when you use certificate-based authentication. For user-based authentication, use the information in User-based authentication instead.
If your AOS allows for Remote Desktop connections
After creating the certificate, configure AOS to trust the test automation connection. On a multi-AOS environment, repeat the following steps for all AOS machines.
Open a Remote Desktop connection to the AOS machine.
Open IIS and find AOSService in the list of sites.
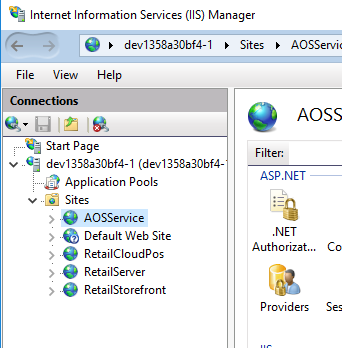
Right-click AOSService, then select Explore.
Open and find the file wif.config.

Update the wif.config file by adding a new authority entry, as shown in the following example. Use 127.0.0.1 for the authority name and paste your certificate thumbprint.
<issuerNameRegistry type="Microsoft.Dynamics.AX.Security.SharedUtility.AxIssuerNameRegistry, Microsoft.Dynamics.AX.Security.SharedUtility">
    <authority name="CN=127.0.0.1">
        <keys>
            <add thumbprint="ccbc124d0a119xxxxxxxxxxxxxxxxxxxx841e797" />
        </keys>
            <validIssuers>
                <add name="CN=127.0.0.1" />
            </validIssuers>
    </authority>
If you have no Remote Desktop access to the server
In cases where your Remote Desktop Protocol (RDP) access is removed, such as Microsoft-managed or self-service type sandboxes, Microsoft generates the certificate for your environment and has it preconfigured. Follow these steps to retrieve the RSAT certificate and use it using the LCS user interface. For automation, there's information on the Fetch an environment's RSAT certificate in a zip file API reference page.
Under Maintain on your environment details page in Lifecycle Services you see two new options.
- Download RSAT certificate
- Regenerate RSAT certificate
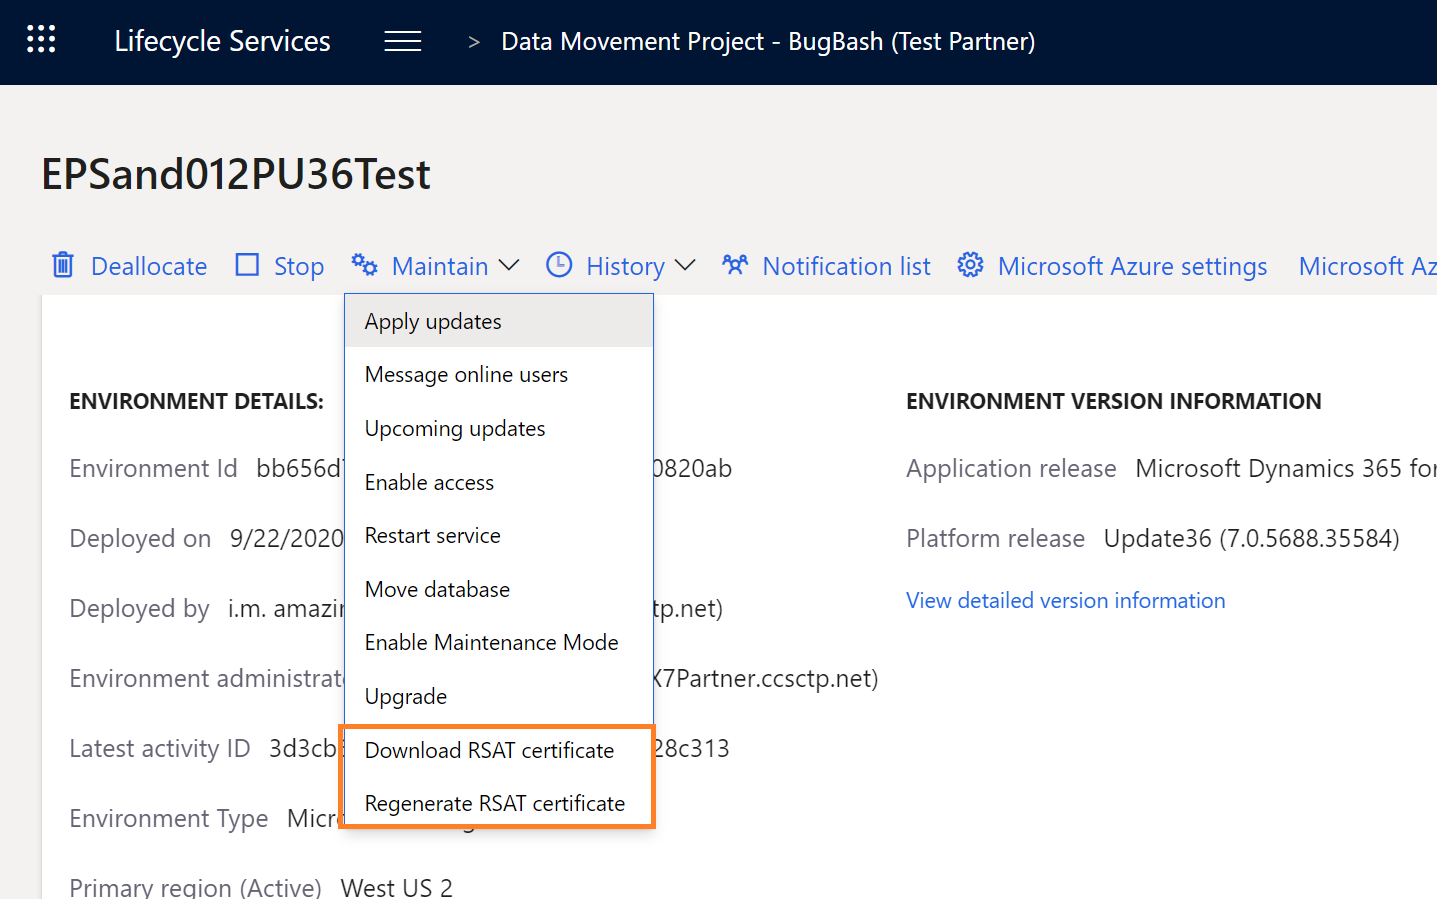
Use the Download button to retrieve the certificate bundle as a .zip file.
You receive a warning that a clear-text password is displayed on your screen. You need the password in subsequent steps. Select Yes to continue.
Copy the clear-text password for later use. You see the .zip file has been downloaded. Inside the .zip file is a certificate (.cer) and a personal information exchange (.pfx) file. Unzip the file.
Install the certificate in the local machine's trusted root store:
- Double-click the certificate (.cer) to open it, and then select Install Certificate.
- Select local machine, and then browse to the Trusted Root Certification Authorities store to install it in the trusted root store.
Install the pfx file in the local machine's personal store:
- Double-click the personal information exchange (.pfx) file to open it, and select Local Machine.
- Enter the password saved in step 2, and browse to the Personal store.
Double-click the certificate file to open it. Browse to the Details tab, and scroll down until you see the Thumbprint section. Select Thumbprint, and note the ID in the text box. Select or paste this thumbprint in RSAT settings.
You can now run your tests against the environment using this certificate. The certificate is autorotated by Microsoft before it expires, at which time you need to download a new version of this certificate starting from step 1 above. For self-service environments, this is rotated every 60 days during a downtime window that is closest to the expiry. These downtime windows include customer initiated package deployment, and database movement operations that target the environment.
Manual configuration of authentication certificates
Optionally, you can manually configure the RSAT authentication certificate.
If you aren't familiar with this process, get help from your system administrator. Make sure you have Windows Kits installed on your machine. If you don't have Windows Kits installed on your machine, you can download the Windows 10 SDK from Windows 10 SDK. You need these components for the steps described in this document.
- Windows SDK Signing Tools for Desktop Apps
- Windows SDK for UWP-Managed Apps.
Generate the certificate
You must generate the certificate file on the RSAT client computer. The certificate must be generated on the same computer that the test tool is running on. To generate the certificate file, follow these steps:
Create the C:\Temp folder if it does not already exist on your computer.
Open a command-line window as Administrator.
Go to the folder where you installed the Windows SDK. Your exact folder may be different, depending on where you installed the windows SDK. You can also use Windows Kits 8.1.
cd c:\Program Files (x86)\Windows Kits\10\bin\10.0.17763.0\x64Run the following command. When you're prompted to enter a private key password, enter None.
makecert.exe -n "CN=127.0.0.1" -ss My -sr LocalMachine -a sha256 -len 2048 -cy end -r -eku 1.3.6.1.5.5.7.3.1 c:\temp\authCert.cer
Install the certificate to the Trusted Root
To install the certificate, follow these steps:
Double-click authCert.cer to install the certificate.
Select Install Certificate.
Select Local Machine > Place all certificates in the following Store > Browse > Trusted Root Certification Authorities and select Next through each screen.
Leave the Password field blank.
In the Certificate dialog box, browse to Details and look for Thumbprint.

Copy and save the thumbprint. You need it to configure the AOS as described earlier in this article.
Feedback
Coming soon: Throughout 2024 we will be phasing out GitHub Issues as the feedback mechanism for content and replacing it with a new feedback system. For more information see: https://aka.ms/ContentUserFeedback.
Submit and view feedback for