Use SideFX Houdini to prepare 3D objects for use in Dynamics 365 Guides and mixed-reality components included in apps created with Power Apps
This tutorial provides step-by-step instructions that show you how to:
Optimize a 3D object by reducing the polygon count so that it matches performance targets for Microsoft Dynamics 365 Guides and mixed-reality components included in apps created with Power Apps.
Add the correct material to a 3D object.
Export an optimized 3D model as a GLB file that you can use in Dynamics 365 Guides and Power Apps
Create a template, so you can quickly optimize other 3D objects in the future.
Important
This document is created strictly for informative purposes to demonstrate how SideFX Houdini works with Dynamics 365 Guides and Power Apps. Your use of third-party applications is subject to terms between you and the third party. Microsoft Corporation is not affiliated with, is not a partner to, and does not endorse or sponsor SideFX or any of SideFX's products. There are other content-creation apps you can use to prepare your 3D objects.
What is Houdini?
Houdini is a procedural system that empowers artists to work freely, create multiple iterations, and rapidly share workflows with colleagues.
Import a 3D object into Houdini
Open Houdini 17.5.
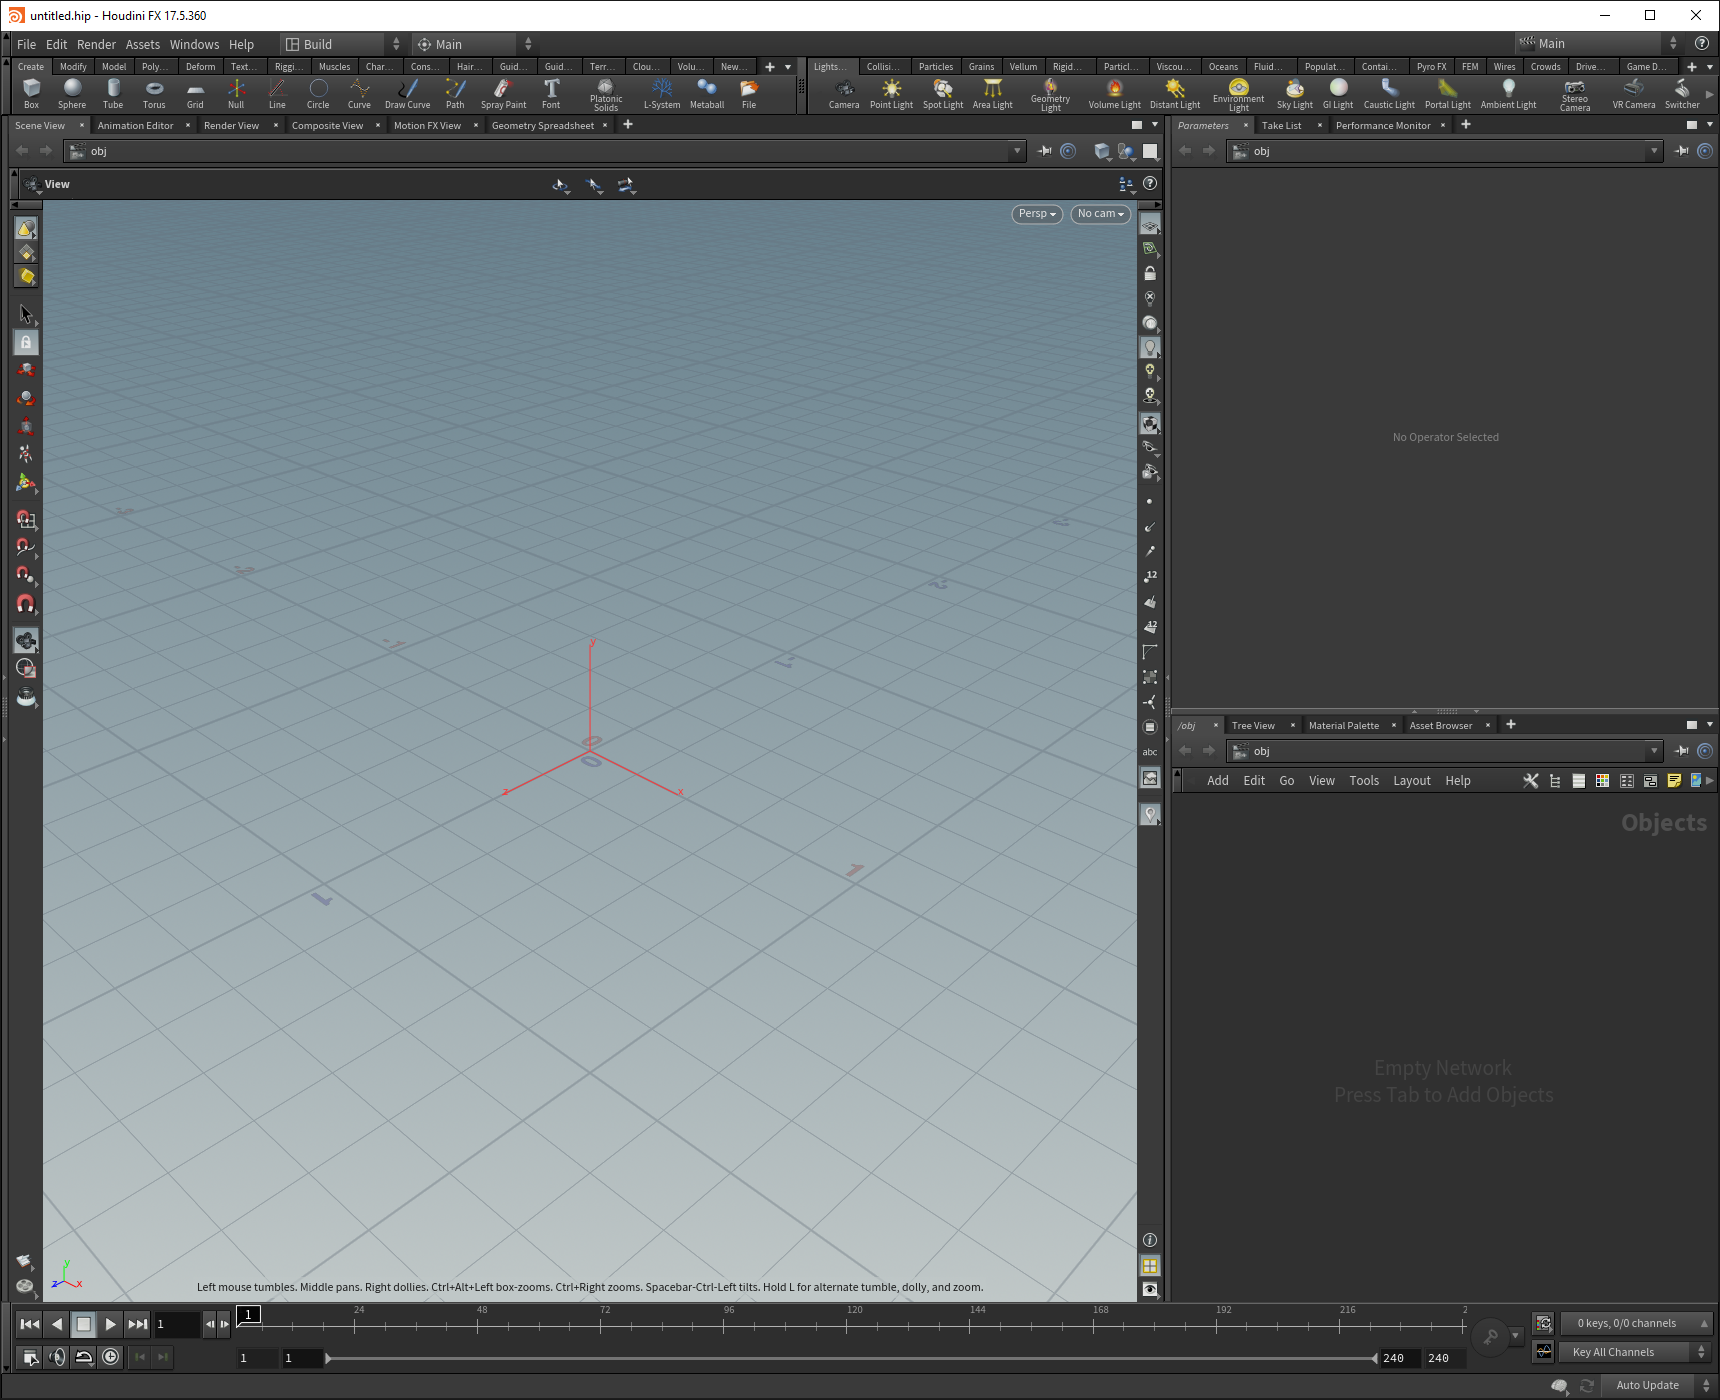
A new scene is automatically created.
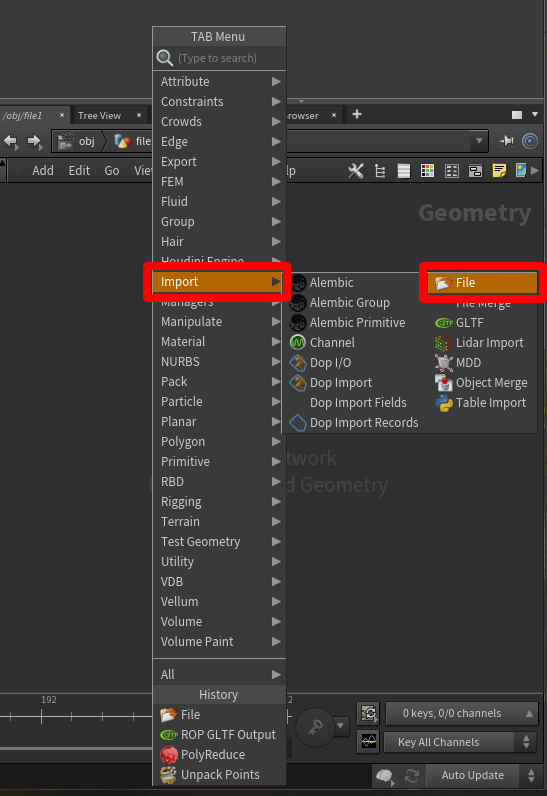
Right-click in the lower-right window pane to open the TAB Menu (or select the Tab key).
On the TAB Menu, select Import, and then select File to place a File node in the Geometry pane.
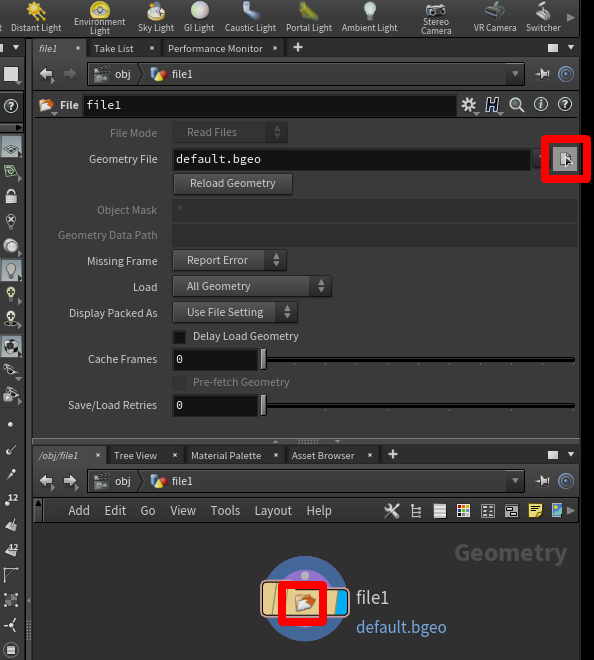
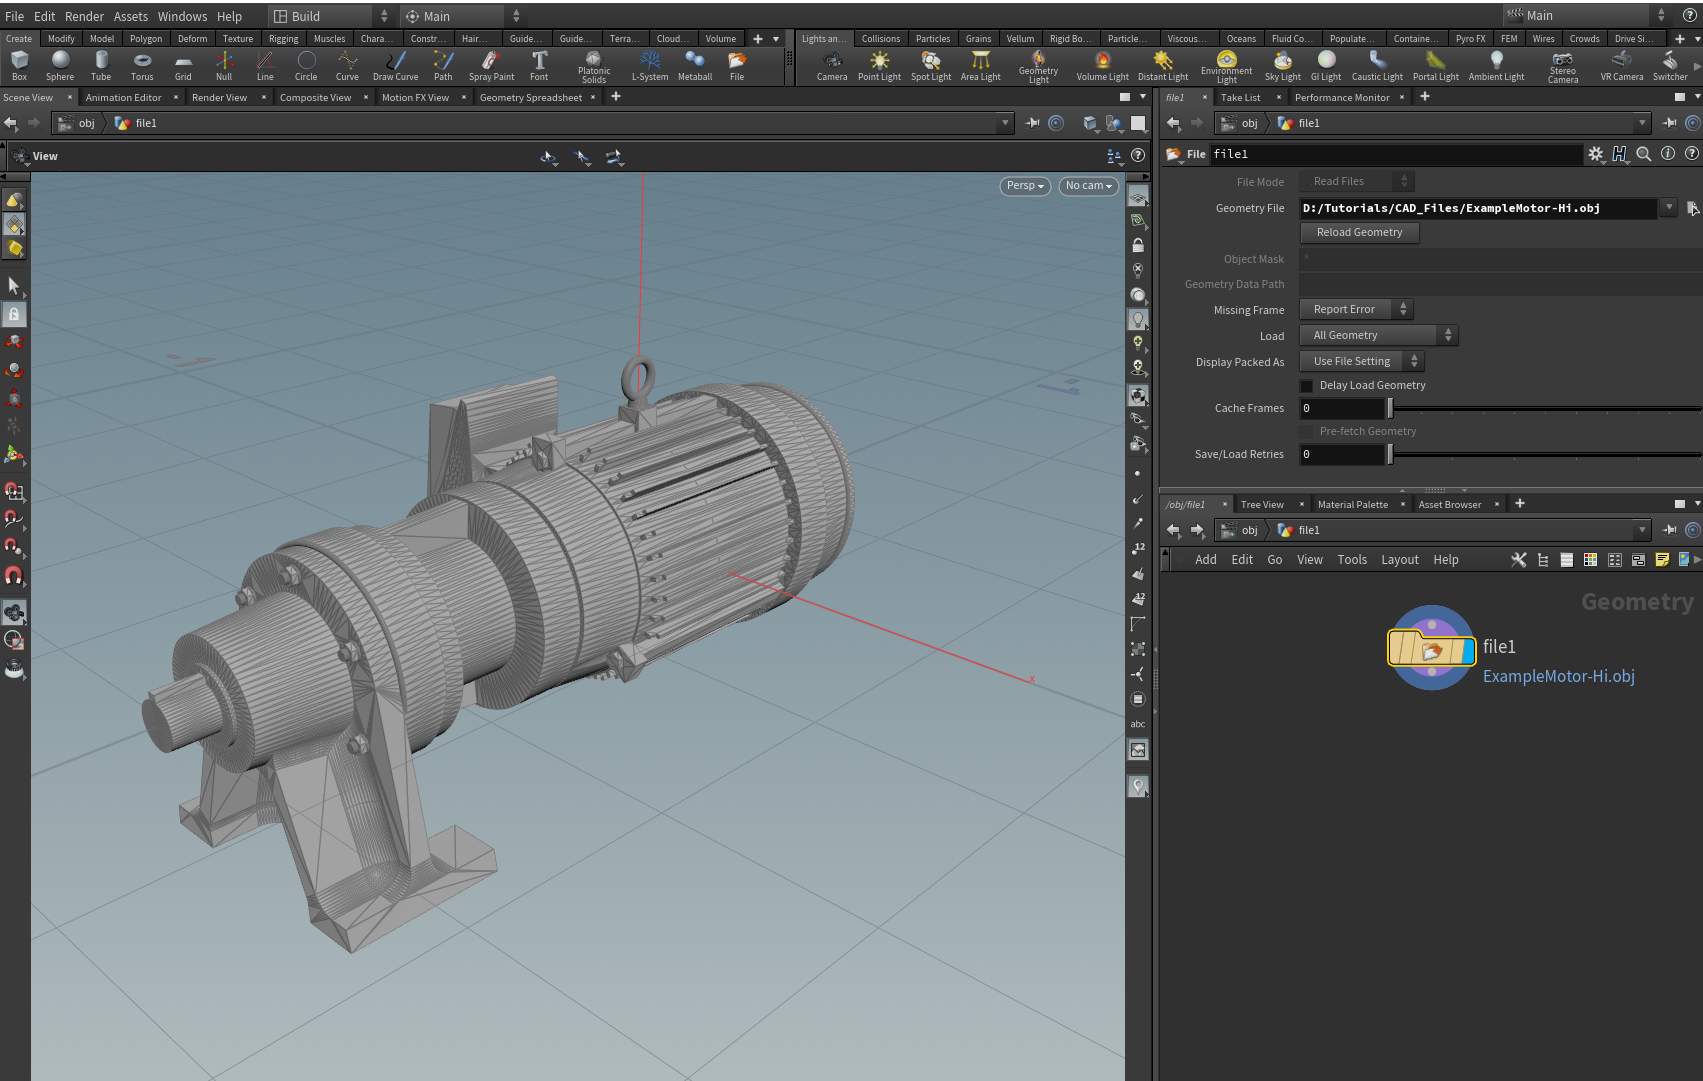
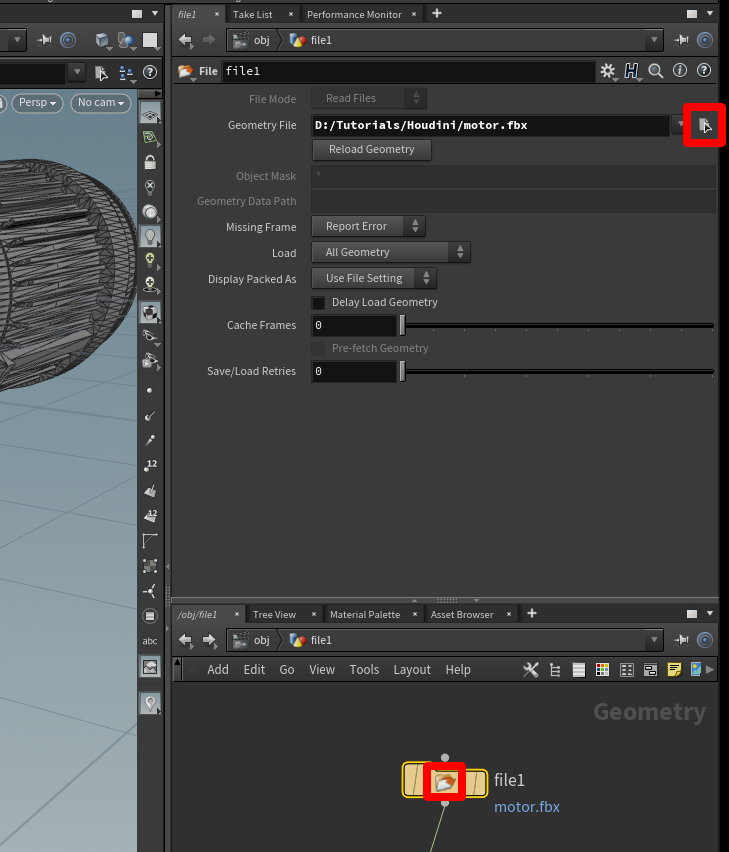
Double-click the file1 icon (or press I) to drill down to the file selection part of this node. Select the Open floating file chooser button, and then choose the file you want to import.
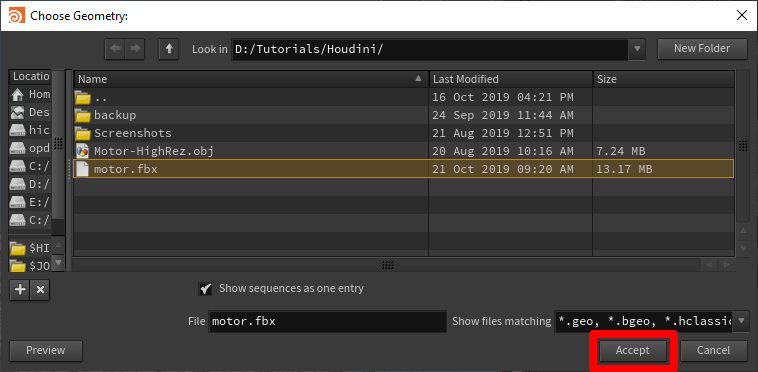
In the pop-up window, browse to the file you want to import, select it, and then select Accept.
The model appears in the viewport.
Decimate a 3D object
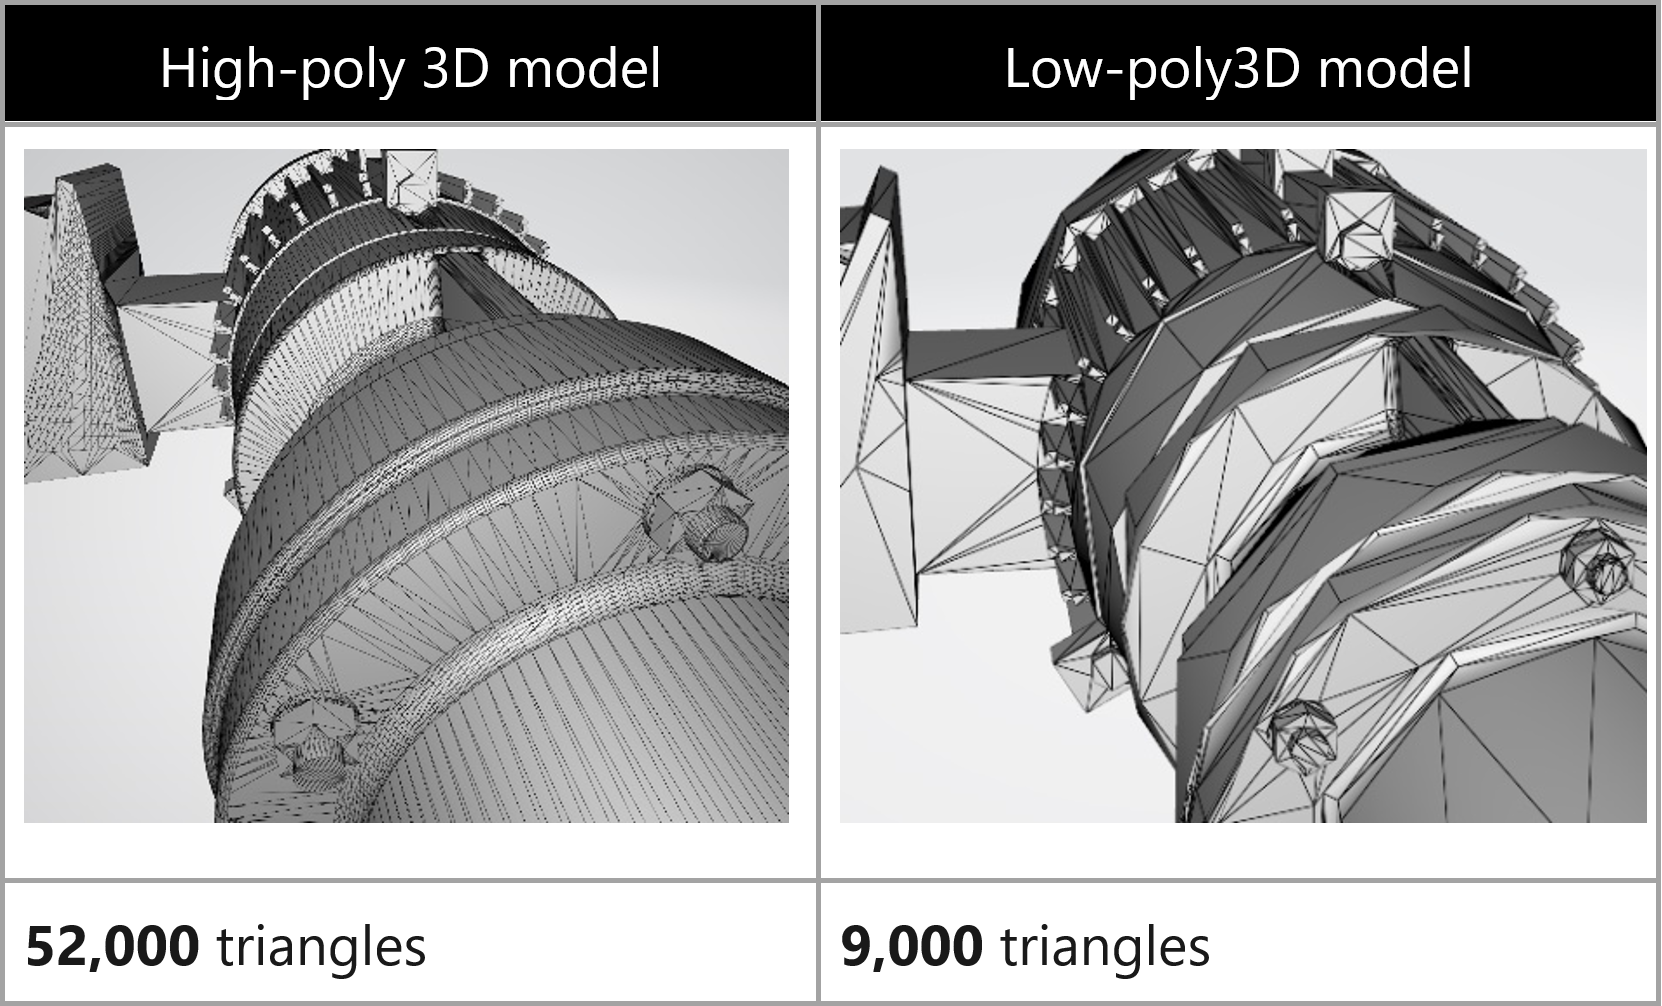
To reach application-specific goals, you might need to "decimate" your 3D objects. Decimation is the process of recomputing the surface polygons of the model to create a similar shape with fewer polygons. This reduces visual fidelity, but increases performance. The example images below show the difference between a high-quality model used for scenes of low complexity on Microsoft HoloLens, and a low-quality model used for scenes of high complexity.
To decimate a 3D object
In the Geometry pane on the lower right, press the Tab key to open the TAB Menu.
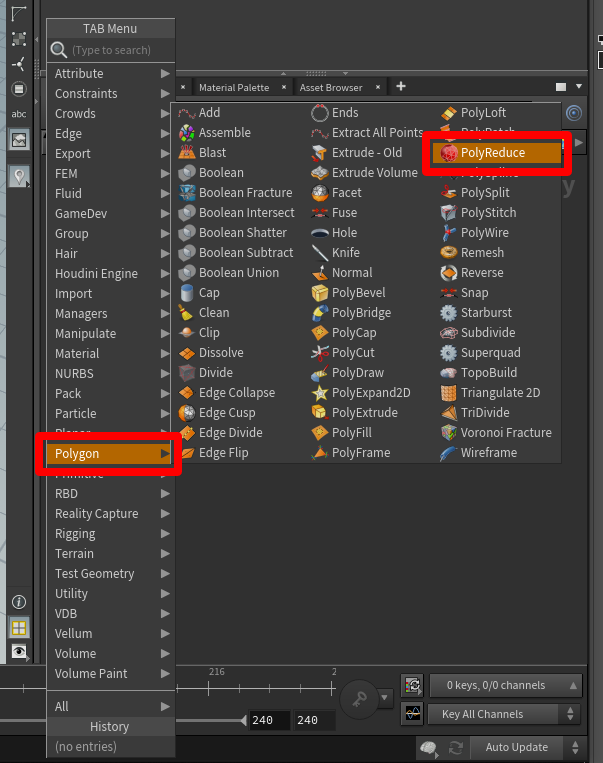
Select Polygon > PolyReduce, and then press Enter to select the PolyReduce node. Select or click in the area beneath the File node to place a PolyReduce node.
A new node named polyreduce1 appears in the Geometry pane near the imported geometry node.
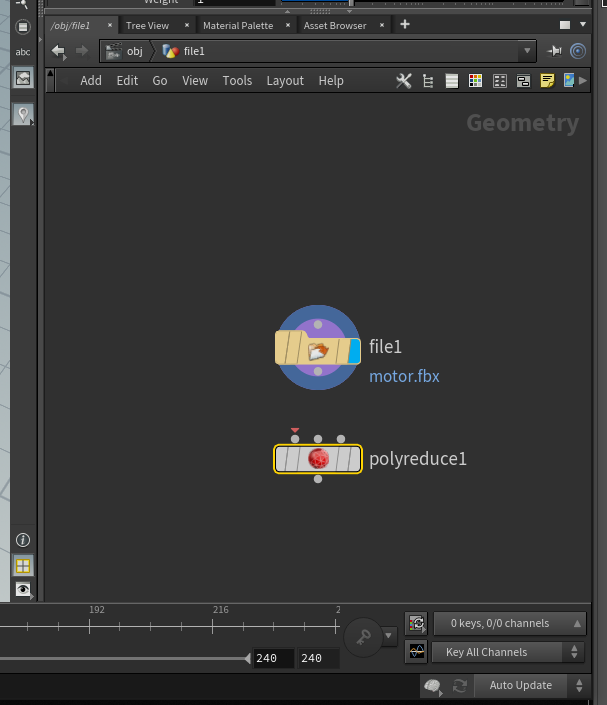
Select the bottom gray dot on the node of the imported geometry, and then drag a connection line to the leftmost top dot on the polyreduce1 node. A red arrow appears on the dot on the polyreduce1 node.
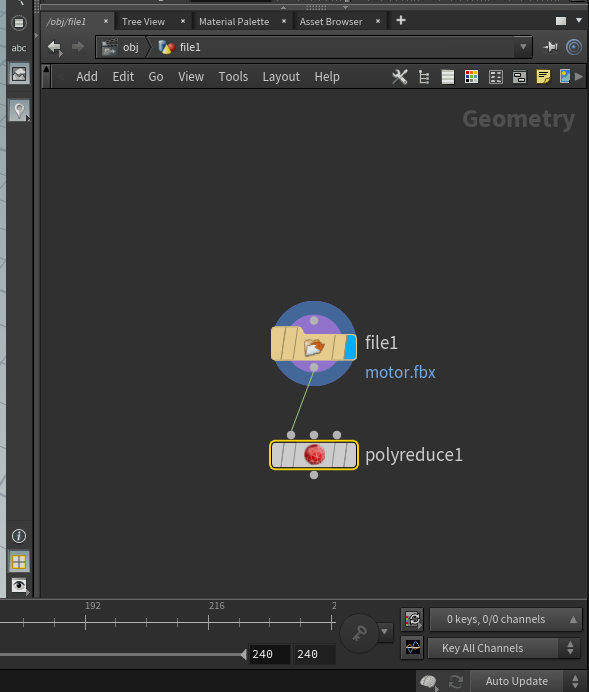
Select the center of the polyreduce1 node, and look at the options available in the tab above the Geometry pane.
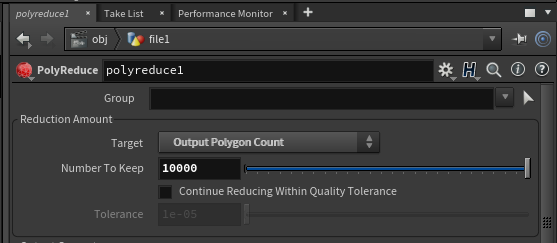
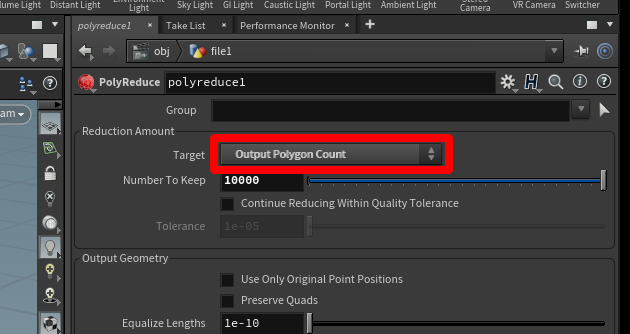
Next to Target, select Output Polygon Count. This enables you to specify a polygon count that meets the polygon targets you want.
To see the results, select the polyreduce1 node, and then select the Template (pink) and Display (blue) bars on the right side of the node.
The model changes to show much less detail.
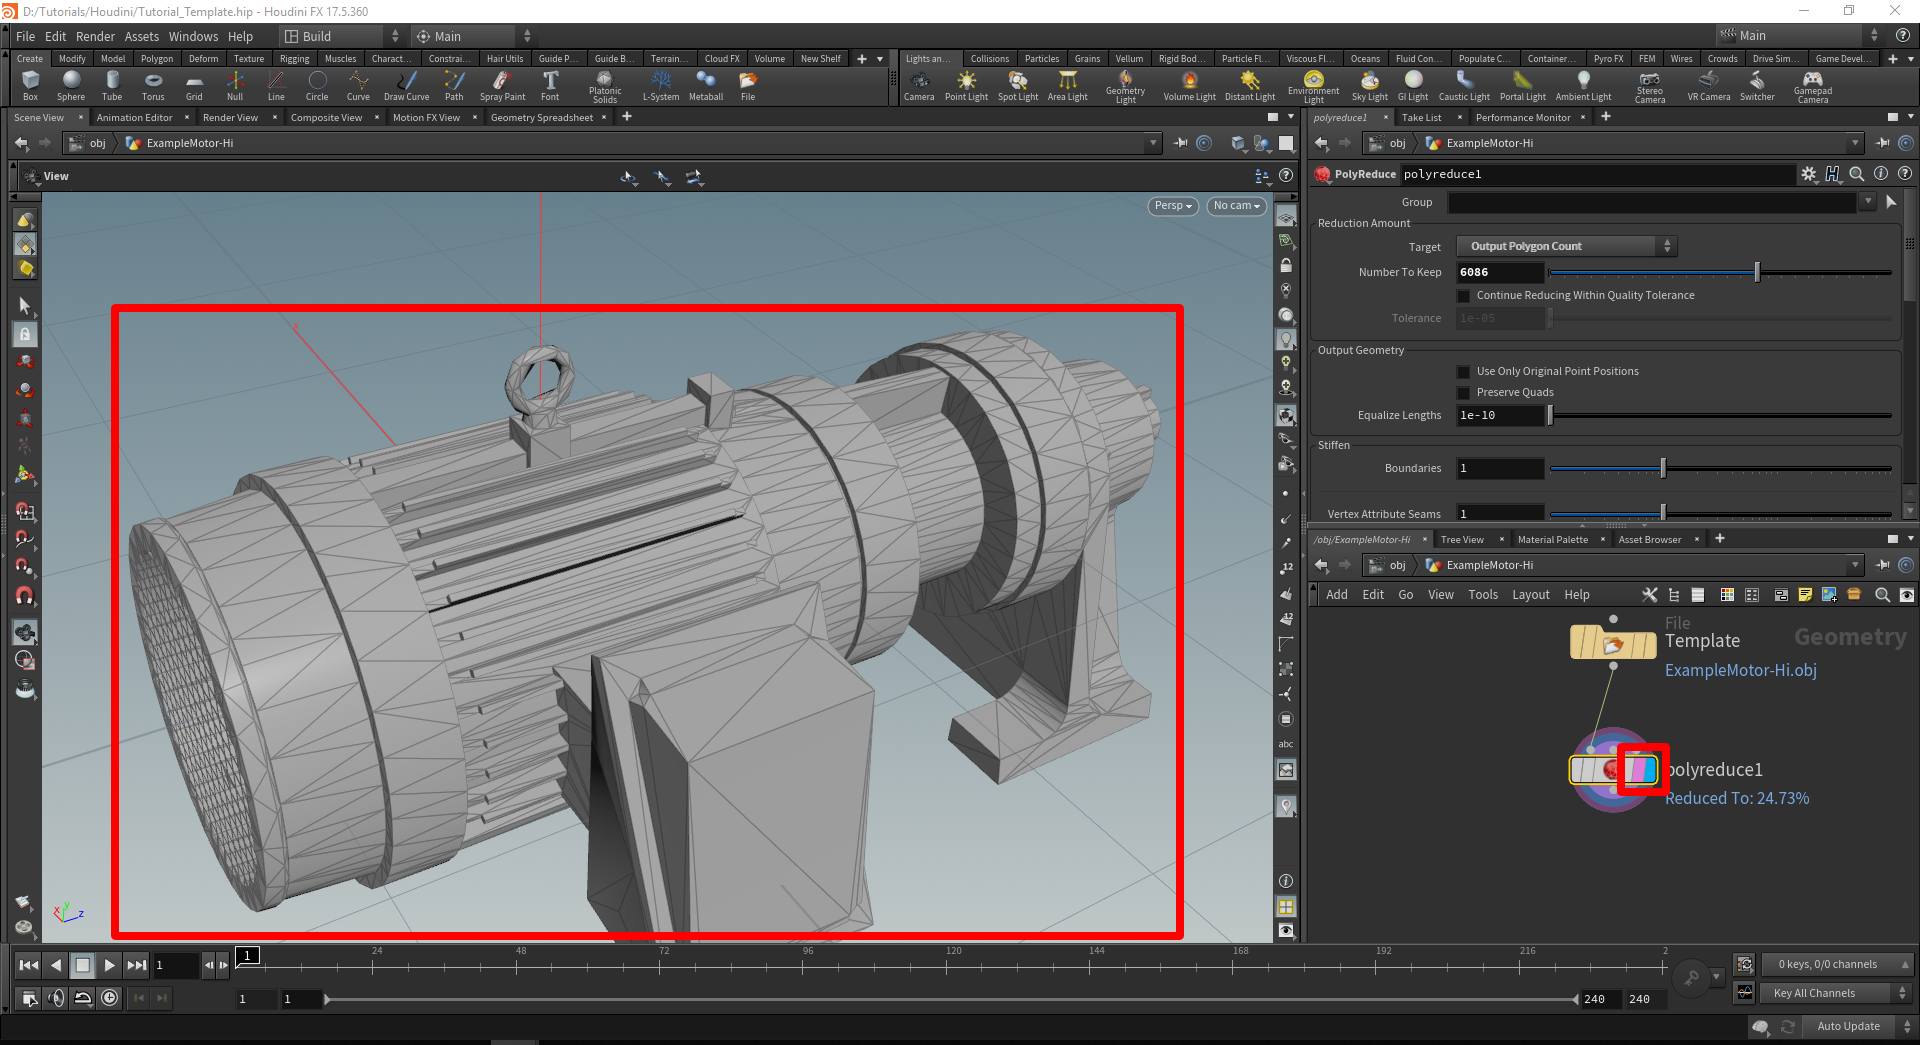
There is some room to experiment with the polygon counts for use on mixed-reality devices. You can use the Number To Keep slider to fine-tune the look of the model. Experiment with this slider to get the look you like with the polygon count you need.
Add a material with a principled shader
To give the model a more realistic appearance, you can add a shader to the model to define how shiny and smooth the model appears.
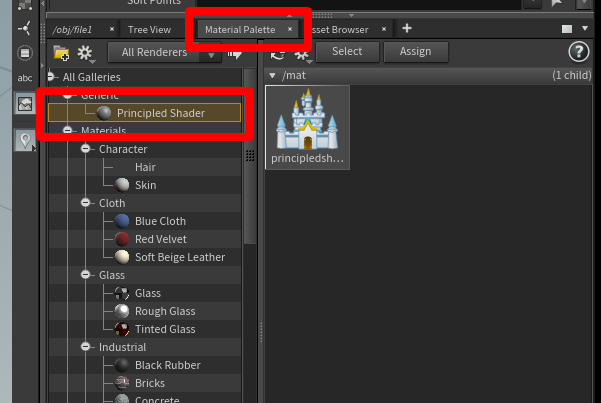
Open the Material Palette tab (in the same window pane as the node system), select Principled Shader, and then drag it to the open space in the pane to the right.
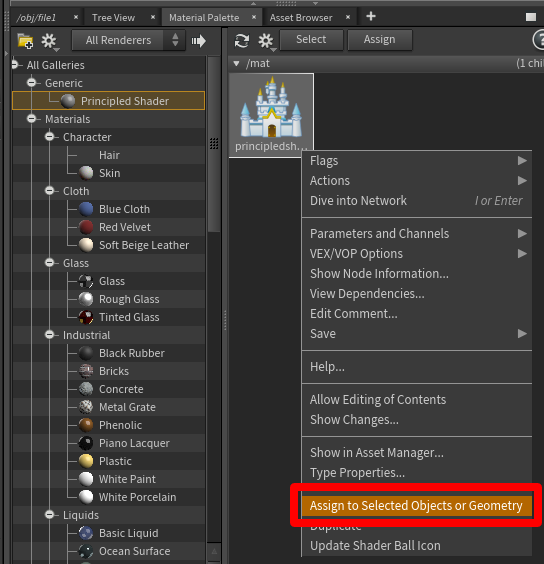
Right-click Principled Shader, and then select Assign to Selected Objects or Geometry.
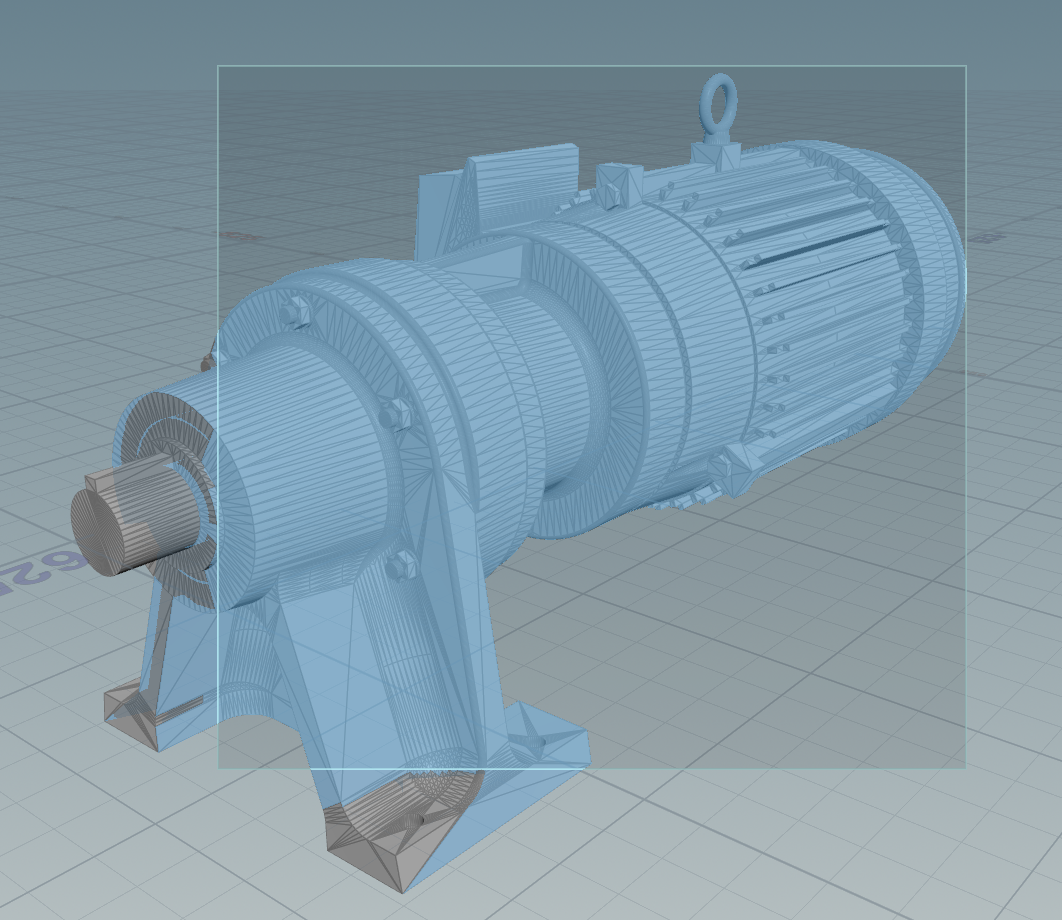
Highlight the entire model. To do this, select the window, and then select Assign.
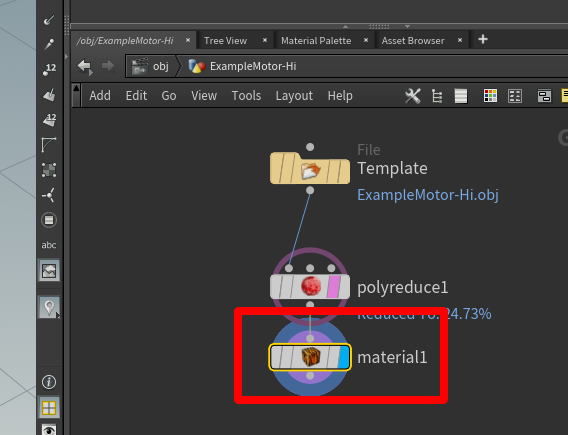
In the Geometry pane, you'll see that a material1 node has been created and linked below the polyreduce1 node.
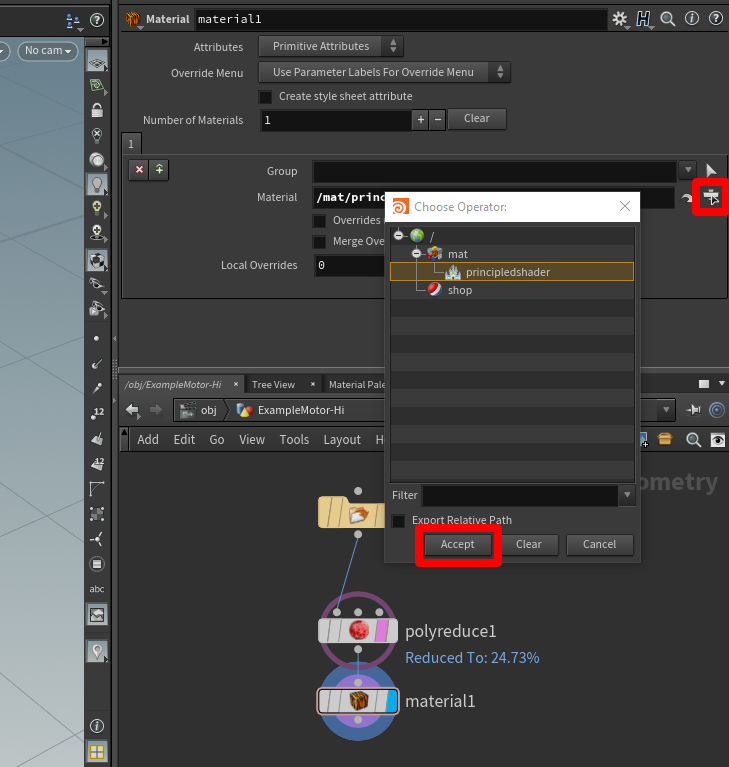
Select the open Open floating file chooser button in the upper pane, select principledshader, and then select Accept.
Adjust material properties
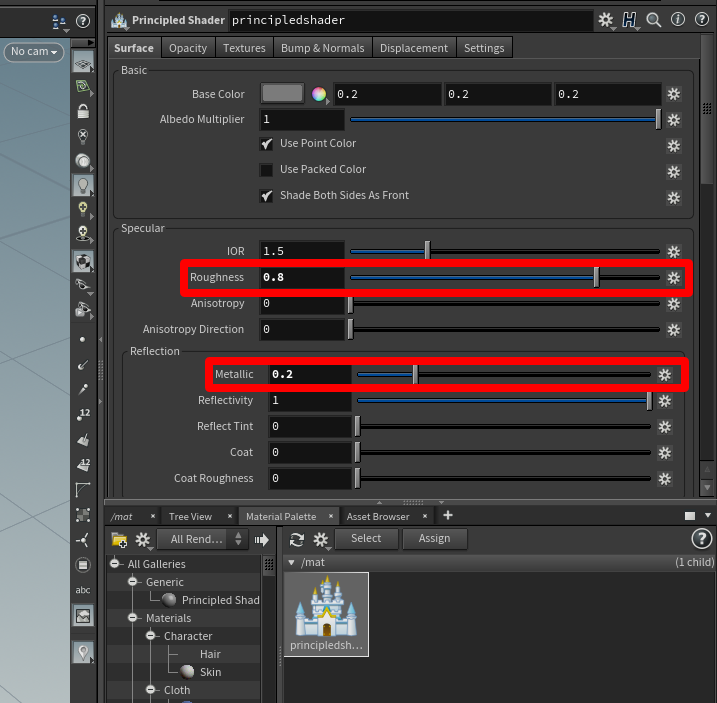
You can adjust visible properties like the color of the material in the window pane above the Material Palette when you have the Principled Shader highlighted. For example, start with Roughness at 0.8 and Metallic at 0.2 for CAD objects.
To change the color of the 3D object
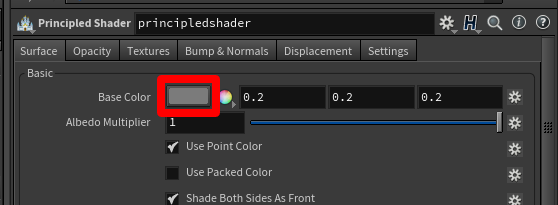
Select the color swatch button located to the right of Base Color.
In the Color Editor dialog box, pick a color. You can pick from previous colors, the mixer wheel, or from the sliders.
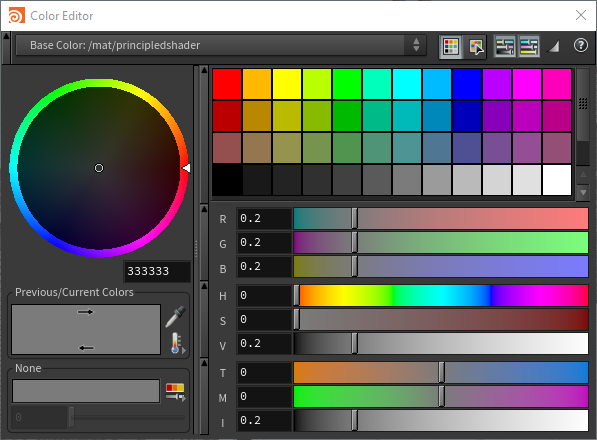
When you're satisfied with the colors, close the Color Editor dialog box.
Export the model to a GLB file
You need to export the model to a GLB file to use it with Dynamics 365 Guides and Power Apps.
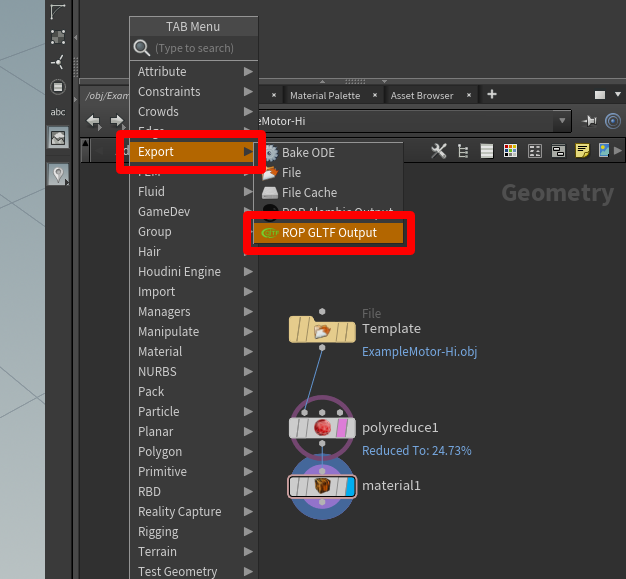
In the Geometry pane, press the Tab key to open the TAB Menu.
Select Export > ROP GLTF Output, press the Enter key, and then select below the material1 node to place the rop_gltf1 node.
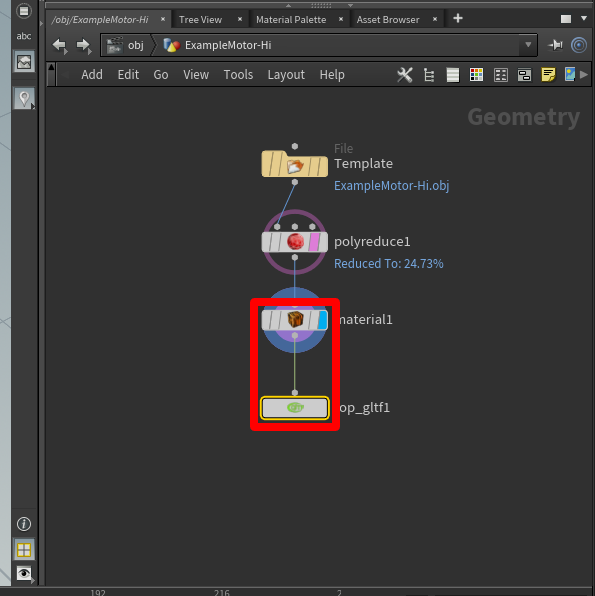
Drag a connection from the material1 node to the rop_gltf1 node.
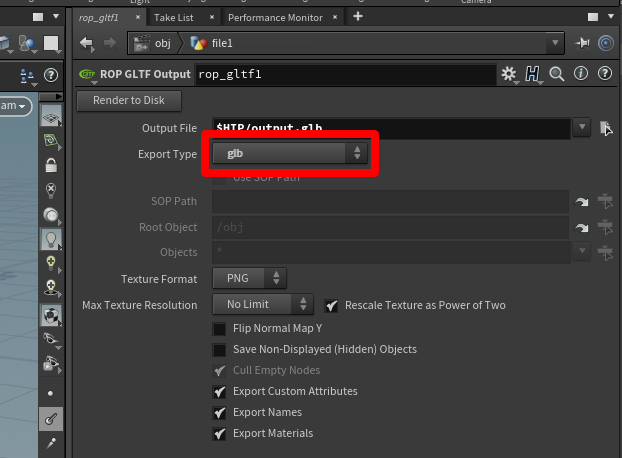
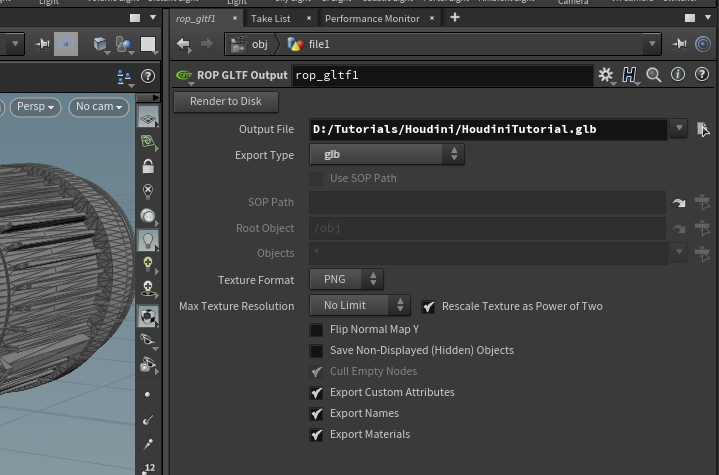
In the top pane, in the Export Type field, select glb.
Next to the Output File field, select the File Chooser button, and then choose a name and destination for the GLB file. Make sure to add .glb to the end of the file name.
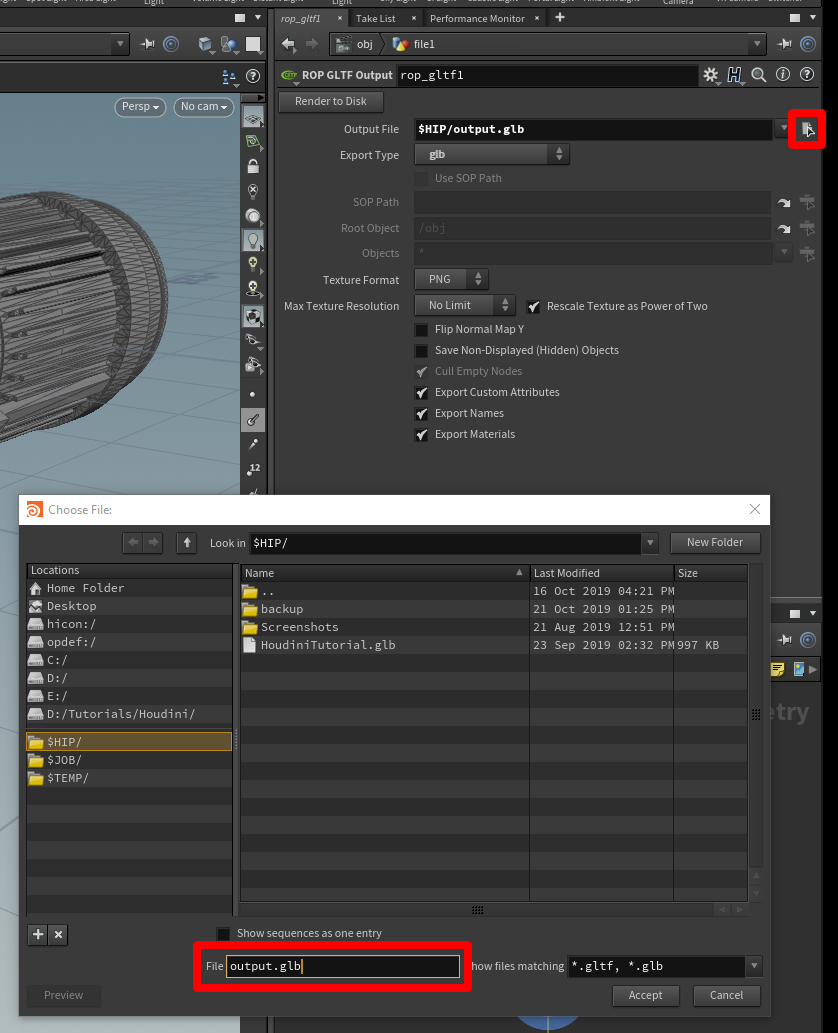
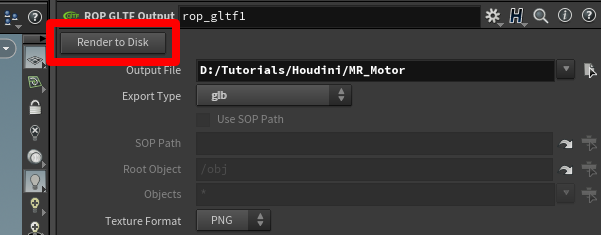
Select Render to Disk to finish the export and create the GLB file.
Create a template
Now that the node tree is set up, you can use it as a template to quickly prepare 3D objects.
The first thing you need to do is replace whatever geometry is currently being used with a default geometry. This makes the template file lightweight so that it loads quickly when you open it.
Select the file icon to activate the geometry file menu in the upper pane.
Change the Geometry File field to default.bgeo, and then select Reload Geometry.
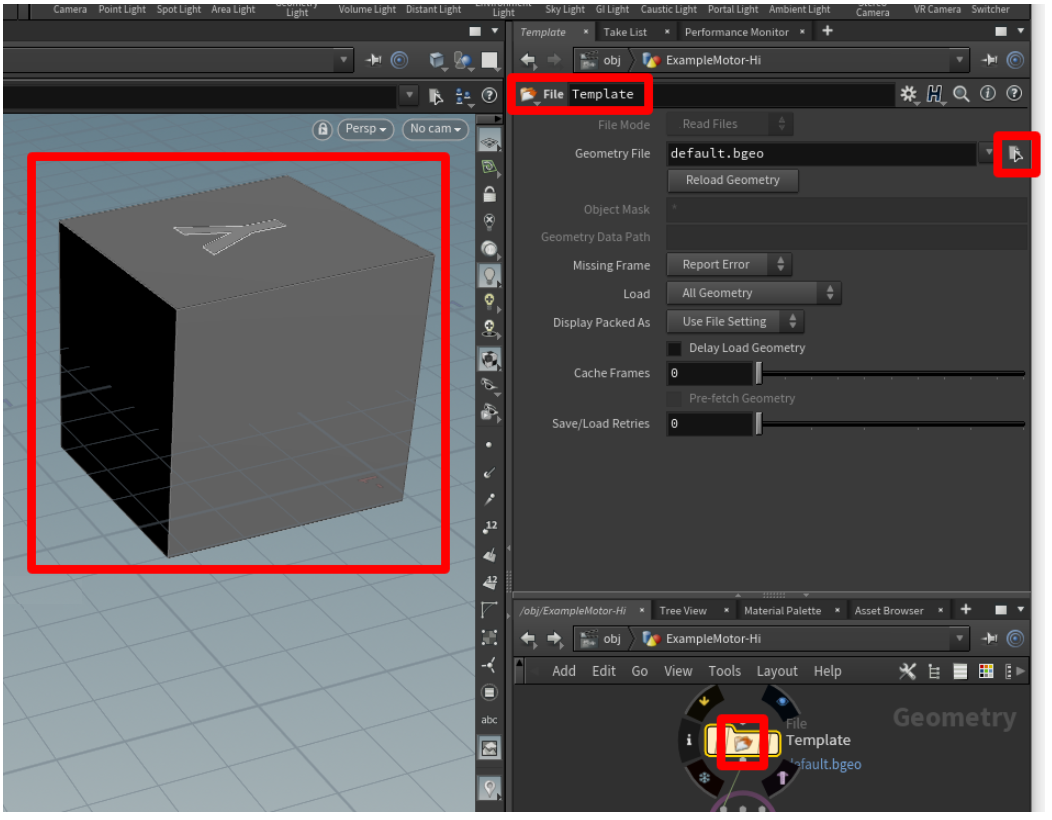
This refreshes the geometry so that it's a generic cube.
Change the file name to something generic like Template.
On the File menu, select Save, and then save the file as something memorable like Prep_Template.
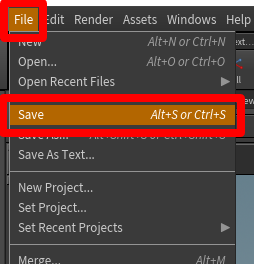
The template is ready. Close Houdini to try it out.
Use a template
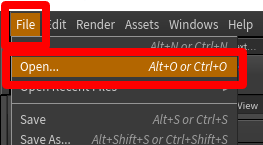
Launch Houdini, open the template file by selecting File > Open, and then select the template.
Select the center of the geometry file node to switch to the File context menu, and then select the Open floating file chooser button to select the 3D object you want to prepare.
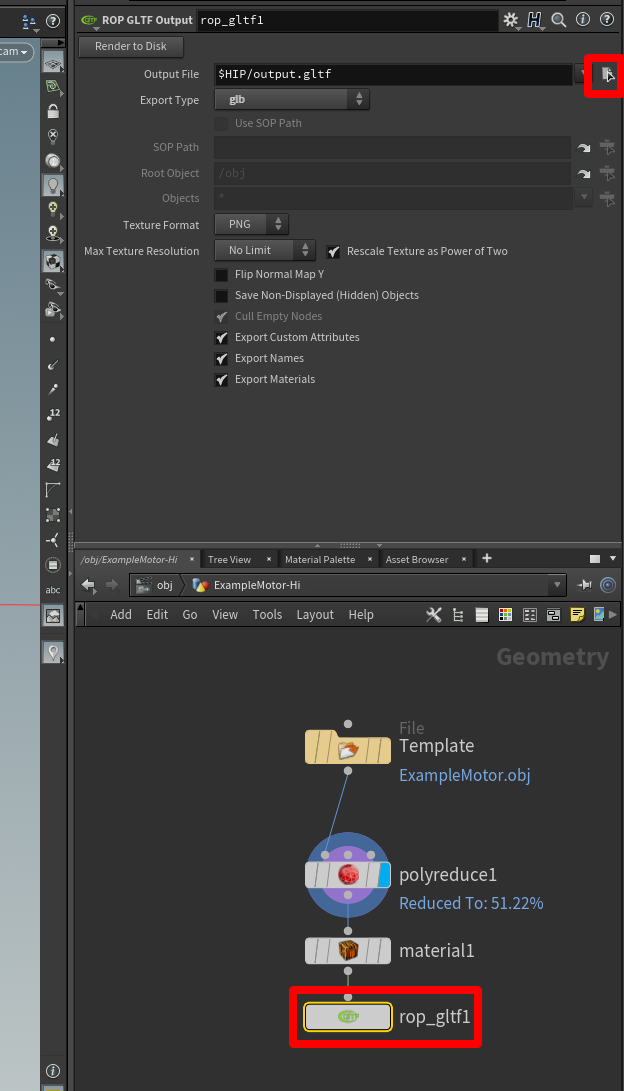
When the geometry is loaded, select the red sphere on the polyreduce1 node, and then the blue tab to the far right of the polyreduce1 node.

This shows you what the reduced poly model looks like in the view window, and provides access to the reduction tools.
When the model reaches a quality that meets your requirements, select the rop_gltf1 node, select the Open floating file chooser button, and then choose a location and name for the file you're exporting. Be sure to include the .glb extension in the file name.
Select Render to Disk to create the 3D object.
Repeat this process with the rest of your 3D objects to rapidly produce optimized objects ready for use in Dynamics 365 Guides and Power Apps.
View a 3D object in Dynamics 365 Guides or Power Apps
After you've prepared a 3D object, use the following links to learn more about using the model in Dynamics 365 Guides or Power Apps:
More information
Several screenshots in this document were taken from the Houdini software program in order to provide clear instructions on how to use Houdini's software. Learn more about SideFX Houdini.
Microsoft Corporation is not responsible for, and expressly disclaims all liability for damages of any kind arising out of the use of Houdini, or reliance on these instructions. This document is created only to provide general information to our customers and does not take into consideration any individualized business plans or specifications.
The use in this document of trademarked names and images is strictly for informative and descriptive purposes, and no commercial claim to their use, or suggestion of sponsorship or endorsement, is made by Microsoft.
Feedback
Coming soon: Throughout 2024 we will be phasing out GitHub Issues as the feedback mechanism for content and replacing it with a new feedback system. For more information see: https://aka.ms/ContentUserFeedback.
Submit and view feedback for