Adding Cards
Cards are visual components that provide a richer experience for presenting data. There are several types of cards, each with different functionality and targeted to different use case.
When editing a prompt or statement, click the Card button then you'll be able to manage the cards for this statement or prompt.
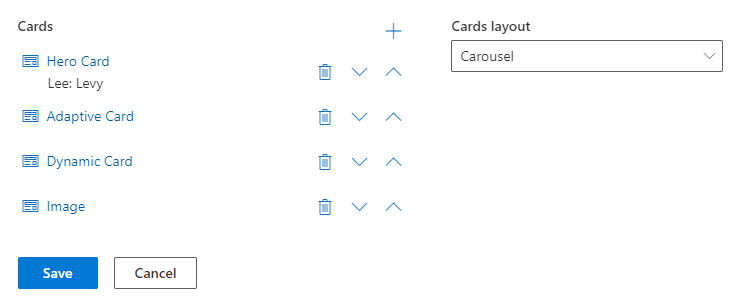
You'll be able to add, remove or rearrange the cards for this prompt. When you hover over the card, you can see more details of the card content. You can also set the layout of how the cards will be shown at runtime. You can choose between vertical or carousel layouts.
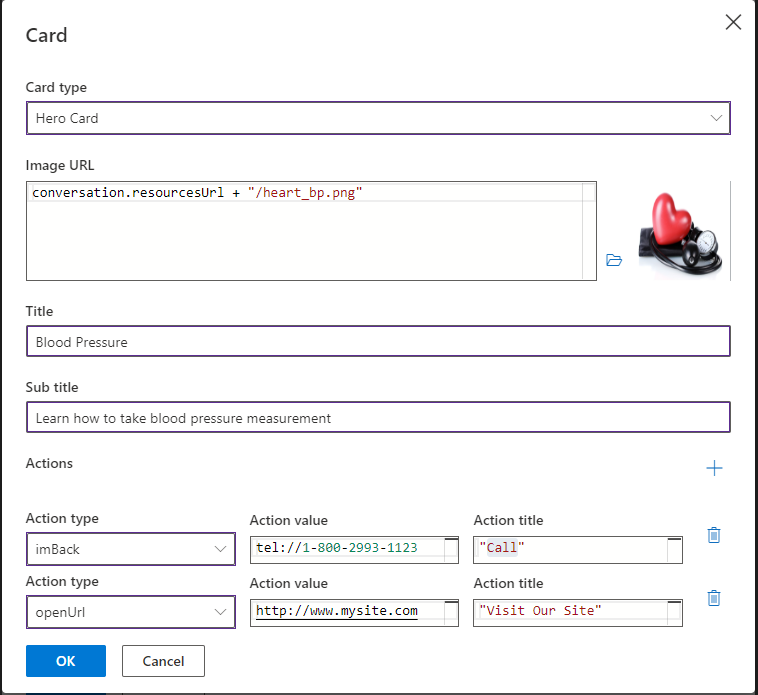
For Hero and Thumbnail cards, the fields below will be revealed to allow you to customize your card:
- Image URL Allows you to display an optional thumbnail image on the card. If a Hero card is selected, it will be shown as a bigger image in the center of the card.
- Title/Sub Title: Inputs for additional information at the top of the card.
- Actions: Selecting the Add Action button opens an other set of fields to define an action button. Each action button can have a different Action type that determines how it functions during the conversation. Each Action will also need to have an Action Title -- the text that will appear on the action button -- and an Action value -- the URL that will be invoked during the conversation.
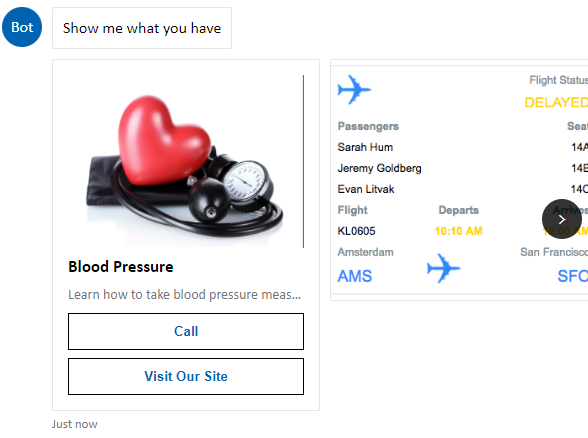
Below are example of a Hero card definition and of the corresponding output.
Dynamic Cards
In case the number of cards is unknown in advance, it's possible to generate the cards dynamically using JavaScript. See the code snippet below for creating array with two ThumbnailCard elements. The dynamically created cards will be added to the static cards and the selected layout will be applied to all the cards.
(function(){
    return [
        new builder.ThumbnailCard().text('Card 1').title('Card 1').subtitle('Card 1').
        buttons([
            builder.CardAction.postBack(session,'hi1','Say Hi'),
            builder.CardAction.postBack(session,'bye1','Say Bye')
        ]),
        new builder.ThumbnailCard().text('Card 2').title('Card 2').subtitle('Card 2').
        buttons([
            builder.CardAction.postBack(session,'hi2','Say Hi'),
            builder.CardAction.postBack(session,'bye2','Say Bye')
        ])
    ]
    })()
Adaptive cards
Adaptive cards allow a high level of flexibility for displaying information and providing interactivity to the end user chatting with an Azure AI Health Bot instance.
The Azure AI Health Bot Service enables the use of adaptive cards when authoring your scenario. Adaptive cards contain a simple JSON object and are treated by an Azure AI Health Bot instance as attachments. When you want to display an adaptive card, you can attach it to either a statement or a prompt.
If the adaptive card does not require an input from the user, for example, in the case of a news or alert message -- you can attach it to a Statement. If, on the other hand, you need an adaptive card with a form that pauses and accepts data from the user, then you must attach it to a Prompt.
The steps to adding an adaptive card are as follows:
- Open the Statement or Prompt properties and select the Attachment button.
- Select "Adaptive Card" from the "Attachment type" drop box and paste your adaptive card JSON into the JSON editor.
You can edit this JSON and parametrize it using the session variables. The JSON is evaluated in runtime and a dynamically created adaptive card will be shown.
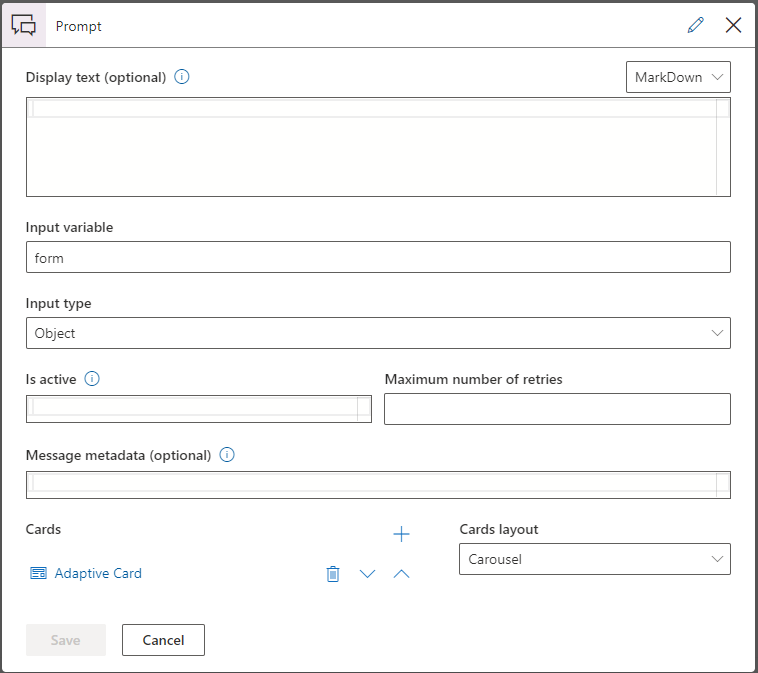
Getting data from forms
Adaptive cards also can be used to get form data. You'll drag a prompt onto the canvas and define the variable to hold the form data. The type of the variable should be defined as an Object.
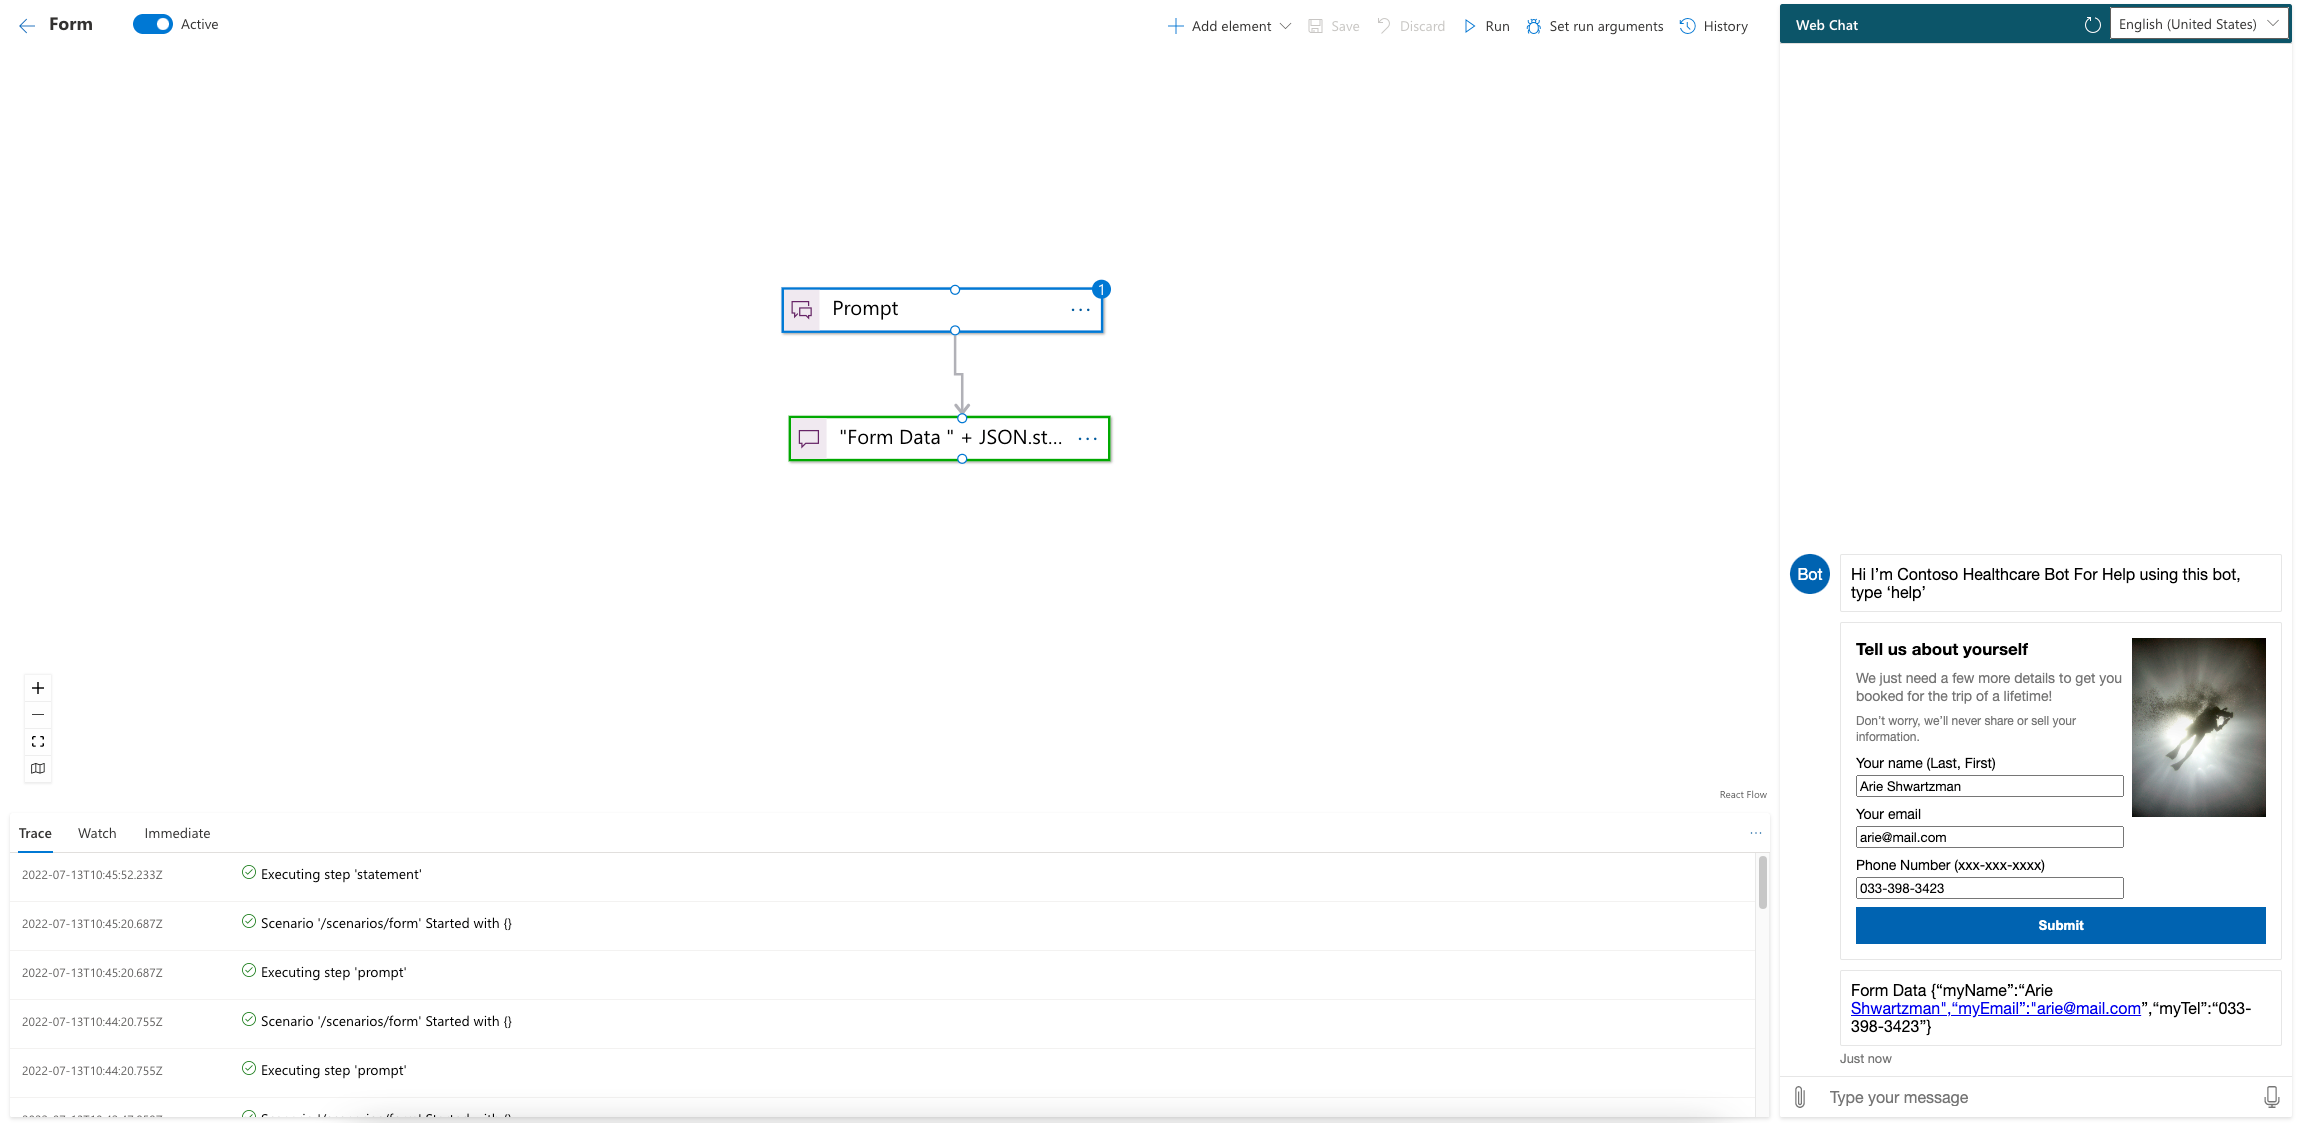
In the example scenario below, the adaptive card displays a form and outputs its content onto the next statement:
The code of the sample adaptive card is as follows:
{
  "$schema": "http://adaptivecards.io/schemas/adaptive-card.json",
  "type": "AdaptiveCard",
  "version": "1.0",
  "body": [
    {
      "type": "ColumnSet",
      "columns": [
        {
          "type": "Column",
          "width": 2,
          "items": [
            {
              "type": "TextBlock",
              "text": "Tell us about yourself",
              "weight": "bolder",
              "size": "medium"
            },
            {
              "type": "TextBlock",
              "text": "We just need a few more details to get you booked for the trip of a lifetime!",
              "isSubtle": true,
              "wrap": true
            },
            {
              "type": "TextBlock",
              "text": "Don't worry, we'll never share or sell your information.",
              "isSubtle": true,
              "wrap": true,
              "size": "small"
            },
            {
              "type": "TextBlock",
              "text": "Your name",
              "wrap": true
            },
            {
              "type": "Input.Text",
              "id": "myName",
              "placeholder": "Last, First"
            },
            {
              "type": "TextBlock",
              "text": "Your email",
              "wrap": true
            },
            {
              "type": "Input.Text",
              "id": "myEmail",
              "placeholder": "youremail@example.com",
              "style": "email"
            },
            {
              "type": "TextBlock",
              "text": "Phone Number"
            },
            {
              "type": "Input.Text",
              "id": "myTel",
              "placeholder": "xxx.xxx.xxxx",
              "style": "tel"
            }
          ]
        },
        {
          "type": "Column",
          "width": 1,
          "items": [
            {
              "type": "Image",
              "url": "https://upload.wikimedia.org/wikipedia/commons/b/b2/Diver_Silhouette%2C_Great_Barrier_Reef.jpg",
              "size": "auto"
            }
          ]
        }
      ]
    }
  ],
  "actions": [
    {
      "type": "Action.Submit",
      "title": "Submit"
    }
  ]
}
In runtime, pressing the Submit button on the card collects all the form data and will pass it to the statement. The statement prints out the form data as shown below:
