Deploy a Spring Boot application to Linux on Azure App Service
This tutorial walks through using Docker to containerize your Spring Boot application and deploy your own docker image to a Linux host in the Azure App Service.
Prerequisites
In order to complete the steps in this tutorial, you need to have the following prerequisites:
- An Azure subscription; if you don't already have an Azure subscription, you can activate your MSDN subscriber benefits or sign up for a free Azure account.
- The Azure Command-Line Interface (CLI).
- A supported Java Development Kit (JDK). For more information about the JDKs available for use when developing on Azure, see Java support on Azure and Azure Stack.
- Apache Maven build tool (Version 3).
- A Git client.
- A Docker client.
Note
Due to the virtualization requirements of this tutorial, you cannot follow the steps in this article on a virtual machine; you must use a physical computer with virtualization features enabled.
Create the Spring Boot on Docker Getting Started web app
The following steps walk through the steps that are required to create a simple Spring Boot web application and test it locally.
Open a command-prompt and create a local directory to hold your application, and change to that directory; for example:
mkdir SpringBoot
cd SpringBoot
Clone the Spring Boot on Docker Getting Started sample project into the directory you created; for example:
git clone https://github.com/spring-guides/gs-spring-boot-docker.gitChange directory to the completed project; for example:
cd gs-spring-boot-docker/completeBuild the JAR file using Maven; for example:
mvn packageOnce the web app has been created, change directory to the
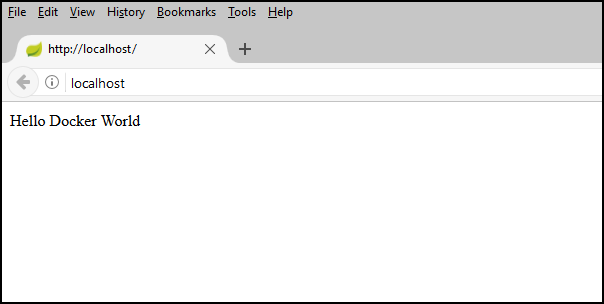
targetdirectory where the JAR file is located and start the web app; for example:cd target java -jar spring-boot-docker-complete-0.0.1-SNAPSHOT.jar --server.port=80Test the web app by browsing to it locally using a web browser. For example, if you have curl available and you configured the Tomcat server to run on port 80:
curl http://localhostYou should see the following message displayed: Hello Docker World
Create an Azure Container Registry to use as a Private Docker Registry
The following steps walk through using the Azure portal to create an Azure Container Registry.
Note
If you want to use the Azure CLI instead of the Azure portal, follow the steps in Create a private Docker container registry using the Azure CLI 2.0.
Browse to the Azure portal and sign in.
Once you've signed in to your account on the Azure portal, follow the steps in the Create a private Docker container registry using the Azure portal article, which are paraphrased in the following steps for the sake of expediency.
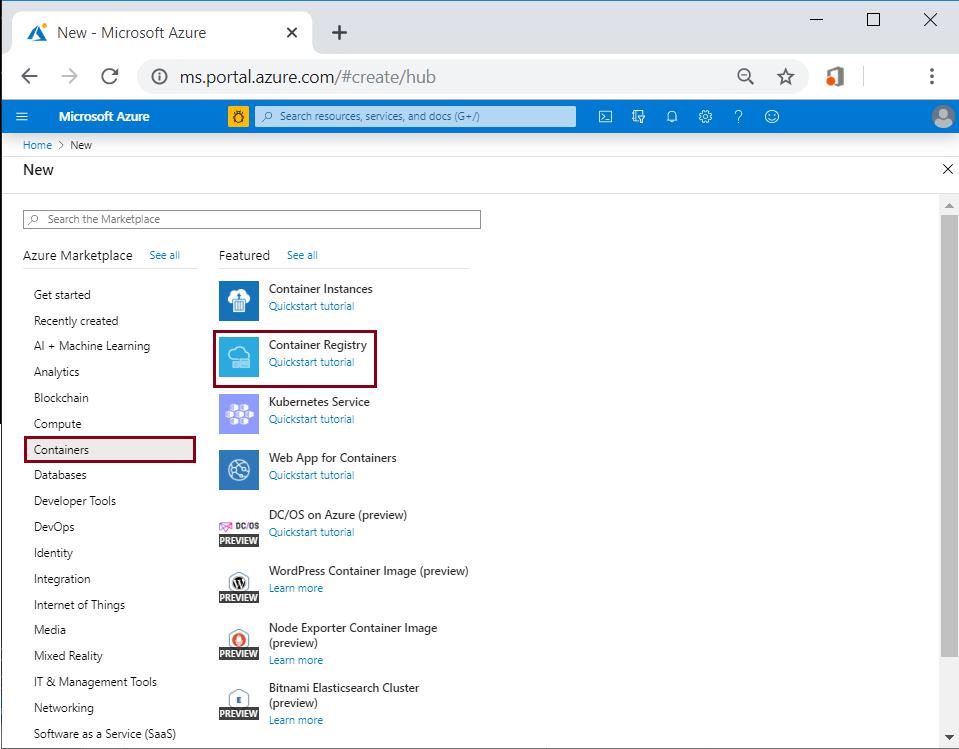
Click the menu icon for New, select Containers, and then select Azure Container Registry.
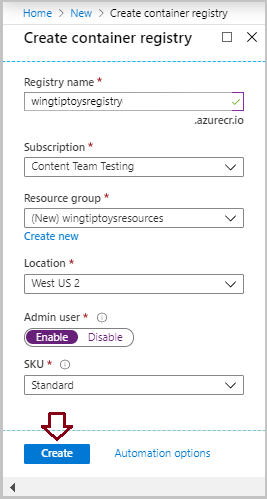
When the Create container registry page is displayed, enter Registry name, Subscription, Resource group, and Location. Then select Create.
Select Access keys under Settings and turn on the Enabled switch behind the Admin user.

Configure Maven to build image to your Azure Container Registry
Navigate to the completed project directory for your Spring Boot application, (for example: "C:\SpringBoot\gs-spring-boot-docker\complete" or "/users/robert/SpringBoot/gs-spring-boot-docker/complete"), and open the pom.xml file with a text editor.
Update the
<properties>collection in the pom.xml file with the latest version of jib-maven-plugin, login server value, and access settings for your Azure Container Registry from the previous section of this tutorial. For example:<properties> <jib-maven-plugin.version>3.2.0</jib-maven-plugin.version> <docker.image.prefix>wingtiptoysregistry.azurecr.io</docker.image.prefix> <java.version>1.8</java.version> </properties>Add jib-maven-plugin to the
<plugins>collection in the pom.xml file. This example uses version 3.2.0.Specify the base image at
<from>/<image>, heremcr.microsoft.com/openjdk/jdk:11-ubuntu. Specify the name of the final image to be built from the base in<to>/<image>.Authentication
{docker.image.prefix}is the Login server on the registry page shown previously. The{project.artifactId}is the name and version number of the JAR file from the first Maven build of the project.<plugin> <artifactId>jib-maven-plugin</artifactId> <groupId>com.google.cloud.tools</groupId> <version>${jib-maven-plugin.version}</version> <configuration> <from> <image>mcr.microsoft.com/openjdk/jdk:11-ubuntu</image> </from> <to> <image>${docker.image.prefix}/${project.artifactId}</image> </to> </configuration> </plugin>Navigate to the completed project directory for your Spring Boot application and run the following command to rebuild the application and push the container to your Azure Container Registry:
az acr login --name wingtiptoysregistry && mvn compile jib:build
Note
- The command
az acr login ...will try to login to Azure Container Registry, otherwise you need to provide<username>and<password>for jib-maven-plugin, see Authentication Methods in jib. - When you're using Jib to push your image to the Azure Container Registry, the image won't use the Dockerfile, see this document for details.
Create a web app on Linux on Azure App Service using your container image
Browse to the Azure portal and sign in.
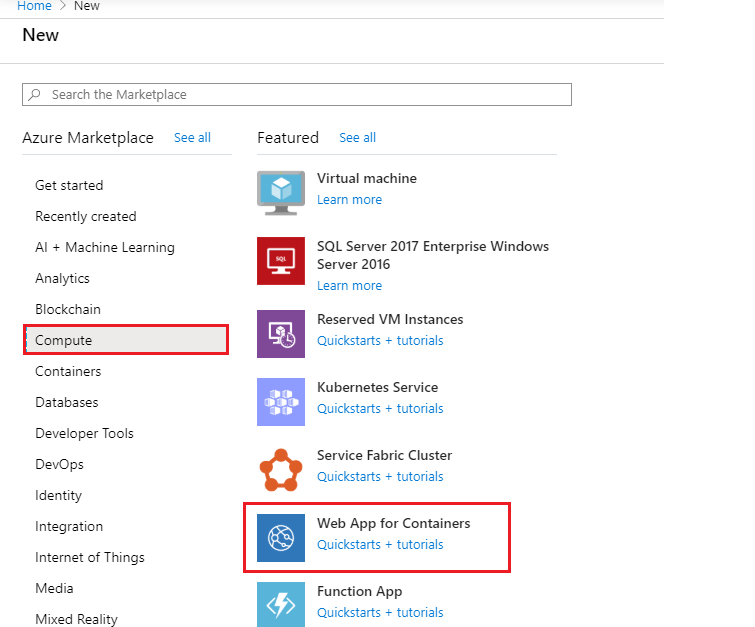
Click the menu icon for Create a resource, select Compute, and then select Web App.
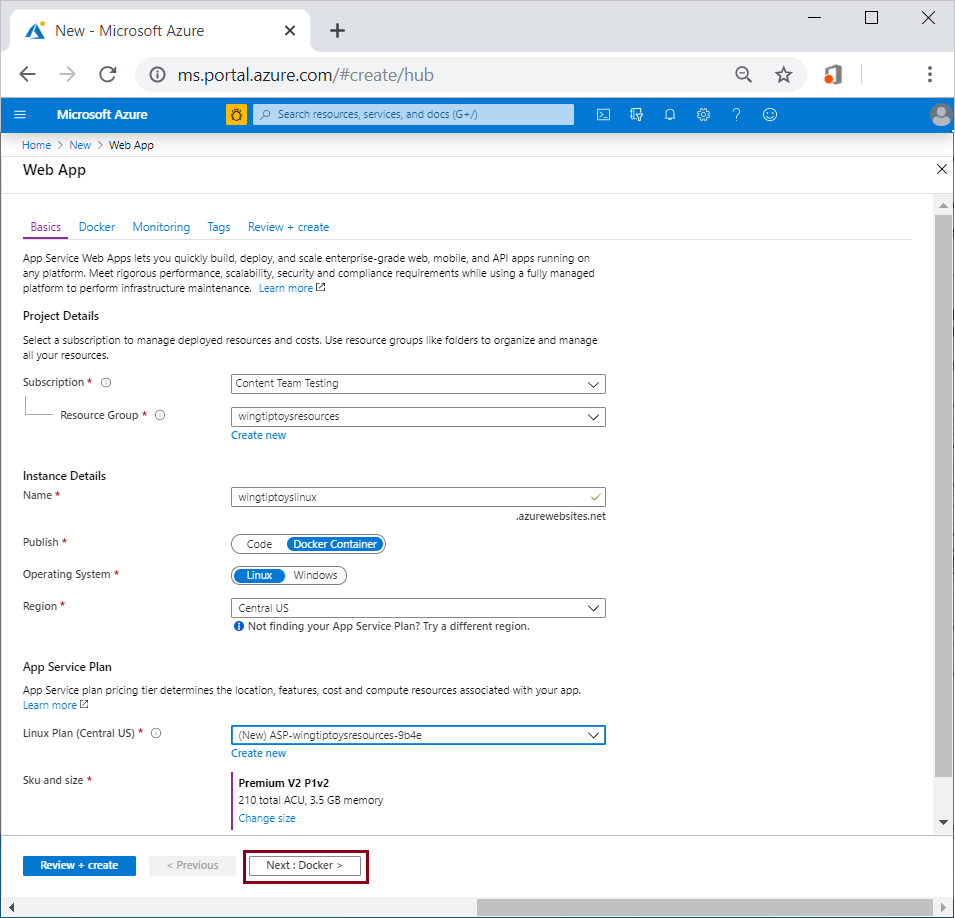
When the Web App on Linux page is displayed, enter the following information:
Choose your Subscription from the drop-down list.
Choose an existing Resource Group, or specify a name to create a new resource group.
Enter a unique name for the App name; for example: "wingtiptoyslinux"
Specify
Docker Containerto Publish.Choose Linux as the Operating System.
Select Region.
Accept Linux Plan and choose an existing App Service Plan, or select Create new to create a new app service plan.
Click Next: Docker.
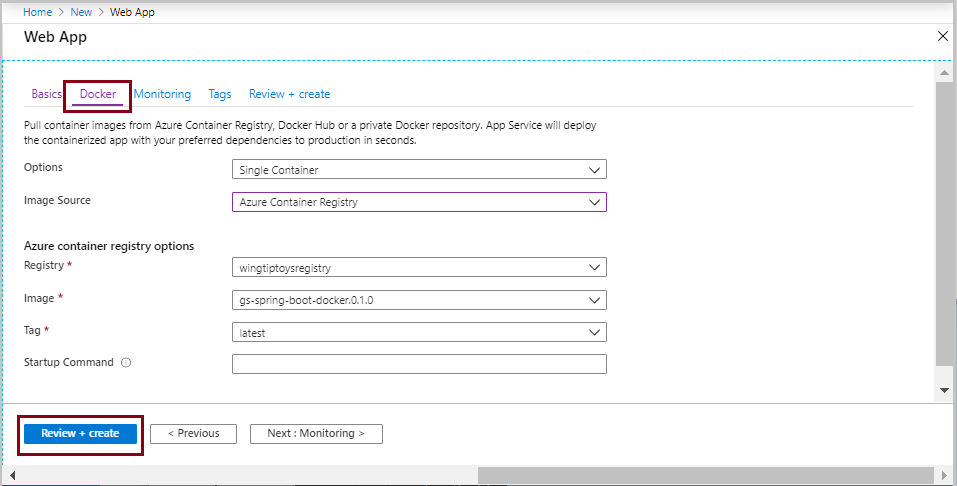
On the Web App page select Docker, and enter the following information:
Select Single Container.
Registry: Choose your container, for example: "wingtiptoysregistry"
Image: Select the image created previously, for example: "spring-boot-docker"
Tag: Choose the tag for the image; for example: "latest"
Startup Command: Keep it blank since the image already has the start up command
After you've entered all of the above information, select Review + create.
- Select Review + create.
Review the information and select Create.
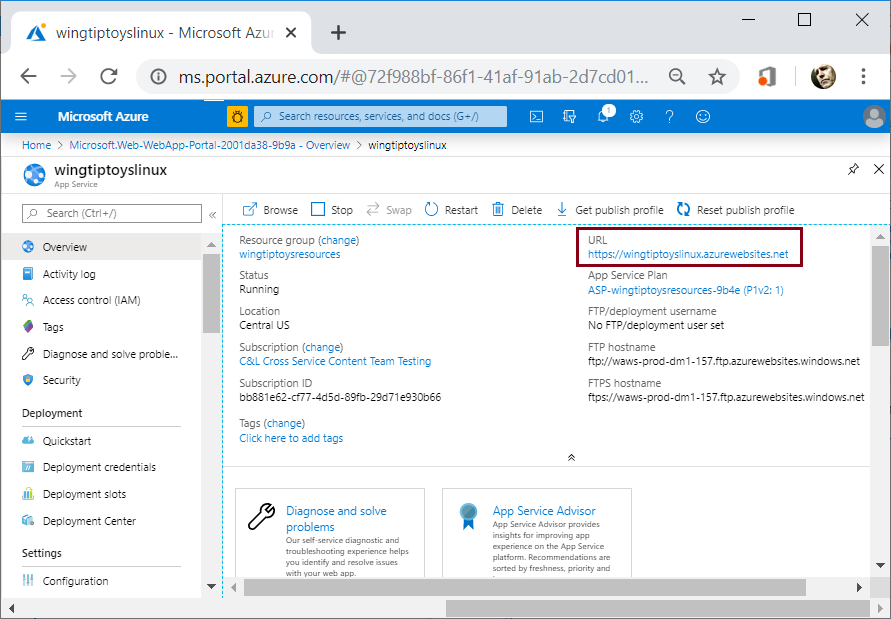
When the deployment is complete, select Go to resource. The deployment page displays the URL to access the application.
Note
Azure will automatically map Internet requests to embedded Tomcat server that is running on the port - 80. However, if you configured your embedded Tomcat server to run on port - 8080 or custom port, you need to add an environment variable to your web app that defines the port for your embedded Tomcat server. To do so, use the following steps:
Browse to the Azure portal and sign in.
Select the icon for Web Apps, and select your app from the App Services page.
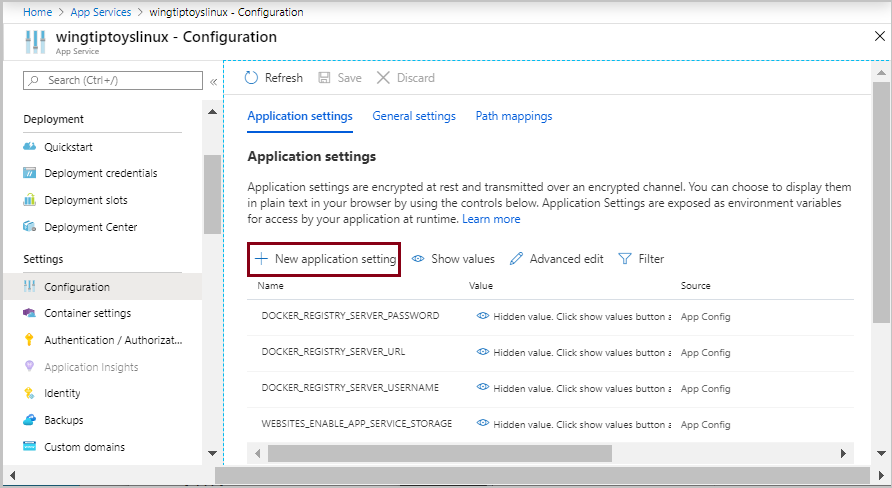
Select Configuration in the left navigation pane.
In the Application settings section, add a new setting named WEBSITES_PORT and enter your custom port number for the value.
Select OK. Then select Save.
Clean up resources
When no longer needed, use the Azure portal to delete the resources created in this article to avoid unexpected charges.
Next steps
To learn more about Spring and Azure, continue to the Spring on Azure documentation center.
See also
For more information about using Spring Boot applications on Azure, see the following articles:
For more information about using Azure with Java, see the Azure for Java Developers and the Working with Azure DevOps and Java.
For further details about the Spring Boot on Docker sample project, see Spring Boot on Docker Getting Started.
For help with getting started with your own Spring Boot applications, see the Spring Initializr at https://start.spring.io/.
For more information about getting started with creating a simple Spring Boot application, see the Spring Initializr at https://start.spring.io/.
For additional examples for how to use custom Docker images with Azure, see Using a custom Docker image for Azure Web App on Linux.
Feedback
Coming soon: Throughout 2024 we will be phasing out GitHub Issues as the feedback mechanism for content and replacing it with a new feedback system. For more information see: https://aka.ms/ContentUserFeedback.
Submit and view feedback for