Exercise - Deploy infrastructure Azure Resource Manager template for SAP on Azure
Azure Resource Manager Templates for deployments of infrastructure for SAP on Azure can be complex, so you should use existing resources where possible. The Azure Quickstart Templates and the Azure Marketplace in the Azure portal are good places to search for examples.
Using a Marketplace Template: Infrastructure for SAP NetWeaver and SAP HANA example
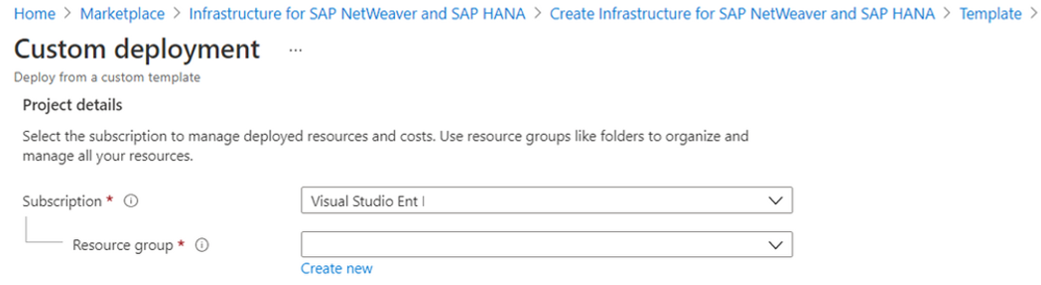
If you start a deployment of a Marketplace item, you can use and modify the existing templates that underlie them. In this example, you'll provide additional information and edit the template through the portal, and you can download the resulting template and parameter files for future use.
Azure Marketplace
Sign into the Azure portal and navigate to the Marketplace.
Search for SAP and browse the results.
From the list of results scroll to find Infrastructure for SAP NetWeaver and SAP HANA (if you can't find it, search for the entire name Infrastructure for SAP NetWeaver and SAP HANA instead).
Select Infrastructure for SAP NetWeaver and SAP HANA, select SAP solution template 2-tier, and then select Create.

Basics tab
Choose your subscription from the Subscription drop-down menu.
Next to Resource group, select Create new, and name your new resource group SAP2tierRG.
Enter the following information in the Instance details section:
- Region: East US
- Username: student
- Authentication type: Password
- Enter and confirm a strong password. Save the password securely (a password manager is recommended).
Go to the next tab: SAP Configuration.


SAP Configuration tab
Enter the SAP System ID: TST
On the SAP Deployment Size drop-down list, select Demo.
Go to the next tab: VM Sizes Configuration.

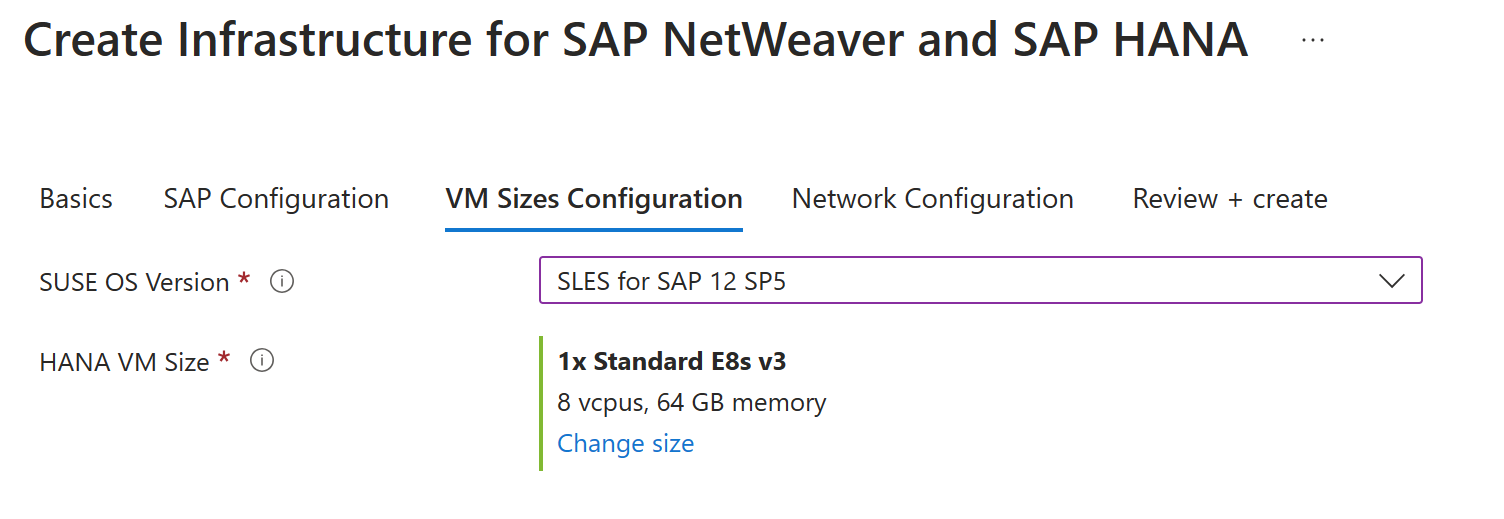
VM Sizes Configuration tab
Keep the default settings:
- SUSE OS Version: update from default, to SLES for SAP 12 SP5
- HANA VM Size: 1x Standard E8s v3
Go to the next tab: Network Configuration.
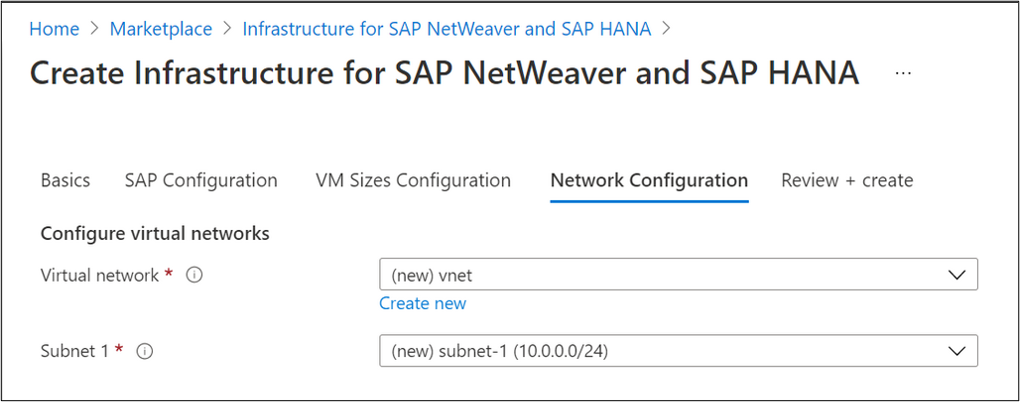
Network Configuration tab
Keep the default settings:
- Virtual network: (new) vnet
- Subnet 1: (new) subnet-1 (10.0.0.0/24)
Go to the next tab: Review + create.
Review + create tab
Note
This step generates the template that you edit. Only review in this section, and don't create the infrastructure.
Review the validation results and fix any errors.
Select View template automation, located following the menu items (such as Review + create).


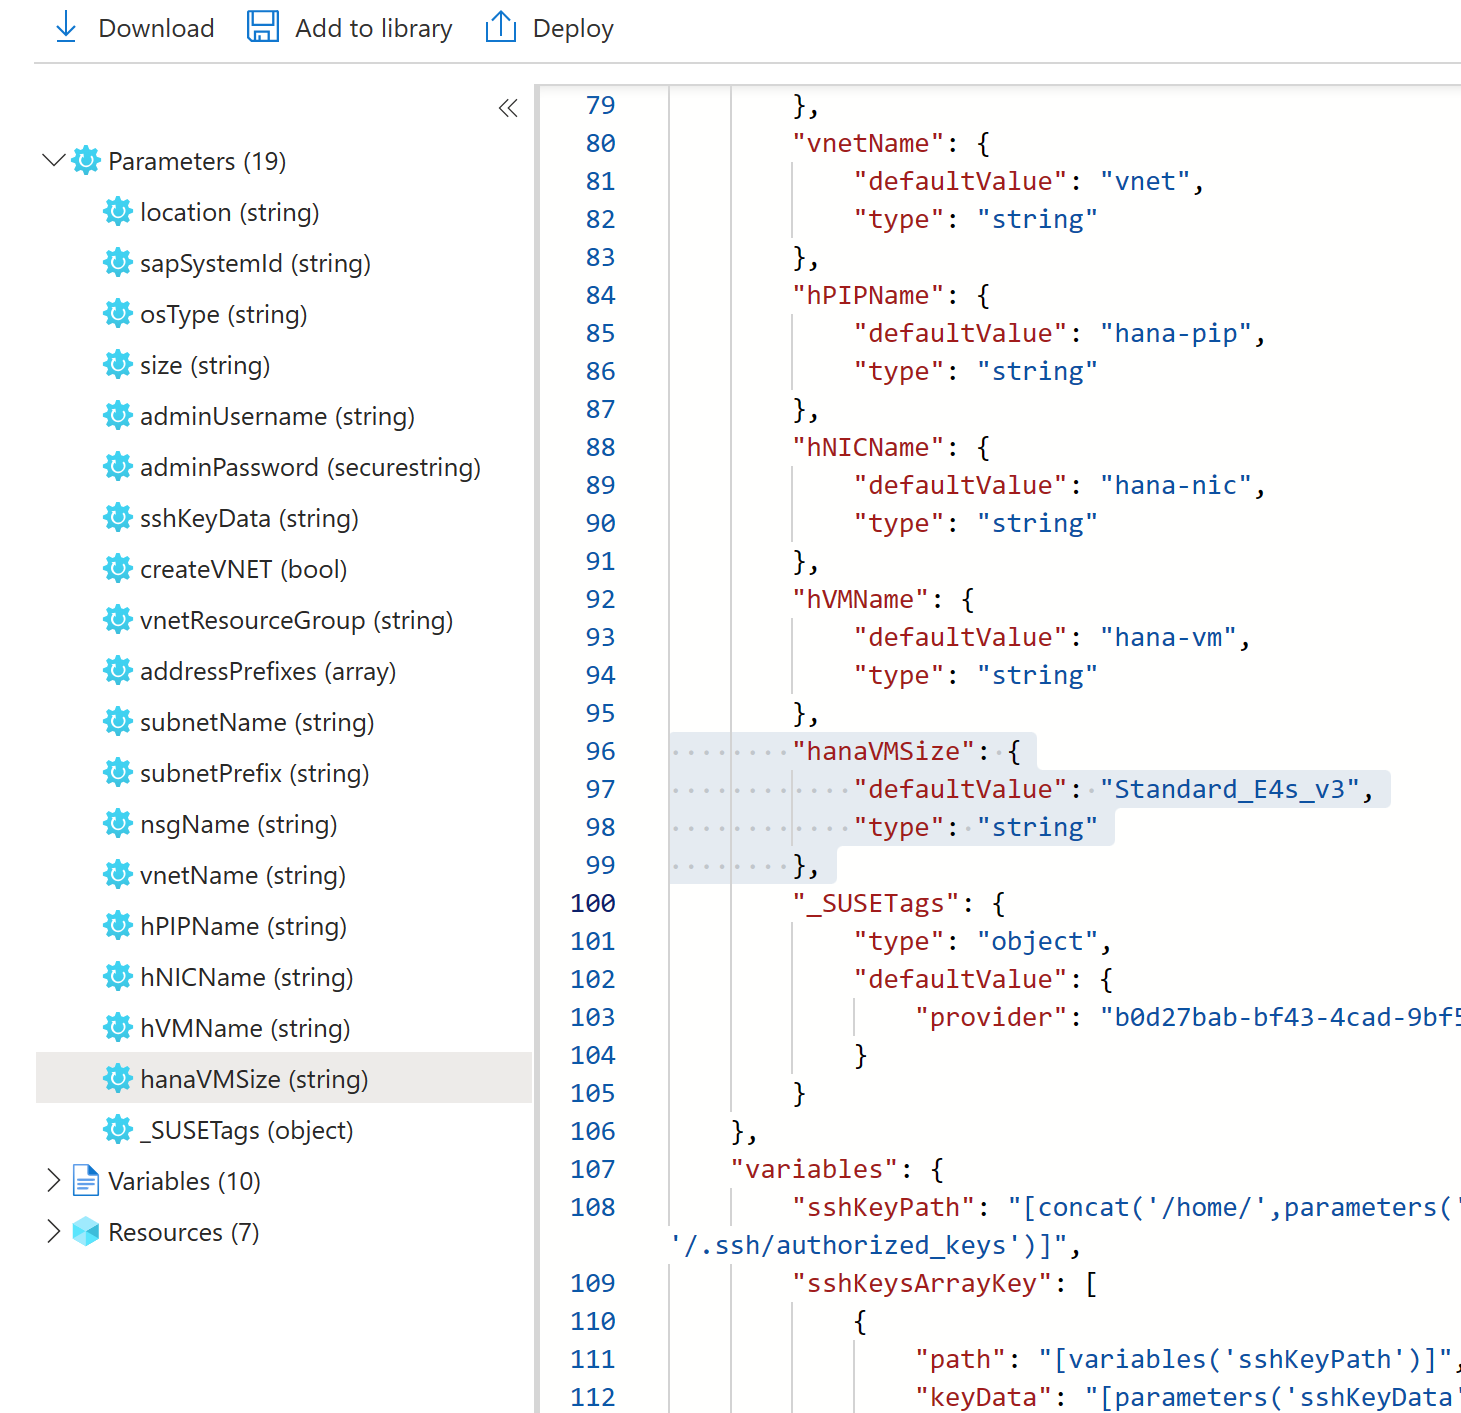
Review the updated template
Examine the Resource Manager template to get a better understanding of its structure and the resources defined by the template. The following items are a section from the top of the template with the numbered labels in the image indicating:
sapSystemIDosTypesize

Read through the template to identify any items that an administrator might want to change. For example, the default value for
hanaVMSize.Select Deploy to update the original Marketplace template with the information you provided, resulting in the options Edit template, Edit parameters, and Visualize.
Note
Alternatively, to store the updated template locally, select Download.
Edit template
Select Edit template to open the Azure Resource Manager template in edit mode.
Note
You can also select Edit parameters.
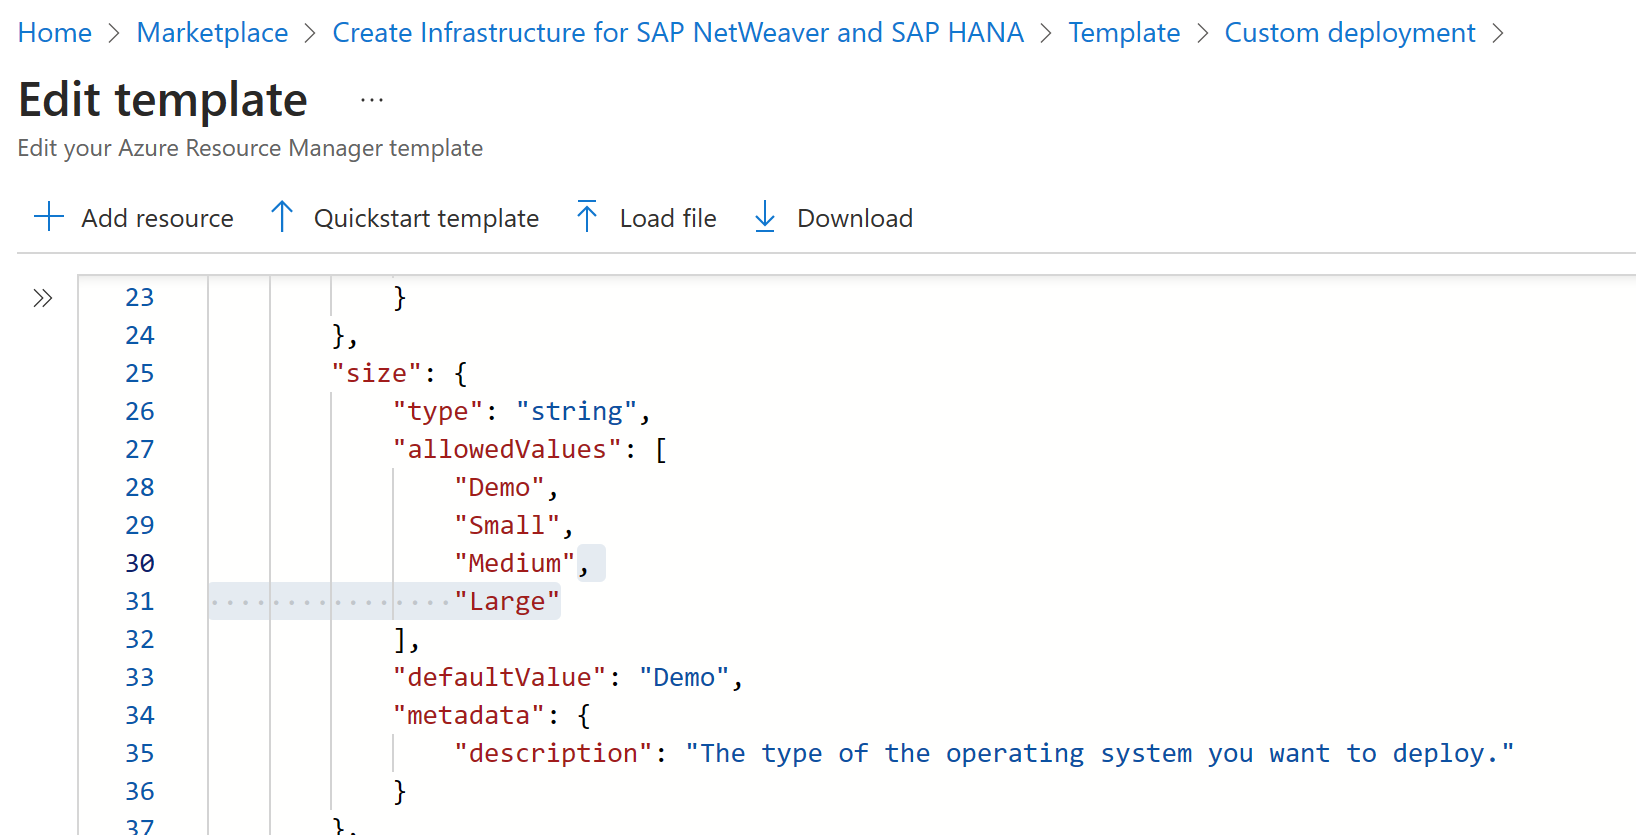
On the Edit template page, make any changes that you want to the Azure Resource Manager template and parameters JSON. For example, remove Large from the
allowedValuesundersize.Select Save.
If you want to save a local copy of the template after you make a change select Download to download the file.
Alternatively, select Deploy to return to the review and create UI. Then decide if you're ready to begin the Azure deployment of your custom template based on the Azure Marketplace Infrastructure for SAP NetWeaver and SAP HANA item through the review and create tab, or make other updates.


Access Azure Resource Manager Templates from previous deployments
To access Azure Resource Manager Templates for your previous deployments, follow these steps.
- Select the resource group you want to export.
- Select the link under Deployments.
- Choose one of the deployments from the deployment history.
- Select Template.
- Download the Template and Parameters, or deploy the template in the portal.

Deploy Azure Resource Manager using the CLI
You can deploy a downloaded template by using the CLI with your Azure credentials locally, or by using Bash Cloud Shell CLI. For more information about the parameter file, see Create Resource Manager parameter file.
To pass a local parameter file, use @ to specify a local file named parameters.json:
az deployment group create
  --name ExampleDeployment \
  --resource-group <Resource Group Name> \
  --template-file template.json \
  --parameters '@ parameters.json'
Clean up resources
If you created any resources with deployments, clean up the resources you deployed by deleting the resource group:
From the Azure portal, select Resource group from the left menu.
Enter the resource group name in the Filter by name field.
Select the resource group name.
Select Delete resource group from the top menu.