Summary
In this module, you updated the design of a stock price service from being polling-based to push-based. The goal was to keep web clients updated automatically as soon as changes to the data were available.
First, you learned about the limitations of the existing solution, which looked for stock price changes on a schedule. Then, you replaced polling with a SignalR Service-based solution that pushes updates to clients as changes are available. Finally, the solution was deployed to the cloud with the static website hosted in Azure Storage.
The solution uses Azure Cosmos DB and Azure Functions in combination with SignalR to detect and broadcast changes in the database.
With this new application architecture, your application enjoys the following benefits:
- An efficient web application architecture, where communication between the client and the server happens only when data is changed.
- Simple data change detection using Azure Functions to listen to the change feed from the Azure Cosmos DB via the Azure Cosmos DB trigger.
- Server-push architecture with a wide range of support for new and old browsers via SignalR.
- Improved response time and reduced to a little over a half second to automatically update the UI.
To verify your implementation, you can reference the end folder or you can view the code on GitHub.
Clean up
The sandbox automatically cleans up your resources when you're finished with this module.
When you're working in your own subscription, it's a good idea at the end of a project to identify whether you still need the resources you created. Resources that you leave running can cost you money. You can delete resources individually or delete the resource group to delete the entire set of resources.
Restore Visual Studio Code settings
The following steps return the settings of your Visual Studio Code instance back to how it was before you completed the tutorial. If you don't restore the previous settings, you aren't able to connect to your Azure subscriptions from Visual Studio Code.
Remove tenant from configuration
- On Windows or Linux, select File > Preferences > Settings. On macOS, select Code > Preferences > Settings.
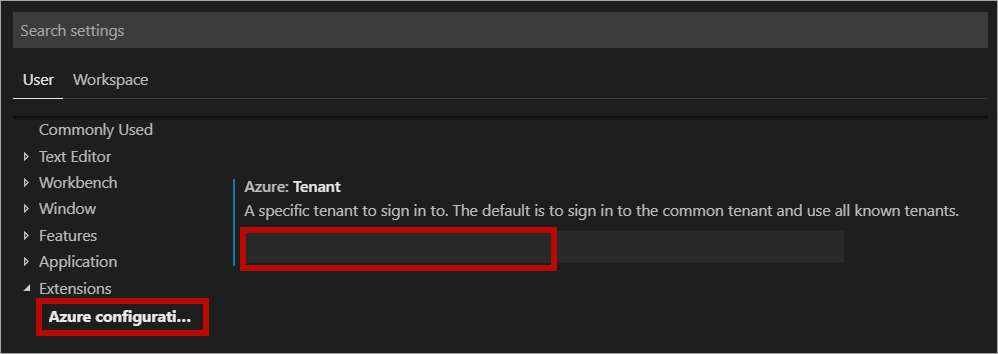
- Navigate through User Settings > Extensions > Azure configuration
- Clear the tenant in the Azure: Tenant textbox.
Sign out and back in
Once the tenant is removed from the Azure extension settings, open the command palette and select Azure: Sign Out and then Azure: Sign In.
Learn more
- Learn more about Azure Cosmos DB input bindings for Azure Functions