Exercise - Set up the structure of your web app
There are different ways to create and manage website projects. Some of these differences depend on the specific tools you have and the preferences of your organization. When creating a website, it's not uncommon for your project structure to change over time as it becomes more complicated. Large projects often require a higher degree of care and attention so that many people can keep everything organized. The key is to maintain a semblance of organization, and there are common strategies to help you.
In this unit, you create a small project structure using Visual Studio Code. The project has three files: an HTML file, a CSS file, and a JavaScript file. You also add a Visual Studio Code extension to simplify running the website in your browser.
Create a new folder for your website
Open Visual Studio Code.
When you open Visual Studio Code, the Welcome page opens. Notice that you can create a new file or open a folder in the Start list.

If the Welcome page isn't visible, you can display it by selecting Help > Welcome on the menu. (Alternatively, you can display the Welcome page by opening the Command Palette using the keyboard shortcut Shift+Ctrl+P on a Windows computer or Shift+Cmd+P on a macOS, or by selecting View > Command Palette from the Visual Studio Code menu. When the Command Palette displays, enter >Help: Welcome in the search field to open the Welcome page.)
Select Open folder in the Start list of the Welcome page, or select File > Open Folder from the Visual Studio Code menu.
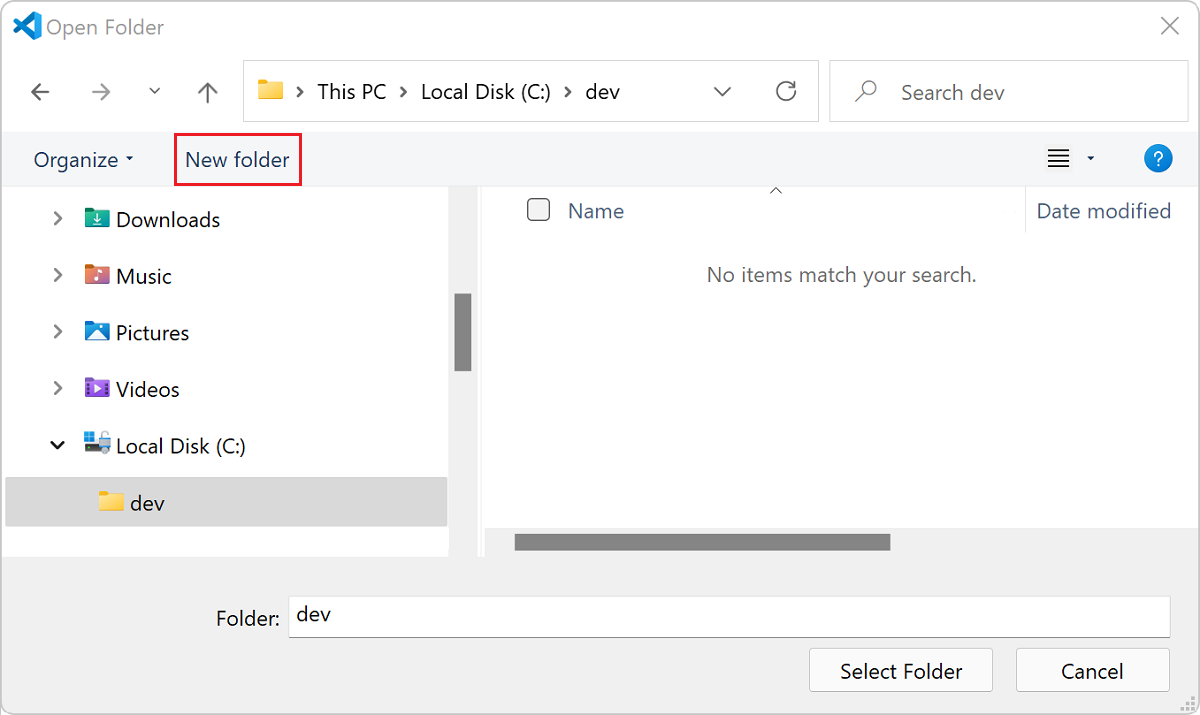
When you open a folder, the operating system has a menu option to create a New Folder.
Navigate to the location where you want to create the new folder for your website, and select New Folder.
Name the folder simple-website, and then select Select Folder.
Important
If a Visual Studio Code dialog appears, select Trust the authors of all files in the parent folder...; this is the Workspace Trust feature that lets you decide whether your project folders should allow or restrict automatic code execution. You just created the folder, so it's safe.


Create some files
Create a new file by selecting File > New File from the menu, or by using Control+N on Windows or Command+N on macOS.
Save the file by selecting Control+S on Windows, or Command+S on macOS.
Enter
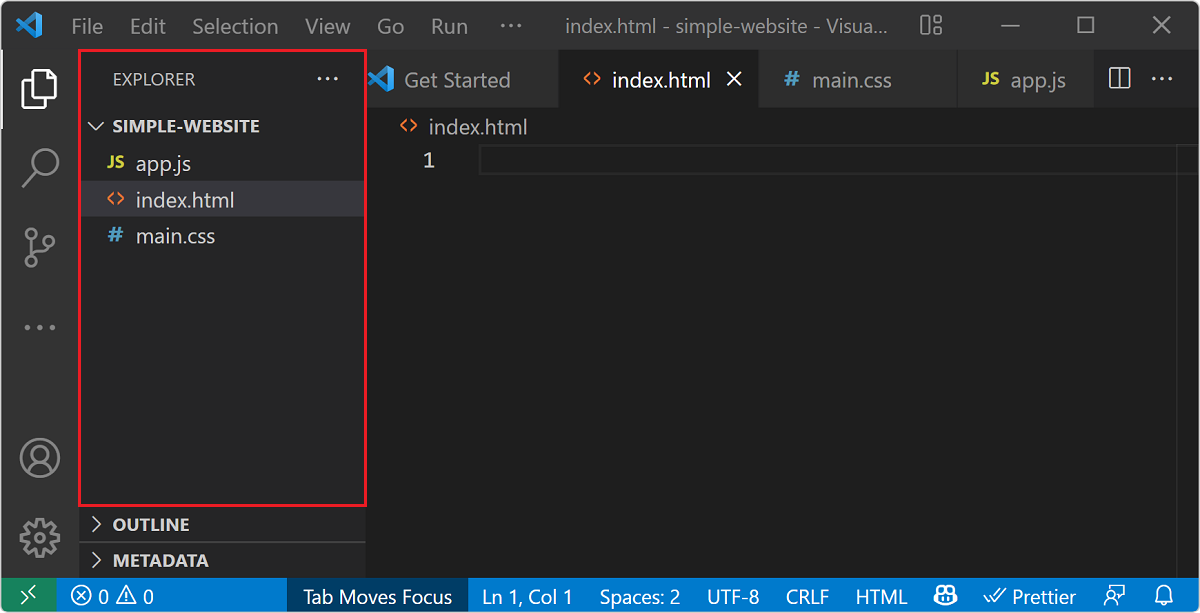
index.htmlfor the file name, and then select Save.Repeat the preceding steps to create two more files:
main.cssandapp.js. When you're finished, the simple-website project folder in Visual Studio Code Explorer should contain the following files:- index.html
- main.css
- app.js

You could build a website by including all of your HTML, CSS styles, and JavaScript code within a single file. However, in this exercise you're using an HTML file for your content, a CSS file for your styling, and a JavaScript file for your interactivity.
Setting up three files helps keep your website project organized. The separation of content, styles, and logic is an example of progressive enhancement. If JavaScript isn't enabled or supported by your customers, your CSS and HTML will still work. However, if CSS isn't supported by your customers, at least your HTML content will appear.
Install extensions or packages
You can extend the functionality of Visual Studio Code using the extensions marketplace. Keep in mind that these extensions are community-developed resources and there are often several solutions for the same type of feature. You can install extensions individually in your editor, or several at once using the command line.
For web development, all you need right now is open in browser. This extension helps you to quickly open the website in your default browser, instead of copying and pasting the file URL into your browser.
To install this extension, use the following steps:
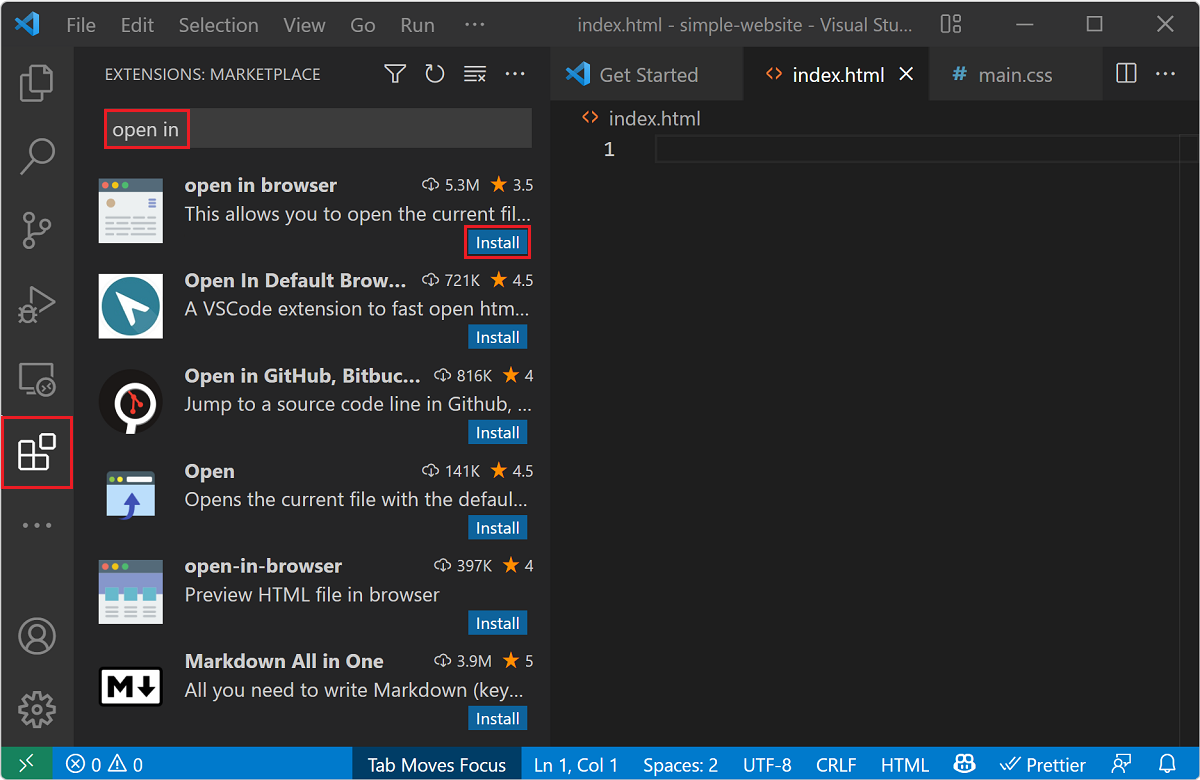
Select the Extensions icon on the vertical Activity Bar (left pane).
Enter "open in" in the search box, and then select the open in browser extension that is published by TechER.
Select Install, and Visual Studio Code installs the extension.
Switch back to Explorer by clicking the top icon in the Activity Bar, or use Control+Shift-E on Windows or Command+Shift-E on macOS.

Way to go! Installation and setup take a little extra time, but you only need to install and set up once. Now you're ready to create a website.