Exercise - Create a Power Automate button that sends an email with your location
Are you a field service analyst who is delayed for the next appointment due to traffic? Or your current appointment has taken longer than expected and will be delayed for your next?
Don't you wish there was an easier way to let your manager know your current location so that your next appointment can be handed off to someone else?
This unit describes how to build a flow that is triggered by a button that will send an email with your current location to your manager. The flow will be built entirely from the Power Automate app on your smart phone.
In the Microsoft Power Automate app, select the Flows icon that is available in the lower portion of the app. Select the + icon on the upper right of the app.
A menu option will slide upward from the lower part of the app. Select the Create from blank option.
In the Connectors option, select Flow button for mobile. If you don't see the option, then search for it in Search all connectors and triggers and then select it when you've found it.
In the Manually trigger a flow trigger, select +, Add an input, and then Text. Select Input, delete Input, and then enter Reason. Select Done in the upper right of the page.
Select + and then New step.
Select Add an action.
Search for Time. Select Date Time and then select Date Time Convert time zone.

Select Base time and then select the Timestamp option from Manually trigger a flow and then select Done.
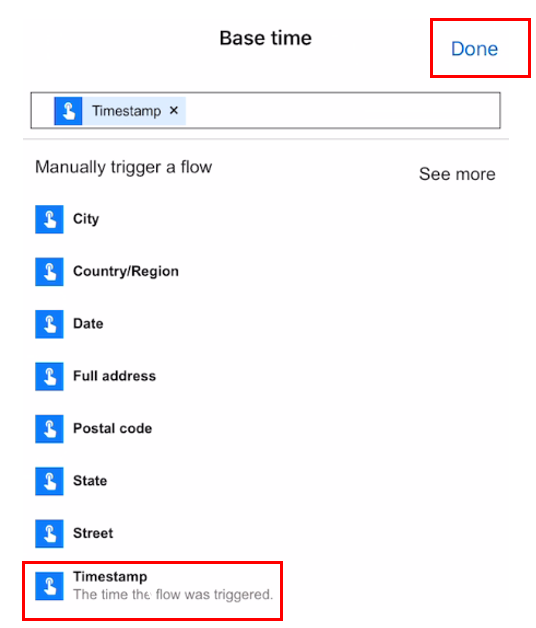
For both Source time zone and Destination time zone, select the same time zone that works for your geographic location. This example uses the (UTC-05:00) Eastern Time (US & Canada) option. After you have selected the time zone, select Done on the upper right of the screen.
For Format String, select General date/time pattern (short time) - 6/15/2009 1:45 PM (g).
Select + New step.
In the Connectors option, select Office 365 Users. If you don't see the selection, then search for it in Search all connectors and triggers and then select it when you've found it.
Select Office 365 Users Get Manager (V2).
Select User email from Manually trigger a flow and then select Done.

Select + New step.
Select Add an action.
In the Connectors option, select Office 365 Outlook. If you don't see the selection, search for it in Search all connectors and triggers and then select it when you've found it.
Select Office 365 Outlook Send an email (V2).
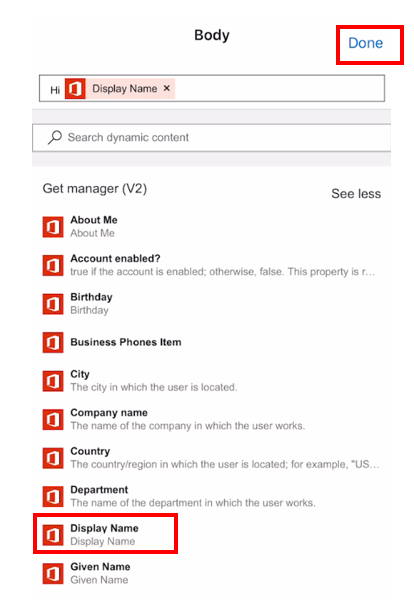
Select To. In the Get manager (V2) option, select See more, select Mail, and then select Done.
Select Subject, enter Arrived Onsite, and then select Done.
Select Body and then enter the following text:
HiThen, next to Get Manager (V2), select See more. Select Display Name and then Done.
Select Body again and then enter the following text:
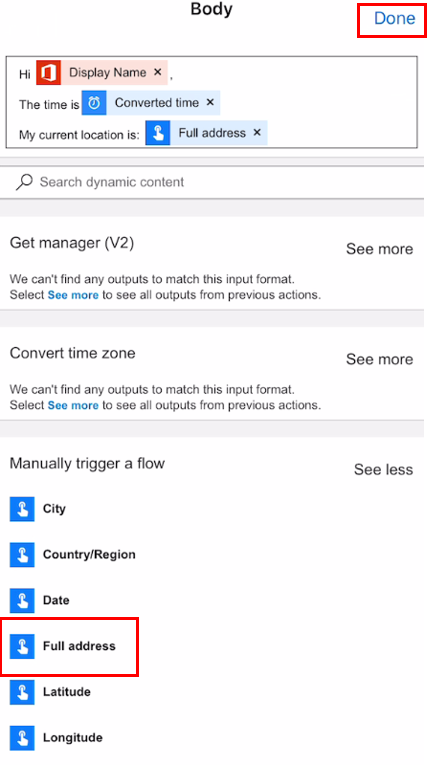
I have arrived at the location.

The time is
Next to Convert time zone, select See more, select Converted time, and then select Done.

Select Body again and then enter the following text:

My current location is:Select Manually trigger a flow, then See more, and Full address. Select Done.
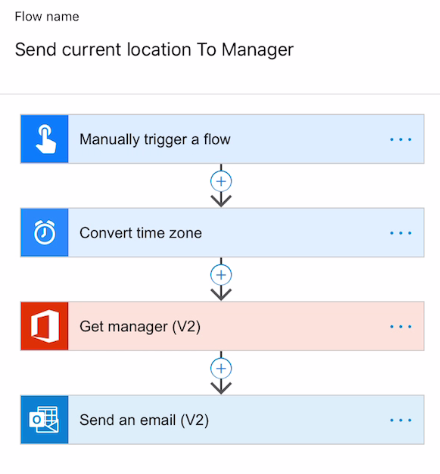
Give your flow a name such as Send current location to Manager and then select Create on the upper right of the screen.
In the next screen, select Done.
On the lower horizontal menu, select Buttons and then select your new Send current location to Manager option.
Your manager will receive an email.

