Exercise - Plan work using Azure Boards
Here, you'll create a project, a team, and a board in Azure DevOps.
The Tailspin team is eager to see how Azure Boards is going to work. With the pre-planning out of the way, they can start to use the tools and build the solution they planned.
Set up Azure Boards using the Basic process
In this section, you'll set up an Azure DevOps project and Azure Boards for the Tailspin team.
Create the project
Here, you'll create an Azure DevOps project.
Sign in to your account at dev.azure.com.
Select your organization.
Select + New project. If you don't already have existing projects in your organization, there won't be a + New project button, and you can proceed to step 3.
The Create a project dialog box opens.
In the Project name field, enter Space Game - web.
In the Description field, enter The Space Game website.
Under Visibility, choose whether to make your project public or private. For now, you can select private.
Open-source project creators will often choose public visibility so that others can view active issues and build status.
Select Advanced.
Under Version control, ensure that Git is selected. Under Work item process, ensure that Basic is selected.
Select Create.
After just a few moments, you're taken to your new project.
Create a team
Here, you'll create a team for the project.
Select Project settings in the lower corner.
On the Project details page, under General, select Teams.
You see that a default team, based on the name of the project, Space Game - web Team, has been created. We'll use this team, but in practice you might have multiple teams that contribute to the same project.
Select Space Game - web Team.
You'll see that you're already a member of this team. Let's add more members.
Add team members
Now's a good time to add members to your team. Although not required, if you'd like to add a coworker to your Azure DevOps organization, here's how:
- Under Members, select Add.
- Enter the email address of the user you'd like to add, then select Save.
- Repeat the process for any other members you'd like to add.
Mara adds entries for herself and her team members: andy@tailspintoys.com, amita@tailspintoys.com, mara@tailspintoys.com, and tim@tailspintoys.com.
In practice, you might manage your team through an identity and access management service like Microsoft Entra ID, and set the appropriate permission levels for each team member. We'll point you to more resources at the end of this module.
Create the board
Although Mara and her team identified a number of issues, here you'll add the three work items Mara originally proposed to her team, which you can use to practice the process.
In the column on the left, hover over Boards and select Boards from the menu that appears.
Select Space Game - web Team. A blank board appears.
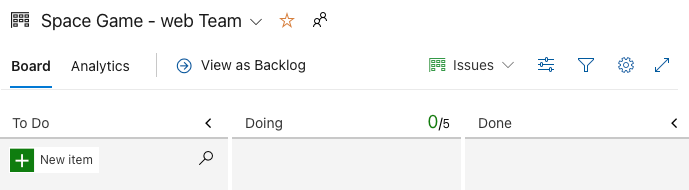
Recall that you're using the Basic process. The Basic process involves three task states: To Do, Doing, and Done.
If you choose a different process, like Scrum, you'll see a layout that supports that process.
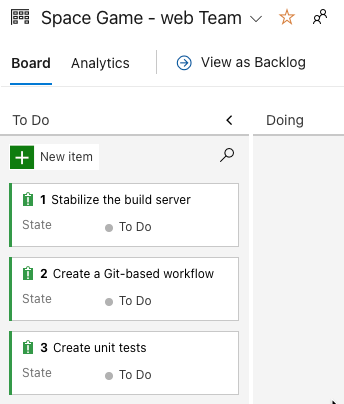
In the To Do column, select the green + button next to the New item field.
Enter Stabilize the build server, and then press Enter.
Select the ellipsis (...) on the item you just created, then select Open.
In the Description field, enter this text:
The build server keeps falling over. The OS requires security patches and updates. It's also a challenge to keep build tools and other software up to date.
Select Save & Close.
Follow the same steps for the next two items.
Title Description Create a Git-based workflow Migrate source code to GitHub and define how we'll collaborate. Create unit tests Add unit tests to the project to help minimize regression bugs. Drag Stabilize the build server to the top of the stack, then drag Create a Git-based workflow to the second item position. Your final board looks like this:
Define a sprint
Mara: This is looking great. Now let's define a sprint.
When you create an Azure Boards project, you get an initial sprint called Sprint 1. All you need to do is assign dates to the sprint and add tasks. Here's how to follow along with the team:
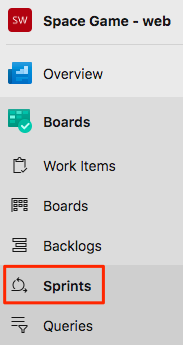
In the left-side column, select Sprints.
Select the Set dates link in the upper-right corner.
Leave the name as Sprint 1.
In the Start date field, select the calendar and pick today's date.
In the End date field, select the calendar and pick the date two weeks from today.
Select Save and close.
Assign tasks and set the iteration
An iteration is another name for a sprint.
You have an initial set of work items and a timeline for your first sprint. Here, you'll connect work items to your sprint and assign the tasks to yourself.
Under Boards, select Work items.
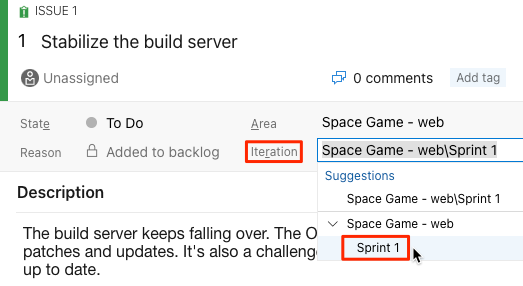
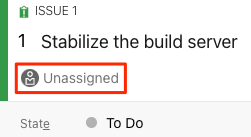
Select Stabilize the build server.
In the Iteration dropdown, select Sprint 1.
From the same window, select Unassigned and set yourself as the task owner.
Select Save.
Repeat the process for the other two work items.
- Create a Git-based workflow
- Create unit tests
Mara: We did it! We created our first project on Azure Boards and we identified the first tasks we'll take on. It's great! As Andy and I do this work, we'll move each work item to the Doing state.
Amita: Sounds good. I enjoyed getting together and deciding what's important to us right now. And, like Andy said, now we have a way to see everything all in one place.