Add a column to a table
You can add columns when you create a new custom table, or you can add columns to an existing table at any time. Adding a new column is the same whether you're creating a new table or adding to an existing table.
Tip
Before you create a custom column, evaluate whether an existing column meets your requirement.
In your browser, go to https://make.powerapps.com, From the left navigation menu, select Tables. If you don't see Tables on the left, you can select More, then in the flyout menu find and select Tables.
Open an existing table or create a new table.
In the menu at the top, select + New and then select Column.
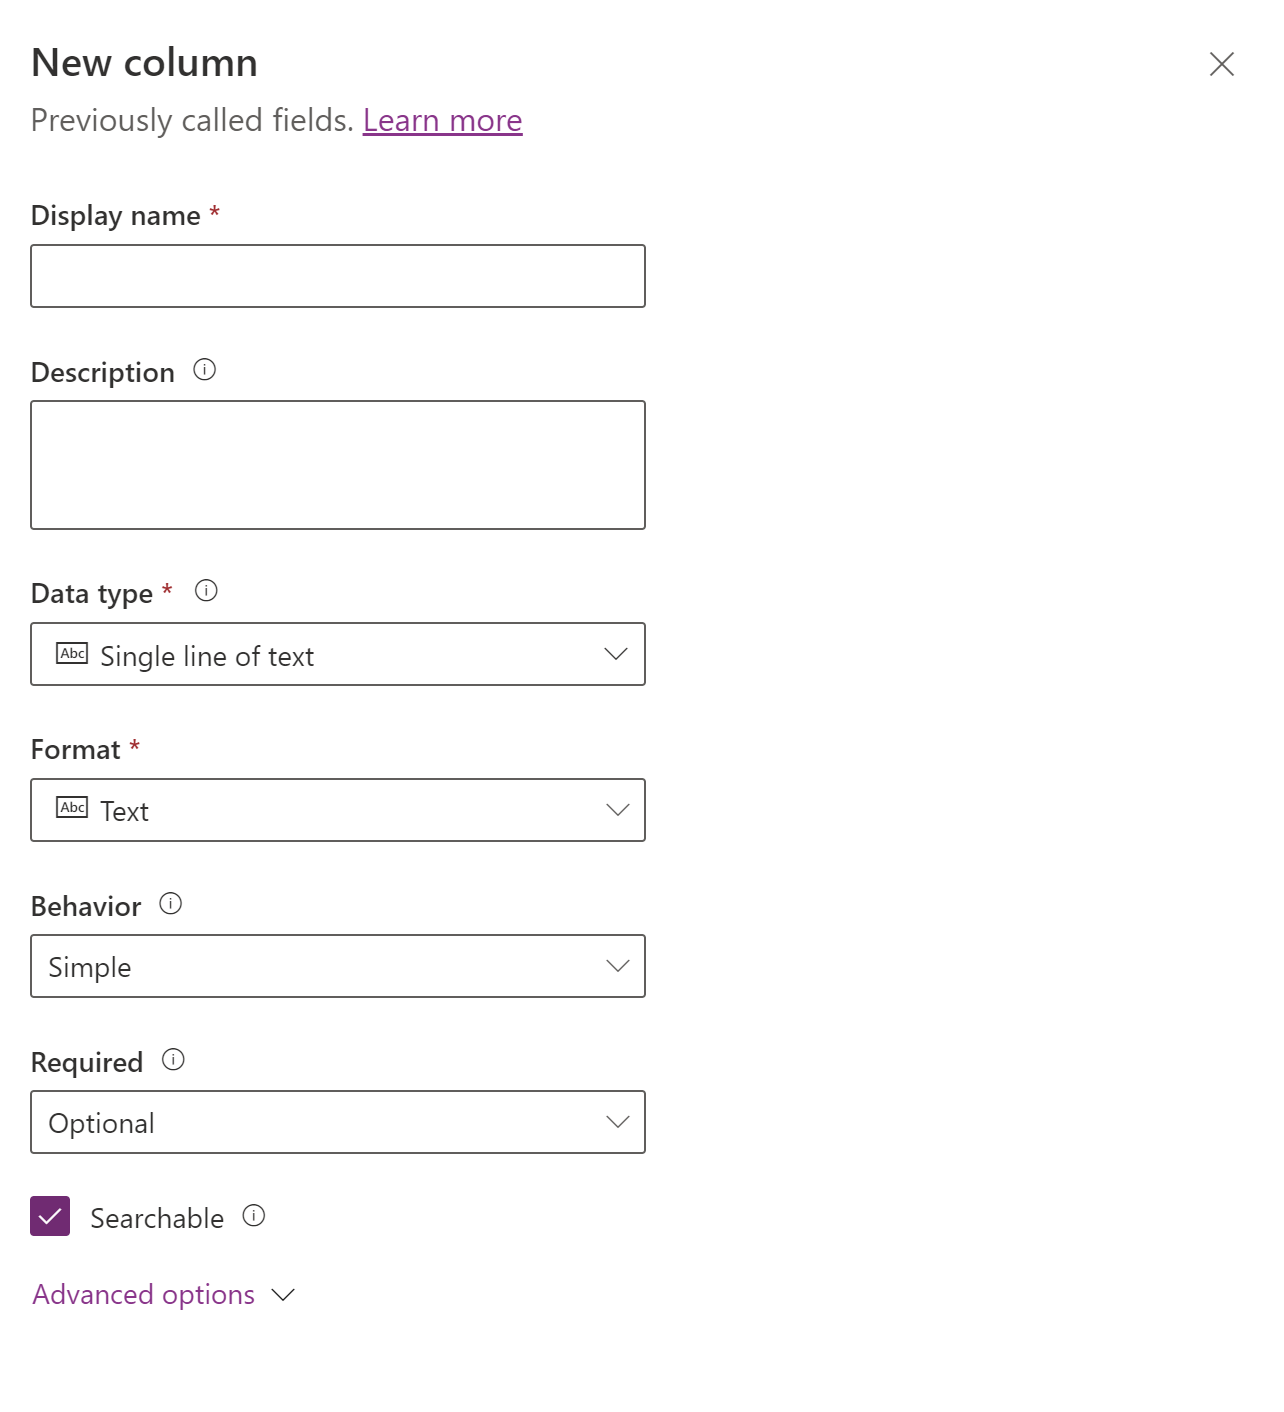
Enter information in the following columns:
Display name - The name that is shown to users.
Data type - This is the type of data that you want to store in the column.
Required - Select this check box if you want to ensure that this column always has a value when a user tries to add a record to this table.
Searchable - Clear this check box for columns for the table that you don't use. When a column is searchable, it appears in Advanced Find and is available when you're customizing views. Clearing this check box reduces the number of options that are shown to people who are using Advanced Find, and helps make it easier for users to create custom views without seeing unused columns. Clear the Searchable check box when you're working with columns in a standard or complex table that you don't use.
Behavior - Choose between Simple or Calculated, and use this to define a calculation or a rollup in this column.
Description - This is a description of the column.
Maximum character count - Use to define the maximum length of the data that a user can enter in this column. This is used with text columns.
Minimum and Maximum Values - This column is available and used with number columns.