Exercise - Build and store an image by using Azure Container Registry
Azure Container Registry provides storage for Docker images in the cloud.
In the example scenario, the team needs to create a registry to store the images for their web apps.
In this unit, you'll use the Azure portal to create a new registry in Container Registry. You'll build a Docker image from the source code for a web app and upload it to a repository in your registry. Finally, you'll examine the contents of the registry and the repository.
Important
You need your own Azure subscription to run this exercise, and you might incur charges. If you don't already have an Azure subscription, create a free account before you begin.
Create a registry in Azure Container Registry
Sign in to the Azure portal with your Azure subscription.
On the Azure portal home page, under Azure services, select Create a resource. The Create a resource pane appears.
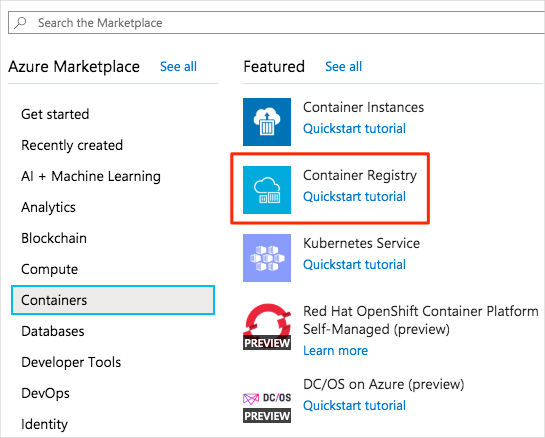
In the left menu pane, select Containers, and under Popular Azure services, select Container Registry.
The Create container registry pane appears.
On the Basics tab, enter the following values for each setting.
Setting Value Project details Subscription Select your Azure subscription. Resource group Select Create new, and enter learn-deploy-container-acr-rg, and select OK. This approach may make it easier to clean up these resources when you're finished with the module. If you choose a different resource group name, make note of it for the rest of the exercises in this module. Instance details Registry name Enter a unique name and make a note of it for later. Location Select a location that is close to you. SKU Standard Select Review + create. After validation successfully passes, select Create. Wait until the container registry has been created before you continue.
Build a Docker image and upload it to Azure Container Registry
In Azure Cloud Shell in the portal (select the Cloud Shell icon on the upper toolbar), run the following command to download the source code for the sample web app. This web app is simple. It presents a single page that contains static text and a carousel control that rotates through a series of images.
git clone https://github.com/MicrosoftDocs/mslearn-deploy-run-container-app-service.git
Move to the source folder.
cd mslearn-deploy-run-container-app-service/dotnet
Move to the source folder.
cd mslearn-deploy-run-container-app-service/node
Run the following command. This command sends the folder's contents to the Container Registry, which uses the instructions in the Docker file to build the image and store it. Replace
<container_registry_name>with the name of the registry you created earlier. Take care not to leave out the.character at the end of the command.az acr build --registry <container_registry_name> --image webimage .
The Docker file contains the step-by-step instructions for building a Docker image from the source code for the web app. Container Registry runs these steps to build the image, and as each step completes, a message is generated. The build process should finish after a couple of minutes without any errors or warnings.
Examine the container registry
Return to the Azure portal, and on the Overview page for your container registry, select Go to resource. Your Container registry pane appears.
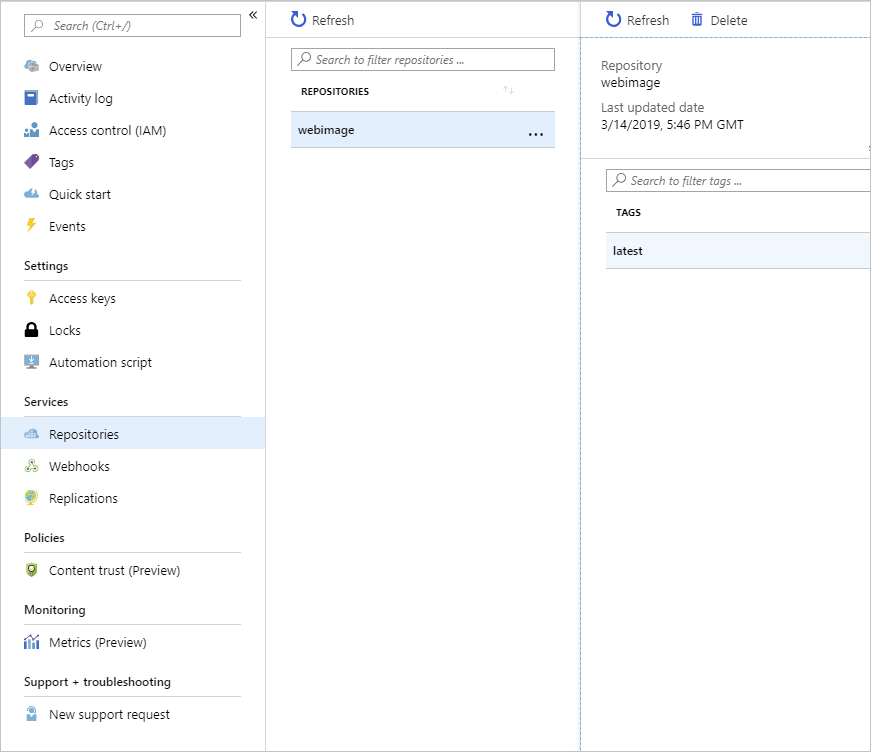
In the left menu pane, under Services, select Repositories. The Repositories pane appears for your container registry. You'll see a repository named
webimage.Select the
webimagerepository. The webimage repository pane appears. It contains an image with thelatesttag. This is the Docker image for the sample web app.
The Docker image that contains your web app is now available in your registry for deployment to App Service.