Exercise - Create a custom connector from Azure API Management
In this exercise you're going to create a custom connector by exporting an API from Azure API Management.
In the VanArsdel fusion development scenario, Maria needs to display warehouse locations in her Power Apps application. Kiana and her development team have built several web APIs one of which returns the warehouse locations.
The web APIs are served through Azure API Management, which has the ability to create custom connectors for any web APIs it hosts. With the custom connector, Maria's Power Apps app will be able to call the warehouse location API in Azure API Management.
Note
If you want to use Azure API Management and Power Apps throughout the exercises in this module you will need to follow a couple of steps.
The first is to download the web API files from GitHub, unzip the archive, and provision and deploy them to API Management using the instructions included in the README file.
The second is Power Apps requires either a Microsoft 365 license or a free trial. Learn more about your licensing options. Microsoft products include Microsoft Power Apps and Power Automate.
Export a web API from API Management to a custom connector
You need a subscription key in order for Power Apps to access any web API hosted in API Management. Go to the
Subscriptionsblade, click the three dots (...) and select theShow/hide keysmenu.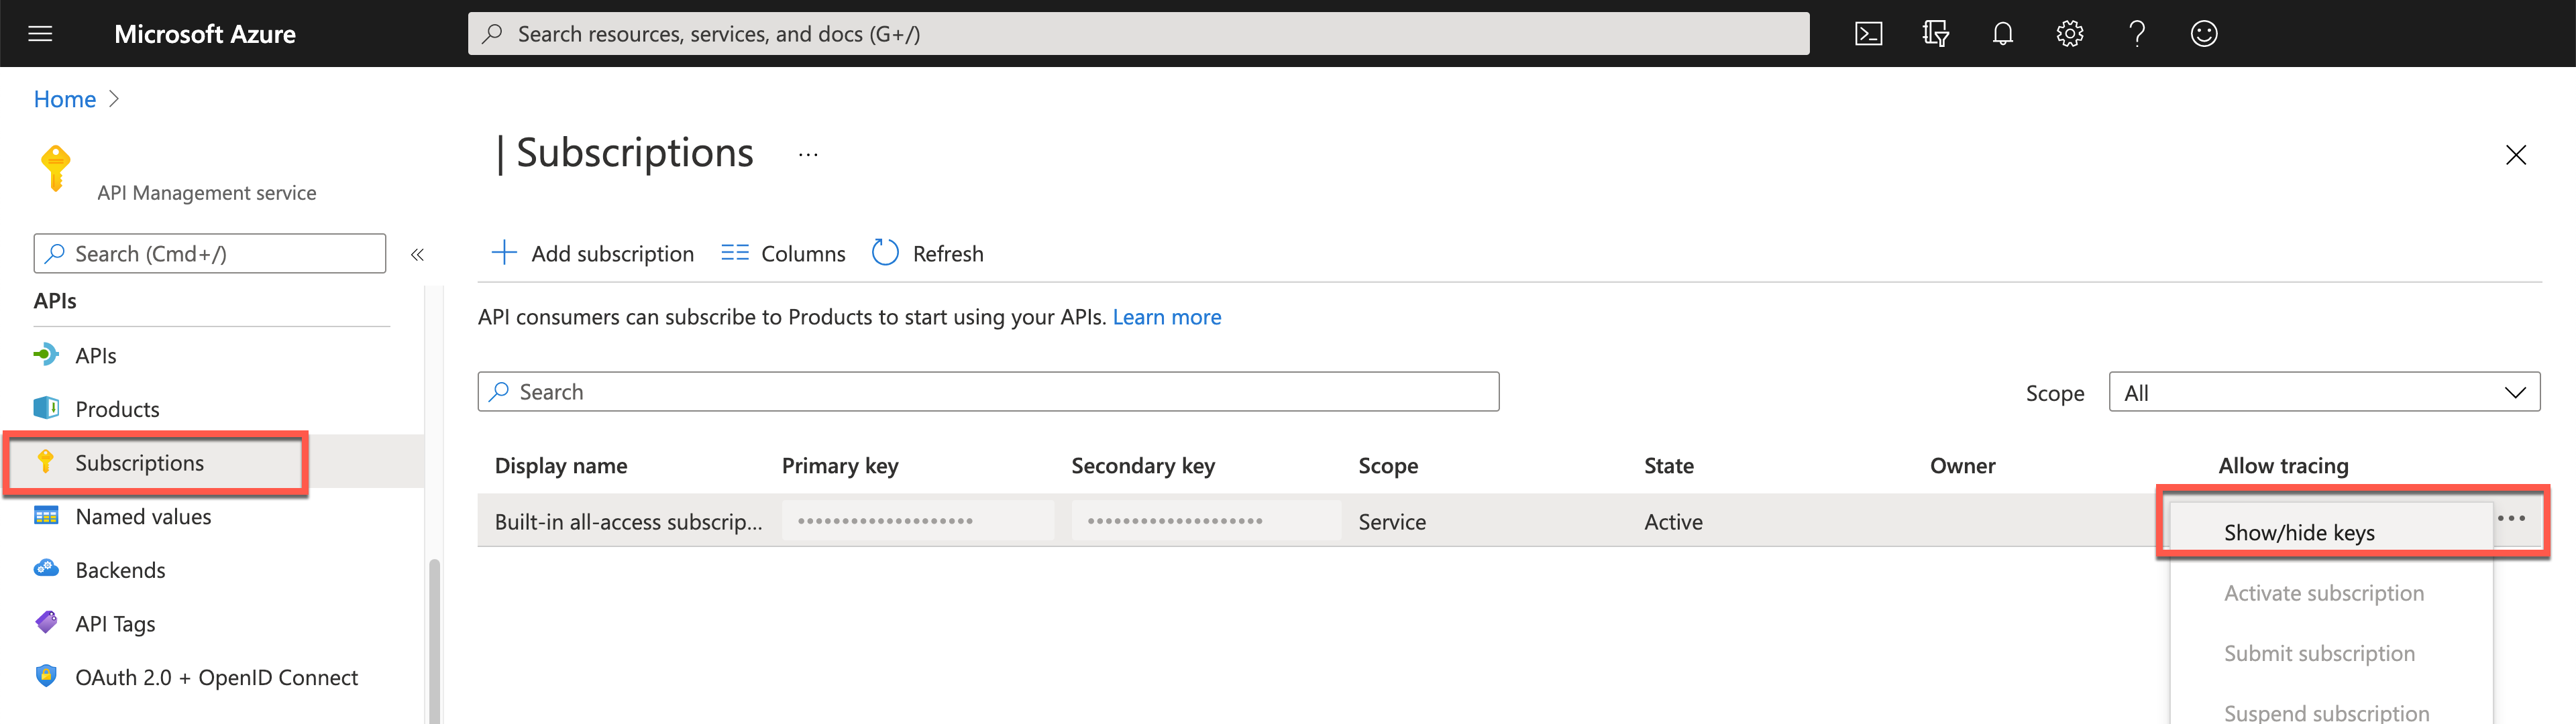
Then, copy the subscription key from either
Primary keyorSecondary key.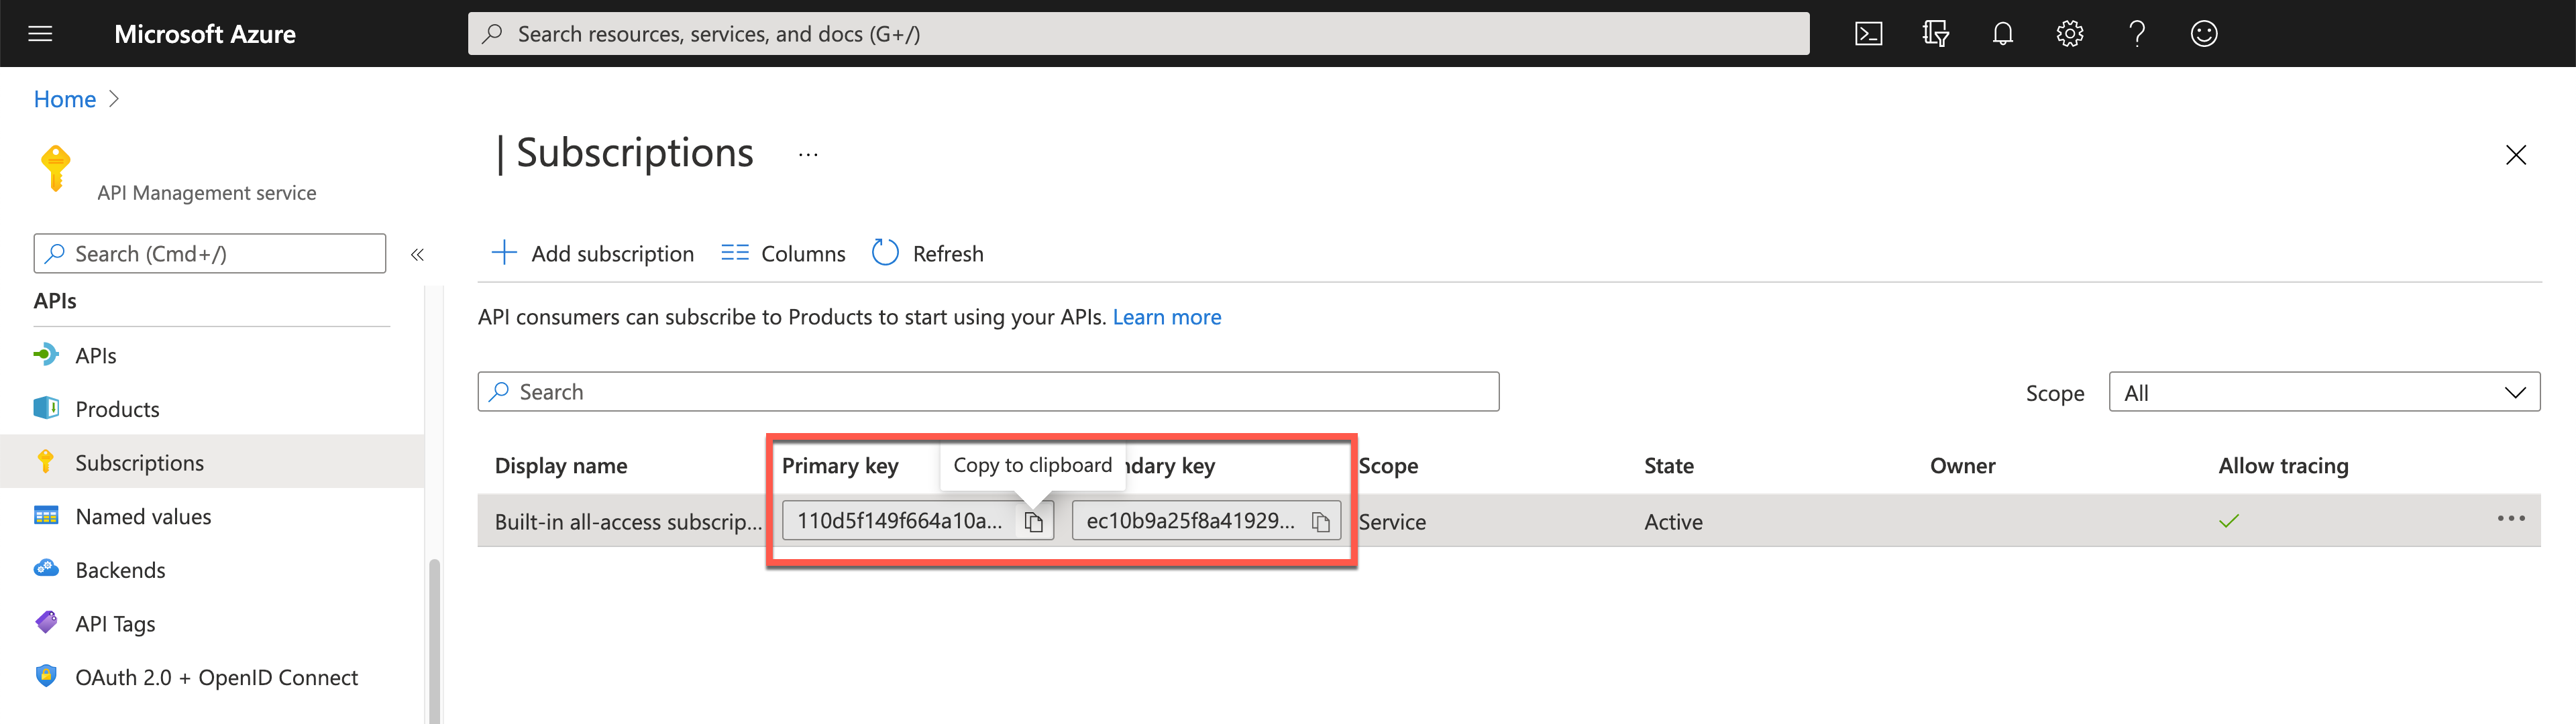
To generate a custom connector from Azure API Management, go to the
APIsblade and select an appropriate API under theAll APIssection. In the screenshot, it's Inventory Management. Then, you will be able to see the API for the warehouse locations.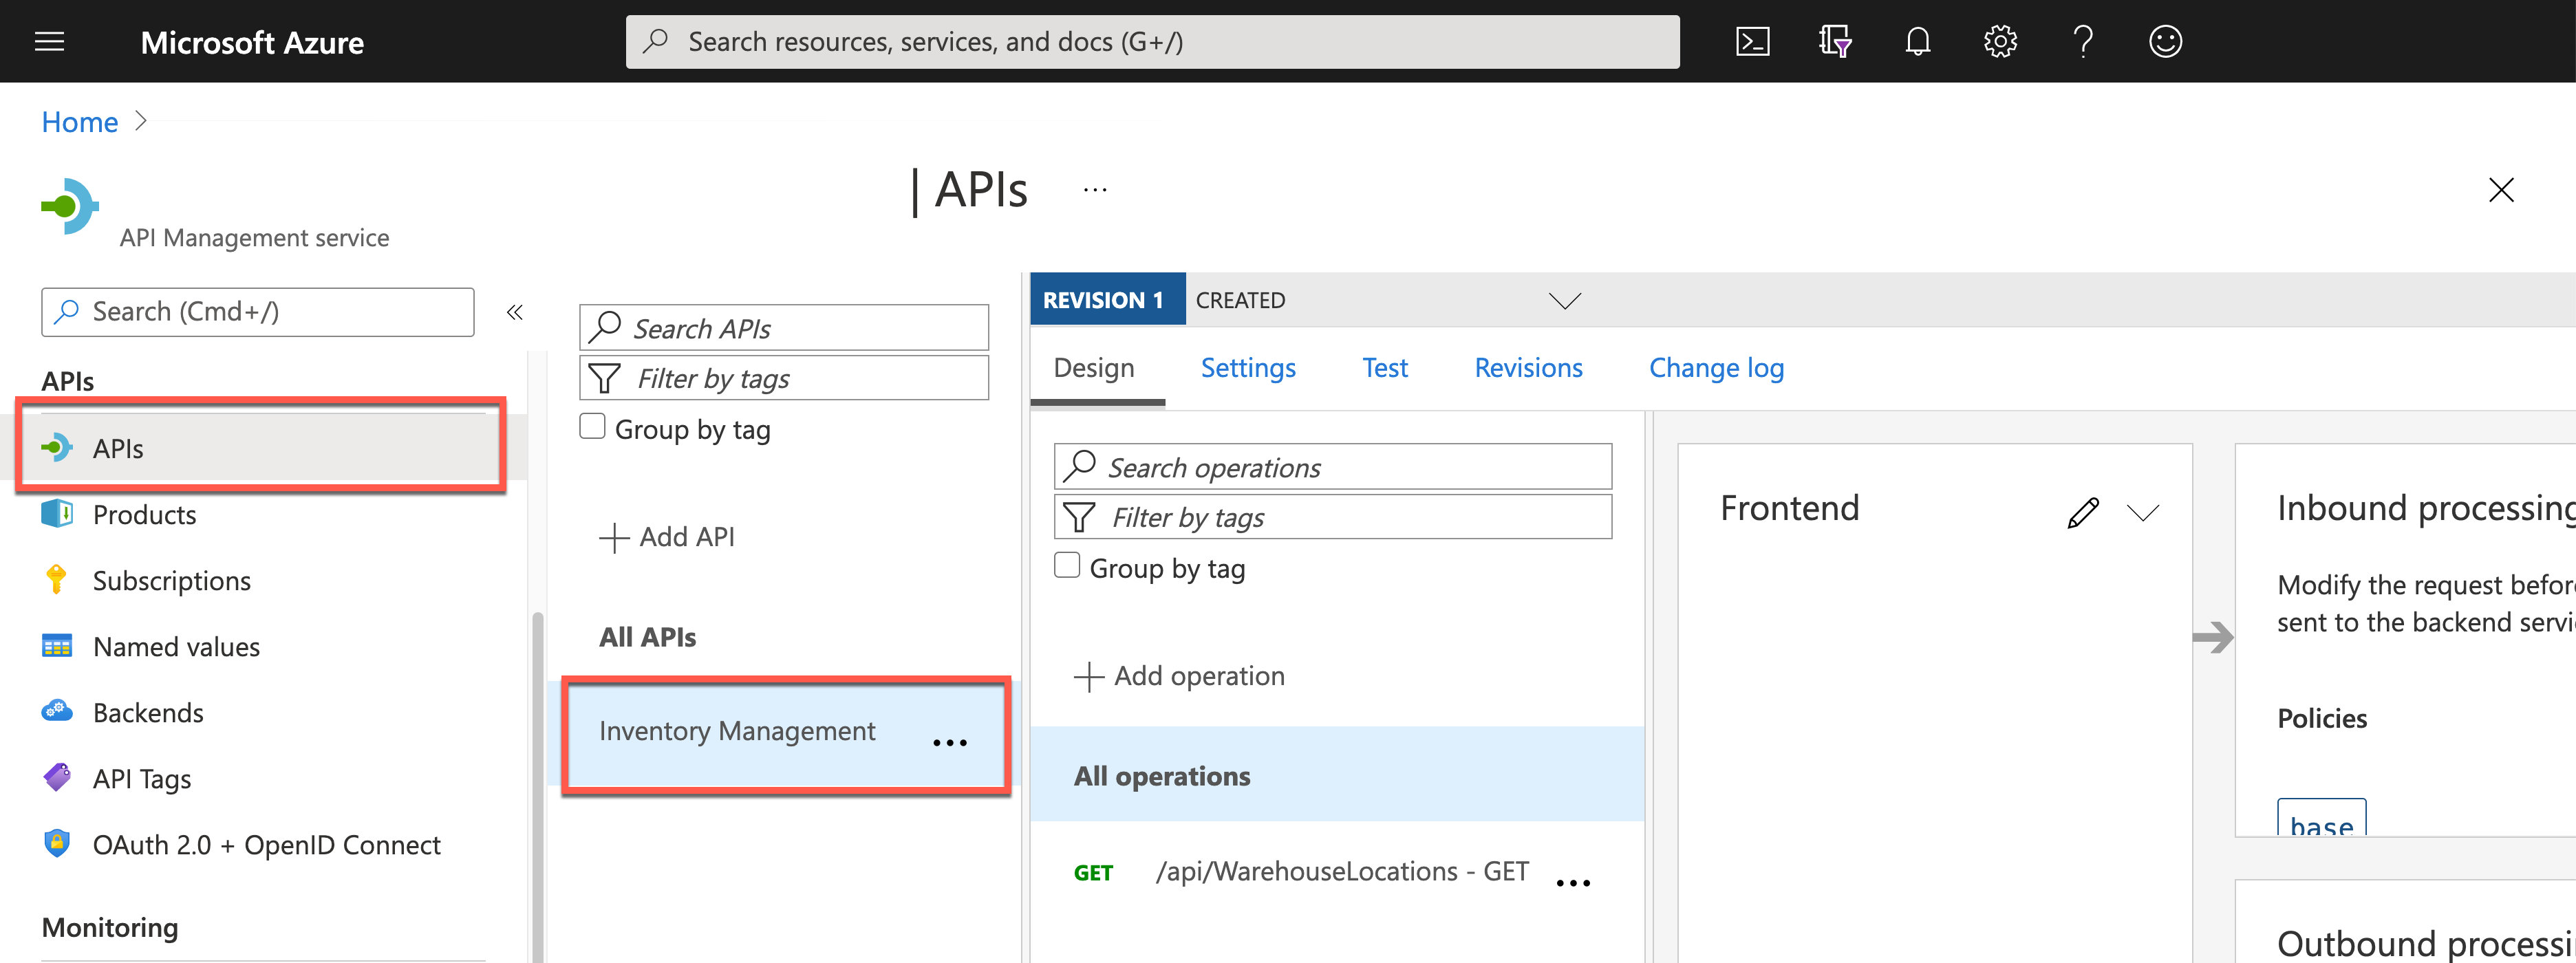
Click the three dots (
...), and you will see the context menu. Select theExport ⬇️menu.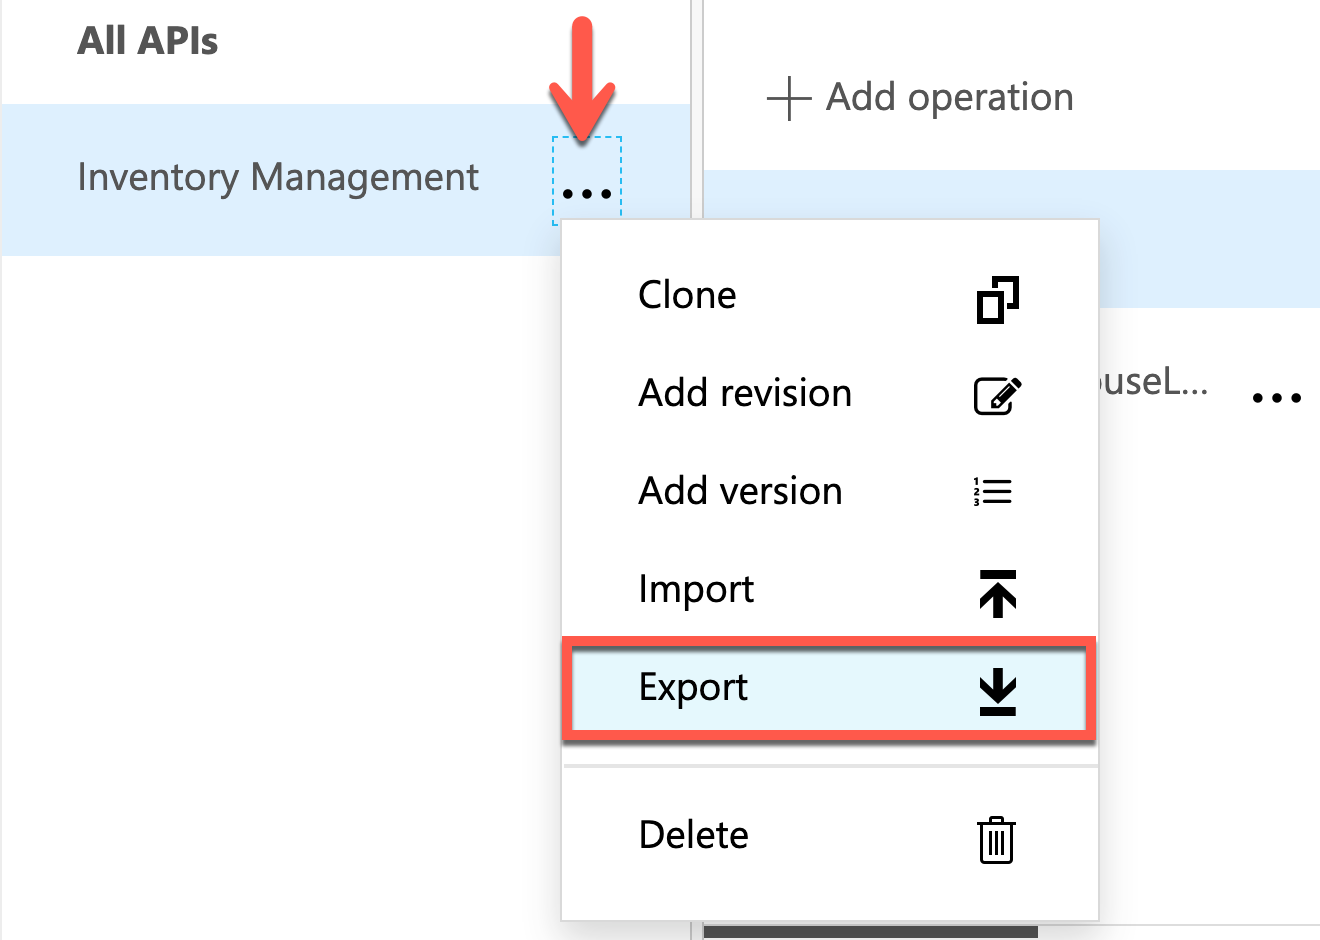
Click the
Power Apps and Power Automatepanel at the right bottom corner.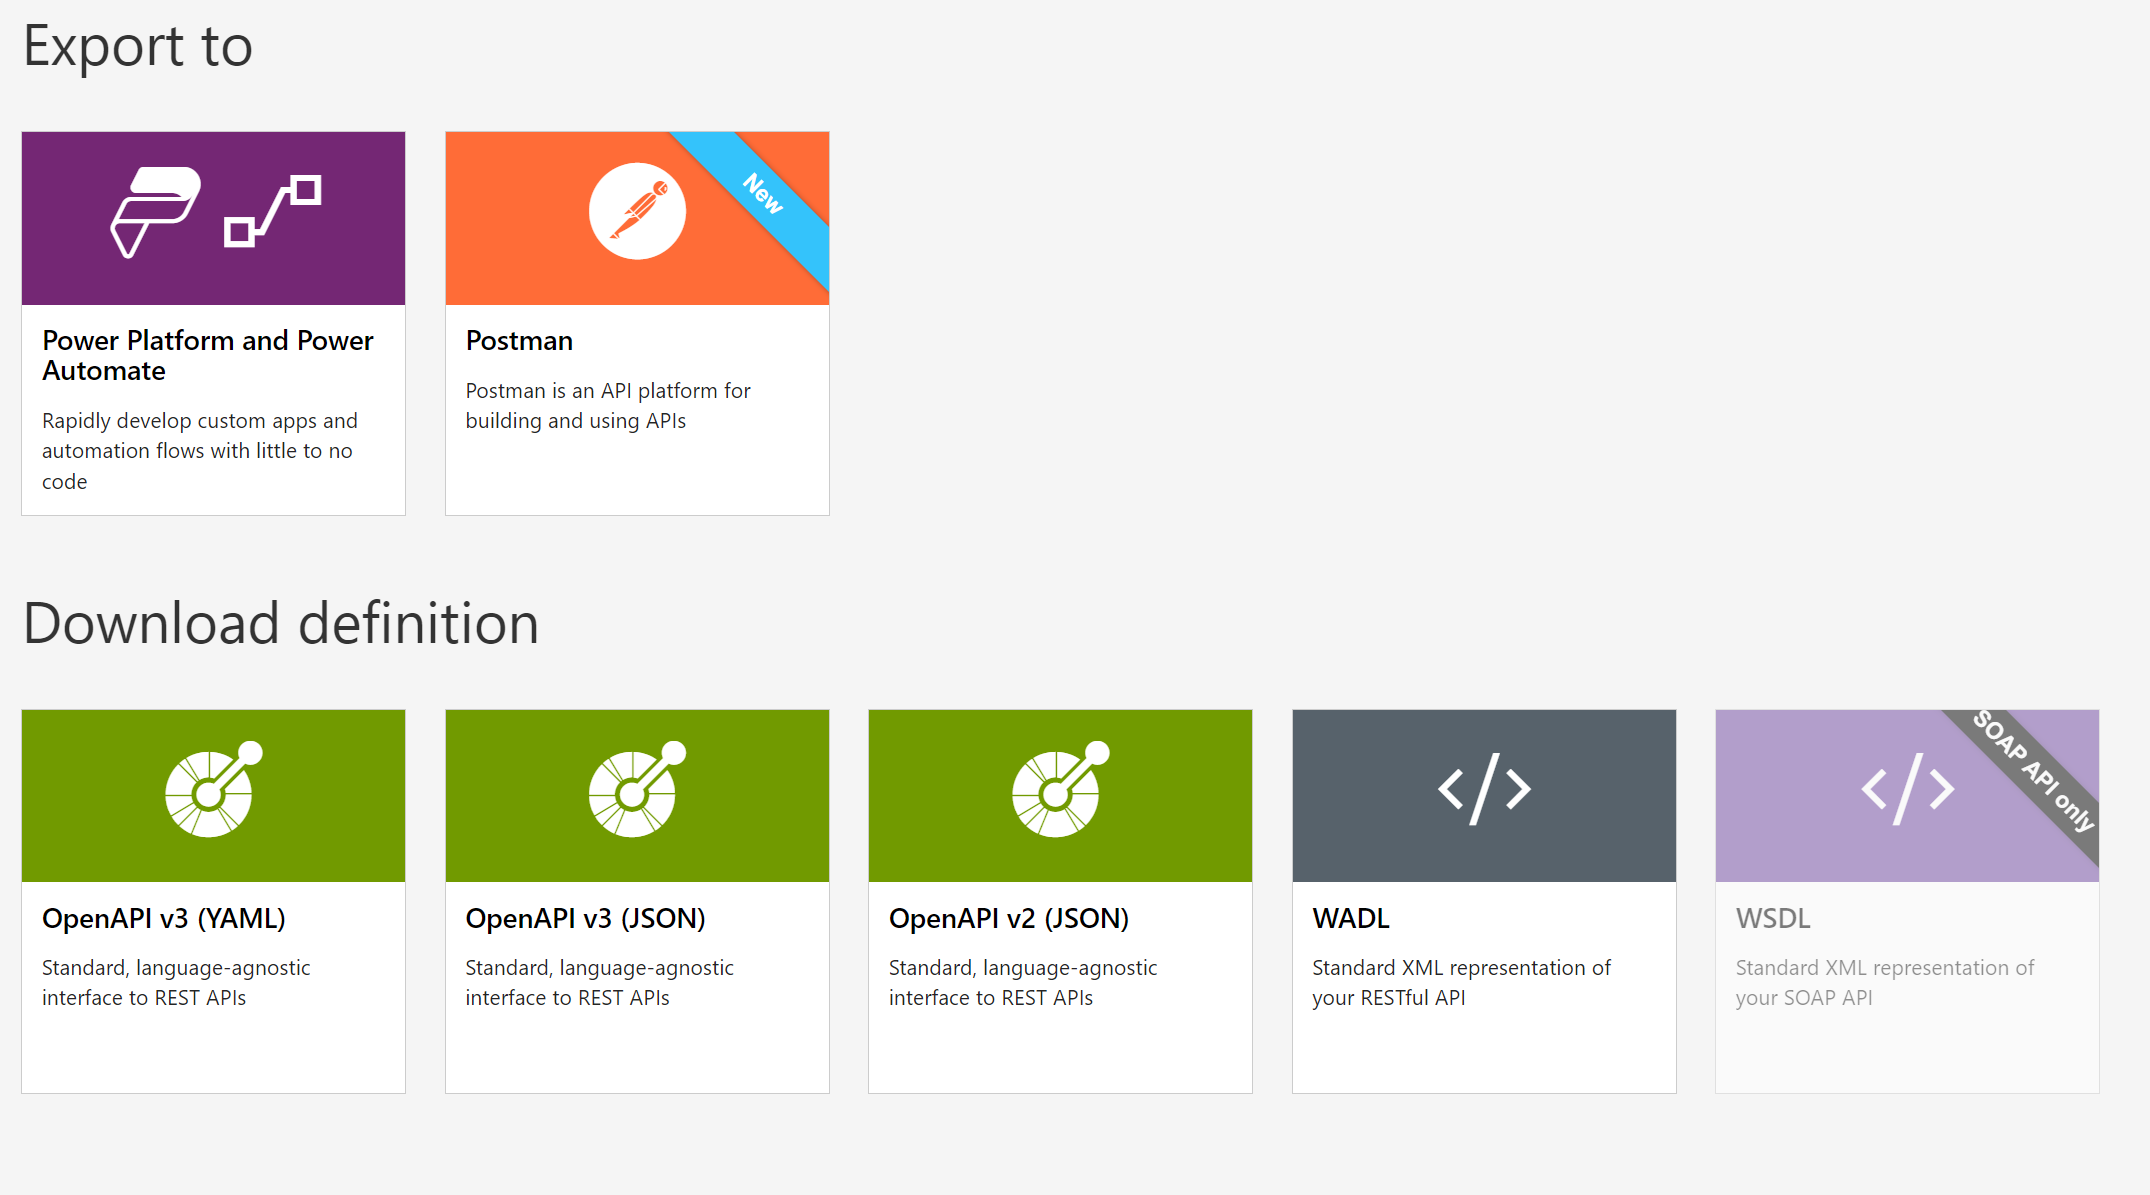
Choose your Power Apps environment for the custom connector to publish and give the display name, InventoryManager. Then click the
Exportbutton at the bottom.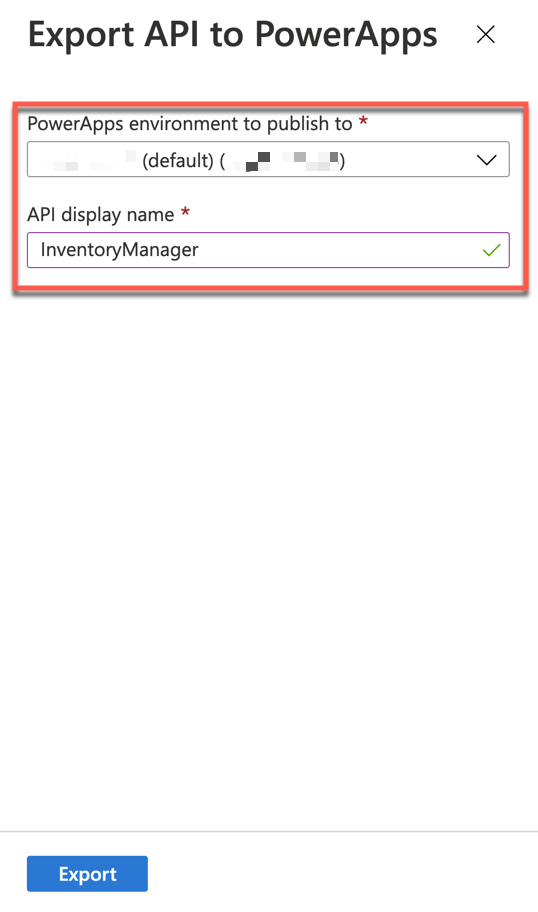
The inventory management APIs have been exported to Power Apps.
Create a connection to the custom connector
You need to create a connection to the custom connector in order to use it. Generally speaking, creating the connection requires authentication to the web APIs.
After logging into Power Apps dashboard, open the
Datablade and click theCustom Connectorsmenu on the left-hand side. Then, click the➕button on the right-hand side.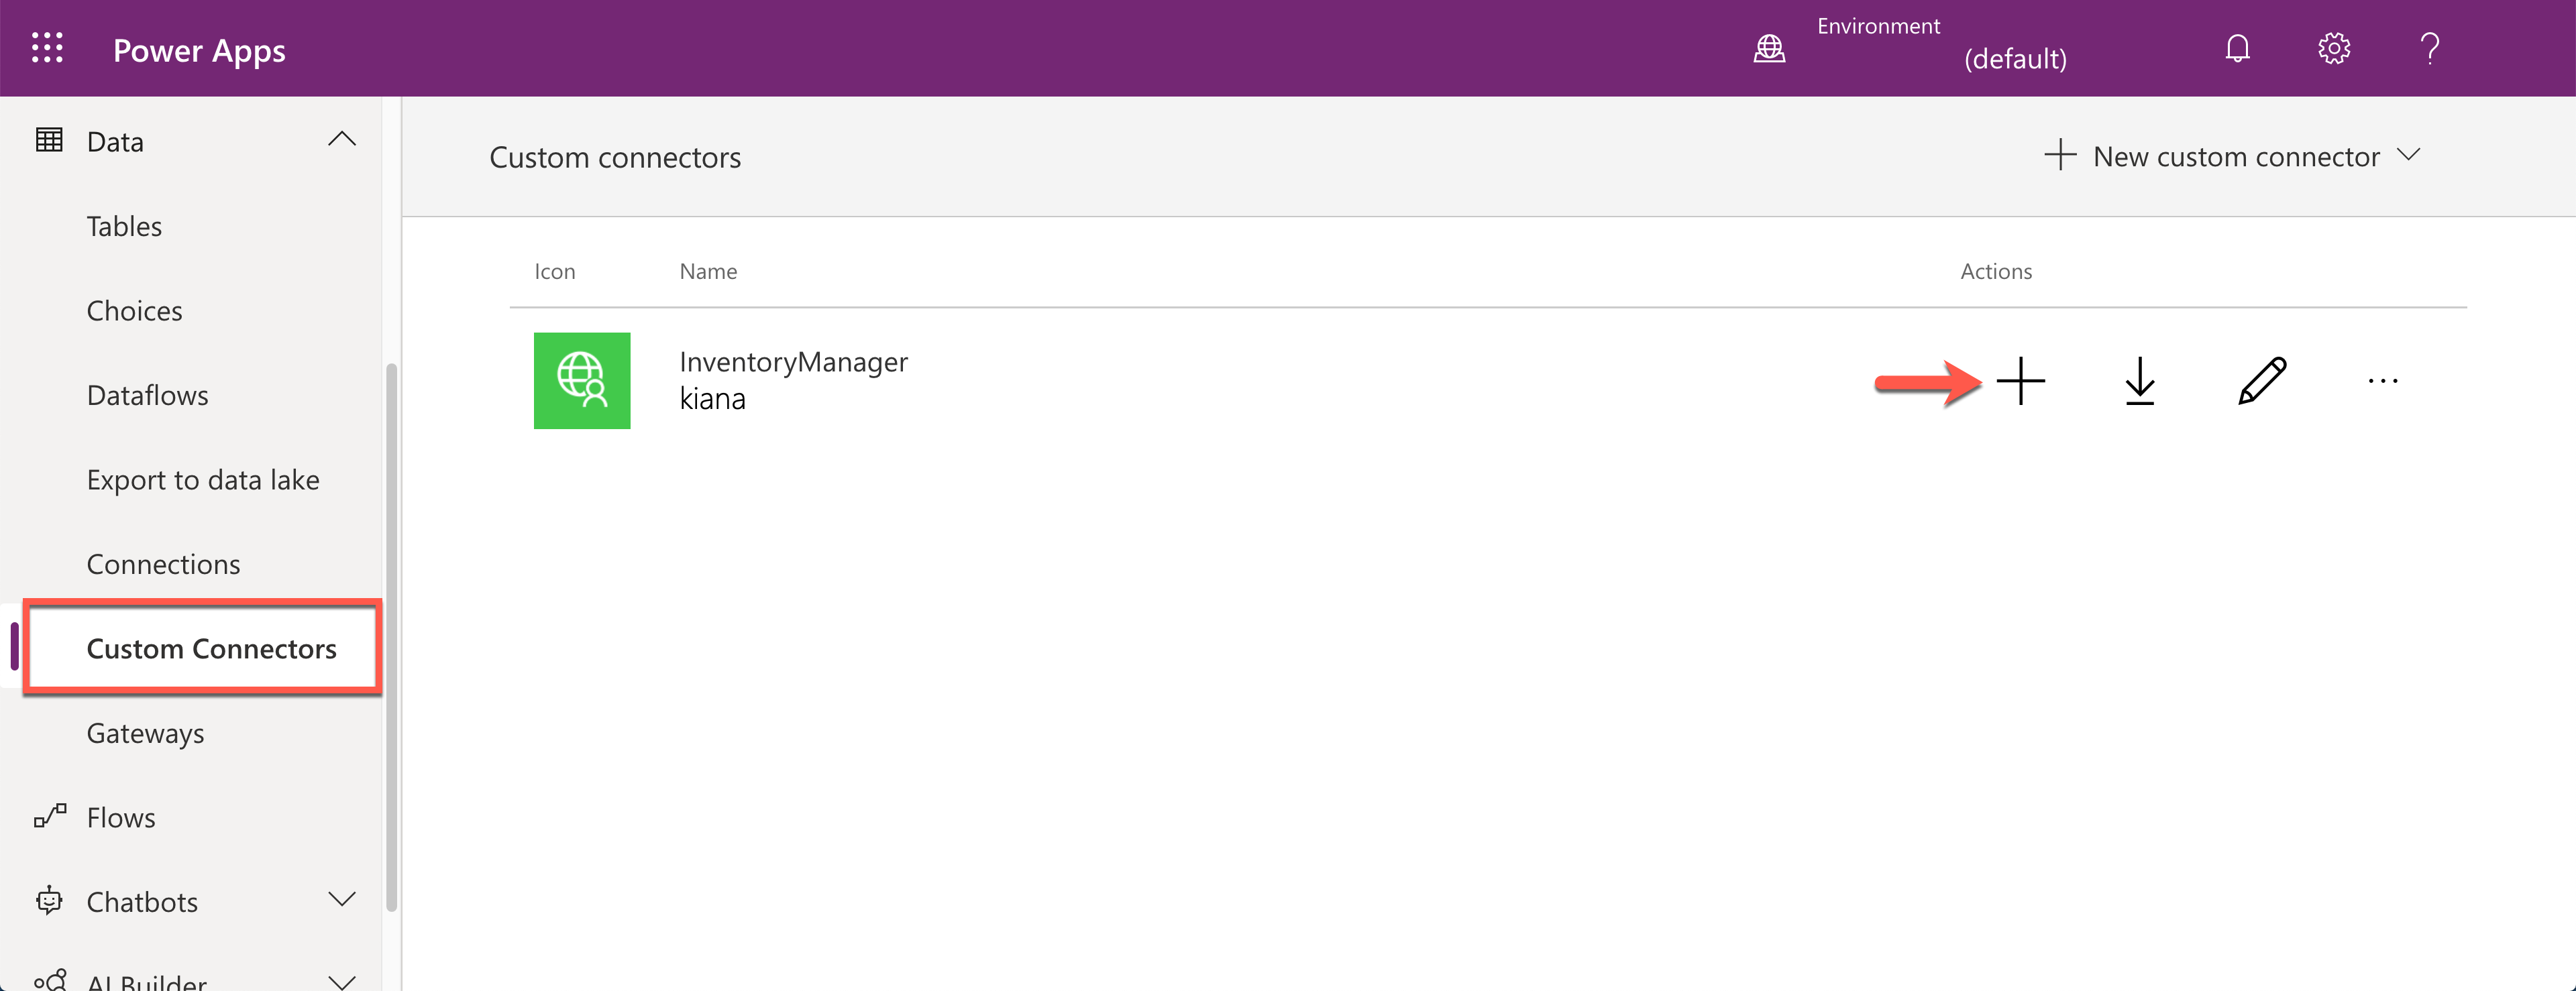
When a pop-up modal shows up, you will see the API Key field enabled. Enter the API key copied at the beginning of this unit. Then click the
Createbutton.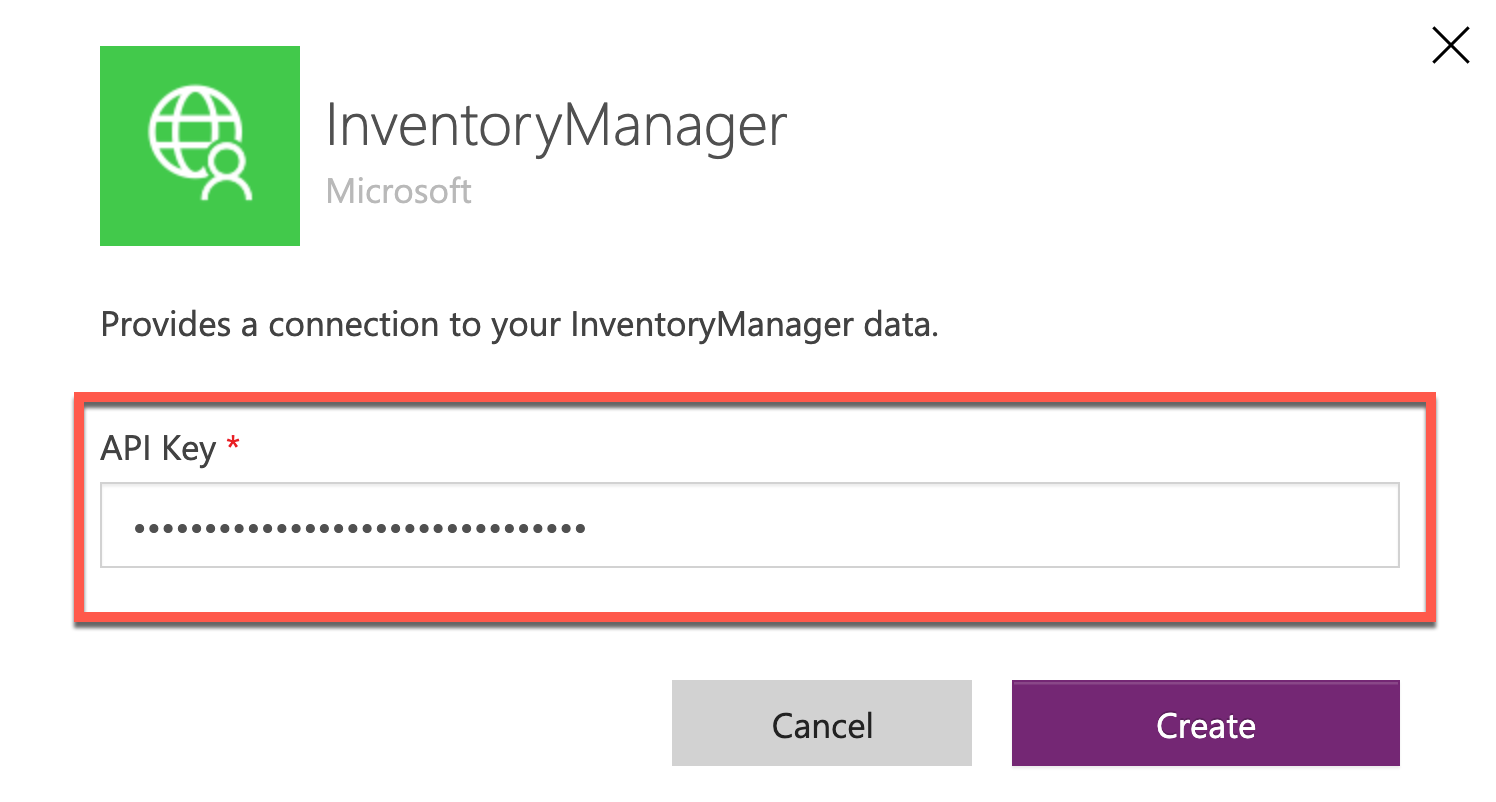
Go to the
Connectionsmenu, and you will see the new connection has been created.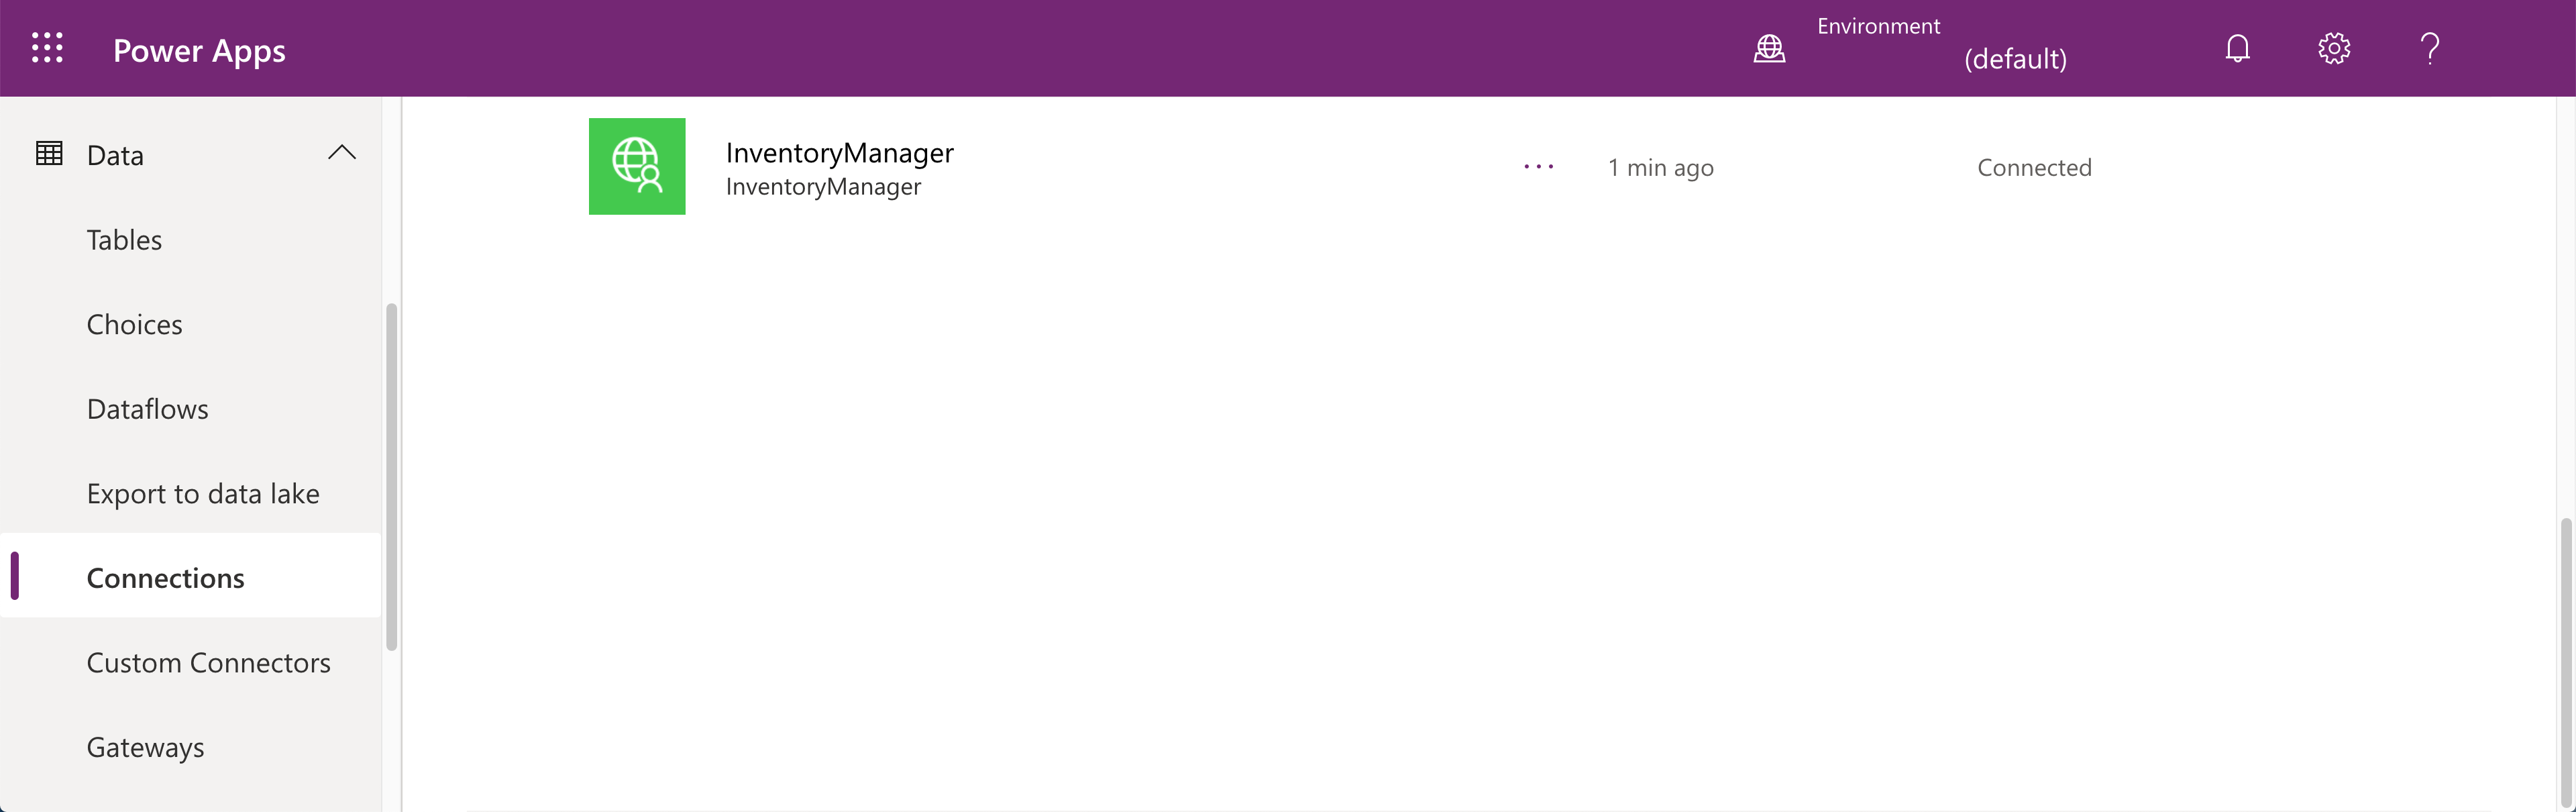
You have completed creating a custom connector for inventory management.