Exercise - Create a custom table and import data
Scenario
The current sales process for your company is manual and updates are only provided each Friday. You want to simplify this process, minimize the opportunity for mistakes, and improve visibility. So you decide you want to create a new app to track sales leads and automatically calculate the forecasted revenue. You want Dataverse to store the list of potential customers.
Use Microsoft Dataverse to store data
In this exercise, you use a custom Dataverse table to store the list of potential customers for your app.
You learn how to:
Create a custom table.
Add custom columns to your table.
Create a calculated column.
Configure a business rule.
Import data from a Microsoft Excel workbook.
Create a custom table
Go to the Power Apps maker portal and sign in (if necessary).
On the menu, select Tables.
Select New table and select Set advanced properties.

Under Properties, enter the Display name: Prospect.
Select the Primary column tab and change the Display name to Prospect Name.
Select Save.
After a few moments, the Tables > Prospect screen appears.

Select + to add a new column in the Prospect columns and data section.
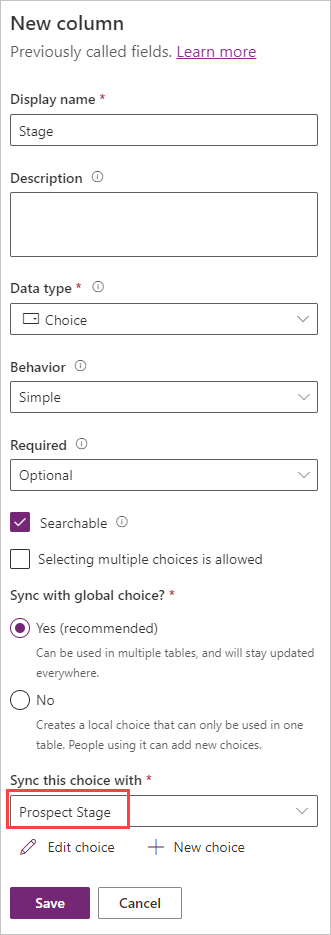
In the New column pane, enter the following information:
Display name: Stage
Data type: Select Choice (and select Choice from the pop-up)
Required: Select Business required
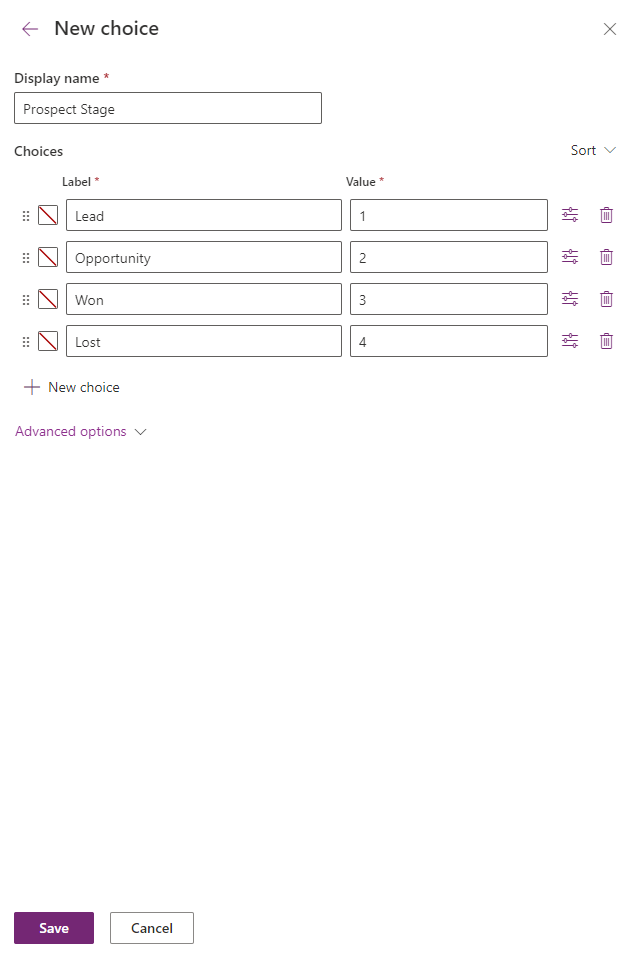
Under Sync this choice with, select New choice. The New choice pane appears. Enter the following information and select Save.
Display name: Prospect Stage
Add the following choices under Label, selecting New choice between entries until your table looks like the following screenshot. When completed, select Save:
Lead (under Value enter 1)
Opportunity (under Value enter 2)
Won (under Value enter 3)
Lost (under Value enter 4)
Once you've saved your New choice, select the drop-down list under Sync this choice with and find/select Prospect Stage.
Under Default choice select Lead.
Select Save.
Select + in the Prospect columns and data pane to add a new column.
Enter the following information in the New column pane and then select Save.
Display name: Contract Amount
Data type: Currency
Select + again to add a new column with the following information and then select Save.
Display name: Probability
Data type: Whole Number (Select Number and then Whole number from the popup.)
Next, we're going to add a column with a behavior. This one is a little more complex. Add a column with the following information.
Display name: Forecasted Revenue
Data type: Currency
Behavior: Calculated
You may notice something different when you choose the behavior as Calculated. You need to save this column before you can edit the calculation. Notice the Save and edit link, just below the behavior box. Go ahead and select that link.
After a few moments, a calculated field pop-up window appears with the Set Forecasted Revenue where you can edit the behavior of the Forecasted Revenue column. Add an Action by selecting the Add action button.
Enter the following formula next to the equals sign, but don't copy and paste.
Note
Your column names aren't exactly the same as the example, since the crXXX_ is specific numbers and letters that define your environment. The formula entry auto-suggests options as you start to type the column names. Check the screenshot to see what your formula should look like in the Action pane.
crXXX_contractamount * (crXXX_probability / 100)
If it looks good, select the circled checkmark to save your changes. (You may need to scroll right to see the circled checkmark.)
Select SAVE AND CLOSE at the top of the window and the window disappears to reveal your Prospect Tables screen again.


Add a business rule
In the table designer, find the Customizations pane on the far right and select Business rules.
Select New business rule at the top of the screen; a new browser tab opens.
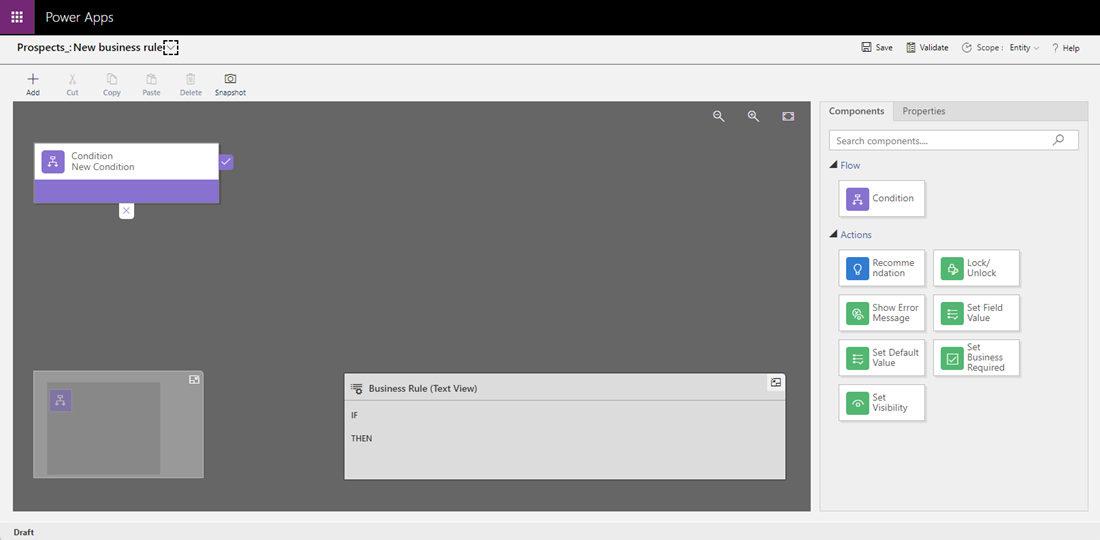
Select the Condition New Condition inside of your design pane. The condition Properties pane shows on the right hand side of the screen.
In the Properties pane under Rules, look at your Field, ensure that Contract Amount is selected.
For the Operator, change the value from Equals to Contains data.
Select Apply.
Now select the Components tab.
Find the component Set Business Required and drag and drop it on the plus symbol to the right of the purple checkbox in the design pane (the plus symbol appears as you begin to move the component to the canvas).

With Set Business Required New Action selected/highlighted, look at the Properties pane and under Business Required, select Probability in the top dropdown and Business Required in the bottom dropdown.
Select Apply.

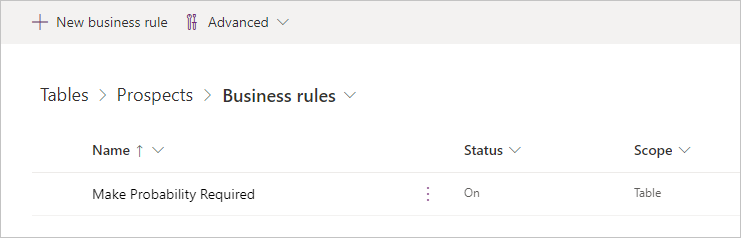
In the top left of the screen, select the chevron drop-down just to the right of Prospect New business rule and in the Business rule name, type Make Probability Required.
Select Save in top-right corner of screen.
Select Activate to (also top-right of screen) activate the rule.
After a few moments, a popup window appears for Process Activate Confirmation. Select Activate in the popup to confirm activation.
Close the browser tab.
Select Done.
Notice your new business rule has been added to the Business rules screen. Now return to your table editing screen.


Import data from an Excel file
You use the spreadsheet named "Prospects.csv" for this exercise. Open this link and Download the file.
Extract the Prospects.csv from the zip file.
Open the Prospects.csv file in Excel. Notice the Stage column is empty. You need to enter these values manually. Enter the following values in the Stage column:
Contoso Flooring: Won
Fabrikam Inc: Won
Adventure Works: Lead
VanArsdel: Lost
Adatum: Lead
Relecloud: Opportunity
Save your file locally as an Excel Workbook (Prospects.xlsx). Then close the spreadsheet.
Return to your Prospect table in the Power Apps maker portal.
Select the Import button at the top of the screen and select Import > Import data.
Note
Do not select Import data from Excel, which is a legacy function. Be sure to use the Import data which activates Power Query.
In the Power Query popup, there are many ways you can point towards your Excel sheet. You can drag and drop the file, browse for it, or connect to it directly from OneDrive.
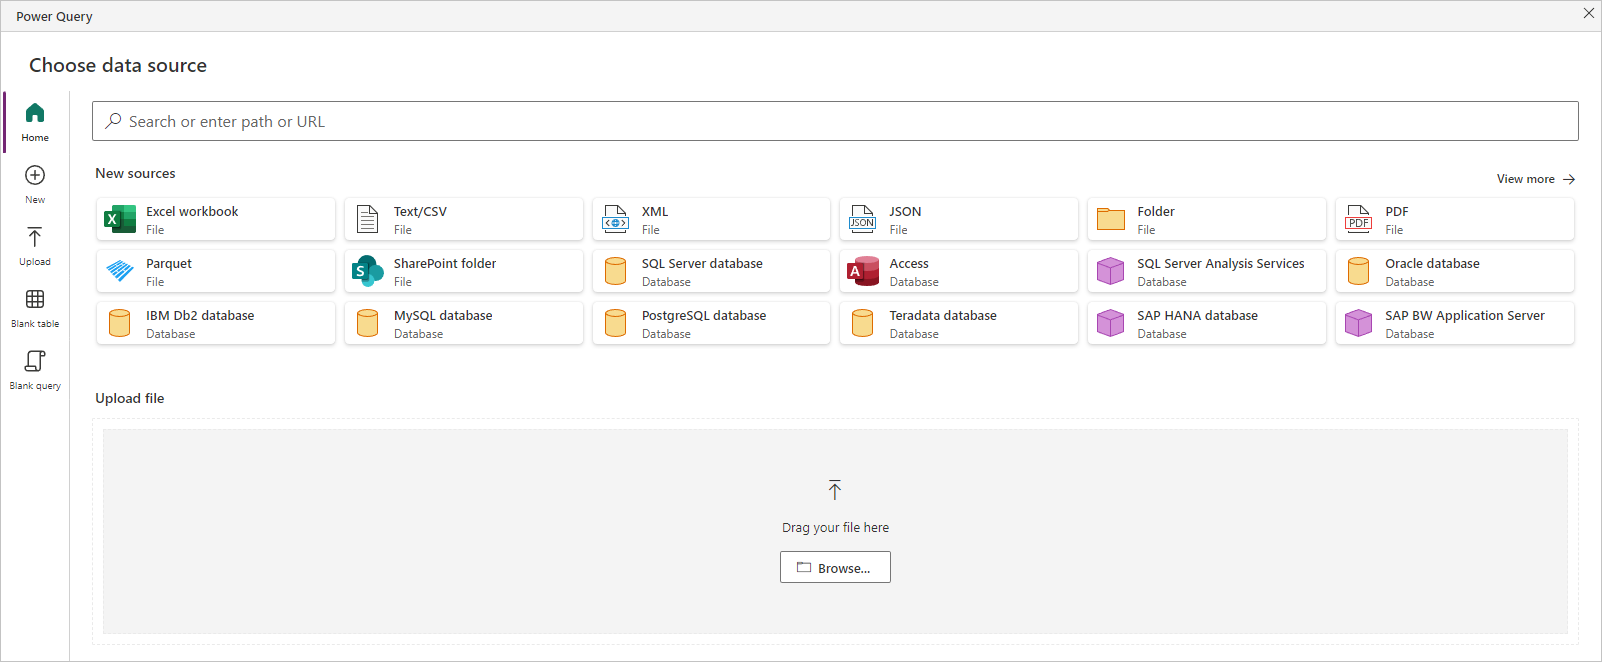
Once you find the Prospects.xlsx (you may need to enter your connection credentials), ensure that the connection is valid and then select Next to continue.
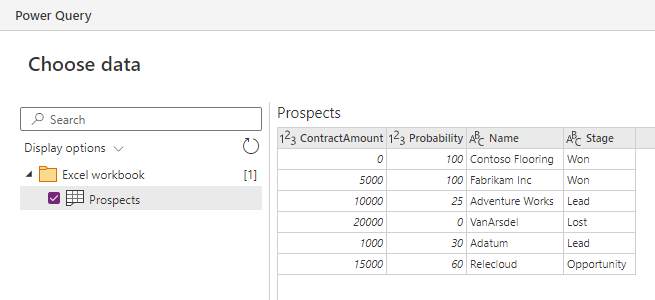
The Power Query now switches to Choose data. Find the Prospects table under the Excel workbook folder and select it. Doing so previews your data, giving you a chance to ensure that you're about to import the correct table. Then select Next to continue.
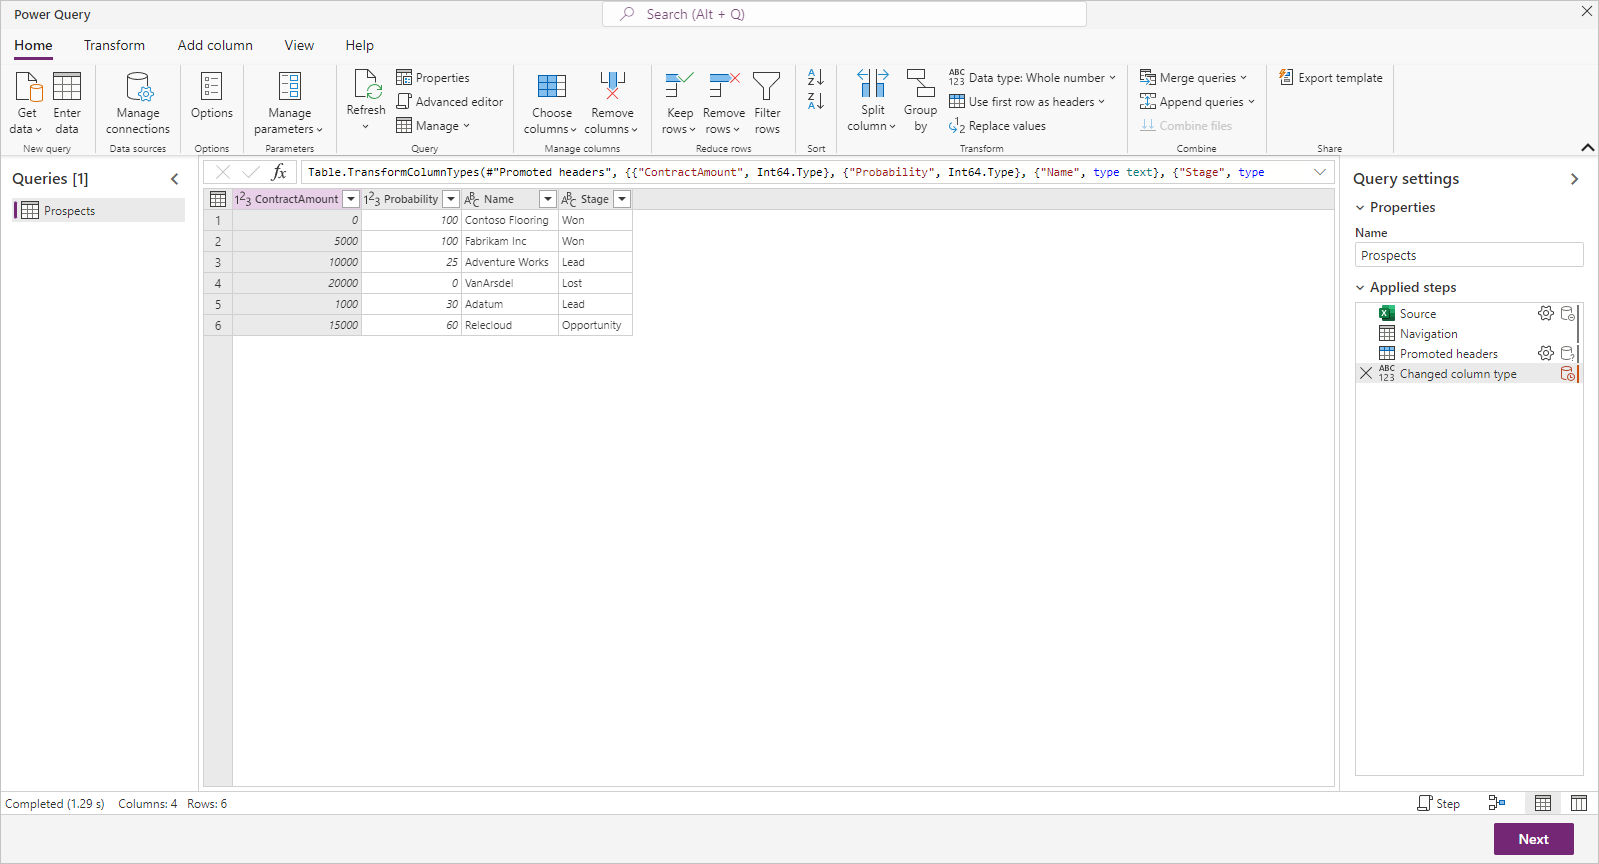
Power Query opens to a transform data screen where you can now shape your data before importing. Notice how Power Query automatically makes a guess at the type of data in each column. ContractAmount and Probability are defined as integer, and Name and Stage are defined as text. In this case, leave it as it is. Select Next to continue.
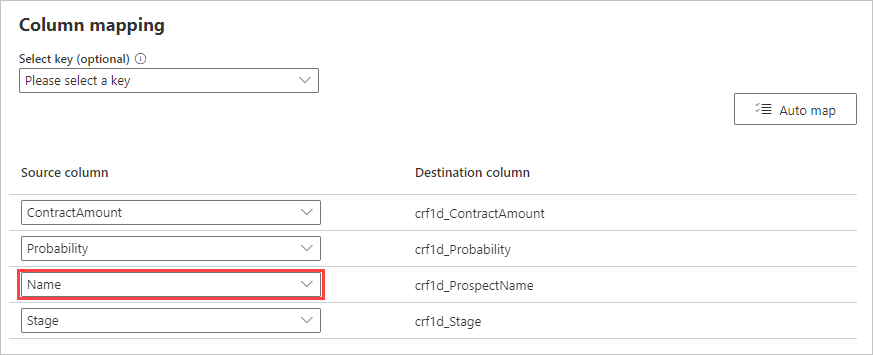
Power Query switches to the Map tables screen, where you can select where you want the data to load to (either a new table or an existing table) and which columns in your existing data source that you send your Excel table data to. In this case select Load to existing table under Load settings, then select your Prospect table from the dropdown under Destination table. Completing this brings up the Column Mapping section showing the Destination column name from your selected table and the Source column with some dropdowns.

Under Column mapping, select the Auto map button at the top right to let Power Query try determining how your columns match. Notice how the Power Query matches three of four of your columns automatically! Let's pick the last one manually matching Name to your ProspectName Dataverse column. Your mapping should now resemble this image:
Select Next to continue.
The Power Query Refresh settings screen gives you the ability to determine how you want the data from this external source to refresh. In this case, leave it as Refresh manually. If you chose to do it automatically, you could set it up on a schedule. Leaving the default as manually, select the Publish button at the bottom right of the screen.
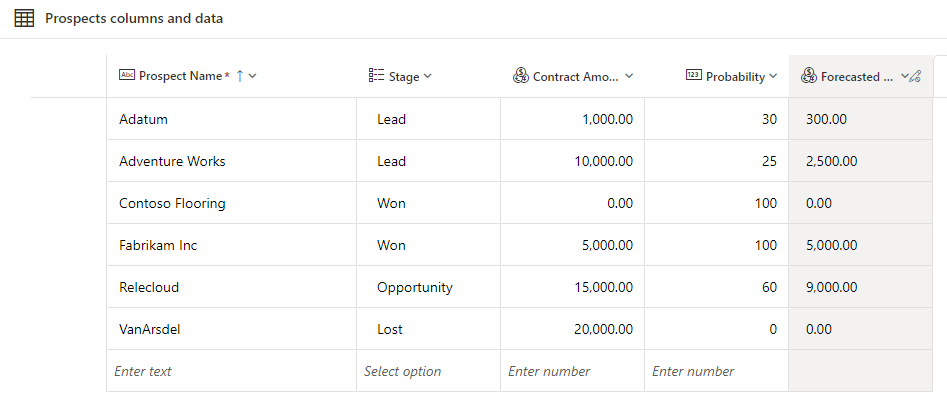
The imported data doesn't appear right away, so go ahead and refresh your browser screen to show the data
Ensure that the data has been successfully imported. Your columns and data should look similar to this screenshot:

Congratulations! You've created a custom table with a business rule and learned how to import external data into Dataverse.