Implement Hyper-V VM live migration
One of the primary benefits of the virtualization is the ability to transition VMs across different physical hosts. The prerequisite for high availability in such scenarios is the ability to perform such operation without any perceivable downtime. Hyper-V Live Migration delivers this functionality.
What is Hyper-V Live Migration?
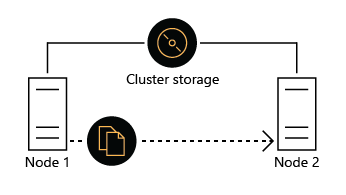
Live Migration is a Hyper-V feature which allows you to seamlessly move running VMs from one Hyper-V host to another while maintaining the availability of VM workloads. The primary benefit of live migration is the resulting flexibility. For example, you can decommission or upgrade a Hyper-V host on an as needed basis, without having to schedule a maintenance window, by simply live migrating all of its VMs.
Note
Windows Server supports shared-nothing live migrations, which doesn't depend on shared storage or failover clustering. Instead, the migration traffic traverses the network connection between the source and target Hyper-V hosts.
Implement Hyper-V Live Migration
You can enable and configure Hyper-V Live Migration by using Hyper-V settings in Hyper-V Manager. When you enable it, on the Live Migrations tab, within Advanced Features, you can choose the authentication protocol. The default option is Credential Security Support Provider (CredSSP); however, you can switch to the Kerberos authentication. When deciding which authentication protocol to use, consider the following:
- CredSSP is easier to configure, however, it doesn't offer the same level of security as Kerberos. To live-migrate a VM with CredSSP enabled, you have to sign in to the source server via a Remote Desktop session or remote Windows PowerShell session.
- Kerberos authentication is the more secure of the two options. It requires additional configuration of constrained delegation, which involves modifying properties of AD DS computer accounts of the source Hyper-V host. However, this eliminates the need to sign in to that host server to initiate live migrations.
Additionally, you have the option to limit the number of simultaneous live migrations and restrict incoming live migrations based on the IP address of the source Hyper-V host.
You can start the live migration process by using:
- Windows Admin Center.
- Failover Cluster Management.
- Hyper-V Manager.
- Windows PowerShell.
Note
You can't use Hyper-V Manager to perform a live migration of a clustered VM.
How does Hyper-V Live Migration work?
The live migration process consists of the following stages:
- Migration setup. When an administrator starts a VM failover, the source Hyper-V server creates a TCP connection to the target Hyper-V server. This connection is used to transfer VM configuration data between the two hosts. Live Migration creates a temporary VM on the target host and allocates memory to the destination VM. The migration preparation also checks to determine whether a VM can be migrated.
- VM memory transfer. The source host transfers memory of the running VM to the target host. Hyper-V repeats the memory copy process several times to allow for any changes that took place since the previous iteration. The copy process stops once the difference between content of the VM memory at the source and target drops lower than a predefined threshold or the number of iterations reaches a predefined limit of 10.
- State transfer. The source Hyper-V stops the VM, transfers its state along with any remaining memory to the target host, at which point, the target host starts its copy of the VM.
- Cleanup. The cleanup stage completes the migration by deleting the VM on the source host.
Note
Live migration supports Server Message Block (SMB) 3.x. This means that you can perform live migration over a network connection to an SMB 3.x share hosting VM files and benefit from such SMB features as SMB Direct and SMB Multichannel. SMB Direct optimizes migration speed with minimum impact on the processor utilization of the source and target Hyper-V hosts.
Demonstration
The following video demonstrates how to perform Hyper-V VMs live migration by using Failover Cluster Manager.
The main steps in the process are:
- Create AD DS environment. Create a single-domain AD DS forest including three domain member servers with the third server containing four data disk each.
- Create a Windows Server failover cluster by using Windows PowerShell. Use the first two domain member servers to create a two-node cluster.
- Set up an iSCSI target. Use the third domain member servers to set up an iSCSI target.
- Set up iSCSI storage. On the third domain member server, create an iSCSI virtual disk and make it available to iSCSI initiators on the cluster nodes.
- Set up iSCSI Initiator. Configure iSCIS initiators on the cluster nodes to set up shared storage.
- Configure CSV. Use Failover Cluster Manager to configure Cluster Shared Volumes (CSV).
- Create a highly available VM. Use Failover Cluster Manager to create a highly available VM.
- Perform Live Migration of a highly available VM. Use Failover Cluster Manager to perform Live Migration of a highly available VM.