Configure identity providers
Direct federation is now called SAML/WS-Fed identity provider (IdP) federation. You can set up federation with any organization whose identity provider (IdP) supports the Security Assertion Markup Language (SAML) 2.0 or WS-Federation (WS-Fed) protocol. When you set up SAML/WS-Fed IdP federation with a partner's IdP, new guest users from that domain can use their own IdP-managed organizational account to sign in to your Microsoft Entra tenant and start collaborating with you. There's no need for the guest user to create a separate Microsoft Entra account.
When is a guest user authenticated with SAML/WS-Fed IdP federation?
After you set up federation with an organization's SAML/WS-Fed IdP, any new guest users you invite will be authenticated using that SAML/WS-Fed IdP. It’s important to note that setting up federation doesn’t change the authentication method for guest users who have already redeemed an invitation from you. Here are some examples:
- Guest users have already redeemed invitations from you, and then later you set up federation with the organization's SAML/WS-Fed IdP. These guest users continue to use the same authentication method they used before you set up federation.
- You set up federation with an organization's SAML/WS-Fed IdP and invite guest users, and then the partner organization later moves to Microsoft Entra ID. The guest users who have already redeemed invitations continue to use the federated SAML/WS-Fed IdP, as long as the federation policy in your tenant exists.
- You delete federation with an organization's SAML/WS-Fed IdP. Any guest users currently using the SAML/WS-Fed IdP are unable to sign in.
In any of these scenarios, you can update a guest user’s authentication method by resetting their redemption status. SAML/WS-Fed IdP federation is tied to domain namespaces, such as contoso.com and fabrikam.com. When the admin establishes federation with AD FS or a third-party IdP, organizations associate one or more domain-namespaces to these IdPs.
End-user experience
With SAML/WS-Fed IdP federation, guest users sign into your Microsoft Entra tenant using their own organizational account. When they're accessing shared resources and are prompted for sign-in, users are redirected to their IdP. After successful sign-in, users are returned to Microsoft Entra ID to access resources. If the Microsoft Entra session expires or becomes invalid and the federated IdP has SSO enabled, the user experiences SSO. If the federated user's session is valid, the user isn't prompted to sign in again. Otherwise, the user is redirected to their IdP for sign-in.
Security Assertion Markup Language 2.0 configuration
Microsoft Entra B2B can be configured to federate with identity providers that use the SAML protocol with specific requirements listed below.
Note
The target domain for direct federation must not be DNS-verified on Microsoft Entra ID.
Required Security Assertion Markup Language 2.0 attributes and claims
The following tables show requirements for specific attributes and claims that must be configured at the third-party identity provider. To set up direct federation, the following attributes must be received in the SAML 2.0 response from the identity provider. These attributes can be configured by linking to the online security token service XML file or by entering them manually.
Required attributes for the SAML 2.0 response from the IdP:
| Attribute | Value |
|---|---|
| AssertionConsumerService | https://login.microsoftonline.com/login.srf |
| Audience | urn:federation:MicrosoftOnline |
| Issuer | The issuer URI of the partner IdP, for example https://www.example.com/exk10l6w90DHM0yi... |
Required claims for the SAML 2.0 token issued by the IdP:
| Attribute | Value |
|---|---|
| NameID Format | urn:oasis:names:tc:SAML:2.0:nameid-format:persistent |
| emailaddress | https://schemas.xmlsoap.org/ws/2005/05/identity/claims/emailaddress |
WS-Federation configuration
Microsoft Entra B2B can be configured to federate with identity providers that use the WS-Fed protocol with some specific requirements as listed below. Currently, the two WS-Fed providers have been tested for compatibility with Microsoft Entra ID include AD FS and Shibboleth.
The target domain for direct federation must not be DNS-verified on Microsoft Entra ID. The authentication URL domain must match either the target domain or the domain of an allowed identity provider.
Required WS-Federation attributes and claims
The following tables show requirements for specific attributes and claims that must be configured at the third-party WS-Fed identity provider. To set up direct federation, the following attributes must be received in the WS-Fed message from the identity provider. These attributes can be configured by linking to the online security token service XML file or by entering them manually.
Required attributes in the WS-Fed message from the IdP:
| Attribute | Value |
|---|---|
| PassiveRequestorEndpoint | https://login.microsoftonline.com/login.srf |
| Audience | urn:federation:MicrosoftOnline |
| Issuer | The issuer URI of the partner IdP, for example https://www.example.com/exk10l6w90DHM0yi... |
Required claims for the WS-Fed token issued by the IdP:
| Attribute | Value |
|---|---|
| ImmutableID | https://schemas.microsoft.com/LiveID/Federation/2008/05/ImmutableID |
| emailaddress | https://schemas.xmlsoap.org/ws/2005/05/identity/claims/emailaddress |
Add Google as an identity provider for B2B guest users
By setting up federation with Google, you can allow invited users to sign in to your shared apps and resources with their own Gmail accounts, without having to create Microsoft accounts.
Note
Google federation is designed specifically for Gmail users. To federate with G Suite domains, use direct federation.
What is the experience for the Google user?
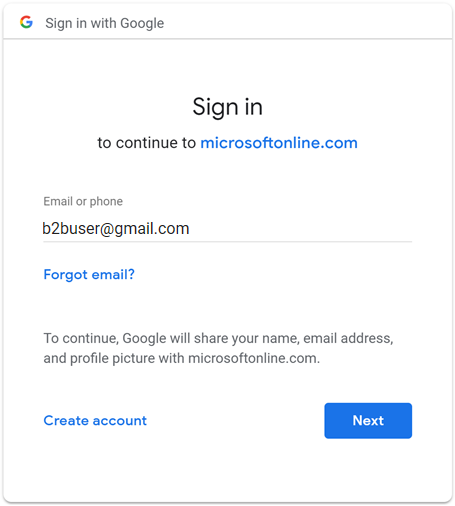
When you send an invitation to Google Gmail users, the guest users should access your shared apps or resources by using a link that includes the tenant context. Their experience varies depending on whether they're already signed in to Google:
- Guest users who aren't signed in to Google will be prompted to do so.
- Guest users who are already signed in to Google will be prompted to choose the account they want to use. They must choose the account you used to invite them.
Guest users who see a header too long error can clear their cookies or open a private or incognito window and try to sign in again.
Deprecation of WebView sign-in support
Google is deprecating embedded web-view sign-in support (Starting September 30, 2021). If your apps authenticate users with an embedded web-view and you're using Google federation with Microsoft Entra B2C or Microsoft Entra B2B for external user invitations or self-service sign-up, Google Gmail users won't be able to authenticate.
The following are known scenarios that will affect Gmail users:
- Microsoft apps (e.g. Teams and Power Apps) on Windows.
- Windows apps that use the WebView control, WebView2, or the older WebBrowser control, for authentication. These apps should migrate to using the Web Account Manager (WAM) flow.
- Android applications using the WebView UI element.
- iOS applications using UIWebView/WKWebview.
- Apps using Microsoft Authentication Library.
This change doesn't affect:
- Web apps
- Microsoft 365 services that are accessed through a website (for example, SharePoint Online, Office web apps, and Teams web app)
- Mobile apps using system web-views for authentication (SFSafariViewController on iOS, Custom Tabs on Android).
- Google Workspace identities, for example when you’re using SAML-based federation with Google Workspace.
- Windows apps that use the Web Account Manager (WAM) or Web Authentication Broker (WAB).
Sign-in endpoints
Teams fully supports Google guest users on all devices. Google users can sign in to Teams from a common endpoint like https://teams.microsoft.com.
Other applications' common endpoints might not support Google users. Google guest users must sign in by using a link that includes your tenant information. Following are examples:
https://myapps.microsoft.com/?tenantid= your tenant IDhttps://portal.azure.com/ your tenant IDhttps://myapps.microsoft.com/ your verified domain .onmicrosoft.com
If Google guest users try to use a link like https://myapps.microsoft.com or https://portal.azure.com, they'll get an error.
You can also give Google guest users a direct link to an application or resource, as long as the link includes your tenant information. For example, https://myapps.microsoft.com/signin/Twitter/ application ID?tenantId= your tenant ID
Step 1: Configure a Google developer project
First, create a new project in the Google Developers Console to obtain a client ID and a client secret that you can later add to Microsoft Entra ID.
Go to the Google APIs at https://console.developers.google.com, and sign in with your Google account. We recommend that you use a shared team Google account.
Accept the terms of service if you're prompted to do so.
Create a new project: On the dashboard, select Create Project, give the project a name (for example, Microsoft Entra B2B), and then select Create:

On the APIs and Services page, select View under your new project.
Select Go to APIs overview on the APIs card. Select OAuth consent screen.
Select External, and then select Create.
On the OAuth consent screen, enter an Application name:

Scroll to the Authorized domains section and enter microsoftonline.com:
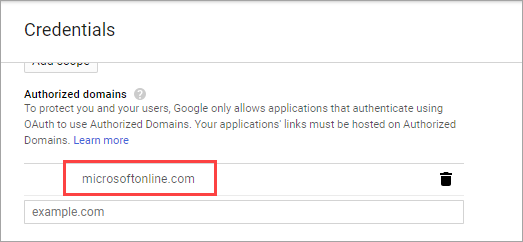
Select Save.
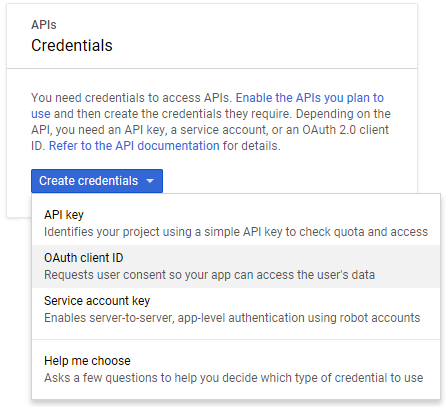
Select Credentials. On the Create credentials menu, select OAuth client ID:
Under Application type, select Web application. Give the application a suitable name, like Microsoft Entra B2B. Under Authorized redirect URIs, enter the following URIs:
https://login.microsoftonline.comhttps://login.microsoftonline.com/te/ tenant ID /oauth2/authresp(where tenant ID is your tenant ID in Azure)
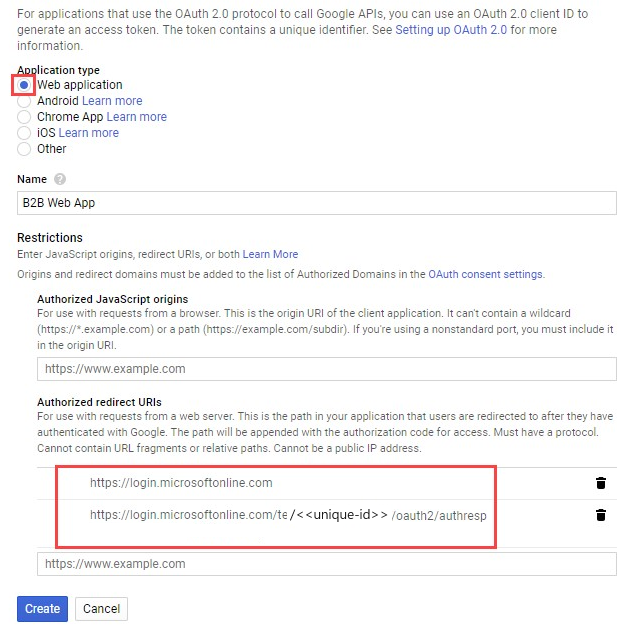
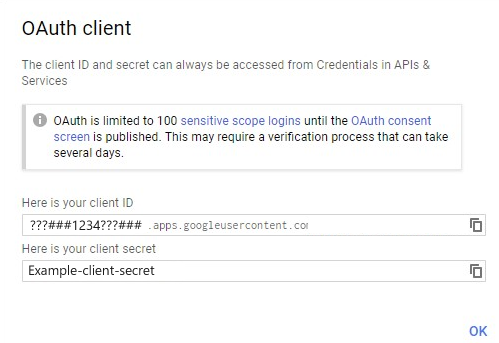
Select Create. Copy the client ID and client secret. You'll use them when you add the identity provider in the Azure portal.
Step 2: Configure Google federation in Microsoft Entra ID
You'll now set the Google client ID and client secret. You can use the Azure portal or PowerShell to do so. Be sure to test your Google federation configuration by inviting yourself. Use a Gmail address and try to redeem the invitation with your invited Google account.
To configure Google federation in the Azure portal
Go to the Azure portal. On the left pane, select Microsoft Entra ID.
Select External Identities.
Select All identity providers, and then select the Google button.
Enter the client ID and client secret you obtained earlier. Select Save:

How do I remove Google federation?
You can delete your Google federation setup. If you do so, Google guest users who have already redeemed their invitation won't be able to sign in. But you can give them access to your resources again by deleting them from the directory and reinviting them.
To delete Google federation in Microsoft Entra ID
Go to the Azure portal. On the left pane, select Microsoft Entra ID.
Select External Identities.
Select All identity providers.
On the Google line, select the ellipsis button (...) and then select Delete.
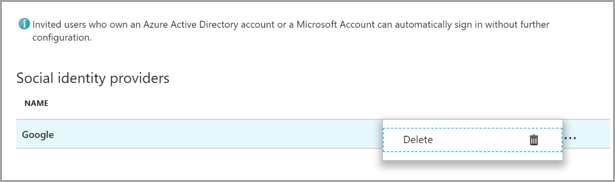
Select Yes to confirm the deletion.
Add Facebook as an identity provider for external identities
You can add Facebook to your self-service-sign-up user flows (Preview) so that users can sign in to your applications using their own Facebook accounts. Allow users to sign in using Facebook, you'll need to enable self-service sign-up for your tenant. After you add Facebook as an identity provider, set up a user flow for the application and select Facebook as one of the sign-in options.
Note
Users can only use their Facebook accounts to sign up through apps using self-service-sign-up and user flows. Users cannot be invited and redeem their invitation using a Facebook account.
Create an app in the Facebook developers console
To use a Facebook account as an identity provider, you need to create an application in the Facebook developers console. If you don't already have a Facebook account, you can sign up at https://www.facebook.com/.
Note
Use the following URLs in the steps 9 and 16 below.
- For Site URL enter the address of your application, such as
https://contoso.com. - For Valid OAuth redirect URIs, enter
https://login.microsoftonline.com/te/ tenant-id /oauth2/authresp. You can find yourtenant-IDin the Microsoft Entra ID Overview screen.
- Sign in to Facebook for developers with your Facebook account credentials.
- If you haven't already done so, you need to register as a Facebook developer. Select Get Started on the upper-right corner of the page, accept Facebook's policies, and complete the registration steps.
- Select My Apps and then Create App.
- Enter a Display Name and a valid Contact Email.
- Select Create App ID. You have to accept Facebook platform policies and complete an online security check.
- Select Settings then select Basic.
- Choose a Category, for example Business and Pages. This value is required by Facebook, but not used for Microsoft Entra ID.
- At the bottom of the page, select Add Platform, and then select Website.
- In Site URL, enter the appropriate URL (noted above).
- In Privacy Policy URL, enter the URL for the page where you maintain privacy information for your application, for example https://www.contoso.com.
- Select Save Changes.
- At the top of the page, copy the value of App ID.
- Select Show and copy the value of App Secret. You use both of them to configure Facebook as an identity provider in your tenant. App Secret is an essential security credential.
- Select the plus sign next to PRODUCTS, and then select Set up under Facebook Login.
- Under Facebook Login, select Settings.
- In Valid OAuth redirect URIs, enter the appropriate URL (noted above).
- Select Save Changes at the bottom of the page.
- To make your Facebook application available to Microsoft Entra ID, select the Status selector at the top right of the page and turn it On to make the Application public, and then select Switch Mode. At this point, the Status should change from Development to Live.
Configure a Facebook account as an identity provider
Now you'll set the Facebook client ID and client secret, either by entering it in Microsoft Entra admin center or by using PowerShell. You can test your Facebook configuration by signing up via a user flow on an app enabled for self-service sign-up.
To configure Facebook federation in the Microsoft Entra ID screen
Sign in to the Azure portal as the global administrator of your Microsoft Entra tenant.
Under Azure services, select Microsoft Entra ID.
In the left menu, select External Identities.
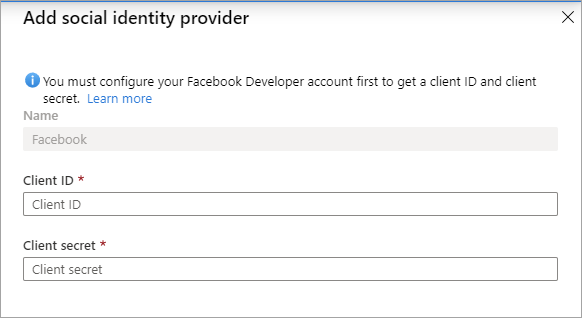
Select All identity providers, then select Facebook.
For the Client ID, enter the App ID of the Facebook application that you created earlier.
For the Client secret, enter the App Secret that you recorded.
Select Save.
How do I remove Facebook federation?
You can delete your Facebook federation setup. If you do so, any users who have signed up through user flows with their Facebook accounts will no longer be able to sign in.
To delete Facebook federation in Microsoft Entra ID:
- Go to the Azure portal. In the left pane, select Microsoft Entra ID.
- Select External Identities.
- Select All identity providers.
- On the Facebook line, select the context menu (...) and then select Delete.
- Select Yes to confirm deletion.