Exercise - Create a cloud flow that calls a Power Automate desktop flow
By the end of this exercise, you can create a Power Automate cloud flow that runs a Power Automate desktop flow. The flow is designed to approve or deny an employee's request for time off.
The flow works as follows:
Power Automate requests 3 inputs from the user. A first name, a last name, and the number of days off an employee is requesting.
Power Automate passes all three inputs to Power Automate for desktop as input variables.
The Power Automate desktop flow writes the values of these variables to a new row in an open Excel sheet.
A message box prompts the user to approve or deny the time off.
Power Automate for desktop writes the result of the approval request to the Excel sheet and passes it back to Power Automate as an output variable.
Power Automate uses the result of the approval request as a variable and sends an e-mail containing the value of the variable.
Exercise
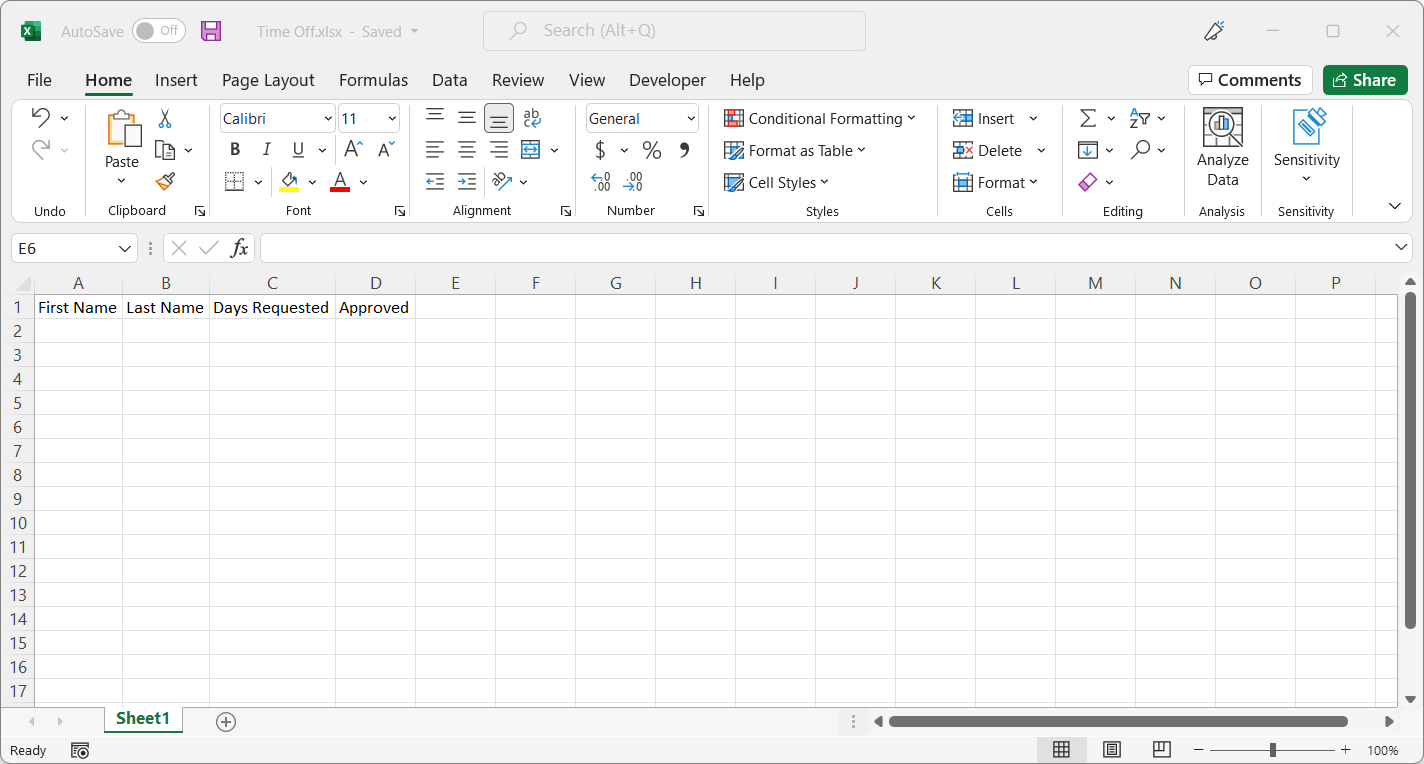
Create an Excel file, save the file with the name Time Off.xlsx and don't close Excel. Enter the headers in the first row in the following order: First Name, Last Name, Days Requested, Approved
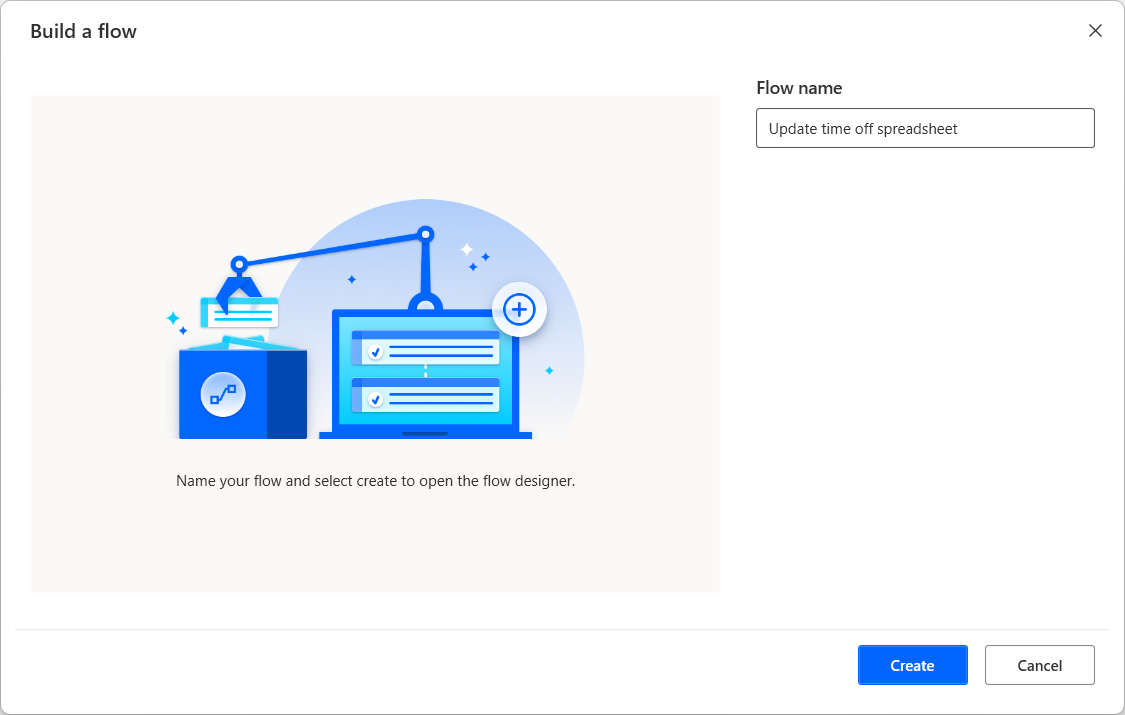
In Power Automate for desktop, select New Flow and specify a flow name.
Add an input variable. Repeat this three times, specifying the fields as follows:
Variable Name External Name Description FirstName FirstName The first name of the employee. LastName LastName The last name of the employee. TimeOff TimeOff The amount of time requested in days. Add an output variable with the following properties:
Variable name: Approval
External name: Approval
Description: "Yes" - Approved, "No" - Denied
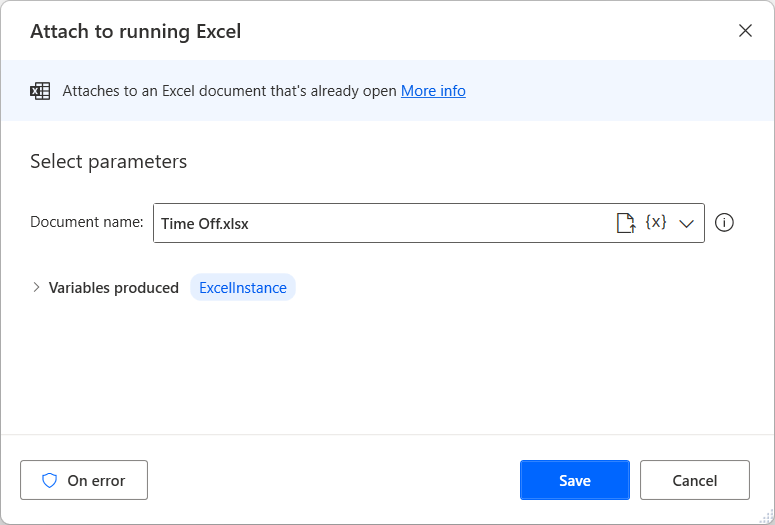
Add the Attach to running Excel action. Specify the Document name, entering Time Off.xlsx.
Add the Get first free column/row from Excel worksheet action.
Add a Write to Excel worksheet action. Repeat this three times, specifying the fields as in the following table:
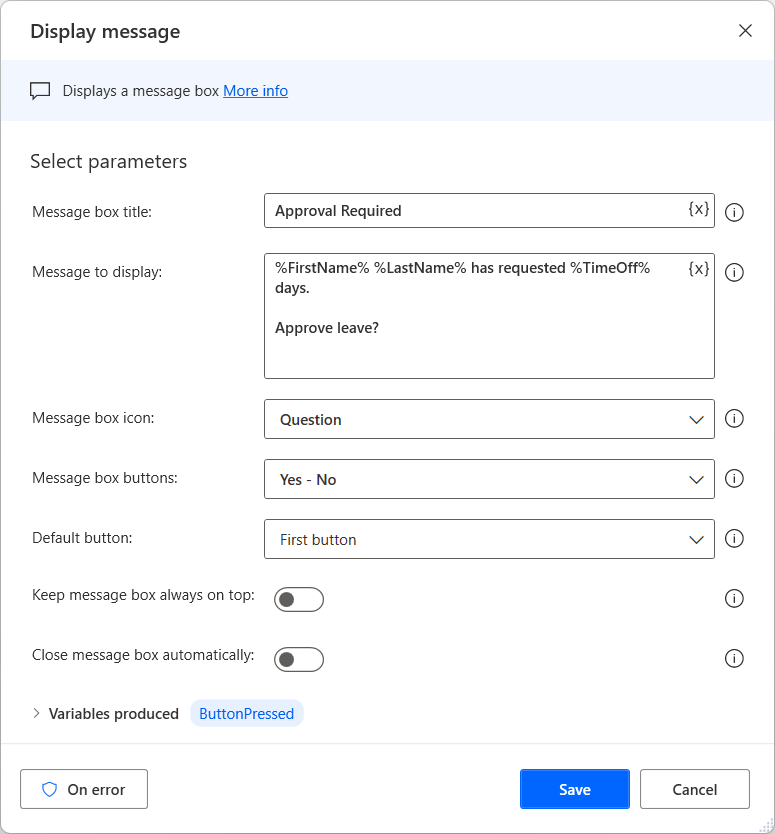
Value to write Column Row %FirstName% A %FirstFreeRow% %LastName% B %FirstFreeRow% %TimeOff% C %FirstFreeRow% Add a Display message action, and fill in the parameters as follows:
Message box title: Approval Required
Message to display: %FirstName% %LastName% has requested %TimeOff% days. Approve leave?
Message box icon: Question
Message box buttons: Yes - No
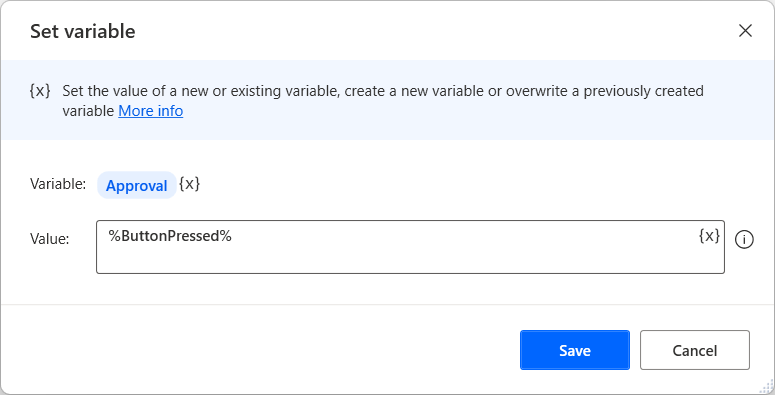
Add a Set variable action, and set Approval to %ButtonPressed%.
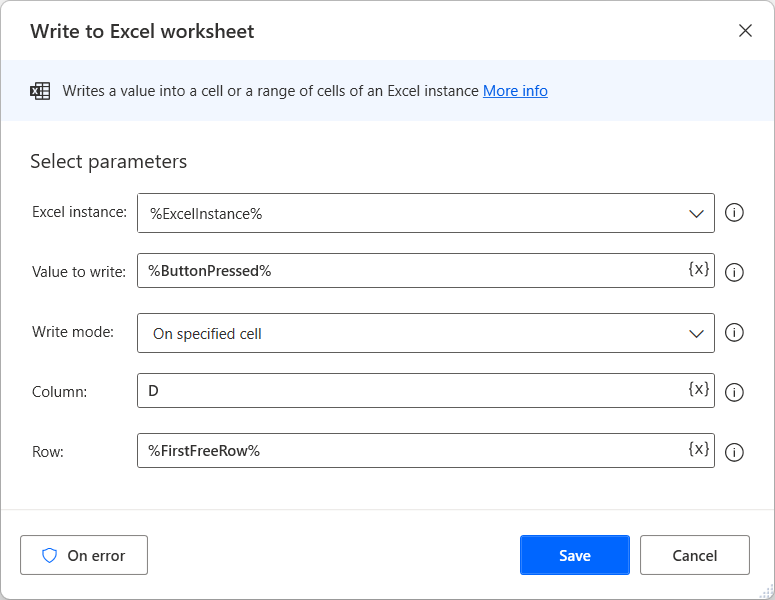
Add a Write to Excel worksheet action, and select the following parameters:
Value to write: %ButtonPressed%
Column: D
Row: %FirstFreeRow%
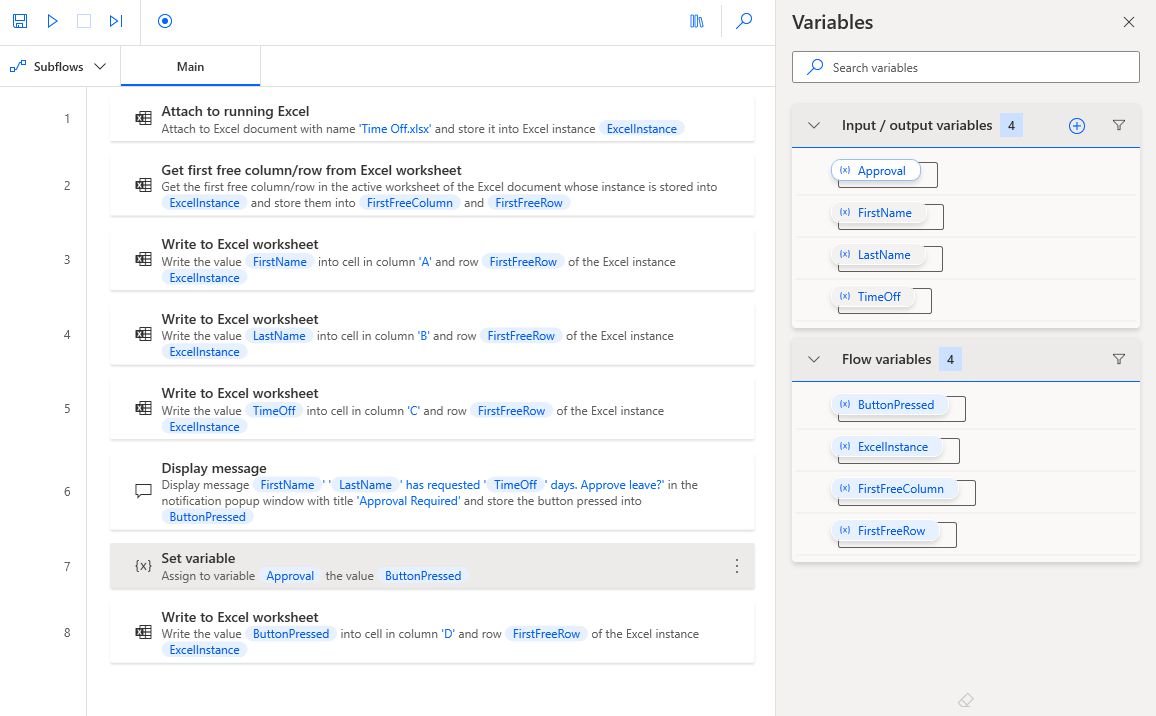
The completed desktop flow should look like the following figure:
Go to flow.microsoft.com
Select Create and Instant cloud flow.
Add a flow name, and select Manually trigger a flow
Select the Manually trigger a flow action, then select Add an input and Text to add three text inputs as follows:
Title Description First Name Enter the employee's first name Last Name Enter the employee's last name Time Off Enter the time off requested in days 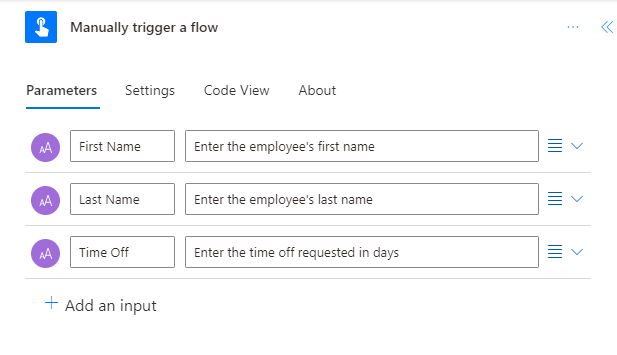
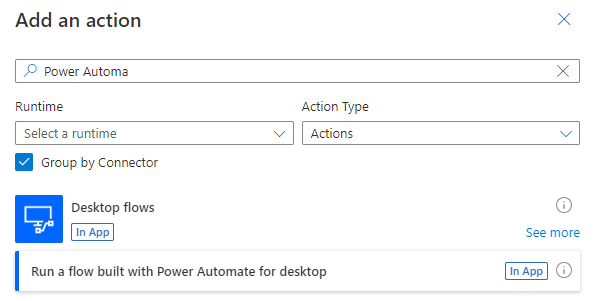
Add a new action and search for the Run a flow built with Power Automate for desktop action.
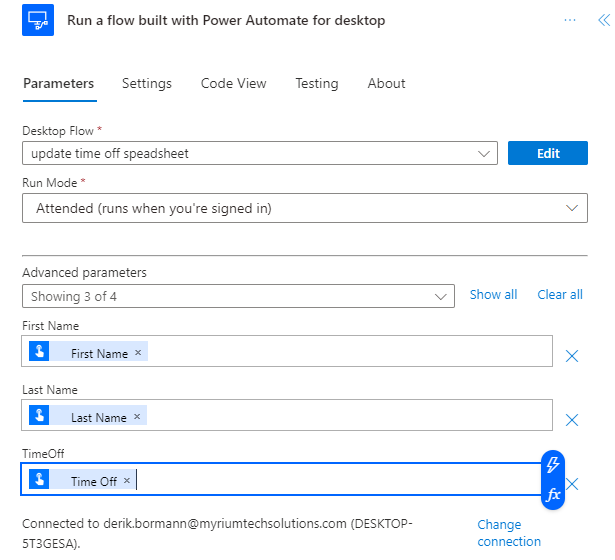
Select the Update time off spreadsheet flow made previously and set Run Mode to Attended. Set the three variables to their corresponding values from the text inputs of the first action, using dynamic content.
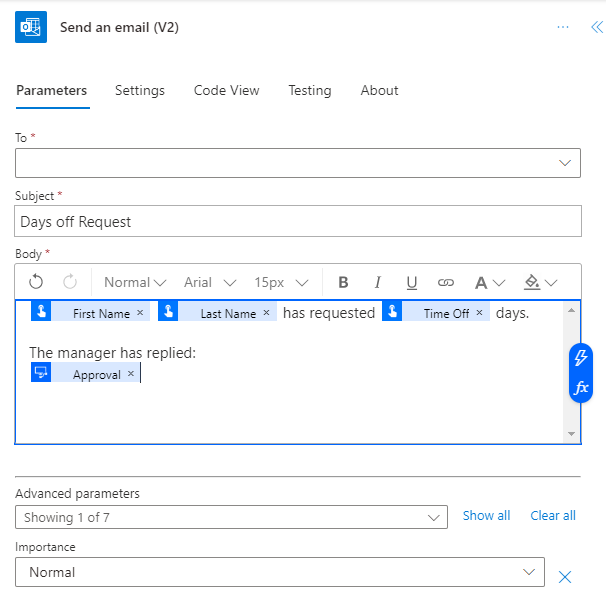
Add a Send an e-mail (V2) action. For the exercise, send an e-mail to your address. Set Subject to Days Off Request and use dynamic content to set the body as in this figure:
Note
The Approval variable originates from the Run a flow built with Power Automate for desktop action.
Save and test the flow. Enter the inputs as requested.
When the flow runs, notice that the spreadsheet is updated and a dialog box prompts the user to approve or deny the requested time off. The e-mail is also sent to the provided address containing the result of the request for approval.