Lab - Personalize user options
Read this first - before you start the lab!
Important
For this lab, you CANNOT sign in with your own credentials. Use the following steps to sign in to your lab environment with the correct credentials.
Ensure that you are signed in to Microsoft Learn.
Select Launch VM mode or Sign in to launch VM mode in this unit.
In the Resources tab on the lab side bar, select the T icon next to Password in the MININT box, to have the administrator password for the Virtual Machine entered for you.
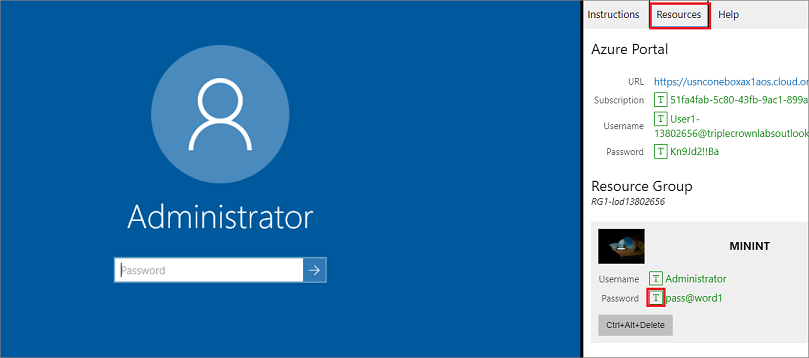
Select Enter.
Microsoft Edge will open. Wait for it to navigate to the Sign in page for finance and operations.
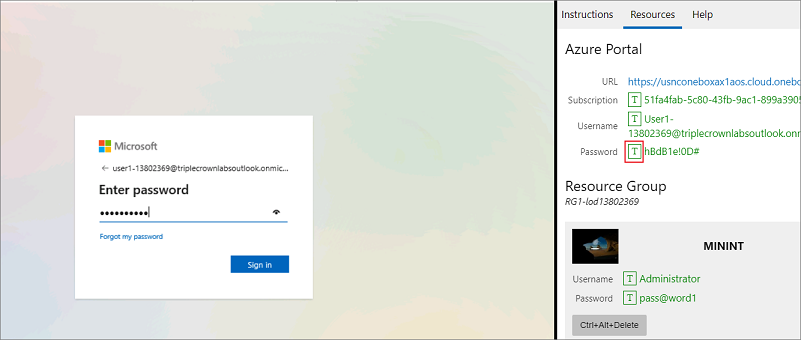
On the Microsoft Sign in page in finance and operations, place your mouse cursor into the Username field.
On the Resources tab of the lab side bar, below the Azure portal heading, select the T icon next to Username, then press Enter.

Your mouse cursor will now be in the Password page.
On the Resources tab of the lab side bar, below the Azure portal heading, select the T icon next to select Password, then press Enter.
Don't stay signed in or store the password on the virtual machine.
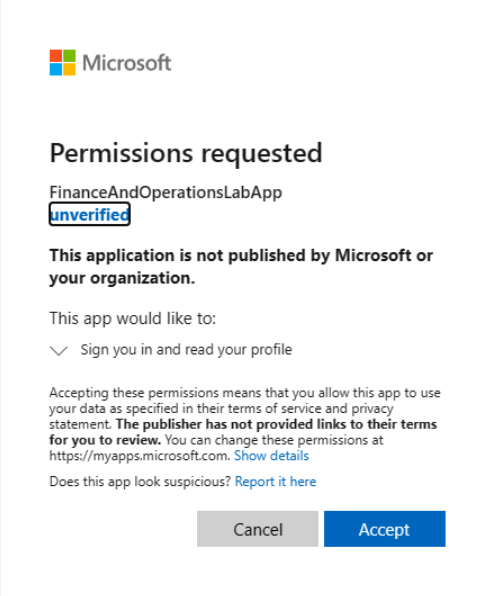
Select Accept in the Permissions requested page.
To see the lab instructions, select the Instructions tab on the lab side bar.
You can now begin your work on this lab.
Scenario
You want to personalize your user options to automatically use the USRT legal entity when you sign in to finance and operations apps. You also want to change the color theme to green, and set the initial page to Employee self-service, and assign SMTP for the email provider.
Instructions
- Go to Settings > User options in top menu of the finance and operations home page.
- In the Color theme field, select Green.
- In the Size field, select Compressed.
- Select the Preferences tab.
- In the Company field, type 'usrt' and press the Tab key.
- In the Initial page field, select Employee self service.
- Select the Account tab.
- In the Email provider ID field, confirm the selection SMTP.
- Select the Workflow tab.
- Select Yes in the Send notifications in email field.
- Expand the Delegation section.
- Select Add.
- In the Scope field, select 'Workflow'.
- In the Name field, enter or select a workflow.
- In the Delegate field, select ALICIA.
- In the Start date/time field, set the date and time to 09/01/2023.
- In the End date/time field, set the date and time to 12/01/2023.
- Select Save.
- Close the page.
Go to the next lab instructions from the lab environment
Select the Next button in the bottom-right corner of the lab side bar.