Exercise implement access management for apps
Create an Azure account and add Microsoft Entra ID Premium P2 trial licenses
The tasks in this exercise and the exercises in this learning path require you to already have and Azure subscription that you can use or to sign up for an Azure trial account. If you already have your own Azure subscription, you skip this task and continue to the next.
- In a web browser, go to Azure free subscription portal.
- Scroll down through the page to learn more about the benefits and free services available.
- Select Start free.
- Use the wizard to sign up for your Azure trial subscription.
- You need to a Microsoft Entra ID P2 license to complete some of the exercises. In the organization you created, search for and then select Microsoft Entra ID.
- In the left navigation menu, select Getting started.
- Under Getting started with Microsoft Entra ID, select Get a free trial for Microsoft Entra ID Premium.
- In the Activate pane, under Microsoft Entra ID PREMIUM P2, select Free trial and then select Activate.
- In the navigation menu on the left, select Overview.
- Refresh the browser until you see Microsoft Entra ID Premium P2 under the organization name. It takes a couple of minutes.
- You need to sign out and sign back into Microsoft Azure if you encounter any problems with expected features not being available.
Add an app to your Microsoft Entra tenant
Here, you add an Enterprise app that you can use for the exercise.
Sign in to the Microsoft Entra admin center using a Global Administrator account.
Open the portal menu and then select Identity.
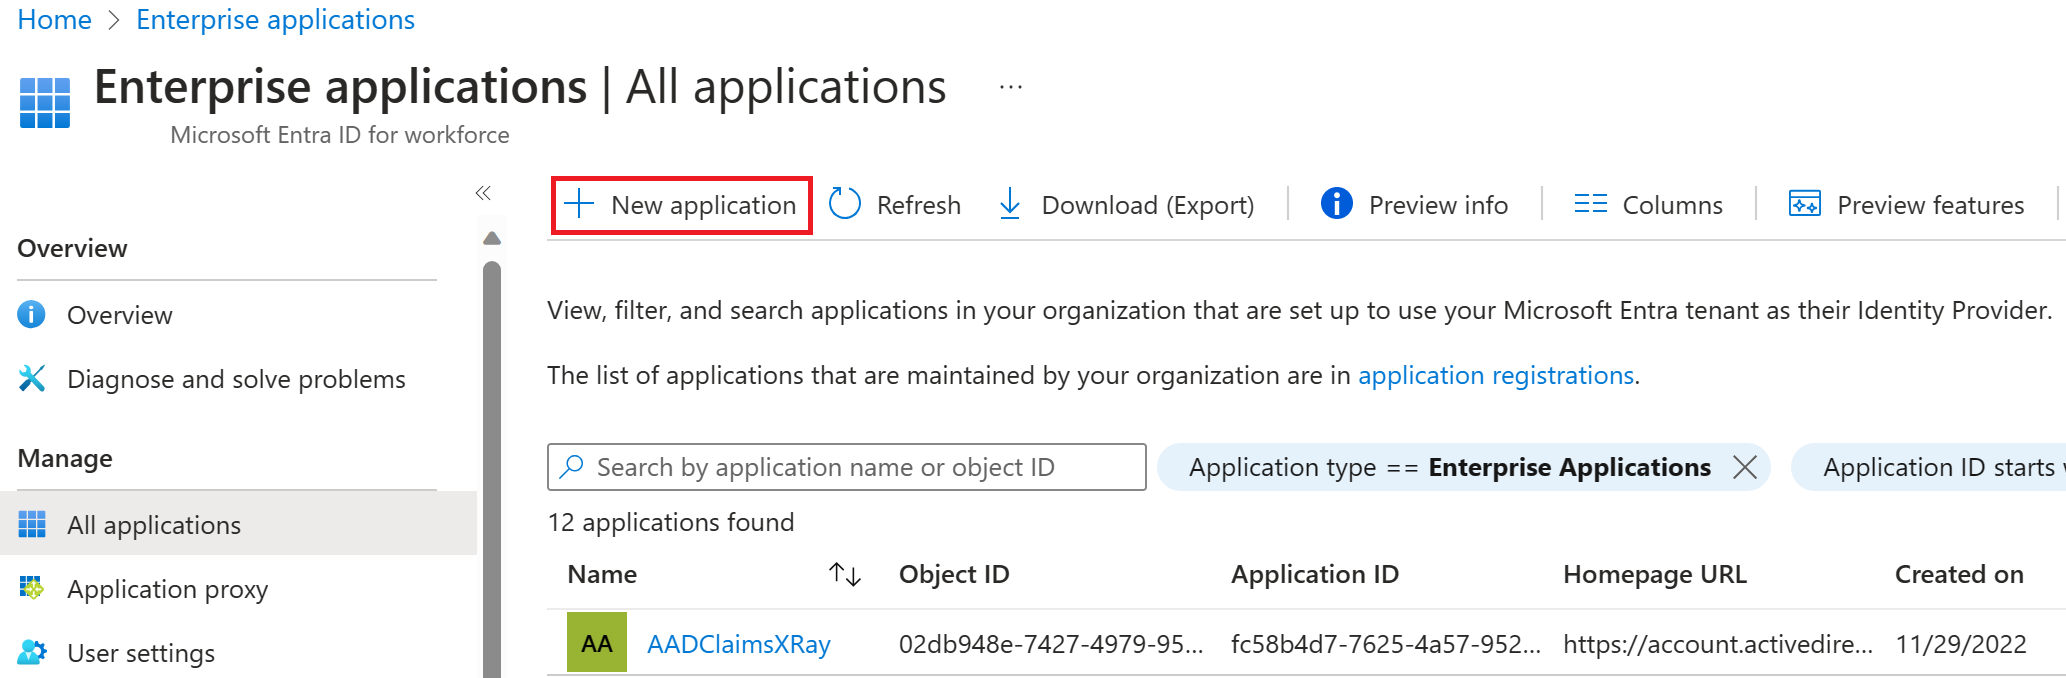
On the Identity menu, under Applications, select Enterprise applications.
In the Enterprise applications pane, select + New application.
In the Browse Microsoft Entra Gallery page, in the Search application box, enter GitHub.
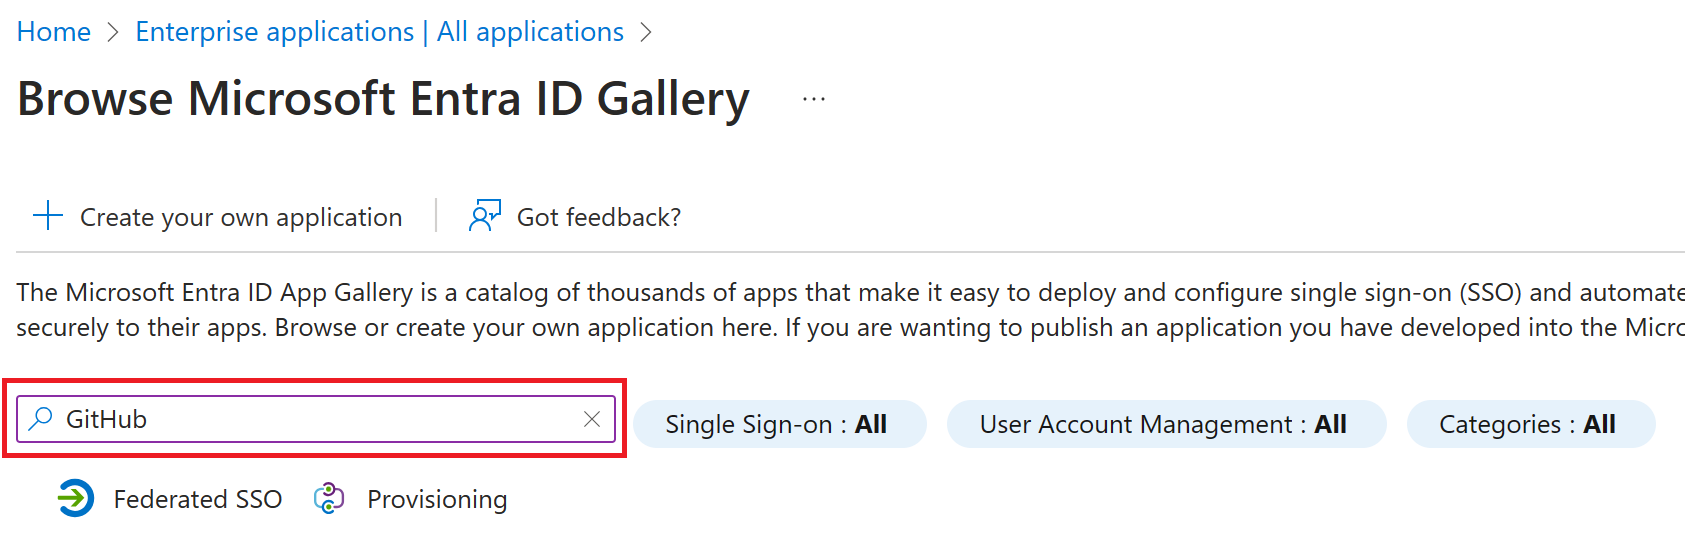
In the results, select GitHub Enterprise Cloud – Enterprise Account.
In the GitHub Enterprise Cloud – Enterprise Account, review the settings and then select Create.
Once the account is created, you are redirected to the GitHub Enterprise Cloud – Enterprise Account screen.
Assign users to an app
Assign your administrator account to the recently added app.
On the GitHub Enterprise Cloud – Enterprise Account screen, on the Overview page, under Getting Started, select 1. Assign users and groups. Alternatively, in the left navigation, under Manage, you can select Users and groups.
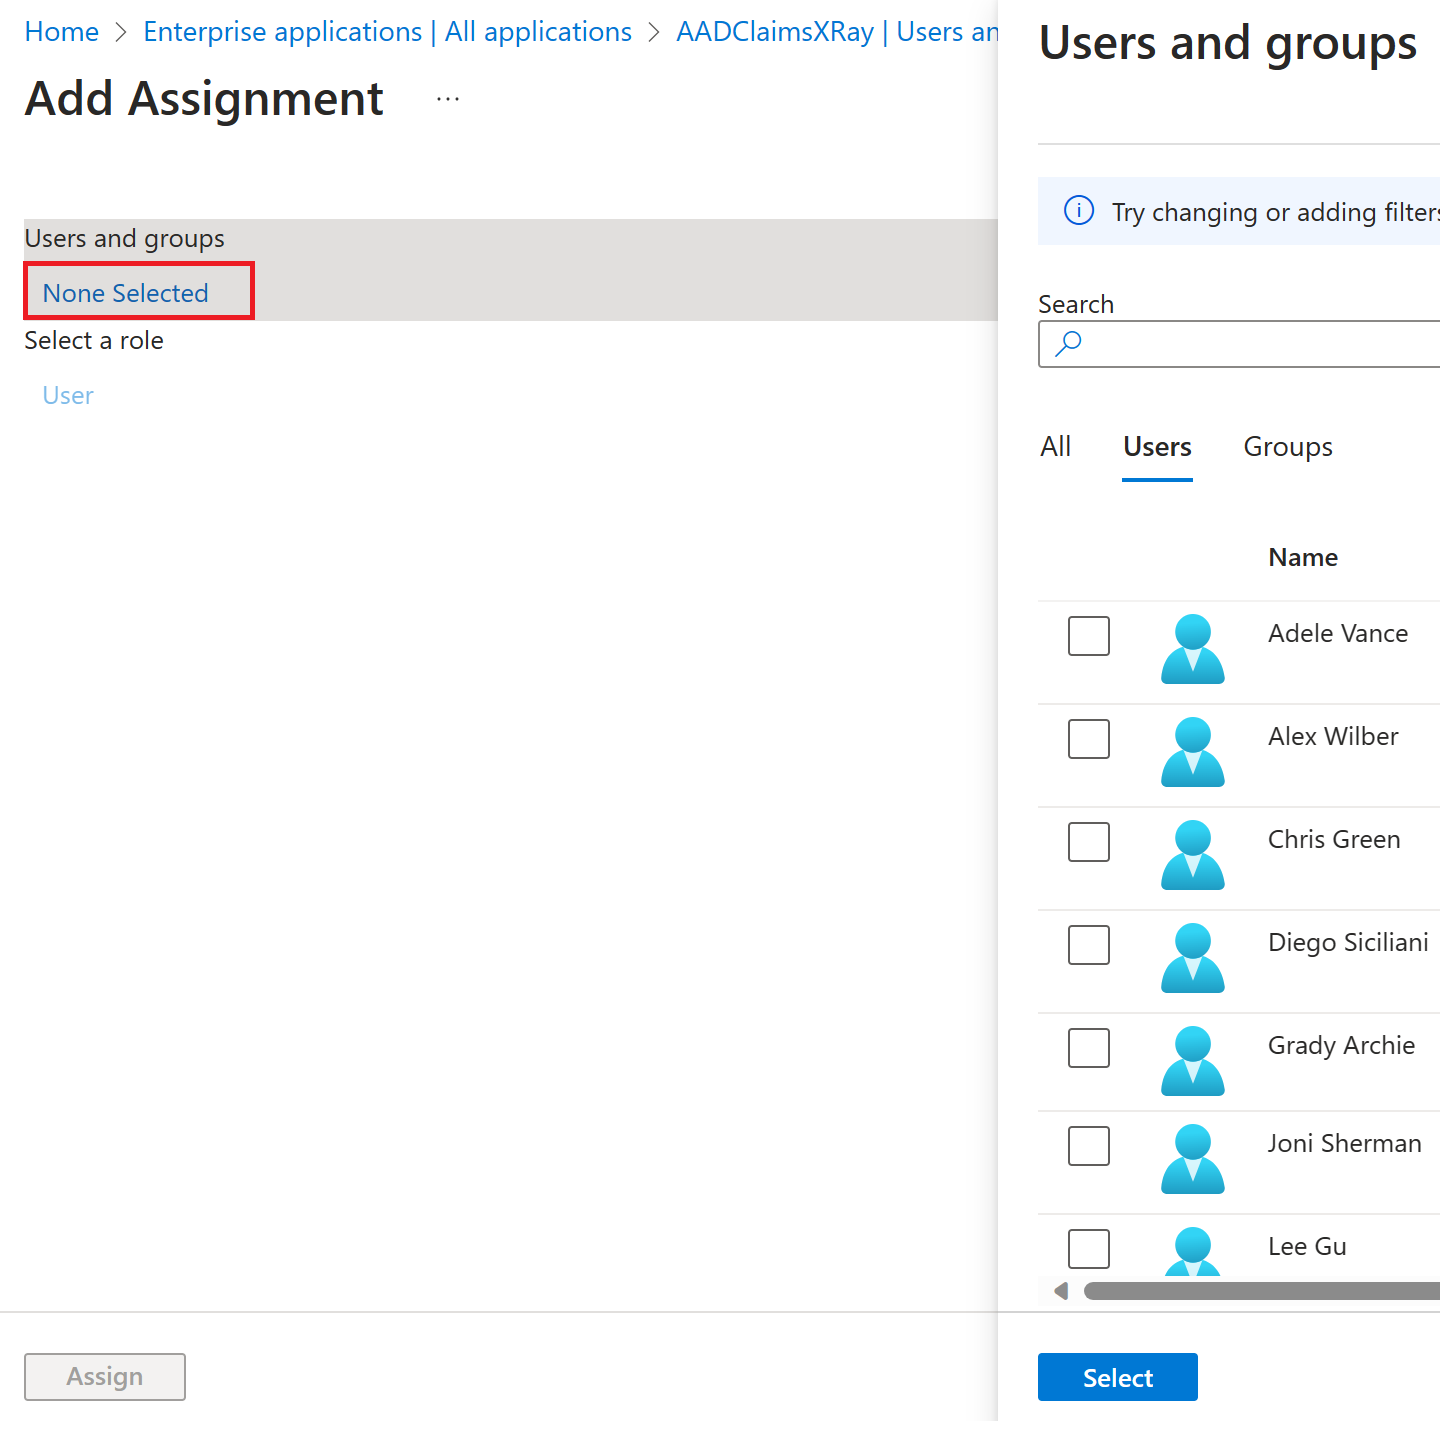
On the Users and groups page, on the menu, select +Add user/group.
On the Add Assignment dialog, select Users and groups.
In the Users and groups pane, select your administrator account and then Select.
Select Assign.