Exercise - Blob uploads and downloads
To interact with individual blobs in Blob Storage, use a BlobClient object. You can get a BlobClient by requesting it with the blob's name from the BlobContainerClient in which the blob is located. BlobClient has methods to upload, download, and manage individual blobs in Blob Storage.
Getting a BlobClient object
To get a BlobClient by name, call the GetBlobClient methods on the BlobContainerClient that contains the blob, by using the name of the blob. A BlobClient object allows you to interact with the blob by uploading, downloading, or managing the blob in Blob Storage.
Moving data to and from a blob is a network operation that takes time. The Azure Storage SDK for .NET provides asynchronous implementation of all methods that require network activity. We recommend using these async implementations whenever possible in your application.
We recommend using streams instead of in-memory structures like byte arrays or strings when you're working with large data objects. This approach avoids buffering the full content in memory before sending it to the target. ASP.NET Core supports reading and writing streams from requests and responses.
To get a BlobClient by name, call the getBlobClient methods on the BlobContainerClient that contains the blob, by using the name of the blob. A BlobClient object allows you to interact with the blob by uploading, downloading, or managing the blob in Blob Storage.
We recommend using streams instead of in-memory structures like byte arrays or strings when you're working with large data objects. This approach avoids buffering the full content in memory before sending it to the target.
Create new blobs
To create a new blob, call one of the Upload methods on a reference to a blob that doesn't exist in storage. This approach does two things: creates the blob in storage and uploads the data.
BlobClient blobClient = containerClient.GetBlobClient(name);

var response = blobClient.UploadAsync(fileStream);
To create a new blob, call one of the upload methods on a reference to a blob that doesn't exist in storage. This approach does two things: creates the blob in storage, and uploads the data.
BlobClient blobClient = blobContainerClient.getBlobClient(name);
blobClient.upload(inputStream, contentLength);
Exercise
Finish your app by adding the upload and download code, then deploy it to Azure App Service for testing.
Upload
To upload a blob, you implement the BlobStorage.Save method. First, you get a BlobClient object that represents the blob by calling GetBlobClient on a BlobContainerClient. Then, use the UploadAsync method on the BlobClient to save the Stream of data passed to this method up to Blob Storage.
In the editor, in
BlobStorage.cs, replaceSavewith the following code. Use CTRL+S to save your work.public Task Save(Stream fileStream, string name) { BlobServiceClient blobServiceClient = new BlobServiceClient(storageConfig.ConnectionString); // Get the container (folder) the file will be saved in BlobContainerClient containerClient = blobServiceClient.GetBlobContainerClient(storageConfig.FileContainerName); // Get the Blob Client used to interact with (including create) the blob BlobClient blobClient = containerClient.GetBlobClient(name); // Upload the blob return blobClient.UploadAsync(fileStream); }Note
The stream-based upload code shown here is more efficient than reading the file into a byte array before sending it to Blob Storage. However, the ASP.NET Core
IFormFiletechnique you use to get the file from the client is not a true end-to-end streaming implementation. It is only appropriate for handling uploads of small files.
To upload a blob, you implement the BlobStorage.save method. First, you get a BlobClient object that represents the blob by calling getBlobClient on a BlobContainerClient. Then, use the upload method on the BlobClient to save the InputStream of data passed to this method up to Blob Storage.
In the editor, in
BlobStorage.java, replacesavewith the following code.public void save(String name, InputStream inputStream, long contentLength) { BlobClient blobClient = blobContainerClient.getBlobClient(name); blobClient.upload(inputStream, contentLength); }
Download
To download a file, the OpenReadAsync method on the BlobClient object is returned. This method returns a Stream, which means that your code doesn't need to load all of the bytes from Blob Storage at once. You just need to return a reference to the blob stream, which ASP.NET Core can use to stream the file to the browser.
Replace
Loadwith this code and save your work using CTRL + S.public Task<Stream> Load(string name) { BlobServiceClient blobServiceClient = new BlobServiceClient(storageConfig.ConnectionString); // Get the container the blobs are saved in BlobContainerClient containerClient = blobServiceClient.GetBlobContainerClient(storageConfig.FileContainerName); // Get a client to operate on the blob so we can read it. BlobClient blobClient = containerClient.GetBlobClient(name); return blobClient.OpenReadAsync(); }
To download a file, use the openInputStream method on the BlobClient. This method returns an InputStream, which means that your code doesn't need to load all of the bytes from Blob Storage at once. You just need to return a reference to the blob stream, which IndexBean can use to stream the content to the browser.
Replace read with this code and save your work.
public InputStream read(String name) {
    BlobClient blobClient = blobContainerClient.getBlobClient(name);
    return blobClient.openInputStream();
}
Deploy and run in Azure
Your app is finished. Deploy it and see it work.
Create an App Service app and configure it with app settings for your storage account connection string and container name. Get the storage account's connection string with
az storage account show-connection-string, and set the name of the container to befiles.The app name needs to be globally unique. Choose your own name to fill in
<your-unique-app-name>. Use the storage account name you created previously to replace<your-unique-storage-account-name>. Run each of the following commands in order in Azure CLI:az appservice plan create \ --name blob-exercise-plan \ --resource-group "<rgn>[sandbox resource group name]</rgn>" \ --sku FREE --location eastusaz webapp create \ --name <your-unique-app-name> \ --plan blob-exercise-plan \ --resource-group "<rgn>[sandbox resource group name]</rgn>"CONNECTIONSTRING=$(az storage account show-connection-string \ --name <your-unique-storage-account-name> \ --resource-group "<rgn>[sandbox resource group name]</rgn>" \ --output tsv)az webapp config appsettings set \ --name <your-unique-app-name> --resource-group "<rgn>[sandbox resource group name]</rgn>" \ --settings AzureStorageConfig:ConnectionString=$CONNECTIONSTRING AzureStorageConfig:FileContainerName=filesDeploy your app. The following commands publish the site to the pub folder, zip it up into site.zip, and deploy the zip to App Service.
Note
Make sure your shell is still in the mslearn-store-data-in-azure/store-app-data-with-azure-blob-storage/src/start directory before running the following commands. You can use
cd mslearn-store-data-in-azure/store-app-data-with-azure-blob-storage/src/startto change directory to this location.dotnet publish -o pub cd pub zip -r ../site.zip *az webapp deployment source config-zip \ --src ../site.zip \ --name <your-unique-app-name> \ --resource-group "<rgn>[sandbox resource group name]</rgn>"To see the running app, in a browser, open
https://<your-unique-app-name>.azurewebsites.net. It should look like the following image.
Try uploading and downloading some files to test the app. After you upload a few files, to see the blobs in the container, run the following code in the shell. Replace
<your-unique-storage-account-name>with the storage account name that you created earlier in the module:az storage blob list --account-name <your-unique-storage-account-name> --container-name files --query [].{Name:name} --output table
Your app is finished. Deploy it and see it work. Use the Maven Plugin for Azure App Service to create an App Service app, configure it and deploy.
In the editor, open the file pom.xml and add the following
pluginsunder thebuildxml tag.<plugins> <plugin> <groupId>com.microsoft.azure</groupId> <artifactId>azure-webapp-maven-plugin</artifactId> <version>2.3.0</version> <configuration> <schemaVersion>v2</schemaVersion> <subscriptionId>${env.AZ_SUBSCRIPTION_ID}</subscriptionId> <resourceGroup>${env.AZ_RESOURCE_GROUP}</resourceGroup> <appName>${env.AZ_APP_NAME}</appName> <pricingTier>${env.AZ_PRICING_TIER}</pricingTier> <region>${env.AZ_REGION}</region> <runtime> <os>Linux</os> <javaVersion>Java 11</javaVersion> <webContainer>Tomcat 9.0</webContainer> </runtime> <deployment> <resources> <resource> <directory>${project.basedir}/target</directory> <includes> <include>*.war</include> </includes> </resource> </resources> </deployment> <appSettings> <property> <name>STORAGE_CONNECTION_STRING</name> <value>${env.AZ_STORAGE_CONNECTION_STRING}</value> </property> <property> <name>STORAGE_CONTAINER_NAME</name> <value>${env.AZ_STORAGE_CONTAINER_NAME}</value> </property> </appSettings> </configuration> </plugin> <plugin> <groupId>org.apache.maven.plugins</groupId> <artifactId>maven-war-plugin</artifactId> <version>3.3.2</version> </plugin> </plugins>The following commands prepare environment variables for the Maven Plugin for Azure App Service. Extract the storage account's connection string with
az storage account show-connection-string, the subscription ID withaz account show, and set region, pricing, container name, and app name. The app name needs to be globally unique. Choose your own name to fill in<your-unique-app-name>.export AZ_SUBSCRIPTION_ID=$(az account show --query id --output tsv) export AZ_RESOURCE_GROUP="<rgn>[sandbox resource group name]</rgn>" export AZ_REGION=eastus export AZ_APP_NAME=<your-unique-app-name> export AZ_PRICING_TIER=F1 export AZ_STORAGE_CONNECTION_STRING=$(az storage account show-connection-string --name <your-unique-storage-account-name> --output tsv) export AZ_STORAGE_CONTAINER_NAME=filesTip
The minimum recommended tier for deploying real world Java applications is any Premium V2 Service Plan.
Deploy your app. The following command builds the app into ROOT.war and deploys the WAR file to App Service. The Maven Plugin for Azure App Service provisions resources at the first deployment attempt.
Note
Make sure your shell is still in the mslearn-store-data-in-azure/store-java-ee-application-data-with-azure-blob-storage/start directory before running the following commands. You can use
cd mslearn-store-data-in-azure/store-java-ee-application-data-with-azure-blob-storage/startto change directory to this location.mvn clean package azure-webapp:deployTo see the running app, in a browser, open
https://<your-unique-app-name>.azurewebsites.net. It should look like the following image.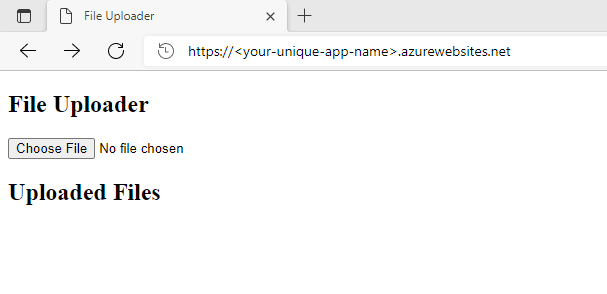
Tip
This module uses Maven Plugin for Azure App Service to deploy the app on Tomcat 9 on Azure App Service. To learn about other options see the Further Reading section at the end of this module.
Try uploading and downloading some files to test the app. After you upload a few files, to see the blobs in the container, run the following code in the shell.
az storage blob list --account-name <your-unique-storage-account-name> --container-name files --query [].{Name:name} --output table