Use Group Policy settings to configure Windows Update
Group Policy enables policy-based administration using Microsoft Active Directory directory services (AD DS). Group Policy uses directory services and security group membership to apply device and user configurations from a central management point. Policy settings are specified by an administrator. This is in contrast to profile settings, which are specified by a user. Policy settings are created using the Microsoft Management Console (MMC) snap-in for Group Policy – GPMC.msc.
To configure each individual computer with specific Windows Update settings would be very time-consuming. Fortunately, you can create a Group Policy Object (GPO) to configure the necessary settings, and then use Active Directory Domain Services (AD DS) to apply those settings to the appropriate collection of computers. Three nodes in Group Policy contain Windows Update settings that are relevant for Windows devices.
Note
There are several settings for earlier Windows versions. This section lists only those that are relevant to Windows 10 and later.
The first of these nodes is the Windows Update node. Open the Group Policy Management Editor on a domain controller, and then navigate to Computer Configuration/Administrative Templates/Windows Components/Windows Update. You can configure the following settings:
Configure Automatic Updates. This policy setting specifies whether the computer will receive security updates and other important downloads through the Windows automatic-updating service. This setting lets you specify whether to enable automatic updates on your computer. If you enable this service, you must select one of the four options in the Group Policy setting:
2 - Notify for download and notify for install. When Windows finds updates that apply to your computer, an icon displays in the status area, with a message that updates are ready for download. Selecting the icon or the message provides the option to select the specific updates that you want to download. Windows then downloads your selected updates in the background. When the download completes, the icon displays in the status area again, with notification that the updates are ready for installation. Selecting the icon or message provides the option to select which updates to install.
3 - Auto download and notify for install. Windows finds updates that apply to your computer, and then downloads these updates in the background, without notifying or interrupting the user during this process. When the download completes, the icon displays in the status area, with a notification that the updates are ready for installation. Selecting the icon or message provides the option to select which updates to install.
4 - Auto download and schedule the install. Specify the schedule by using the options in the Group Policy setting. If you do not specify a schedule, the default schedule for all installations will be every day at 03:00. If any of the updates require a restart to complete the installation, the Windows operating system will restart the computer automatically. If a user is signed in to the computer when the Windows operating system is ready to restart, it will notify the user and give the option to delay the restart.
5 - Allow local admin to choose setting. With this option, the local administrators will be allowed to use the Automatic Updates control panel to select a configuration option. For example, administrators can choose their own scheduled installation time. Local administrators cannot disable Automatic Updates configuration.
:::image type="content" source="../media/windows-server-update-services-e83f97e0-07f481ae.png" alt-text="Screenshot of configuring options in the local group policy editor.":::To use the Configure Automatic Updates setting, select Enabled, and then select one of the options (2, 3, 4, or 5). If you select 4, you can set a recurring schedule. If you don't specify a schedule, all installations will occur every day at 03:00. If you set the status to Enabled, Windows recognizes when the computer is online, and then uses its Internet connection to search Windows Update for updates that apply to your computer. If you set the status to Disabled, you must manually download and install any updates that are available on Windows Update. If you set the status to Not Configured, the use of Automatic Updates isn't specified at the Group Policy level. However, an administrator can still configure Automatic Updates through Control Panel.
Specify intranet Microsoft update service location. This setting specifies an intranet server to host updates from Microsoft Update. You then can use this update service to update your network’s computers automatically. This setting lets you specify a server on your network to function as an internal update service. The Automatic Updates client will search this service for updates that apply to the computers on your network. To use this setting, you must set two server name values, including the:
Server from which the Automatic Updates client detects and downloads updates
Server to which updated workstations upload statistics
You can set both values to be the same server. If you set the status to Enabled, the Automatic Updates client connects to the specified intranet location, instead of Windows Update, to search for and download updates. Enabling this setting means that end users in your organization don't have to go through a firewall to get updates, and it gives you the opportunity to test updates before deploying them. If you set the status to Disabled or Not Configured, and if Automatic Updates isn't disabled by policy or user preference, the Automatic Updates client connects directly to the Windows Update site on the Internet.
Note
The preceding settings do not have an obvious effect on the user interface, because in Windows 10 and later, these options are not visible in the Advanced options pane of Windows Update. They are visible in Windows 8.1. However, these settings do affect the way in which Windows Update delivers updates.
Do not connect to any Windows Update Internet locations. This policy is applicable only when you have configured the Specify intranet Microsoft update service location setting. When enabled, this policy will prevent users from downloading updates that you haven't authorized in the Windows Server Update Services console. It may disrupt users’ connection to the Microsoft Store.
- Do not include drivers with Windows Updates. When you enable this setting, targeted devices won't install drivers with quality updates.
- Specify deadline before auto-restart for update installation. By using this setting, you can configure a deadline before which users have to restart their computer after installing updates. The default deadline is 7 days, but you can configure a deadline between 2 and 14 days.
Turn off auto-restart for updates during active hours. With this setting, you can configure the active hours and prevent users from changing them. The span of active hours can be up to 12 hours.
Windows Update for Business. In this node, you can configure one or both of the following policy settings:
- Select when Preview Builds and Feature Updates are received. This policy configures whether the targeted Windows devices will be in the Windows Insider build – Fast, Windows Insider build – Slow, Release Windows Insider build, or General Availability Channel. You can further delay feature updates up to 365 days. You also can prevent feature updates from being received for up to 35 days by selecting the Pause feature updates check box.
- Select when Quality Updates are received. With this policy, you can configure deferral of quality updates for up to 30 days. You also can prevent quality updates from being received for up to 35 days, by selecting the Pause quality updates check box.
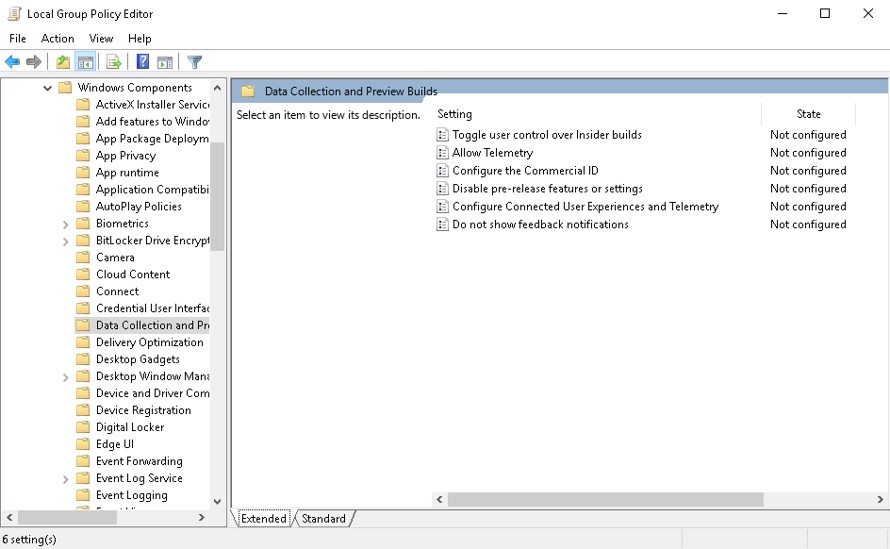
In addition to the Windows Update node, you also can configure update settings in Computer Configuration/Administrative Templates/Windows Components/Data Collection and Preview Builds. You can configure the following settings:
Toggle user control over Insider builds. This policy setting determines whether users can access the Insider build controls in the Update & security section in the Settings app. It also enables users to choose whether to make their devices available for downloading and installing Windows preview software. These controls are located under Windows Insider Program. If you enable or don't configure this policy setting, users can download and install Windows preview software on their devices. If you disable this policy setting, the users can't install Windows Insider builds.
Allow Telemetry. This policy setting determines the amount of diagnostic and usage data reported to Microsoft. A value of 0 indicates that operating system (OS) components will send no telemetry data to Microsoft. Setting a value of 0 is applicable for enterprise and server devices only. Setting a value of 0 for other devices is equivalent to choosing a value of:
A value of 1 sends only a limited amount of diagnostic and usage data. Note that setting values of 0 or 1 will degrade certain experiences on the device.
A value of 2 sends enhanced diagnostic and usage data.
A value of 3 sends the same data as a value of 2, plus additional diagnostics data, such as the system state at the time of a system halt or crash, and the files and content that may have caused the problem.
If you disable or don't configure this policy setting, users can configure the Telemetry level in Settings.
Disable pre-release features or settings. This policy setting determines the level to which Microsoft can experiment with the product to study user preferences or device behavior. A value of 1 permits Microsoft to configure device settings only. A value of 2 allows Microsoft to conduct full experimentations. If you disable this policy setting, no experimentations will occur. If you don't configure this policy setting, user can configure the Let Microsoft try features on this build option in Settings.
Finally, the Computer Configuration/Administrative Templates/Windows Components/Delivery Optimization node contains the following settings:
Download Mode. Set this policy to configure the use of Windows Update Delivery Optimization in downloads of Windows apps and updates. Available modes are: Bypass, Group, HTTP only, Internet, LAN, and Simple.
Group ID. Set this policy to specify an arbitrary group ID to which the device belongs. Use this if you need to:
Limit the number of devices participating in peering in a domain network with many users.
Create a single group for Local Network Peering for branches that are on different domains or aren't on the same network address translation (NAT).
Note
This is a best effort optimization. You should not rely on it for an authentication of identity. You must use a globally unique identifier (GUID) as the group ID.
Max Upload Bandwidth. Set this policy to define a limit for the upload bandwidth that a device will utilize for all concurrent upload activity via Delivery Optimization (set in kilobytes per second).
Max Cache Size. Set this policy to define the maximum cache size Delivery Optimization can utilize as a percentage of the internal disk size.
Max Cache Age. Set this policy to define the maximum time that the Delivery Optimization cache holds each file.