Train an unstructured document processing model in Microsoft Syntex
Applies to: ✓ Unstructured document processing
Follow the instructions in Create a model in Syntex to create an unstructured document processing model in a content center. Or, follow the instructions in Create a model on a local SharePoint site to create the model on a local site. Then start with this article to begin training your model.
Create a classifier
A classifier is a type of model that you can use to automate identification and classification of a document type.
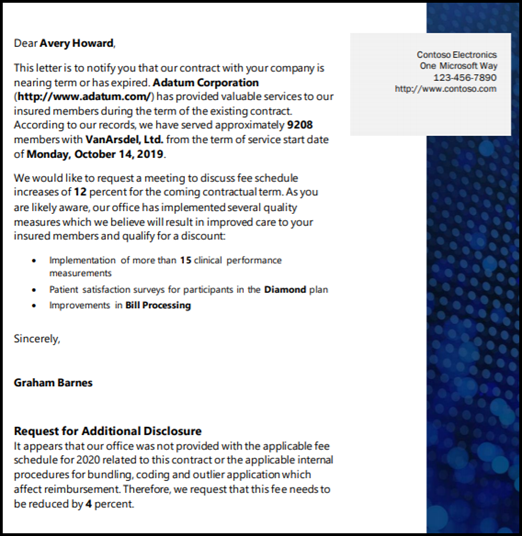
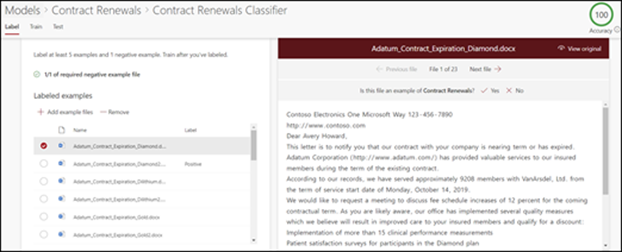
For example, you might want to identify all Contract Renewal documents that are added to your document library, such as is shown in the following illustration.
Creating a classifier enables you to create a new SharePoint content type that will be associated to the model.
When creating the classifier, you need to create explanations to define the model. This step enables you to note common data that you would expect to consistently find this document type.
Use examples of the document type ("example files") to "train" your model to identify files that have the same content type.
To create a classifier, you need to:
- Name your model.
- Add your example files.
- Label your example files.
- Create an explanation.
- Test your model.
Note
While your model uses a classifier to identify and classify document types, you can also choose to pull specific pieces of information from each file identified by the model. Do this by creating an extractor to add to your model. See Create an extractor.
Name your model
The first step to create your model is to give it a name:
From the content center, select New, and then Model.
On the Options for model creation page, select Teaching method.
On the Teaching method: Details page, select Next.
On the Create a model with the teaching method page, in the Model name field, type the name of the model. For example, if you want to identify contract renewal documents, you could name the model Contract Renewal.
Choose Create. This action creates a home page for the model.
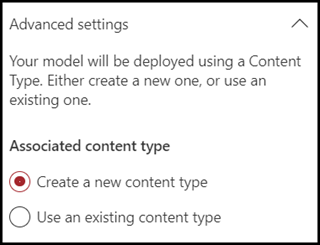
When you create a model, you're also creating a new site content type. A content type represents a category of documents that have common characteristics and share a collection of columns or metadata properties for that particular content. SharePoint content types are managed through the Content types gallery. For this example, when you create the model, you're creating a new Contract Renewal content type.
Select Advanced settings if you want to map this model to an existing enterprise content type in the SharePoint Content type gallery to use its schema. Enterprise content types are stored in the Content Type Hub in the SharePoint admin center and are syndicated to all sites in the tenant. Note that even though you can use an existing content type to leverage its schema to help with identification and classification, you still need to train your model to extract information from files it identifies.
Add your example files
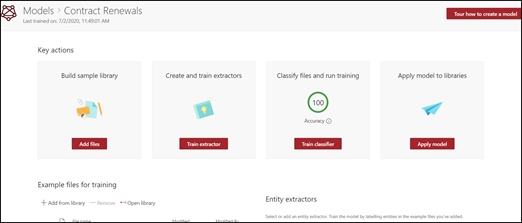
On the model home page, add your examples files you'll need to help train the model to identify your document type.
Note
You should use the same files for both classifier and extractor training. You always have the option to add more later, but typically you add a full set of example files. Label some to train your model, and test the remaining unlabeled ones to evaluate model fitness.
For your training set, you want to use both positive and negative examples:
- Positive example: Documents that represent the document type. These contain strings and information that would always be in this type of document.
- Negative example: Any other document that doesn't represent the document you want to classify.
Be sure to use at least five positive examples and at least one negative example to train your model. You want to create another ones to test your model after the training process.
To add example files:
On the model home page, in the Add example files tile, select Add files.
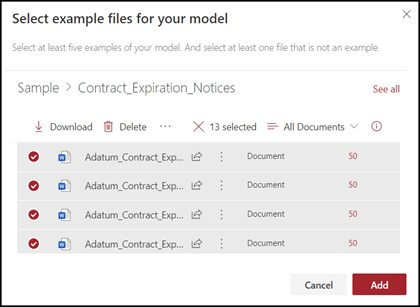
On the Select example files for your model page, select your example files from the Training files library in the content center. If you hadn't already uploaded them there, choose to upload them now by clicking Upload to copy them to the Training files library.
After selecting your example files to use to train the model, select Add.
Label your example files
After adding your example files, you need to label them as either positive or negative examples.
From the model home page, on the Classify files and run training tile, select Train classifier. This step displays the label page that shows a listing of your example files, with the first file visible in the viewer.
In the viewer on the top of the first example file, you should see text asking if the file is an example of the model you just created. If it's a positive example, select Yes. If it's a negative example, select No.
From the Labeled examples list on the left, select additional files that you want to use as examples, and label them.
Note
Label at least five positive examples. You must also label at least one negative example.
Create an explanation
The next step is for you to create an explanation on the Train page. An explanation helps the model understand how to recognize the document. For example, the Contract Renewal documents always contain a Request for additional disclosure text string.
Note
When used with extractors, an explanation identifies the string that you want to extract from the document.
To create an explanation:
From the model home page, select the Train tab to go to the Train page.
On the Train page, in the Trained files section you should see a list of the sample files that you previously labeled. Select one of the positive files from the list, and it displays in the viewer.
In the Explanation section, select New and then Blank.
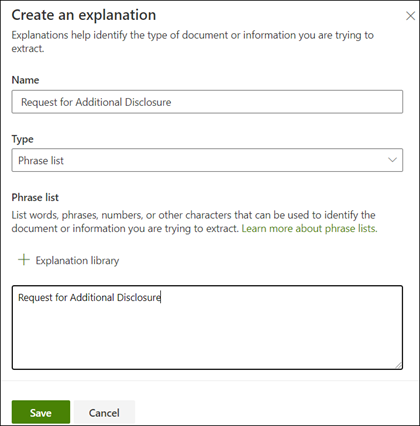
On the Create an explanation page: a. Type the Name (for example, "Disclosure Block"). b. Select the Type. For the sample, select Phrase list, since you add a text string. c. In the Type here box, type the string. For the sample, add "Request for additional disclosure". You can select Case sensitive if the string needs to be case sensitive. d. Select Save.
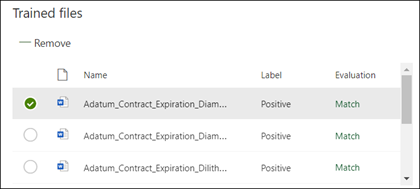
The content center now checks to see if the explanation you created is complete enough to identify the remaining labeled example files correctly, as positive and negative examples. In the Trained files section, check the Evaluation column after the training has completed to see the results. The files show a value of Match, if the explanations you created was enough to match what you labeled as positive or negative.
If you receive a Mismatch on the labeled files, you might need to create an additional explanation to provide the model more information to identify the document type. If a mismatch happens, select the file to get more information about why the mismatch occurred.
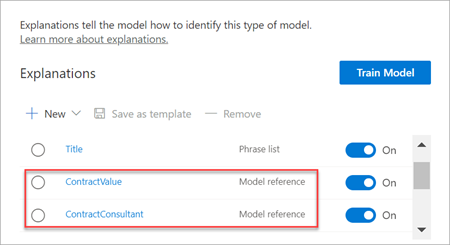
Once you've trained an extractor, that trained extractor can be used as an explanation. In the Explanations section, this is shown as a Model reference.
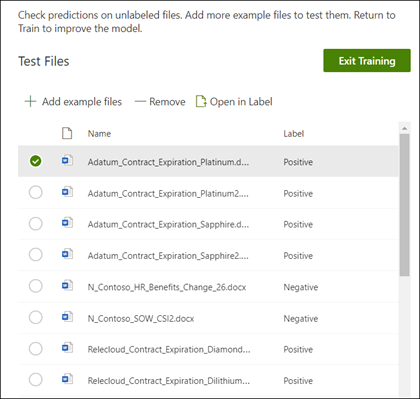
Test your model
If you received a match on your labeled sample files, you can now test your model on your remaining unlabeled example files that the model hasn't seen before. This step is optional, but a useful step to evaluate the “fitness” or readiness of the model before using it, by testing it on files the model hasn’t seen before.
From the model home page, select the Test tab. This runs the model on your unlabeled sample files.
In the Test files list, your example files display and shows if the model predicted them to be positive or negative. Use this information to help determine the effectiveness of your classifier in identifying your documents.
See also
Feedback
Coming soon: Throughout 2024 we will be phasing out GitHub Issues as the feedback mechanism for content and replacing it with a new feedback system. For more information see: https://aka.ms/ContentUserFeedback.
Submit and view feedback for