Deploying Microsoft Identity Manager Certificate Manager 2016 (MIM CM)
The installation of Microsoft Identity Manager Certificate Manager 2016 (MIM CM) involves a number of steps. As a way to simplify the process we are breaking things down. There are preliminary steps that must be taken prior to any actual MIM CM steps. Without the preliminary work the installation is likely to fail.
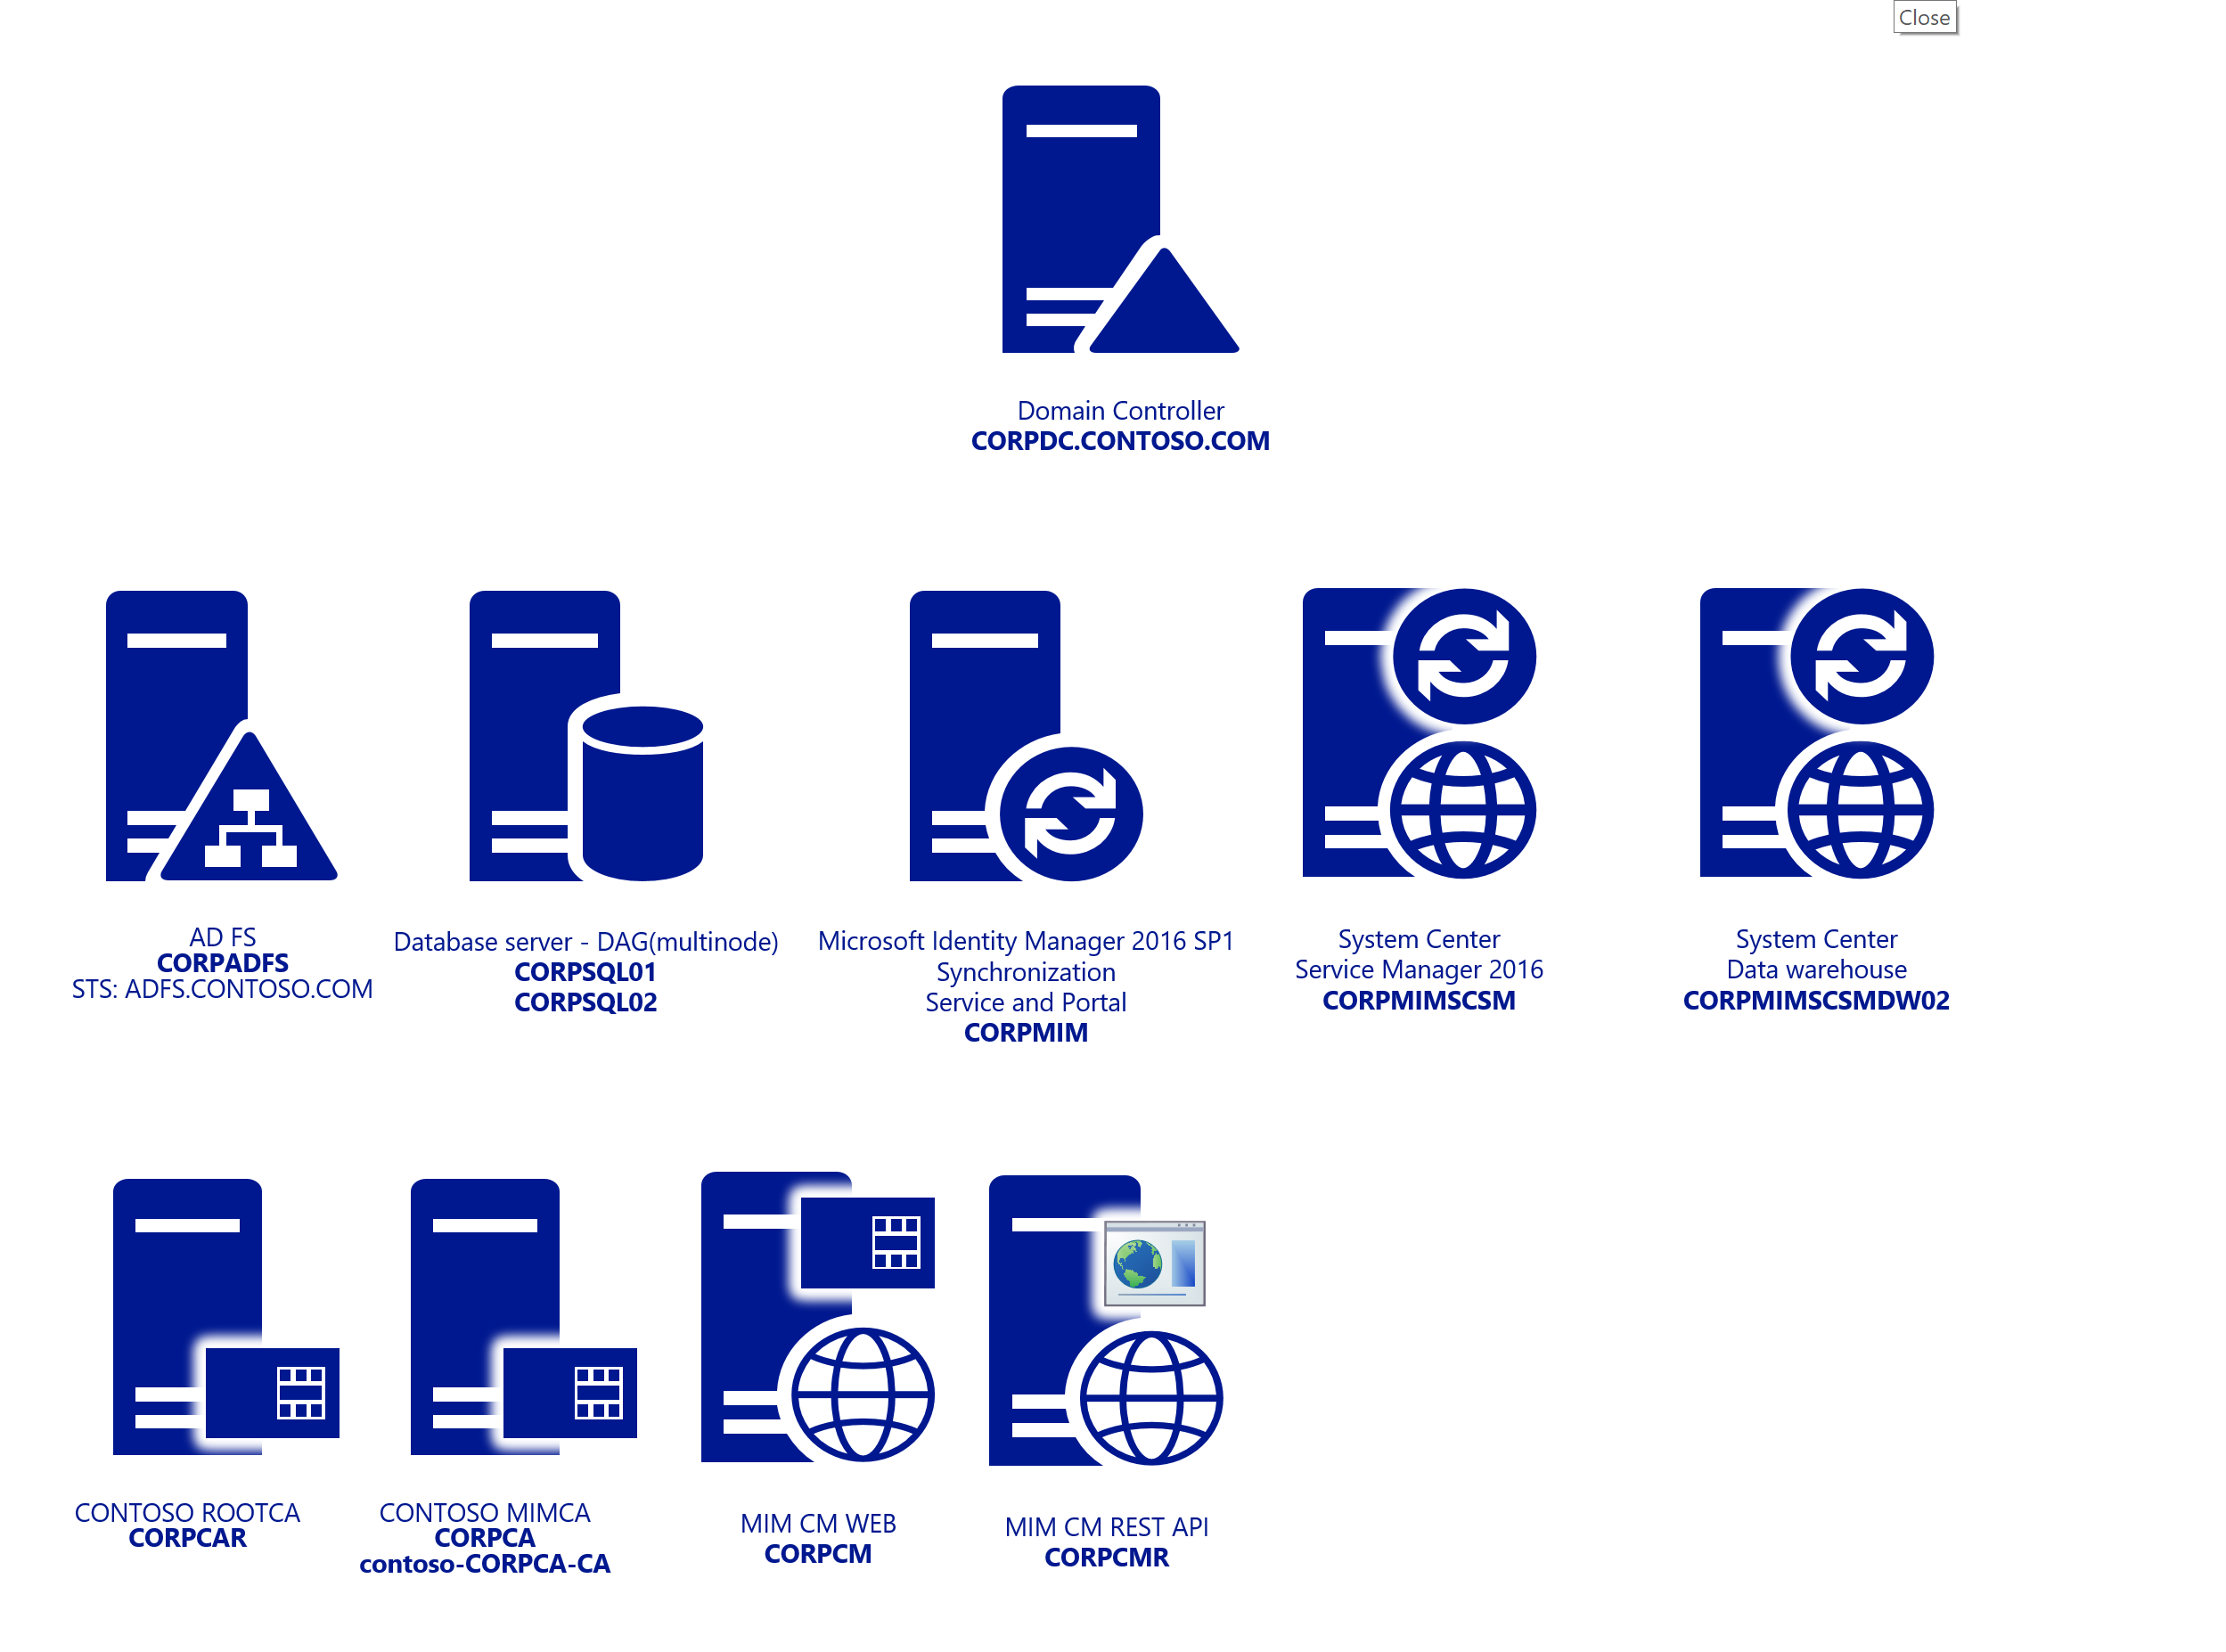
The diagram below shows an example of the type of environment that may be used. The systems with numbers are included in the list below the diagram and are required to successfully complete the steps covered in this article. Finally, Windows 2016 Datacenter Servers are used:

- CORPDC – Domain Controller
- CORPCM – MIM CM Server
- CORPCA – Certificate Authority
- CORPCMR – MIM CM Rest API Web – CM Portal For Rest API – Used for later
- CORPSQL1 – SQL 2016 SP1
- CORPWK1 – Windows 10 Domain Joined
Deployment overview
Base operating system installation
The lab consists of windows 2016 Datacenter servers.
Note
For more details on the supported platforms for MIM 2016 take a look at the article titled Supported platforms for MIM 2016.
Pre-deployment steps
Creating service accounts
IIS
Configuring Kerberos
Database-related steps
SQL configuration requirements
Database permissions
Deployment
Pre-deployment steps
The MIM CM configuration wizard requires information to be provided along the way in order for it to complete successfully.
Extending the schema
The process of extending the schema is straightforward but must be approached with caution due to its irreversible nature.
Note
This step requires that the account used has schema admin rights.
Browse to the location of the MIM media and navigate to \Certificate Management\x64 folder.
Copy the Schema folder to CORPDC then navigate to it.
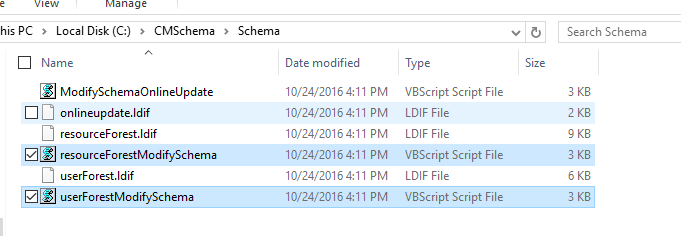
Run the script resourceForestModifySchema.vbs single Forest scenario. For the Resource forest scenario run the scripts:
DomainA – Users located (userForestModifySchema.vbs)
ResourceForestB – Location of CM installation (resourceForestModifySchema.vbs).
Note
Schema changes are a one way operation and require a forest recovery to roll back so make sure you have necessary backups. For details on the changes made to the schema by performing this operation review the article Forefront Identity Manager 2010 Certificate Management Schema Changes
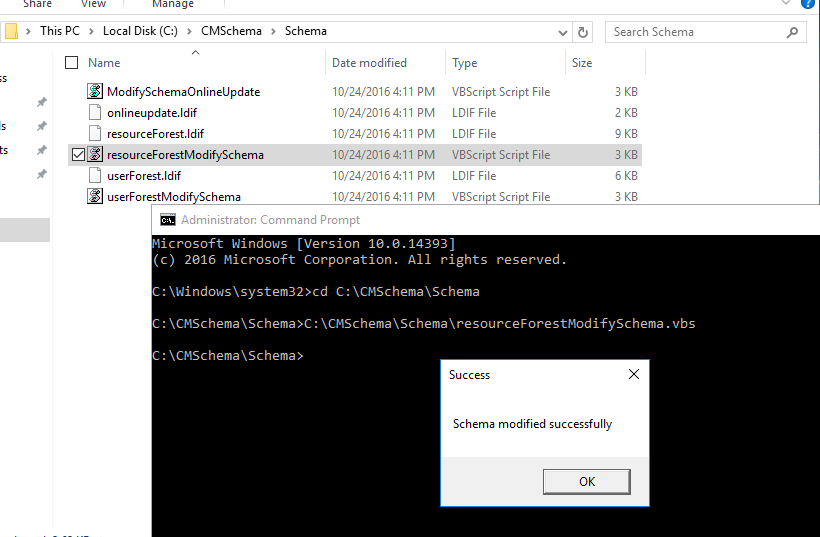
Run the script and you should receive a success message once that the script completes.
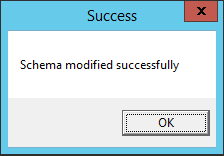
The schema in AD is now extended to support MIM CM.
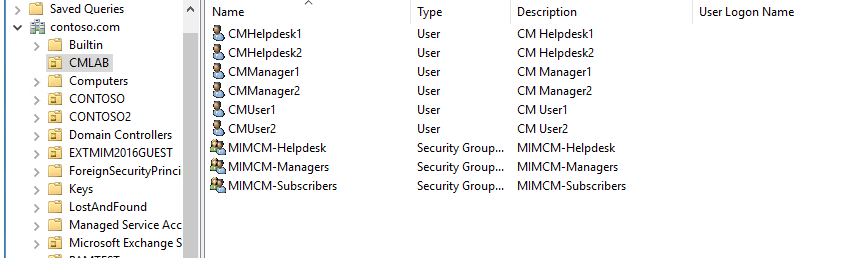
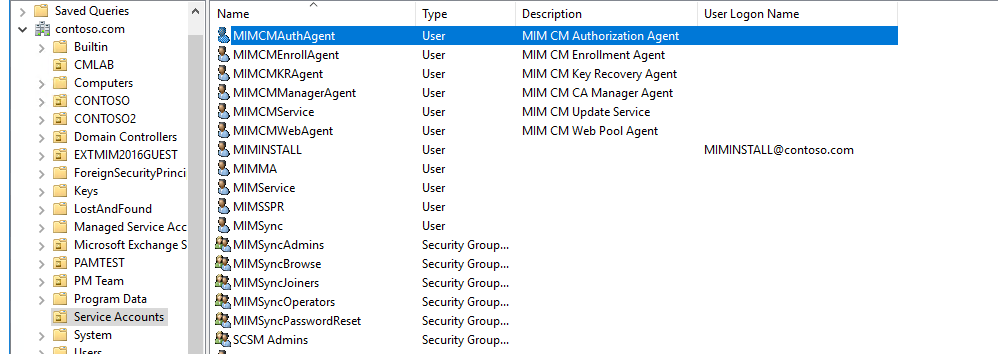
Creating service accounts and groups
The following table summarizes the accounts and permissions required by MIM CM. You can allow the MIM CM create the following accounts automatically or you can create them prior to installation. The actual account names can be changed. If you do create the accounts yourself, consider naming the user accounts in such away that it is easy to match the user account name to its function.
Users:
| Role | User log on name |
|---|---|
| MIM CM Agent | MIMCMAgent |
| MIM CM Key Recovery Agent | MIMCMKRAgent |
| MIM CM Authorization Agent | MIMCMAuthAgent |
| MIM CM CA Manager Agent | MIMCMManagerAgent |
| MIM CM Web Pool Agent | MIMCMWebAgent |
| MIM CM Enrollment Agent | MIMCMEnrollAgent |
| MIM CM Update Service | MIMCMService |
| MIM Install Account | MIMINSTALL |
| Help Desk Agent | CMHelpdesk1-2 |
| CM Manager | CMManager1-2 |
| Subscriber User | CMUser1-2 |
Groups:
| Role | Group |
|---|---|
| CM Helpdesk Members | MIMCM-Helpdesk |
| CM Manager Members | MIMCM-Managers |
| CM Subscribers Members | MIMCM-Subscribers |
Powershell: Agent Accounts:
import-module activedirectory
## Agent accounts used during setup
$cmagents = @{
"MIMCMKRAgent" = "MIM CM Key Recovery Agent";
"MIMCMAuthAgent" = "MIM CM Authorization Agent"
"MIMCMManagerAgent" = "MIM CM CA Manager Agent";
"MIMCMWebAgent" = "MIM CM Web Pool Agent";
"MIMCMEnrollAgent" = "MIM CM Enrollment Agent";
"MIMCMService" = "MIM CM Update Service";
"MIMCMAgent" = "MIM CM Agent";
}
##Groups Used for CM Management
$cmgroups = @{
"MIMCM-Managers" = "MIMCM-Managers"
"MIMCM-Helpdesk" = "MIMCM-Helpdesk"
"MIMCM-Subscribers" = "MIMCM-Subscribers"
}
##Users Used during testlab
$cmusers = @{
"CMManager1" = "CM Manager1"
"CMManager2" = "CM Manager2"
"CMUser1" = "CM User1"
"CMUser2" = "CM User2"
"CMHelpdesk1" = "CM Helpdesk1"
"CMHelpdesk2" = "CM Helpdesk2"
}

## OU Paths
$aoupath = "OU=Service Accounts,DC=contoso,DC=com" ## Location of Agent accounts
$oupath = "OU=CMLAB,DC=contoso,DC=com" ## Location of Users and Groups for CM Lab


#Create Agents – Update UserprincipalName
$cmagents.GetEnumerator() | Foreach-Object {
New-ADUser -Name $_.Name -Description $_.Value -UserPrincipalName ($_.Name + "@contoso.com")  -Path $aoupath
$cmpwd = ConvertTo-SecureString "Pass@word1" –asplaintext –force
Set-ADAccountPassword –identity $_.Name –NewPassword $cmpwd
Set-ADUser -Identity $_.Name -Enabled $true
}


#Create Users
$cmusers.GetEnumerator() | Foreach-Object {
New-ADUser -Name $_.Name -Description $_.Value -Path $oupath
$cmpwd = ConvertTo-SecureString "Pass@word1" –asplaintext –force
Set-ADAccountPassword –identity $_.Name –NewPassword $cmpwd
Set-ADUser -Identity $_.Name -Enabled $true
}
Update CORPCM Server Local Policy for Agent Accounts
| User log on name | Description and permissions |
|---|---|
| MIMCMAgent | Provides the following services: - Retrieves encrypted private keys from the CA. - Protects smart card PIN information in the FIM CM database. - Protects communication between FIM CM and the CA. This user account requires the following access control settings:- Allow logon locally user right.- Issue and Manage Certificates user right. - Read and Write permission on the system Temp folder at the following location: %WINDIR%\Temp.- A digital signature and encryption certificate issued and installed in the user store. |
| MIMCMKRAgent | Recovers archived private keys from the CA. This user account requires the following access control settings: - Allow logon locally user right.- Membership in the local Administrators group. - Enroll permission on the KeyRecoveryAgent certificate template. - Key Recovery Agent certificate is issued and installed in the user store. The certificate must be added to the list of the key recovery agents on the CA. - Read permission and Write permission on the system Temp folder at the following location: %WINDIR%\\Temp. |
| MIMCMAuthAgent | Determines user rights and permissions for users and groups. This user account requires the following access control settings: - Membership in the Pre-Windows 2000 Compatible Access domain group. - Granted the Generate security audits user right. |
| MIMCMManagerAgent | Performs CA management activities. This user must be assigned the Manage CA permission. |
| MIMCMWebAgent | Provides the identity for the IIS application pool. FIM CM runs within a Microsoft Win32® application programming interface process that uses this user’s credentials. This user account requires the following access control settings: - Membership in the local IIS_WPG, windows 2016 = IIS_IUSRS group. - Membership in the local Administrators group.- Granted the Generate security audits user right. - Granted the Act as part of the operating system user right. - Granted the Replace process level token user right.- Assigned as the identity of the IIS application pool, CLMAppPool. - Granted Read permission on the HKEY_LOCAL_MACHINE\SOFTWARE\Microsoft\CLM\v1.0\Server\WebUser registry key. - This account must also be trusted for delegation. |
| MIMCMEnrollAgent | Performs enrollment on behalf of a user. This user account requires the following access control settings:- An Enrollment Agent certificate that is issued and installed in the user store.- Allow logon locally user right. - Enroll permission on the Enrollment Agent certificate template (or the custom template, if one is used). |
Creating certificate templates for MIM CM service accounts
Three of the service accounts used by MIM CM require a certificate and the configuration wizard requires that you provide the name of the certificates templates that it should use to request certificates for them.
The service accounts that require certificates are:
MIMCMAgent: This account needs a user certificate
MIMCMEnrollAgent: This account needs an enrollment agent certificate
MIMCMKRAgent: This account needs a Key recovery agent certificate
There are templates already present in AD, but we need to create our own versions to work with MIM CM. As we need to make modification from the original baseline templates.
All three of the above accounts will have elevated rights within your organization and should be handled carefully.
Create the MIM CM Signing certificate template
From Administrative Tools, open Certification Authority.
In the Certification Authority console, in the console tree, expand Contoso-CorpCA, and then click Certificate Templates.
Right-click Certificate Templates, and then click Manage.
In the Certificate Templates Console, in the details pane, select and right-click User, and then click Duplicate Template.
In the Duplicate Template dialog box, select Windows Server 2003 Enterprise, and then click OK.
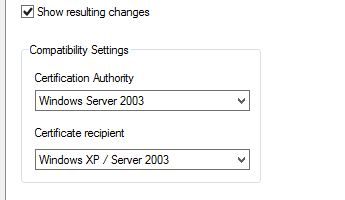
Note
MIM CM does not work with certificates based on version 3 certificate templates. You must create a Windows Server® 2003 Enterprise (version 2)certificate template. See V3 details for more information.
In the Properties of New Template dialog box, on the General tab, in the Template display name box, type MIM CM Signing. Change the Validity Period to 2 years, and then clear the Publish certificate in Active Directory check box.
On the Request Handling tab, ensure that the Allow private key to be exported check box is selected, and then click Cryptography tab.
In the Cryptography Selection dialog box, disable Microsoft Enhanced Cryptographic Provider v1.0, enable Microsoft Enhanced RSA and AES Cryptographic Provider, and then click OK.
On the Subject Name tab, clear the Include e-mail name in subject name and E-mail name check boxes.
On the Extensions tab, in the Extensions included in this template list, ensure that Application Policies is selected, and then click Edit.
In the Edit Application Policies Extension dialog box, select both the Encrypting File System and the Secure Email application policies. Click Remove, and then click OK.
On the Security tab perform the following steps:
Remove Administrator.
Remove Domain Admins.
Remove Domain Users.
Assign only Read and Write permissions to Enterprise Admins.
Add MIMCMAgent.
Assign Read and Enroll permissions to MIMCMAgent.
In the Properties of New Template dialog box, click OK.
Leave the Certificate Templates Console open.
Create the MIM CM Enrollment Agent certificate template
In the Certificate Templates Console, in the details pane, select and right-click Enrollment Agent, and then click Duplicate Template.
In the Duplicate Template dialog box, select Windows Server 2003 Enterprise, and then click OK.
In the Properties of New Template dialog box, on the General tab, in the Template display name box, type MIM CM Enrollment Agent. Ensure that the Validity Period is 2 years.
On the Request Handling tab, enable Allow private key to be exported, and then click CSPs or Cryptography Tab.
In the CSP Selection dialog box, disable Microsoft Base Cryptographic Provider v1.0, disable Microsoft Enhanced Cryptographic Provider v1.0, enable Microsoft Enhanced RSA and AES Cryptographic Provider, and then click OK.
On the Security tab perform the following:
Remove Administrator.
Remove Domain Admins.
Assign only Read and Write permissions to Enterprise Admins.
Add MIMCMEnrollAgent.
Assign Read and Enroll permissions to MIMCMEnrollAgent.
In the Properties of New Template dialog box, click OK.
Leave the Certificate Templates Console open.
Create the MIM CM Key Recovery Agent certificate template
In the Certificate Templates console, in the details pane, select and right-click Key Recovery Agent, and then click Duplicate Template.
In the Duplicate Template dialog box, select Windows Server 2003 Enterprise, and then click OK.
In the Properties of New Template dialog box, on the General tab, in the Template display name box, type MIM CM Key Recovery Agent. Ensure that the Validity Period is 2 years On the Cryptography Tab.
In the Providers Selection dialog box, disable Microsoft Enhanced Cryptographic Provider v1.0, enable Microsoft Enhanced RSA and AES Cryptographic Provider, and then click OK.
On the Issuance Requirements tab, ensure that CA certificate manager approval is disabled.
On the Security tab perform the following:
Remove Administrator.
Remove Domain Admins.
Assign only Read and Write permissions to Enterprise Admins.
Add MIMCMKRAgent.
Assign Read and Enroll permissions to KRAgent.
In the Properties of New Template dialog box, click OK.
Close the Certificate Templates Console.
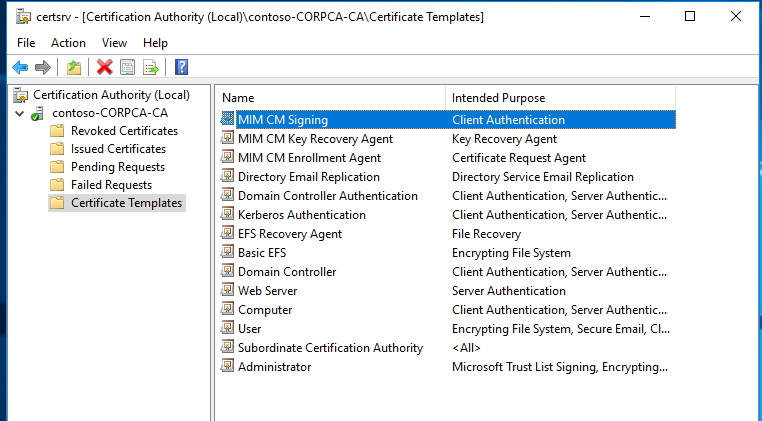
Publish the required certificate templates at the Certification Authority
Restore the Certification Authority console.
In the Certification Authority console, in the console tree, right-click Certificate Templates, point to New, and then click Certificate Template to Issue.
In the Enable Certificate Templates dialog box, select MIM CM Enrollment Agent, MIM CM Key Recovery Agent, and MIM CM Signing. Click OK.
In the console tree, click Certificate Templates.
Verify that the three new templates appear in the details pane, and then close Certification Authority.
Close all open windows and log off.
IIS configuration
In order to host the website for CM, install and configure IIS.
Install and configure IIS
Login to CORLog in as MIMINSTALL account
Important
The MIM installation account should be a local administrator
Open PowerShell and run the following command
Install-WindowsFeature –ConfigurationFilePath
Note
A site named Default Web Site is installed by default with IIS 7. If that site was renamed or removed a site with the name Default Web Site must be available before MIM CM can be installed.
Configuring Kerberos
The MIMCMWebAgent account will be running the MIM CM portal. By default in IIS and up kernel mode authentication is used in IIS by default. You will disable Kerberos kernel mode authentication and configure SPNs on the MIMCMWebAgent account instead. Some command will require elevated permission in active directory and CORPCM server.
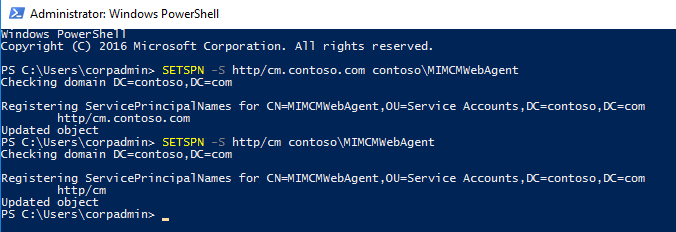
#Kerberos settings
#SPN
SETSPN -S http/cm.contoso.com contoso\MIMCMWebAgent
#Delegation for certificate authority
Get-ADUser CONTOSO\MIMCMWebAgent | Set-ADObject -Add @{"msDS-AllowedToDelegateTo"="rpcss/CORPCA","rpcss/CORPCA.contoso.com"}
Updating IIS on CORPCM

add-pssnapin WebAdministration

Set-WebConfigurationProperty -Filter System.webServer/security/authentication/WindowsAuthentication -Location 'Default Web Site' -Name enabled -Value $true
Set-WebConfigurationProperty -Filter System.webServer/security/authentication/WindowsAuthentication -Location 'Default Web Site' -Name useKernelMode -Value $false
Set-WebConfigurationProperty -Filter System.webServer/security/authentication/WindowsAuthentication -Location 'Default Web Site' -Name useAppPoolCredentials -Value $true
Note
You will need to add a DNS A Record for the “cm.contoso.com” and point to CORPCM IP
Requiring SSL on the MIM CM portal
It is highly recommended that you require SSL on the MIM CM portal. If you don’t the wizard will even warn you about it.
Enroll in web certificate for cm.contoso.com assign to default site
Open IIS Manager and navigate to Certificate Management
In Features View, double-click SSL Settings.
On the SSL Settings page, select Require SSL.
In the Actions pane, click Apply.
Database Configuration CORPSQL For MIM CM
Ensure that you are connected to the CORPSQL01 Server.
Ensure you are logged on as SQL DBA.
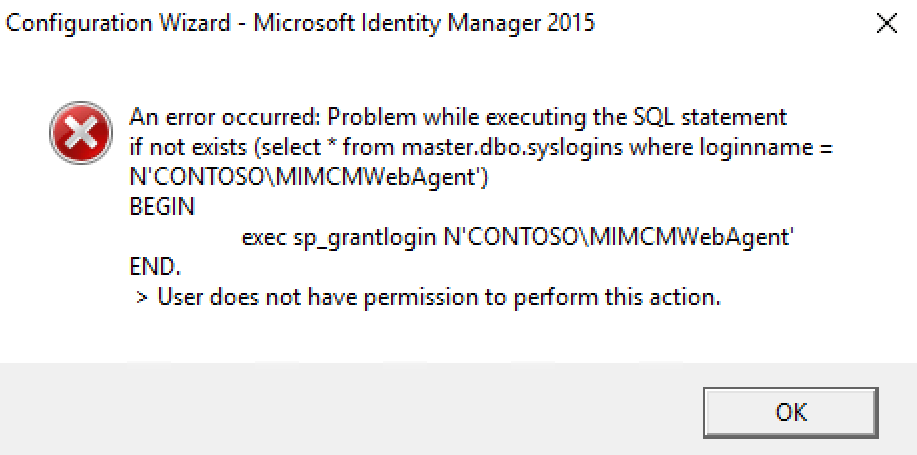
Run the following T-SQL script to allow the CONTOSO\MIMINSTALL Account to create the database when we go to the configuration step
Note
We will need to come back to SQL when we are ready for the exit & policy module
create login [CONTOSO\\MIMINSTALL] from windows;
exec sp_addsrvrolemember 'CONTOSO\\MIMINSTALL', 'dbcreator';
exec sp_addsrvrolemember 'CONTOSO\\MIMINSTALL', 'securityadmin';
Deployment of Microsoft Identity Manager 2016 Certificate Management
Ensure that you are connected to the CORPCM Server and that the MIMINSTALL account is a member of the local administrators group.
Ensure you are logged on as Contoso\MIMINSTALL.
Mount the Microsoft Identity Manager 2016 SP1 or later service pack ISO.
Open the Certificate Management\x64 directory.
In the x64 window, right-click Setup, and then click Run as administrator.
On the Welcome to the Microsoft Identity Manager Certificate Management Setup Wizard page, click Next.
On the End-User License Agreement page, read the agreement, enable the I accept the terms in the license agreement check box, and then click Next.
On the Custom Setup page, make sure the MIM CM Portal and MIM CM Update Service components are set to be installed, and then click Next.
On the Virtual Web Folder page, ensure that the Virtual folder name is CertificateManagement, and then click Next.
On the Install Microsoft Identity Manager Certificate Management page, click Install.
On the Completed the Microsoft Identity Manager Certificate Management Setup Wizard page, click Finish.

Configuration Wizard of Microsoft Identity Manager 2016 Certificate Management
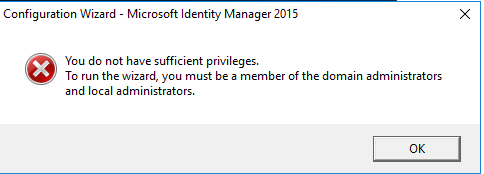
Before logging in to CORPCM please add MIMINSTALL to domain Admins, Schema Admins and local administrators group for configuration wizard . This can be removed later once configuration is complete.
From the Start menu, click Certificate Management Config Wizard. And Run as Administrator
On the Welcome to the Configuration Wizard page, click Next.
On the CA Configuration page, ensure that the selected CA is Contoso-CORPCA-CA, ensure that the selected server is CORPCA.CONTOSO.COM, and then click Next.
On the Set up the Microsoft® SQL Server® Database page, in the Name of SQL Server box, type CORPSQL1 , enable the Use my credentials to create the database check box, and then click Next.
On the Database Settings page, accept the default database name of FIMCertificateManagement, ensure that SQL integrated authentication is selected, and then click Next.
On the Set up Active Directory page, accept the default name provided for the service connection point, and then click Next.
On the Authentication method page confirm windows integrated Authentication is selected, then click Next.
On the Agents – FIM CM page, clear the Use the FIM CM default settings check box, and then click Custom Accounts.
In the Agents – FIM CM multi-tabbed dialog box, on each tab, type the following information:
User name: Update
Password: Pass@word1
Confirm Password: Pass@word1
Use an existing user: Enabled
Note
We created these accounts earlier. Make sure that the procedures in step 8 are repeated for all six agent account tabs.
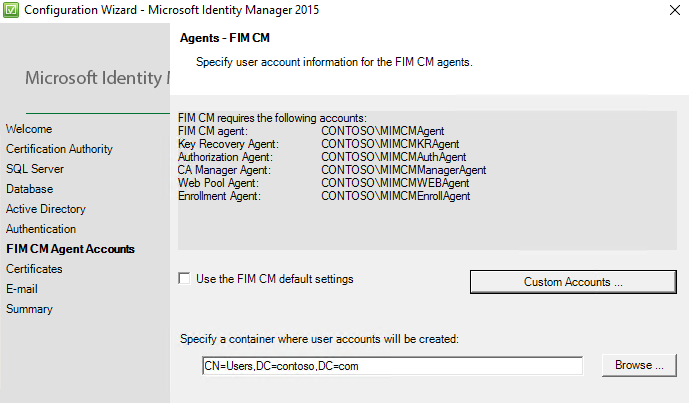
When all agent account information is complete, click OK.
On the Agents – MIM CM page, click Next.
On the Set up server certificates page, enable the following certificate templates:
Certificate template to be used for the recovery agent Key Recovery Agent certificate: MIMCMKeyRecoveryAgent.
Certificate template to be used for the FIM CM Agent certificate: MIMCMSigning.
Certificate template to be used for the enrollment agent certificate: FIMCMEnrollmentAgent.
On the Set-up server certificates page, click Next.
On the Setup E-mail Server, Document Printing page, in the Specify the name of the SMTP server you want to use to e-mail registration notifications box and then click Next.
On the Ready to configure page, click Configure.
In the Configuration Wizard – Microsoft Forefront Identity Manager 2010 R2 warning dialog box, click OK to acknowledge that SSL is not enabled on the IIS virtual directory.

Note
Do not click the Finish button until the execution of the configuration wizard is complete. Logging for wizard can be found here: %programfiles%\Microsoft Forefront Identity Management\2010\Certificate Management\config.log
Click Finish.
Close all open windows.
Add
https://cm.contoso.com/certificatemanagementto local intranet zone in your browser.Visit site from server CORPCM
https://cm.contoso.com/certificatemanagement
Verify the CNG Key Isolation Service
From Administrative Tools, open Services.
In the details pane, double-click CNG Key Isolation.
On the General tab, change the Startup Type to Automatic.
On the General tab, start the service if it is not in a started state.
On the General tab, click OK.
Installing and Configuring the CA Modules :
In this step, we will install and configure the FIM CM CA modules on the certification authority.
Configure FIM CM to only inspect user permissions for management operations
In the C:\Program Files\Microsoft Forefront Identity Manager\2010\Certificate Management\web window, make a copy of web.config naming the copy web.1.config.
In the Web window, right-click Web.config, and then click Open.
Note
The Web.config file is opened in notepad
When the file opens, press CTRL+F.
In the Find and Replace dialog box, in the Find what box, type UseUser, and then click Find Next three times.
Close the Find and Replace dialog box.
You should be on the line <add key=”Clm.RequestSecurity.Flags” value=”UseUser,UseGroups” />. Change the line to read <add key=”Clm.RequestSecurity.Flags” value=”UseUser” />.
Close the file, saving all changes.
Create an account for the CA computer at the SQL server <no script>
Ensure that you are connected to the CORPSQL01 server.
Ensure you are logged on as DBA
From the Start menu, launch SQL Server Management Studio.
In the Connect to Server dialog box, in the Server name box, type CORPSQL01, and then click Connect.
In the console tree, expand Security, and then click Logins.
Right-click Logins, and then click New Login.
On the General page, in the Login name box, type contoso\CORPCA$. Select Windows Authentication. Default database is FIMCertificateManagement.
In the left pane, select User Mapping. In the right pane, click the check box in the Map column beside FIMCertificateManagement. In the database role membership for: FIMCertificateManagement list, enable the clmApp role.
Click OK.
Close Microsoft SQL Server Management Studio.
Install the FIM CM CA modules on the Certification Authority
Ensure that you are connected to the CORPCA server.
In the X64 windows, right-click Setup.exe, and then click Run as administrator.
On the Welcome to the Microsoft Identity Manager Certificate Management Setup Wizard page, click Next.
On the End-User License Agreement page, read the agreement. Select the I accept the terms in the license agreement check box, and then click Next.
On the Custom Setup page, select MIM CM Portal, and then click This feature will not be available.
On the Custom Setup page, select MIM CM Update Service, and then click This Feature will not be available.
Note
This will leave the MIM CM CA Files as the only feature enabled for the installation.
On the Custom Setup page, click Next.
On the Install Microsoft Identity Manager Certificate Management page, click Install.
On the Completed the Microsoft Identity Manager Certificate Management Setup Wizard page, click Finish.
Close all open windows.
Configure the MIM CM Exit Module
From Administrative Tools, open Certification Authority.
In the console tree, right-click contoso-CORPCA-CA, and then click Properties.
On the Exit Module tab, select FIM CM Exit Module, and then click Properties.
In the Specify the CM database connection string box, type Connect Timeout=15;Persist Security Info=True; Integrated Security=sspi;Initial Catalog=FIMCertificateManagement;Data Source=CORPSQL01. Leave the Encrypt the Connection String check box enabled, and then click OK.
In the Microsoft FIM Certificate Management message box, click OK.
In the contoso-CORPCA-CA Properties dialog box, click OK.
Right-click contoso-CORPCA-CA , point to All Tasks, and then click Stop Service. Wait until Active Directory Certificate Services stops.
Right-click contoso-CORPCA-CA , point to All Tasks, and then click Start Service.
Minimize the Certification Authority console.
From Administrative Tools, open Event Viewer.
In the console tree, expand Application and Services Logs, and then click FIM Certificate Management.
In the list of events, verify that the latest events do not include any Warning or Error events since the last restart of Certificate Services.
Note
The last event should state that the Exit Module loaded using settings from:
SYSTEM\CurrentControlSet\Services\CertSvc\Configuration\ContosoRootCA\ExitModules\Clm.ExitMinimize the Event Viewer.
Copy the MIMCMAgent Certificate’s thumbprint to Windows® clipboard
Restore the Certification Authority console.
In the console tree, expand contoso-CORPCA-CA, and then click Issued Certificates.
In the details pane, double-click the certificate with CONTOSO\MIMCMAgent in the Requester Name column and with FIM CM Signing in the Certificate Template column.
On the Details tab, select the Thumbprint field.
Select the thumbprint, and then press CTRL+C.
Note
Do not include the leading space in the list of thumbprint characters.
In the Certificate dialog box, click OK.
From the Start menu, in the Search programs and files box, type Notepad, and then press ENTER.
In Notepad, from the Edit menu, click Paste.
From the Edit menu, click Replace.
In the Find what box, type a space character, and then click Replace All.
Note
This removes all of the spaces between the characters in the thumbprint.
In the Replace dialog box, click Cancel.
Select the converted thumbprintstring, and then press CTRL+C.
Close Notepad without saving changes.
Configure the FIM CM Policy Module
Restore the Certification Authority console.
Right-click contoso-CORPCA-CA, and then click Properties.
In the contoso-CORPCA-CA Properties dialog box, on the Policy Module tab, click Properties.
On the General tab, ensure that Pass non-FIM CM requests to the default policy module for processing is selected.
On the Signing Certificates tab, click Add.
In the Certificate dialog box, right-click the Please specify hex-encoded certificate hash box, and then click Paste.
In the Certificate dialog box, click OK.
Note
If the OK button is not enabled, you accidentally included a hidden character in the thumbprint string when you copied the thumbprint from the clmAgent certificate. Repeat all steps starting from Task 4: Copy the MIMCMAgent Certificate’s Thumbprint to Windows Clipboard in this exercise.
In the Configuration Properties dialog box, ensure that the thumbprint appears in the Valid Signing Certificates list, and then click OK.
In the FIM Certificate Management message box, click OK.
In the contoso-CORPCA-CA Properties dialog box, click OK.
Right-click contoso-CORPCA-CA , point to All Tasks, and then click Stop Service.
Wait until Active Directory Certificate Services stops.
Right-click contoso-CORPCA-CA , point to All Tasks, and then click Start Service.
Close the Certification Authority console.
Close all open windows and then log off.
Last step in the deployment is we want to make sure CONTOSO\MIMCM-Managers can deploy and create templates and configure the system without being schema and Domain Admins. The next script will ACL the permissions to the certificate templates using dsacls. Please run with account that has full permission to change security Read and Write permissions to each existing certificate template in the forest.
First Steps: Configuring Service Connection Point and Target Group Permissions & Delegating Profile Template Management
Configure permissions on the service connection point (SCP).
Configure delegated profile template management.
Configure permissions on the service connection point (SCP). <no script>
Ensure that you are connected to the CORPDC virtual server.
Log on as contoso\corpadmin
From Administrative Tools, open Active Directory Users and Computers.
In Active Directory Users and Computers, on the View menu, ensure that Advanced Features is enabled.
In the console tree, expand Contoso.com | System | Microsoft | Certificate Lifecycle Manager, and then click CORPCM.
Right-click CORPCM, and then click Properties.
In the CORPCM Properties dialog box, on the Security tab, add the following groups with the corresponding permissions:
Group Permissions mimcm-Managers Read FIM CM Audit FIM CM Enrollment Agent FIM CM Request Enroll FIM CM Request Recover FIM CM Request Renew FIM CM Request Revoke FIM CM Request Unblock Smart Card mimcm-HelpDesk Read FIM CM Enrollment Agent FIM CM Request Revoke FIM CM Request Unblock Smart Card In the CORPDC Properties dialog box, click OK.
Leave Active Directory Users and Computers open.
Configure permissions on the descendant user objects
Ensure that you are still in the Active Directory Users and Computers console.
In the console tree, right-click Contoso.com, and then click Properties.
On the Security tab, click Advanced.
In the Advanced Security Settings for Contoso dialog box, click Add.
In the Select User, Computer, Service Account, or Group dialog box, in the Enter the object name to select box, type mimcm-Managers, and then click OK.
In the Permission Entry for Contoso dialog box, in the Apply to list, select Descendant User objects and then enable the Allow check box for the following Permissions:
Read all properties
Read permissions
FIM CM Audit
FIM CM Enrollment Agent
FIM CM Request Enroll
FIM CM Request Recover
FIM CM Request Renew
FIM CM Request Revoke
FIM CM Request Unblock Smart Card
In the Permission Entry for Contoso dialog box, click OK.
In the Advanced Security Settings for Contoso dialog box, click Add.
In the Select User, Computer, Service Account, or Group dialog box, in the Enter the object name to select box, type mimcm-HelpDesk, and then click OK.
In the Permission Entry for Contoso dialog box, in the Apply to list, select Descendant User objects and then select the Allow check box for the following Permissions:
Read all properties
Read permissions
FIM CM Enrollment Agent
FIM CM Request Revoke
FIM CM Request Unblock Smart Card
In the Permission Entry for Contoso dialog box, click OK.
In the Advanced Security Settings for Contoso dialog box, click OK.
In the contoso.com Properties dialog box, click OK.
Leave Active Directory Users and Computers open.
Configure permissions on the descendant user objects <no script>
Ensure that you are still in the Active Directory Users and Computers console.
In the console tree, right-click Contoso.com, and then click Properties.
On the Security tab, click Advanced.
In the Advanced Security Settings for Contoso dialog box, click Add.
In the Select User, Computer, Service Account, or Group dialog box, in the Enter the object name to select box, type mimcm-Managers, and then click OK.
In the Permission Entry for CONTOSO dialog box, in the Apply to list, select Descendant User objects and then enable the Allow check box for the following Permissions:
Read all properties
Read permissions
FIM CM Audit
FIM CM Enrollment Agent
FIM CM Request Enroll
FIM CM Request Recover
FIM CM Request Renew
FIM CM Request Revoke
FIM CM Request Unblock Smart Card
In the Permission Entry for CONTOSO dialog box, click OK.
In the Advanced Security Settings for CONTOSO dialog box, click Add.
In the Select User, Computer, Service Account, or Group dialog box, in the Enter the object name to select box, type mimcm-HelpDesk, and then click OK.
In the Permission Entry for CONTOSO dialog box, in the Apply to list, select Descendant User objects and then select the Allow check box for the following Permissions:
Read all properties
Read permissions
FIM CM Enrollment Agent
FIM CM Request Revoke
FIM CM Request Unblock Smart Card
In the Permission Entry for contoso dialog box, click OK.
In the Advanced Security Settings for Contoso dialog box, click OK.
In the contoso.com Properties dialog box, click OK.
Leave Active Directory Users and Computers open.
Second Steps: Delegating Certificate Template Management Permissions <script>
Delegating permissions on the Certificate Templates container.
Delegating permissions on the OID container.
Delegating permissions on the existing certificate templates.
Define permissions on the Certificate Templates container:
Restore the Active Directory Sites and Services console.
In the console tree, expand Services, expand Public Key Services, and then click Certificate Templates.
In the console tree, right-click Certificate Templates, and then click Delegate Control.
In the Delegation of Control Wizard, click Next.
On the Users or Groups page, click Add.
In the Select Users, Computers, or Groups dialog box, in the Enter the object names to select box, type mimcm-Managers, and then click OK.
On the Users or Groups page, click Next.
On the Tasks to Delegate page, click Create a custom task to delegate, and then click Next.
On the Active Directory Object Type page, ensure that This folder, existing objects in this folder, and creation of new objects in this folder is selected, and then click Next.
On the Permissions page, in the Permissions list, select the Full Control check box, and then click Next.
On the Completing the Delegation of Control Wizard page, click Finish.
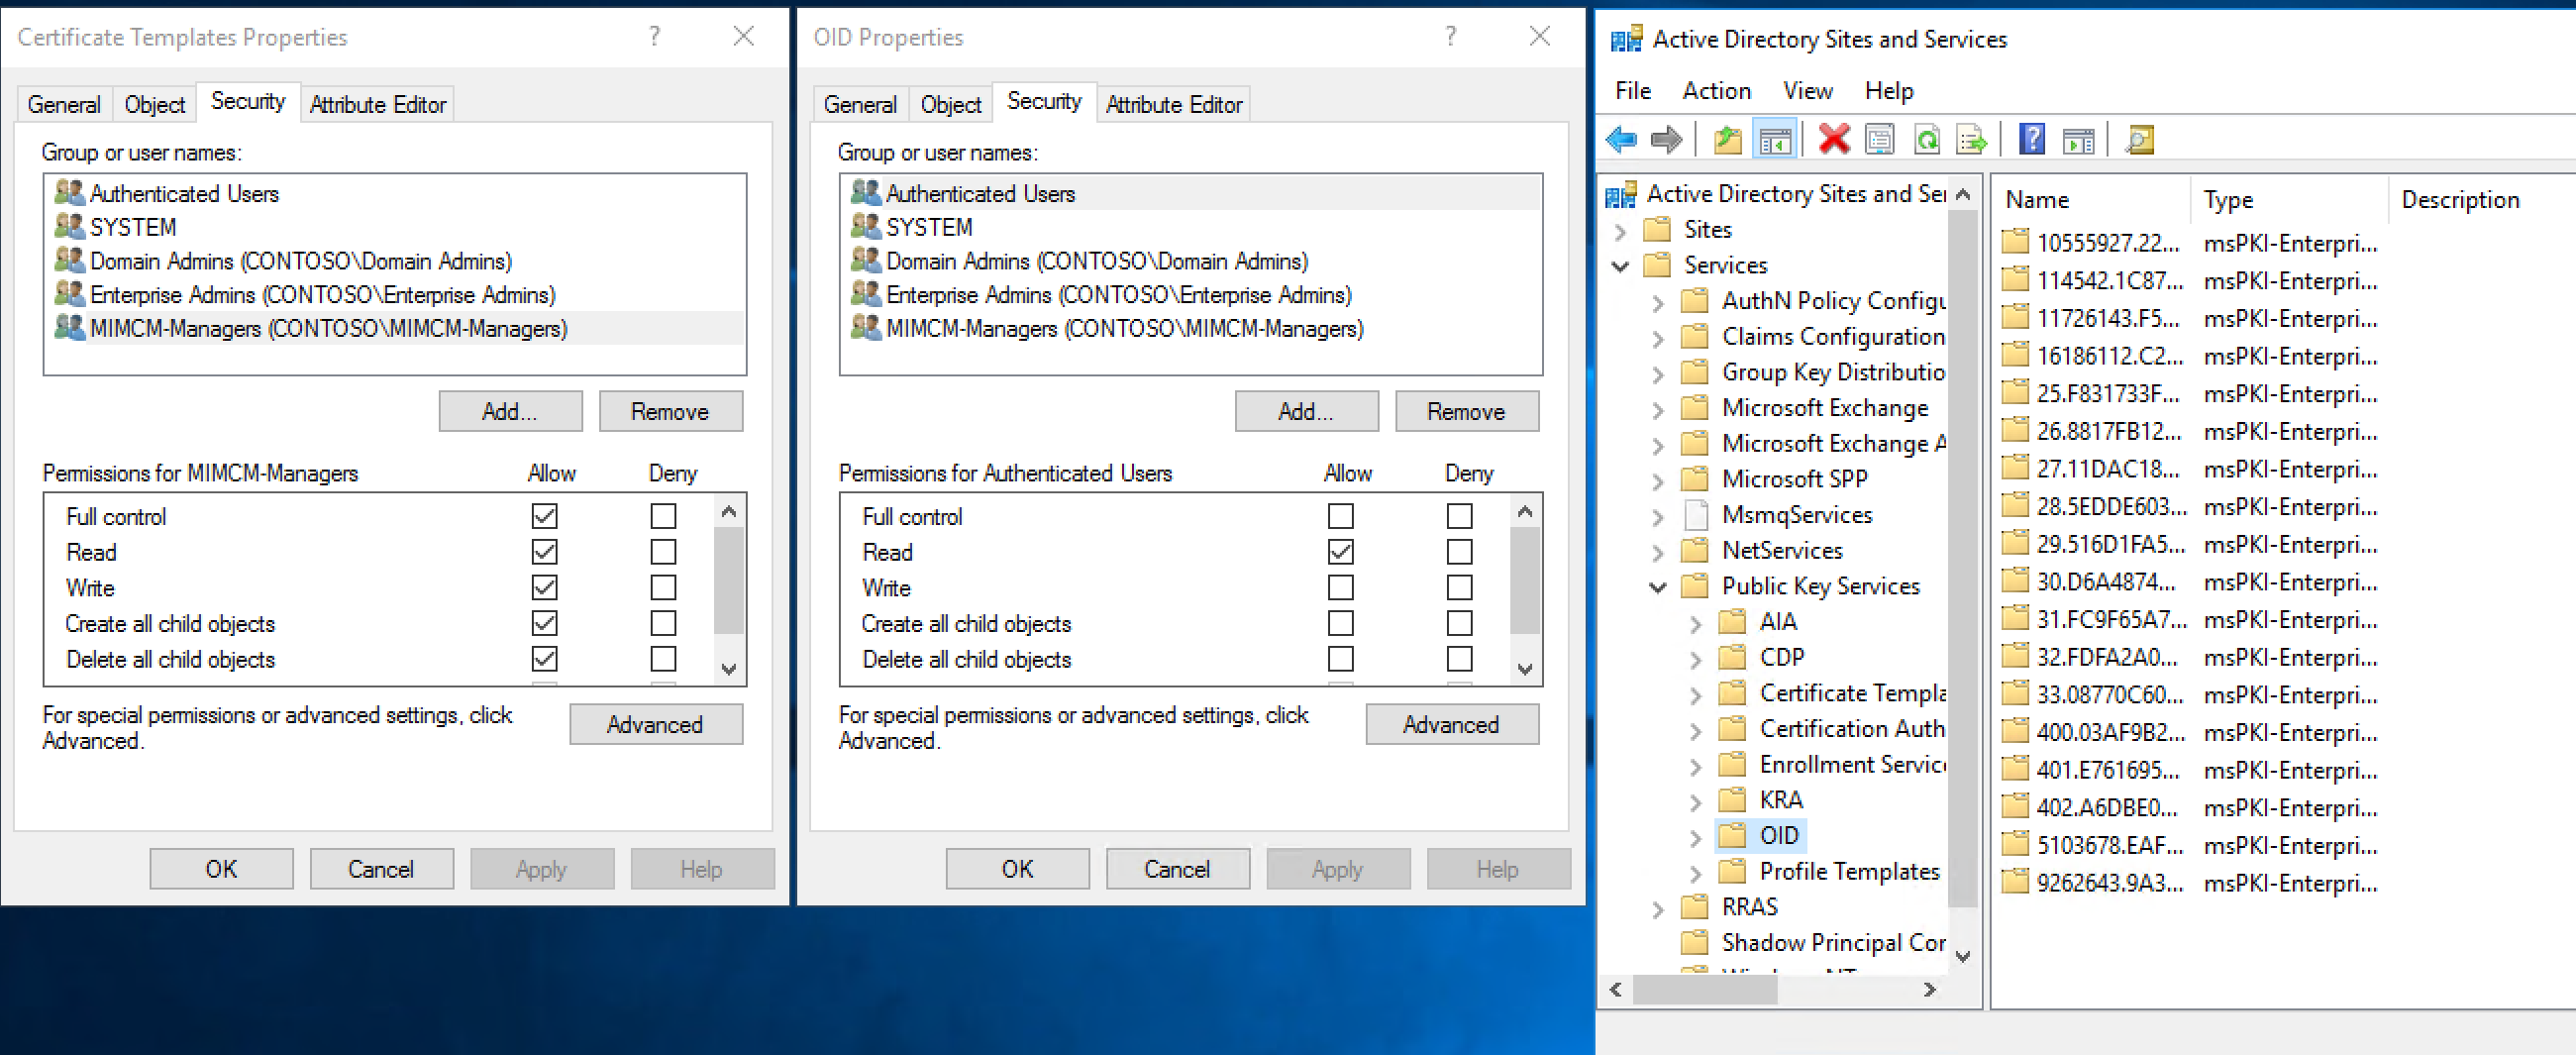
Define permissions on the OID container:
In the console tree, right-click OID, and then click Properties.
In the OID Properties dialog box, on the Security tab, click Advanced.
In the Advanced Security Settings for OID dialog box, click Add.
In the Select User, Computer, Service Account, or Group dialog box, in the Enter the object name to select box, type mimcm-Managers, and then click OK.
In the Permissions Entry for OID dialog box, ensure that the permissions apply to This object and all descendant objects, click Full Control, and then click OK.
In the Advanced Security Settings for OID dialog box, click OK.
In the OID Properties dialog box, click OK.
Close Active Directory Sites and Services.
Scripts: Permissions on the OID, Profile Template & Certificate Templates container
import-module activedirectory
$adace = @{
"OID" = "AD:\\CN=OID,CN=Public Key Services,CN=Services,CN=Configuration,DC=contoso,DC=com";
"CT" = "AD:\\CN=Certificate Templates,CN=Public Key
Services,CN=Services,CN=Configuration,DC=contoso,DC=com";
"PT" = "AD:\\CN=Profile Templates,CN=Public Key
Services,CN=Services,CN=Configuration,DC=contoso,DC=com"
}
$adace.GetEnumerator() | **Foreach-Object** {
$acl = **Get-Acl** *-Path* $_.Value
$sid=(**Get-ADGroup** "MIMCM-Managers").SID
$p = **New-Object** System.Security.Principal.SecurityIdentifier($sid)
##https://msdn.microsoft.com/library/system.directoryservices.activedirectorysecurityinheritance(v=vs.110).aspx
$ace = **New-Object** System.DirectoryServices.ActiveDirectoryAccessRule
($p,[System.DirectoryServices.ActiveDirectoryRights]"GenericAll",[System.Security.AccessControl.AccessControlType]::Allow,
[DirectoryServices.ActiveDirectorySecurityInheritance]::All)
$acl.AddAccessRule($ace)
**Set-Acl** *-Path* $_.Value *-AclObject* $acl
}
Scripts: Delegating permissions on the existing certificate templates.
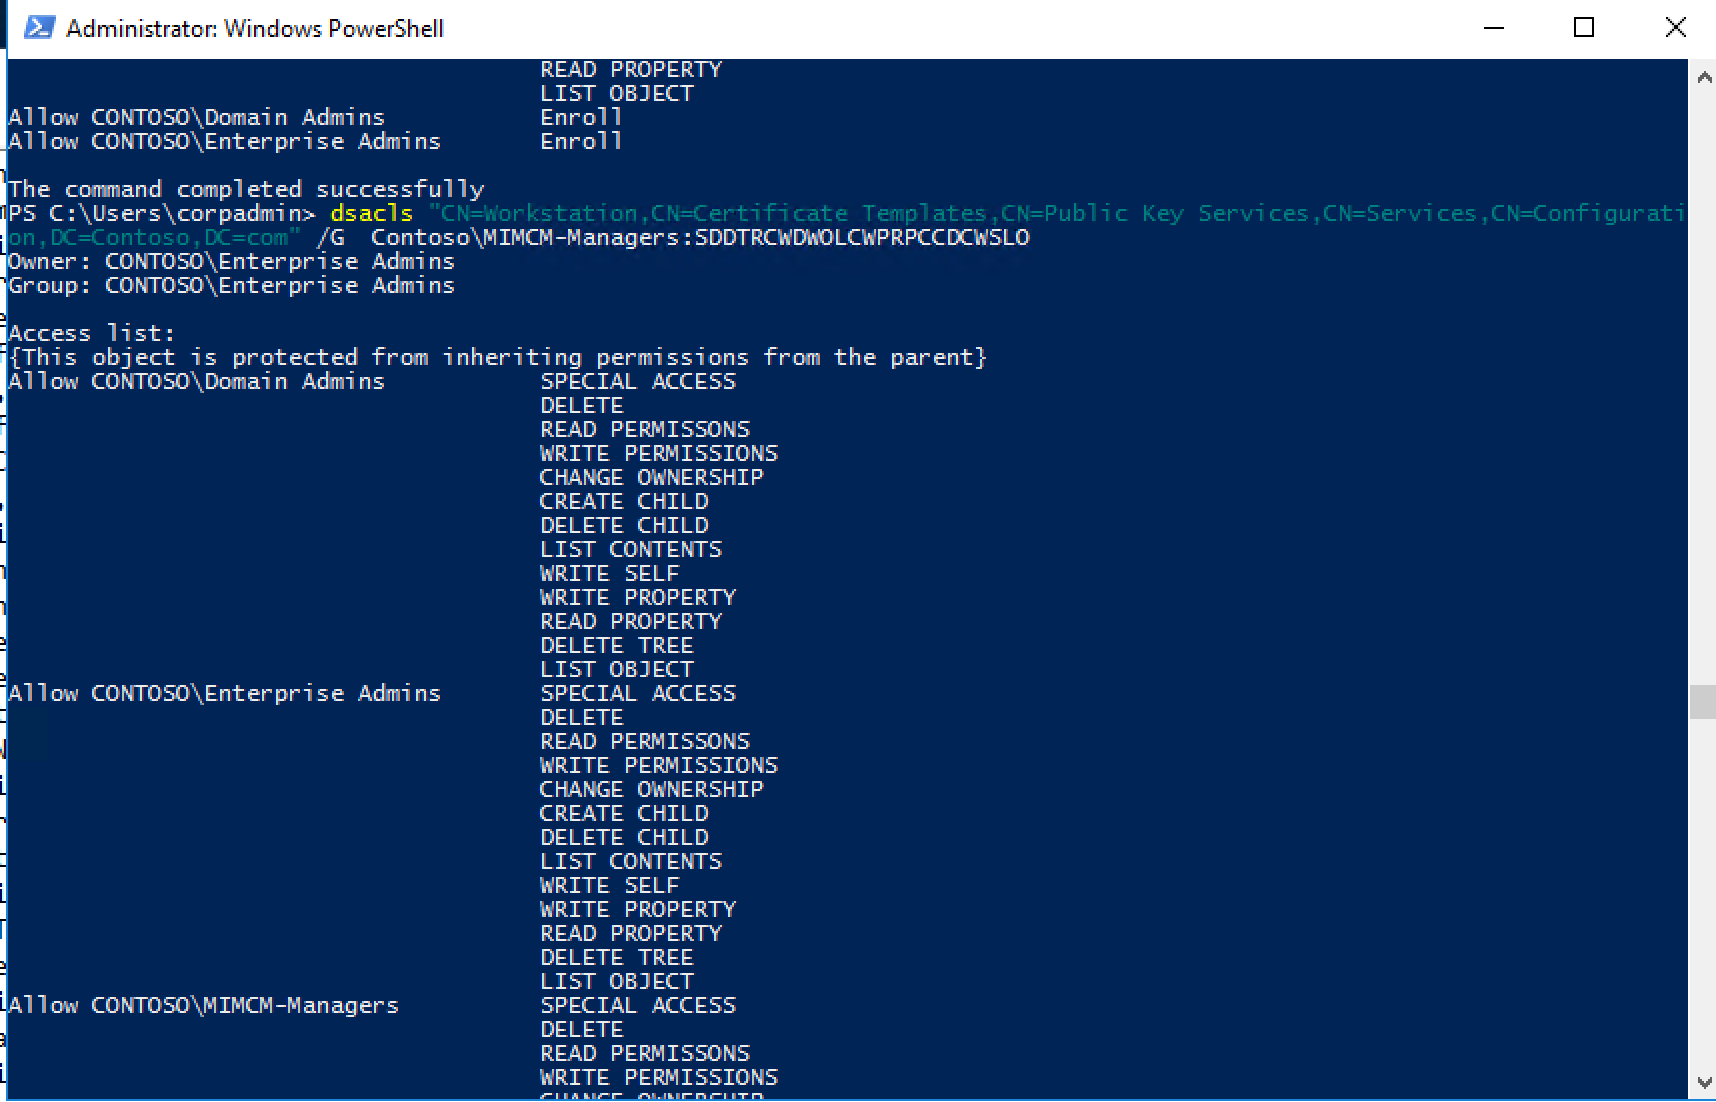
dsacls "CN=Administrator,CN=Certificate Templates,CN=Public Key
Services,CN=Services,CN=Configuration,DC=Contoso,DC=com" /G
Contoso\\MIMCM-Managers:SDDTRCWDWOLCWPRPCCDCWSLO

dsacls "CN=CA,CN=Certificate Templates,CN=Public Key
Services,CN=Services,CN=Configuration,DC=Contoso,DC=com" /G
Contoso\\MIMCM-Managers:SDDTRCWDWOLCWPRPCCDCWSLO

dsacls "CN=CAExchange,CN=Certificate Templates,CN=Public Key
Services,CN=Services,CN=Configuration,DC=Contoso,DC=com" /G
Contoso\\MIMCM-Managers:SDDTRCWDWOLCWPRPCCDCWSLO

dsacls "CN=CEPEncryption,CN=Certificate Templates,CN=Public Key
Services,CN=Services,CN=Configuration,DC=Contoso,DC=com" /G
Contoso\\MIMCM-Managers:SDDTRCWDWOLCWPRPCCDCWSLO

dsacls "CN=ClientAuth,CN=Certificate Templates,CN=Public Key
Services,CN=Services,CN=Configuration,DC=Contoso,DC=com" /G
Contoso\\MIMCM-Managers:SDDTRCWDWOLCWPRPCCDCWSLO

dsacls "CN=CodeSigning,CN=Certificate Templates,CN=Public Key
Services,CN=Services,CN=Configuration,DC=Contoso,DC=com" /G
Contoso\\MIMCM-Managers:SDDTRCWDWOLCWPRPCCDCWSLO

dsacls "CN=CrossCA,CN=Certificate Templates,CN=Public Key
Services,CN=Services,CN=Configuration,DC=Contoso,DC=com" /G
Contoso\\MIMCM-Managers:SDDTRCWDWOLCWPRPCCDCWSLO

dsacls "CN=CTLSigning,CN=Certificate Templates,CN=Public Key
Services,CN=Services,CN=Configuration,DC=Contoso,DC=com" /G
Contoso\\MIMCM-Managers:SDDTRCWDWOLCWPRPCCDCWSLO

dsacls "CN=DirectoryEmailReplication,CN=Certificate Templates,CN=Public Key
Services,CN=Services,CN=Configuration,DC=Contoso,DC=com" /G
Contoso\\MIMCM-Managers:SDDTRCWDWOLCWPRPCCDCWSLO

dsacls "CN=DomainController,CN=Certificate Templates,CN=Public Key
Services,CN=Services,CN=Configuration,DC=Contoso,DC=com" /G
Contoso\\MIMCM-Managers:SDDTRCWDWOLCWPRPCCDCWSLO

dsacls "CN=DomainControllerAuthentication,CN=Certificate Templates,CN=Public Key
Services,CN=Services,CN=Configuration,DC=Contoso,DC=com" /G
Contoso\\MIMCM-Managers:SDDTRCWDWOLCWPRPCCDCWSLO

dsacls "CN=EFS,CN=Certificate Templates,CN=Public Key
Services,CN=Services,CN=Configuration,DC=Contoso,DC=com" /G
Contoso\\MIMCM-Managers:SDDTRCWDWOLCWPRPCCDCWSLO

dsacls "CN=EFSRecovery,CN=Certificate Templates,CN=Public Key
Services,CN=Services,CN=Configuration,DC=Contoso,DC=com" /G
Contoso\\MIMCM-Managers:SDDTRCWDWOLCWPRPCCDCWSLO

dsacls "CN=EnrollmentAgent,CN=Certificate Templates,CN=Public Key
Services,CN=Services,CN=Configuration,DC=Contoso,DC=com" /G
Contoso\\MIMCM-Managers:SDDTRCWDWOLCWPRPCCDCWSLO

dsacls "CN=EnrollmentAgentOffline,CN=Certificate Templates,CN=Public Key
Services,CN=Services,CN=Configuration,DC=Contoso,DC=com" /G
Contoso\\MIMCM-Managers:SDDTRCWDWOLCWPRPCCDCWSLO

dsacls "CN=ExchangeUser,CN=Certificate Templates,CN=Public Key
Services,CN=Services,CN=Configuration,DC=Contoso,DC=com" /G
Contoso\\MIMCM-Managers:SDDTRCWDWOLCWPRPCCDCWSLO

dsacls "CN=ExchangeUserSignature,CN=Certificate Templates,CN=Public Key
Services,CN=Services,CN=Configuration,DC=Contoso,DC=com" /G
Contoso\\MIMCM-Managers:SDDTRCWDWOLCWPRPCCDCWSLO

dsacls "CN=FIMCMSigning,CN=Certificate Templates,CN=Public Key
Services,CN=Services,CN=Configuration,DC=Contoso,DC=com" /G
Contoso\\MIMCM-Managers:SDDTRCWDWOLCWPRPCCDCWSLO

dsacls "CN=FIMCMEnrollmentAgent,CN=Certificate Templates,CN=Public Key
Services,CN=Services,CN=Configuration,DC=Contoso,DC=com" /G
Contoso\\MIMCM-Managers:SDDTRCWDWOLCWPRPCCDCWSLO

dsacls "CN=FIMCMKeyRecoveryAgent,CN=Certificate Templates,CN=Public Key
Services,CN=Services,CN=Configuration,DC=Contoso,DC=com" /G
Contoso\\MIMCM-Managers:SDDTRCWDWOLCWPRPCCDCWSLO

dsacls "CN=IPSecIntermediateOffline,CN=Certificate Templates,CN=Public Key
Services,CN=Services,CN=Configuration,DC=Contoso,DC=com" /G
Contoso\\MIMCM-Managers:SDDTRCWDWOLCWPRPCCDCWSLO

dsacls "CN=IPSecIntermediateOnline,CN=Certificate Templates,CN=Public Key
Services,CN=Services,CN=Configuration,DC=Contoso,DC=com" /G
Contoso\\MIMCM-Managers:SDDTRCWDWOLCWPRPCCDCWSLO

dsacls "CN=KerberosAuthentication,CN=Certificate Templates,CN=Public Key
Services,CN=Services,CN=Configuration,DC=Contoso,DC=com" /G
Contoso\\MIMCM-Managers:SDDTRCWDWOLCWPRPCCDCWSLO

dsacls "CN=KeyRecoveryAgent,CN=Certificate Templates,CN=Public Key
Services,CN=Services,CN=Configuration,DC=Contoso,DC=com" /G
Contoso\\MIMCM-Managers:SDDTRCWDWOLCWPRPCCDCWSLO

dsacls "CN=Machine,CN=Certificate Templates,CN=Public Key
Services,CN=Services,CN=Configuration,DC=Contoso,DC=com" /G
Contoso\\MIMCM-Managers:SDDTRCWDWOLCWPRPCCDCWSLO

dsacls "CN=MachineEnrollmentAgent,CN=Certificate Templates,CN=Public Key
Services,CN=Services,CN=Configuration,DC=Contoso,DC=com" /G
Contoso\\MIMCM-Managers:SDDTRCWDWOLCWPRPCCDCWSLO

dsacls "CN=OCSPResponseSigning,CN=Certificate Templates,CN=Public Key
Services,CN=Services,CN=Configuration,DC=Contoso,DC=com" /G
Contoso\\MIMCM-Managers:SDDTRCWDWOLCWPRPCCDCWSLO

dsacls "CN=OfflineRouter,CN=Certificate Templates,CN=Public Key
Services,CN=Services,CN=Configuration,DC=Contoso,DC=com" /G
Contoso\\MIMCM-Managers:SDDTRCWDWOLCWPRPCCDCWSLO

dsacls "CN=RASAndIASServer,CN=Certificate Templates,CN=Public Key
Services,CN=Services,CN=Configuration,DC=Contoso,DC=com" /G
Contoso\\MIMCM-Managers:SDDTRCWDWOLCWPRPCCDCWSLO

dsacls "CN=SmartCardLogon,CN=Certificate Templates,CN=Public Key
Services,CN=Services,CN=Configuration,DC=Contoso,DC=com" /G
Contoso\\MIMCM-Managers:SDDTRCWDWOLCWPRPCCDCWSLO

dsacls "CN=SmartCardUser,CN=Certificate Templates,CN=Public Key
Services,CN=Services,CN=Configuration,DC=Contoso,DC=com" /G
Contoso\\MIMCM-Managers:SDDTRCWDWOLCWPRPCCDCWSLO

dsacls "CN=SubCA,CN=Certificate Templates,CN=Public Key
Services,CN=Services,CN=Configuration,DC=Contoso,DC=com" /G
Contoso\\MIMCM-Managers:SDDTRCWDWOLCWPRPCCDCWSLO

dsacls "CN=User,CN=Certificate Templates,CN=Public Key
Services,CN=Services,CN=Configuration,DC=Contoso,DC=com" /G
Contoso\\MIMCM-Managers:SDDTRCWDWOLCWPRPCCDCWSLO

dsacls "CN=UserSignature,CN=Certificate Templates,CN=Public Key
Services,CN=Services,CN=Configuration,DC=Contoso,DC=com" /G
Contoso\\MIMCM-Managers:SDDTRCWDWOLCWPRPCCDCWSLO

dsacls "CN=WebServer,CN=Certificate Templates,CN=Public Key
Services,CN=Services,CN=Configuration,DC=Contoso,DC=com" /G
Contoso\\MIMCM-Managers:SDDTRCWDWOLCWPRPCCDCWSLO

dsacls "CN=Workstation,CN=Certificate Templates,CN=Public Key
Services,CN=Services,CN=Configuration,DC=Contoso,DC=com" /G
Contoso\\MIMCM-Managers:SDDTRCWDWOLCWPRPCCDCWSLO
Feedback
Coming soon: Throughout 2024 we will be phasing out GitHub Issues as the feedback mechanism for content and replacing it with a new feedback system. For more information see: https://aka.ms/ContentUserFeedback.
Submit and view feedback for