Remote provisioning and sign in for Teams Android devices
IT admins can remotely provision and sign in to a Teams Android device. To provision a device remotely, the admin needs to upload the MAC IDs of the devices being provisioned and create a verification code. The entire process can be completed remotely from the Teams admin center.
Note
Once you've signed in to a Teams Android device, this feature isn't available. To use it again, the device must be reset to factory default settings.
Supported devices
All Android and SIP devices certified by Microsoft can be provisioned remotely from Teams admin center.
Refer to the following for the list of certified hardware:
Phones, Displays, Panels - Devices for Teams | Microsoft certified hardware Microsoft Teams Rooms on Android - Teams Rooms certified systems and peripherals SIP devices - Teams compatible devices
Add a device MAC address
Complete the following steps to provision a new device.
- Sign in to the Teams admin center.
- Expand Teams Devices.
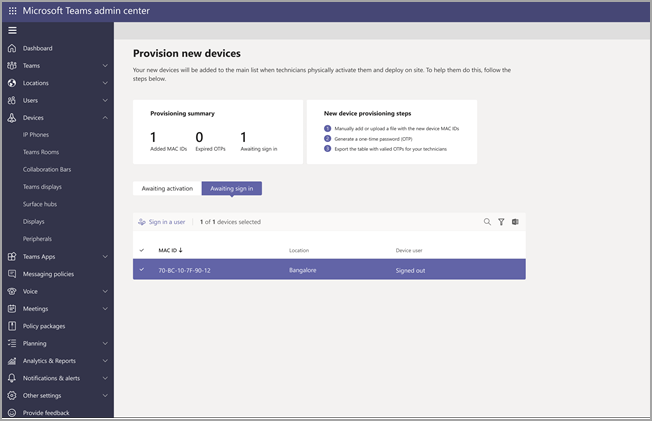
- Select Provision new device from the Actions tab.
In the Provision new devices window, you can either add the MAC address manually or upload a file.
Manually add a device MAC address
From the Waiting on activation tab, select Add MAC ID.

Enter the MAC ID.
Enter a location, which helps technicians identify where to install the devices.
Select Apply when finished.
Upload a file to add a device MAC address
- From the Waiting on activation tab, select Upload MAC IDs.
- Download the file template.
- Enter the MAC ID and location, and then save the file.
- Select file, and then select Upload.
Generate a verification code
You need a verification code for the devices. The verification code is generated in bulk or at the device level and is valid for 24 hours.
From the Waiting on activation tab, select an existing MAC ID. A password is created for the MAC address and is shown in the Verification Code column.
Provide the list of MAC IDs and verification codes to the field technicians. You can export the detail directly in a file and share the file with the technician who is doing the actual installation work.
Provision the device
When the device is powered on and connected to the network, the technician provisions the device. These steps are completed on the Teams device.
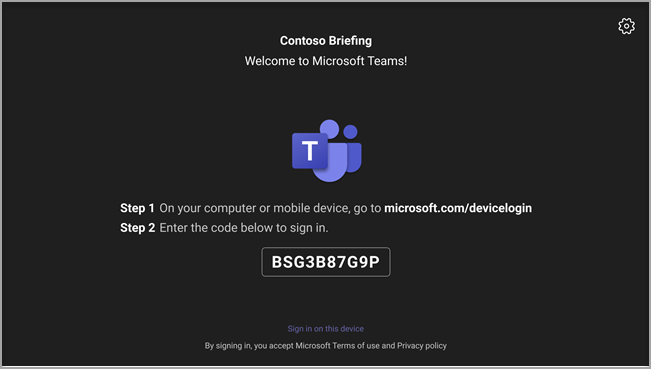
The technician selects Provision device from the Settings.

The technician enters the device-specific verification code in the provided input field.

Once the device is provisioned successfully, the tenant name appears on the sign-in page.
First time remote sign in
The provisioned device appears in the Waiting for sign in tab. Start the remote sign-in process by selecting the individual device.
Select a device from the Waiting for sign in tab.
Follow the instructions in Sign in a user, and then select Close.

This video shows how admins can remotely provision Android-based and SIP devices.
Related articles
Feedback
Coming soon: Throughout 2024 we will be phasing out GitHub Issues as the feedback mechanism for content and replacing it with a new feedback system. For more information see: https://aka.ms/ContentUserFeedback.
Submit and view feedback for