Copy exported Dataverse data to dedicated SQL pool
After creating a continuous pipeline of data from Dataverse to your Synapse workspace with Azure Synapse Link for Dataverse, you can copy the data to dedicated SQL pool with Synapse Pipelines.
Note
Azure Synapse Link for Microsoft Dataverse was formerly known as Export to data lake. The service was renamed effective May 2021 and will continue to export data to Azure Data Lake as well as Azure Synapse Analytics.
Prerequisites
This section describes the prerequisites necessary to copy your Dataverse data to dedicated SQL pool after using the Azure Synapse Link for Dataverse service.
Azure Synapse Link for Dataverse. This guide assumes that you've already exported Dataverse data by using Azure Synapse Link for Dataverse.
Storage Account Access. You must be granted one of the following roles for the storage account: Storage Blob Data Reader, Storage Blob Data Contributor, or Storage Blob Data Owner.
Synapse administrator. You must be granted the Synapse Administrator role access within Synapse studio.
Dedicated SQL Pool. This guide assumes that you've already created a dedicated SQL pool. You can create a dedicated SQL pool under the Manage tab in your Synapse workspace.
Copy the exported Dataverse data to dedicated SQL pool
Navigate to your Azure Synapse Analytics workspace.
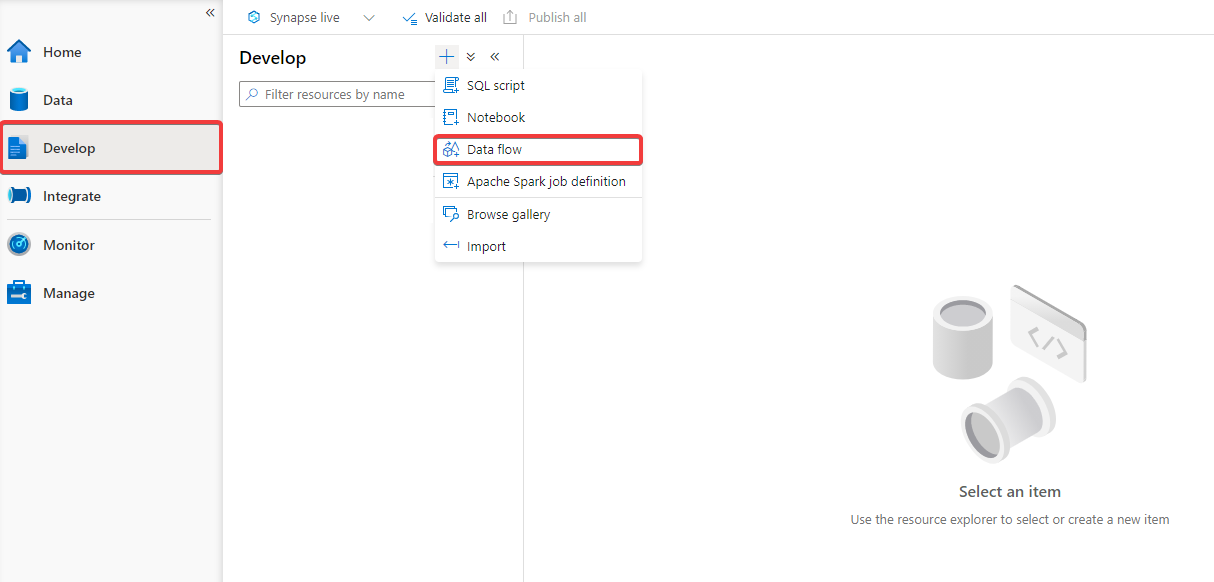
Open the Develop tab and create a new Data flow. Turn on data flow debug. This can take several minutes to complete.

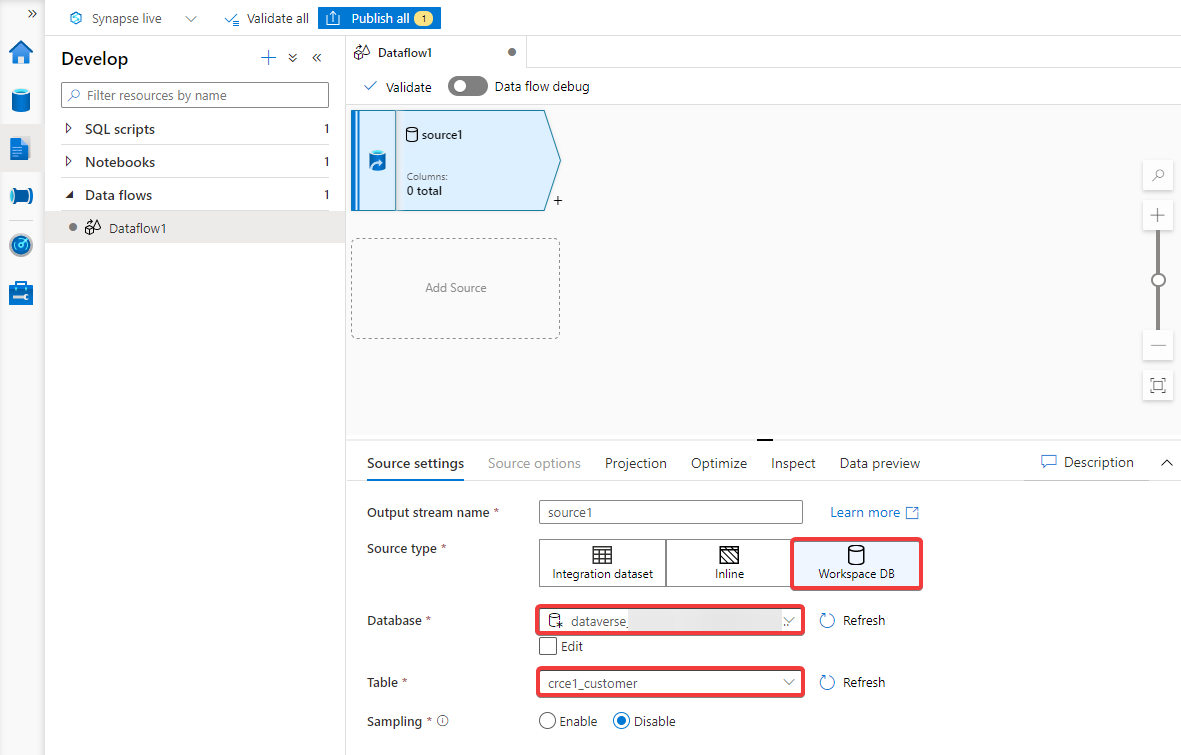
Create a Source and specify the Source type as Workspace DB and select the Database that contains the Dataverse data and Table you want to copy.

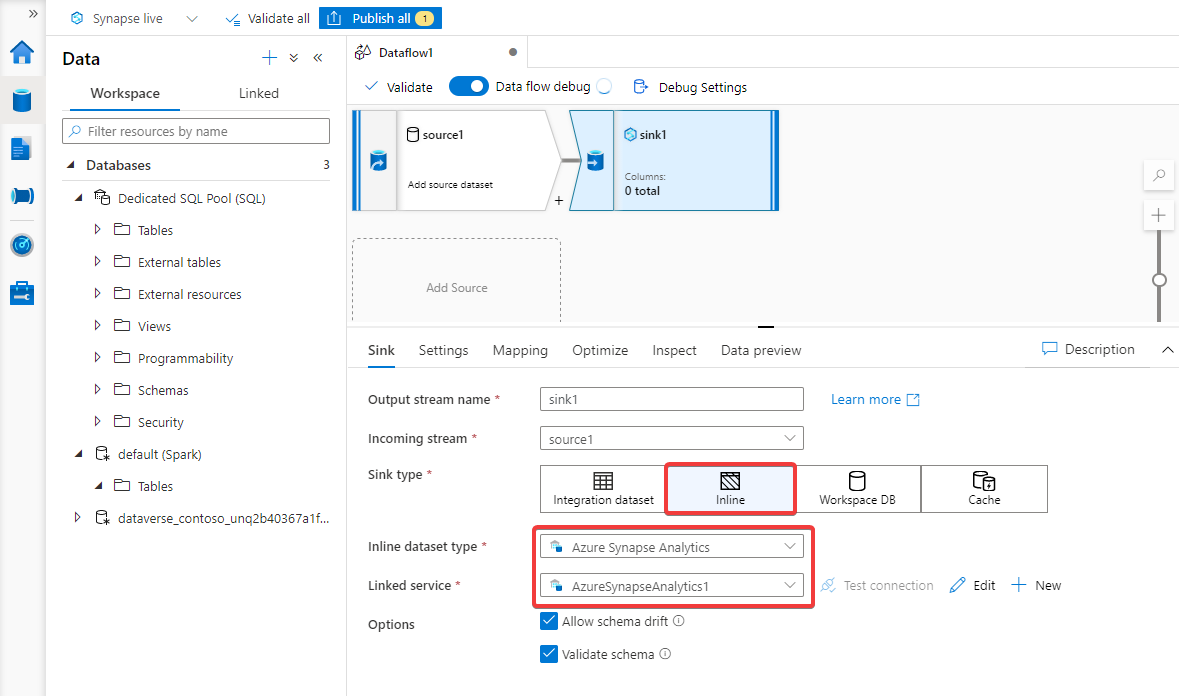
Create a Sink and specify the Sink type as Inline and Inline dataset type as Azure Synapse Analytics. Select your dedicated SQL pool as the Linked service. If the dedicated SQL pool is not already a linked service, create a new connection.

Under the Settings tab, Refresh the Schema Name. Select sys and for the Table name select all_columns. Optionally, configure the other settings.
Navigate to the Integrate tab of the Synapse workspace and create a new Pipeline.
Expand the Move & Transform activity and drag and drop Data flow into the workspace.
Open the Settings and ensure that you have selected the data flow created in the previous steps.
Run your pipeline. Optionally, Add trigger to specify a time for the pipeline to run.
See also
Feedback
Coming soon: Throughout 2024 we will be phasing out GitHub Issues as the feedback mechanism for content and replacing it with a new feedback system. For more information see: https://aka.ms/ContentUserFeedback.
Submit and view feedback for