Open custom pages as dialogs and use cloud flows
This sample demonstrates how you can build simple custom pages that open as dialogs when a command is clicked. You may also call a cloud flow from the custom page dialog.
Prerequisites
Create a command
First, you'll need to determine the table and command bar location to place the command.
Open the app designer, and then add the desired table to your model-driven app. More information: Create a model-driven app that has an account table page
Publish the app.
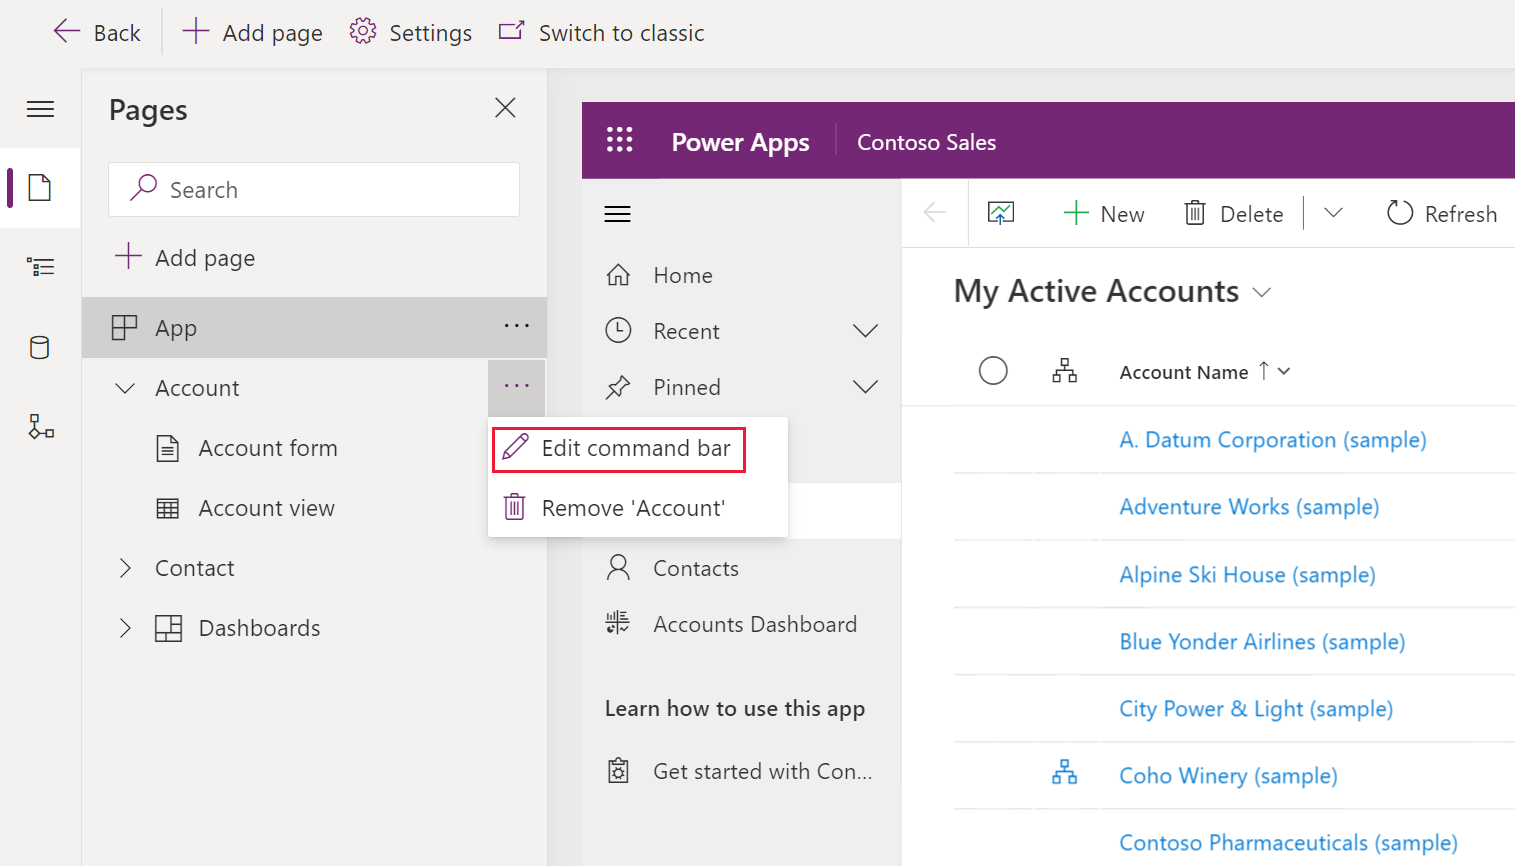
Select the desired table from the Pages area in the app designer.
Select ... (ellipsis), and then select Edit command bar.

Select the location of the command bar you want, and then select Edit. More information: Command bar locations

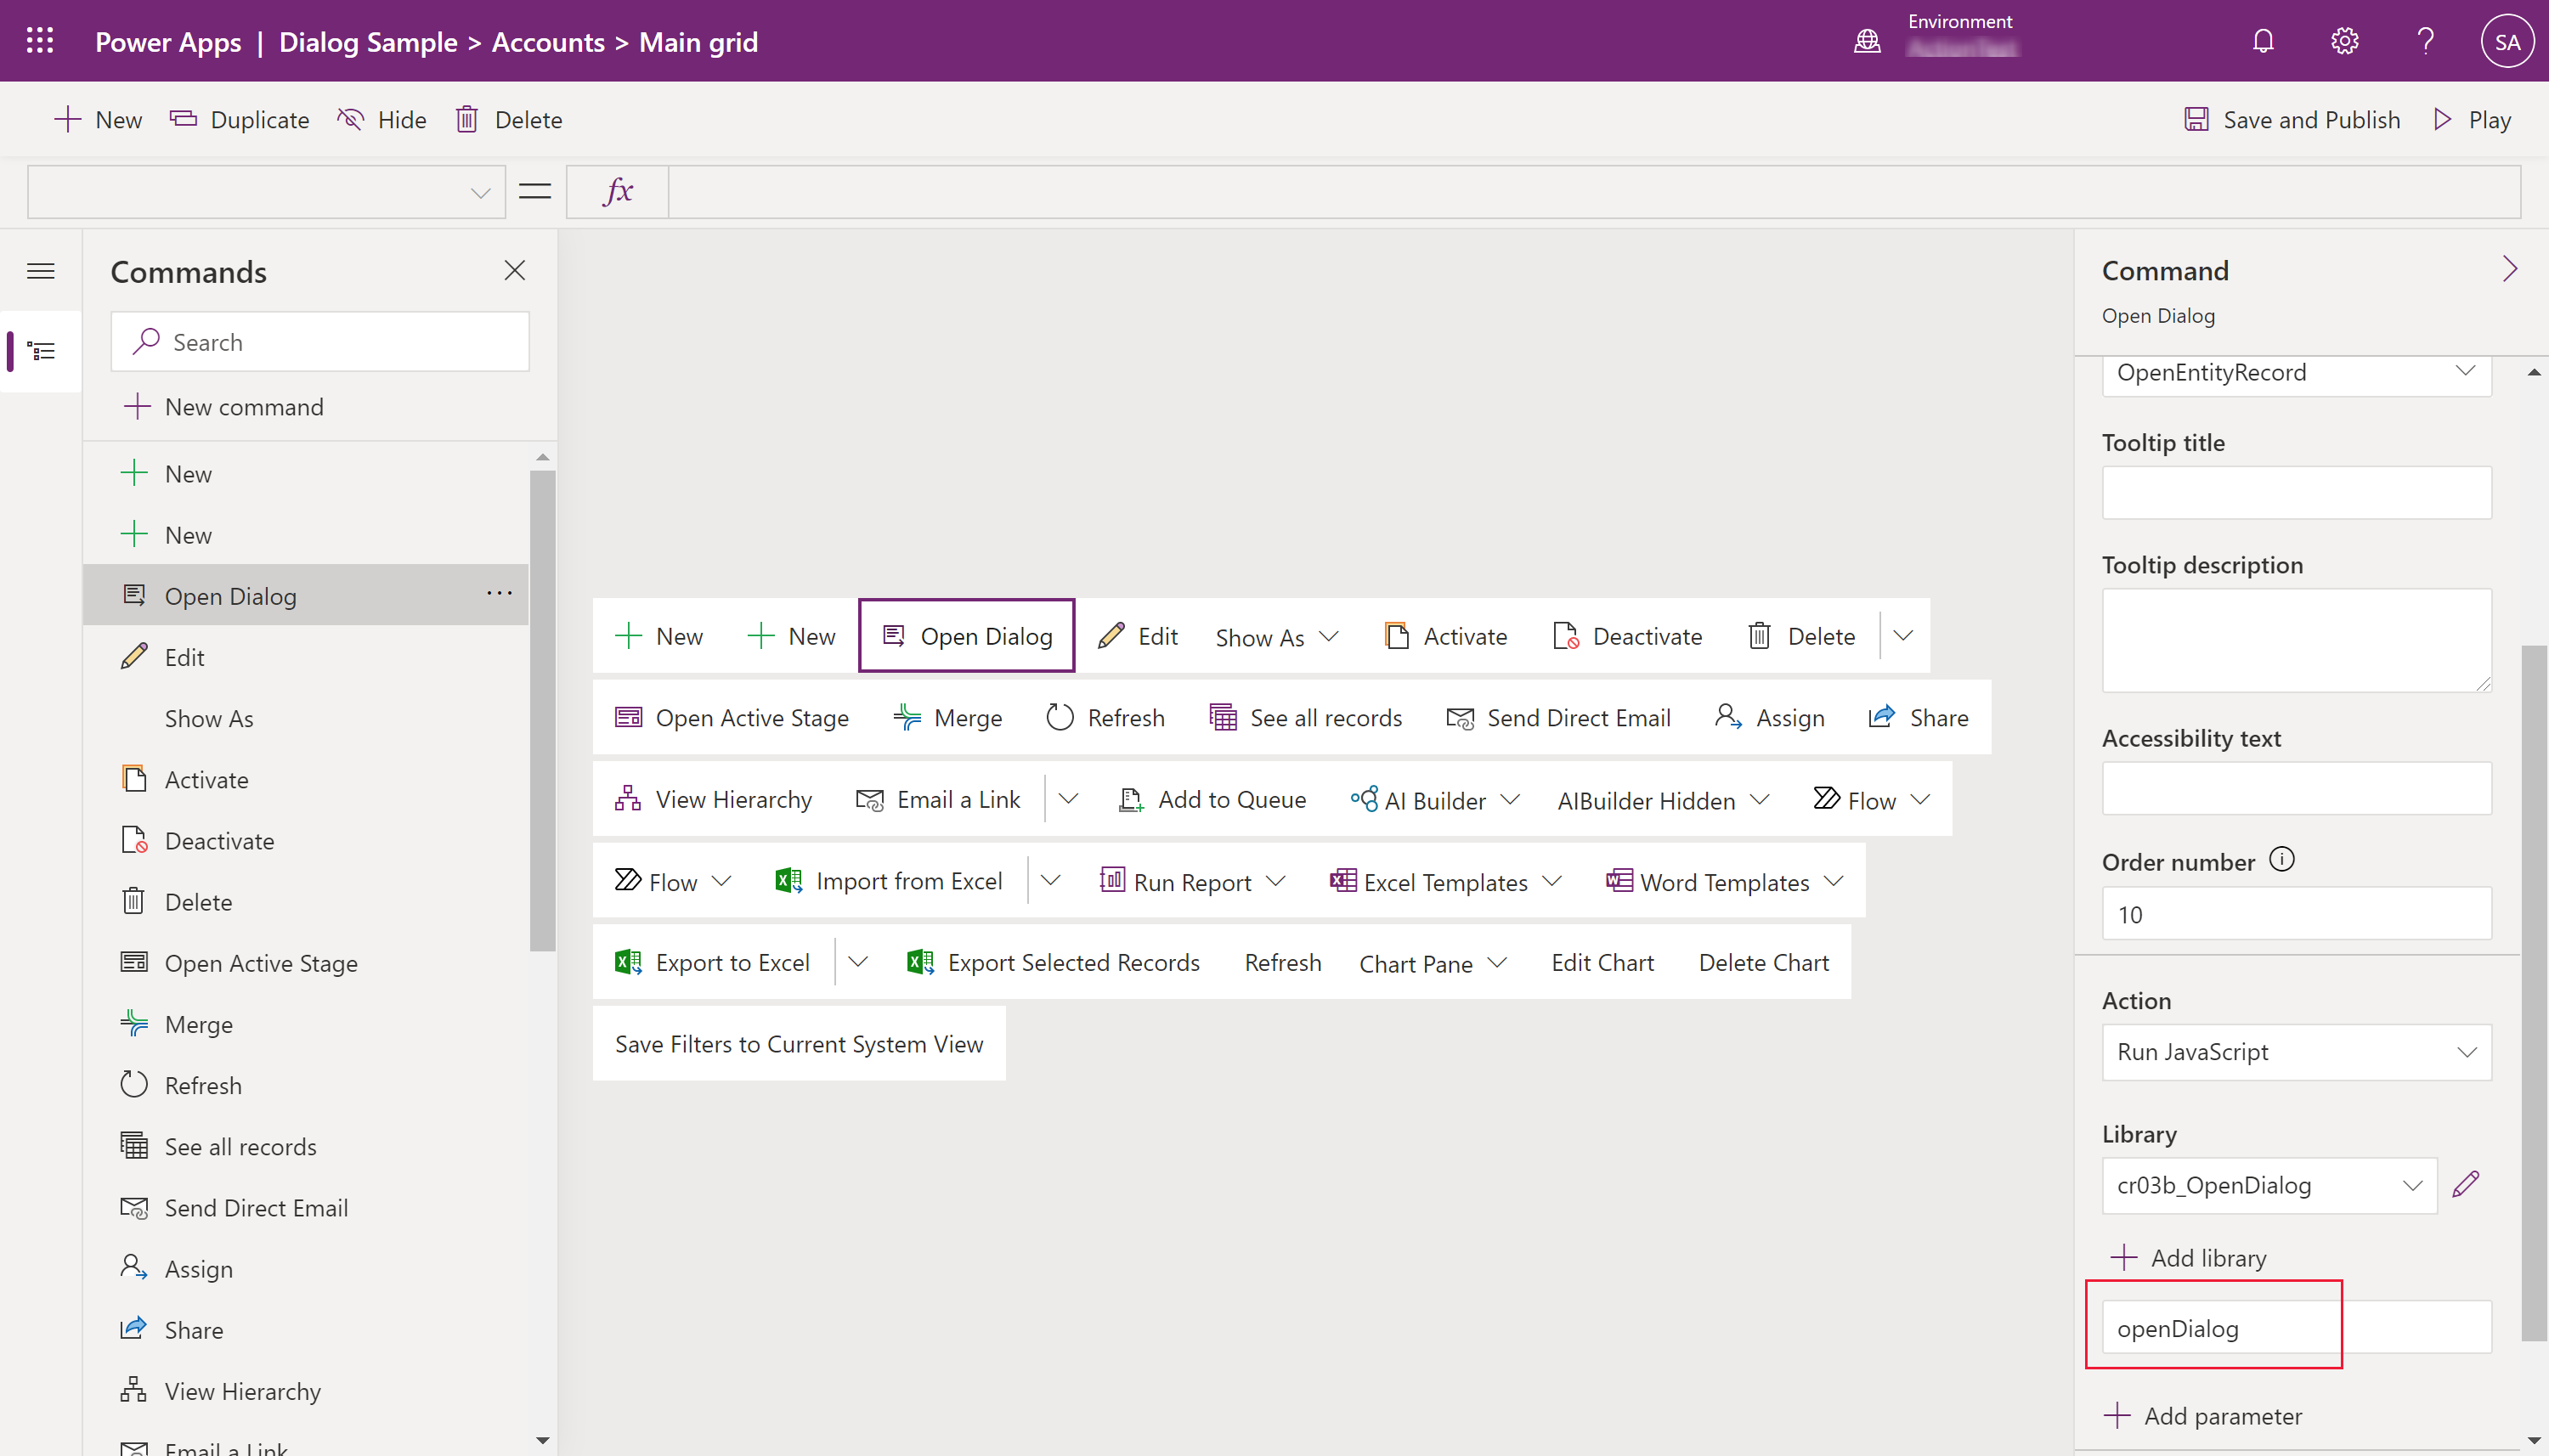
Select + New on the command designer command bar, and then enter the command properties: More information:
- Create a JavaScript web resource for your command.
- For other properties, see Create a new command.

Create a JavaScript web resource for your command
Note
This commanding customization is currently only supported using JavaScript. Currently, Power Fx isn't supported.
- For the command properties Action, select Run JavaScript.
- Select + Add library
- Select New to create a new JavaScript web resource.
- On the Web Resource: New browser window, enter a Name and optionally a Display name name and Description.
- For Type, select Script (JScript).
- Select Text Editor.
- Paste in your JavaScript. For example, depending on the type of dialog you wish to use, copy and paste an example from the Navigate API reference .
- Select Save, and then select Publish to save and publish the web resource.
- Close the browser window tab to return to the command designer.
Call the JavaScript from your command
In the Add JavaScript Library dialog, select the library you created in the previous steps, and then select Add.
Tip
If you can't find the web resource enter the name in the Search box.

In the Command properties pane, enter the name of the JavaScript Function. In this example, openDialog is entered.

Optionally, change the Visibility logic.
Select Save and Publish.
See also
Design a custom page for your model-driven app
Feedback
Coming soon: Throughout 2024 we will be phasing out GitHub Issues as the feedback mechanism for content and replacing it with a new feedback system. For more information see: https://aka.ms/ContentUserFeedback.
Submit and view feedback for