Purchase Power BI Premium for testing
This article describes how to purchase Power BI Premium A SKUs for testing scenarios, and for cases where you don't have the permissions necessary to purchase P SKUs (Microsoft 365 Global Administrator role or Billing Administrator role). A SKUs require no time commitment, and are billed hourly. You purchase A SKUs in the Azure portal.
For more information about Power BI Premium, see What is Power BI Premium. For current pricing and planning information, see the Power BI pricing page. Content creators still need a Power BI Pro license, even if your organization uses Power BI Premium. Make sure to purchase at least one Power BI Pro license for your organization. With A SKUs, all users who consume content also require Pro licenses.
Note
If a Premium subscription expires, you have 30 days of full access to your capacity. After that, your content reverts to a shared capacity. Models that are greater than 1 GB aren't supported in shared capacity.
Purchase A SKUs for testing and other scenarios
A SKUs are available through the Azure Power BI Embedded service. You can use A SKUs in the following ways:
Enable embedding of Power BI in third party applications. For more information, see Power BI Embedded.
Test Premium functionality before you buy a P SKU.
Create development and test environments with a production environment that uses P SKUs.
Purchase Power BI Premium even though you don't have a Microsoft 365 Global Administrator role or Billing Administrator role.
Note
If you purchase an A4 or higher SKU, you can take advantage of all Premium features except for unlimited sharing of content. With A SKUs, all users who consume content require Pro licenses.
Follow these steps to purchase A SKUs in the Azure portal:
Sign in to the Azure portal with an account that has at least capacity admin permissions in Power BI.
Search for Power BI Embedded and select the service in the search results.

Select Create Power BI Embedded.

On the Power BI Embedded create screen, specify the following:
The Subscription in which to create the Power BI Embedded service.
The physical Location in which to create the resource group that contains the service. For better performance, this location should be close to the location of your Microsoft Entra tenant for Power BI.
An existing Resource group to use, or create a new one as shown in the example.
The Power BI capacity administrator. The capacity admin must be a member user or a service principal in your Microsoft Entra tenant.

If you want to use all features of Power BI Premium (except unlimited sharing), you need at least an A4 SKU. Select Change size.

Select a capacity size of A4, A5, or A6, which correspond to P1, P2, and P3. Prices in the following image are examples only.

Select Review + Create, review the options you chose, then select Create.

It can take a few minutes to complete the deployment. When it's ready, select Go to resource.

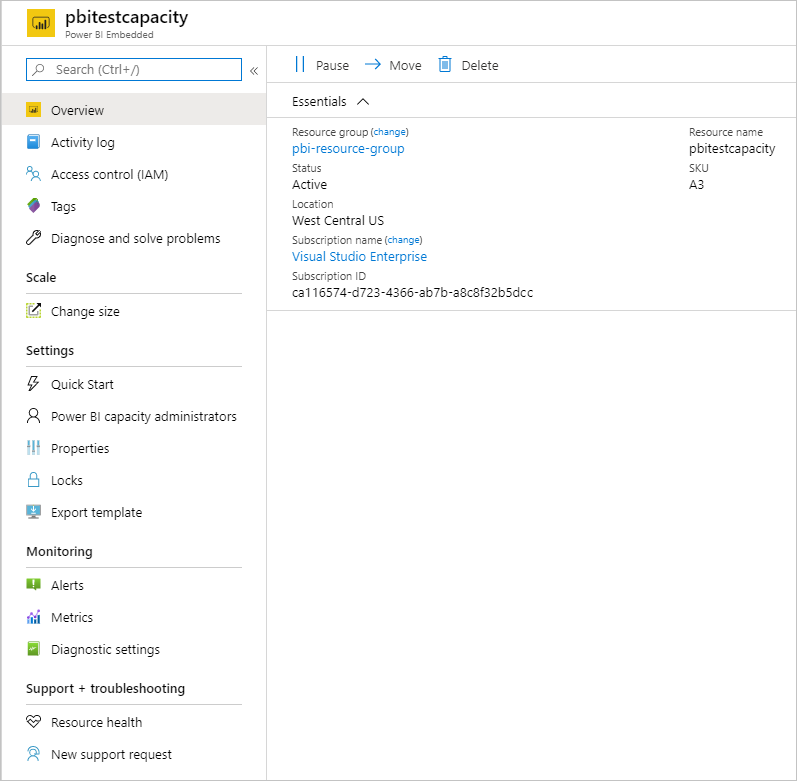
On the management screen, review the options you have for managing the service, including pausing the service when you're not using it.
After you purchase a capacity, see Manage a capacity and Assign a workspace to a capacity.
Related content
- What is Power BI Premium?
- How to purchase Power BI Premium
- Configure and manage capacities in Power BI Premium
- Power BI pricing
- Power BI Premium FAQ
- Download the Planning a Power BI Enterprise Deployment whitepaper
More questions? Ask the Power BI Community
Feedback
Coming soon: Throughout 2024 we will be phasing out GitHub Issues as the feedback mechanism for content and replacing it with a new feedback system. For more information see: https://aka.ms/ContentUserFeedback.
Submit and view feedback for