Tutorial: Add custom CSS to your site
The Styling workspace allows you to edit some of the theme features of your site, such as fonts and colors; however, you may apply your own custom CSS themes.
You can create your own theme by defining a custom CSS file and uploading it to your site.
In this tutorial, you'll learn how to:
- Upload a custom CSS file
- Edit CSS in Visual Studio Code for the Web
Prerequisites
- A Power Pages subscription or trial. Get a Power Pages trial here.
- A Power Pages site created. Create a Power Pages site.
- A custom theme file created using your favorite CSS editor.
Note
Any custom theme you create must be compatible with Bootstrap v3.
Add custom CSS to your site
The following video shows you how to apply custom CSS code to your site.
In this example, we'll add some custom CSS files that will allow us to add shadow effects to buttons on our website. You can use your own custom CSS file or use the sample provided.
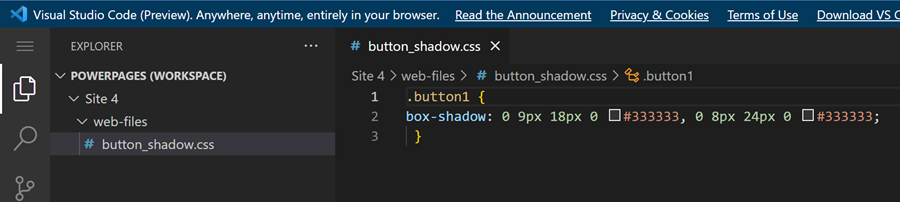
To create a sample, in your favorite CSS editor, create the button_shadow.css custom theme file and save.
.button1 {
box-shadow: 0 9px 18px 0 #333333, 0 8px 24px 0 #333333;
 }
Go to Power Pages.
Select the site to which you want to add the custom theme and choose Edit.
Open up the Styling workspace.
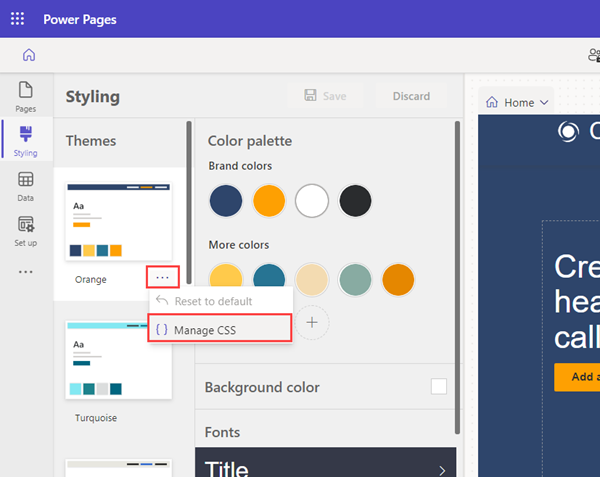
Select a theme and select the ... (ellipses), and then select Manage CSS.
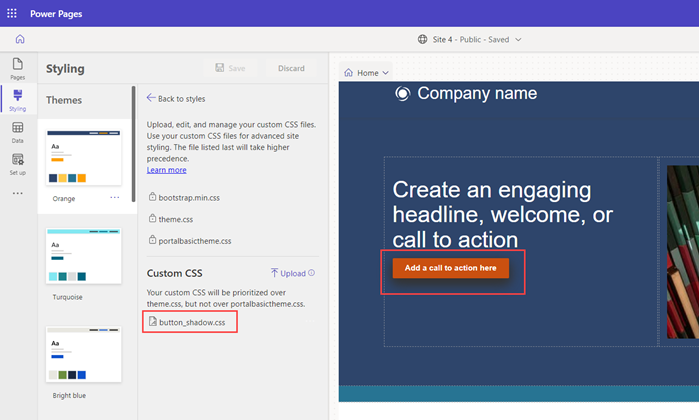
In the Custom CSS section, select Upload and choose your custom CSS file. You can only upload one CSS file at a time, but multiple files can be uploaded. If multiple CSS files update the same attribute, the attributes in the CSS file at the bottom of the list will apply. You can adjust the order of your custom CSS files.
You should immediately see the results of the updates on the pages canvas.
You can disable or move the order of your custom CSS files. The file listed last will take precedence over the others.
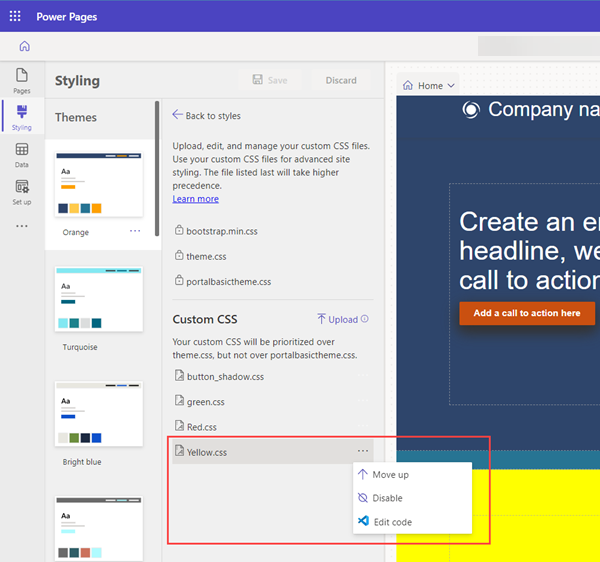
You can edit a CSS file directly by selecting the ellipses (...) and then selecting Edit code. This step will open the Visual Code for the Web editor. Select CTRL-S to save your changes.
Select Sync in the design studio to update the CSS and view the changes.
Select Preview to view the custom theme on your site.
Note
To completely remove the custom theme delete the web file record in the Portal Management app.
Feedback
Coming soon: Throughout 2024 we will be phasing out GitHub Issues as the feedback mechanism for content and replacing it with a new feedback system. For more information see: https://aka.ms/ContentUserFeedback.
Submit and view feedback for