Manage application users in the Power Platform admin center
We're in the process of moving application user management from the legacy web client, as documented in Enable or disable application users. Follow these steps to manage application users in the Power Platform admin center.
Note
At present, deleting an application user isn't supported.
Tip
Check out the video: Administer application users, security roles, teams, and users in the Power Platform admin center.
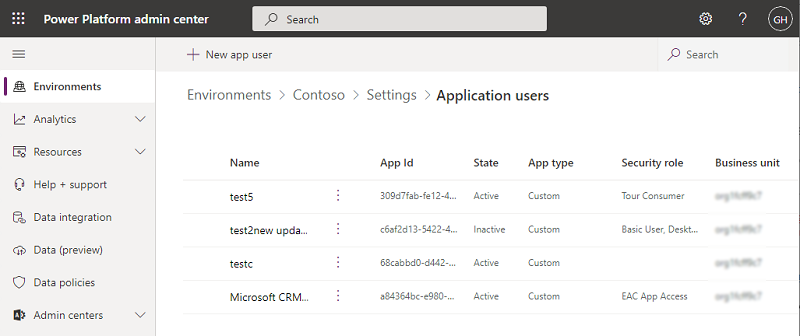
View application users in an environment
On the Application users page, you can view and manage application users. The Custom app type is your local app registration, as created in Microsoft Entra ID.
Sign in to the Power Platform admin center as a System Administrator.
Select Environments, and then select an environment from the list.
Select Settings.
Select Users + permissions, and then select Application users.
Create an application user
You can create an unlicensed application user in your environment. This application user will be given access to your environment's data on behalf of the user who's using your application.
In an environment, you can only have one application user for each Microsoft Entra–registered application.
Sign in to the Power Platform admin center as a System Administrator.
Select Environments, and then select an environment from the list.
Select Settings.
Select Users + permissions, and then select Application users.
Select + New app user to open the Create a new app user page.
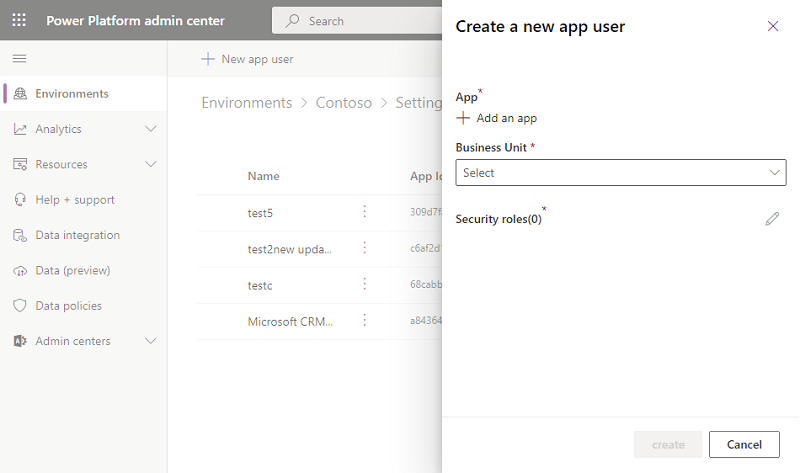
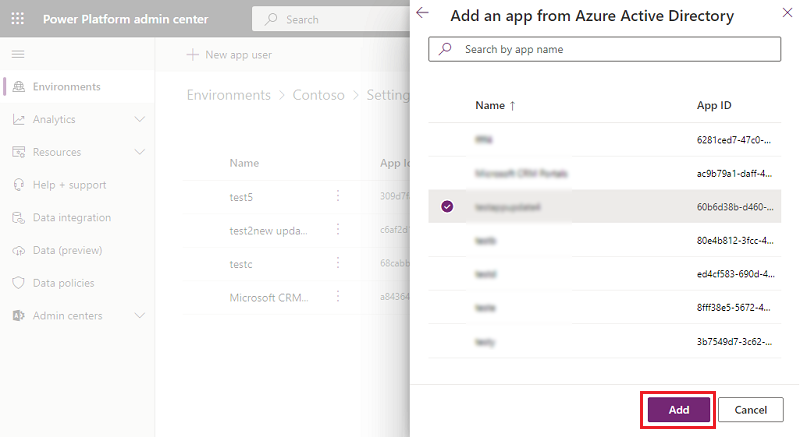
Select + Add an app to choose the registered Microsoft Entra application that was created for the selected user, and then select Add.
Note
In addition to entering the Application Name or Application ID, you can also enter an Azure Managed Identity Application ID. For Managed Identity, do not enter the Managed Identity Application Name, use the Managed Identity Application ID instead.
Enterprise applications don't show in the list of applications, only Microsoft Entra app registrations show in the list. Search for the multitenant application by name or ID to assign it to the application user.
The selected Microsoft Entra app is displayed under App. You can select Edit (
 ) to choose another Microsoft Entra application. Under Business Unit, select a business unit from the dropdown list.
After choosing a business unit, you can select
for Security roles to choose security roles for the chosen business unit to add to the new application user. After adding security roles, select Save.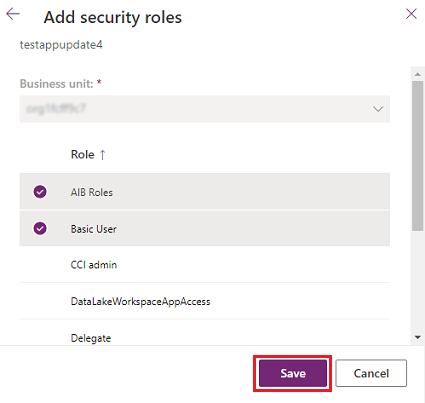
Select Create.
View or edit the details of an application user
Sign in to the Power Platform Admin center as a System Administrator.
Select Environments, and then select an environment from the list.
Select Settings.
Select Users + permissions, and then select Application users.
Select an application user, and then select Details.
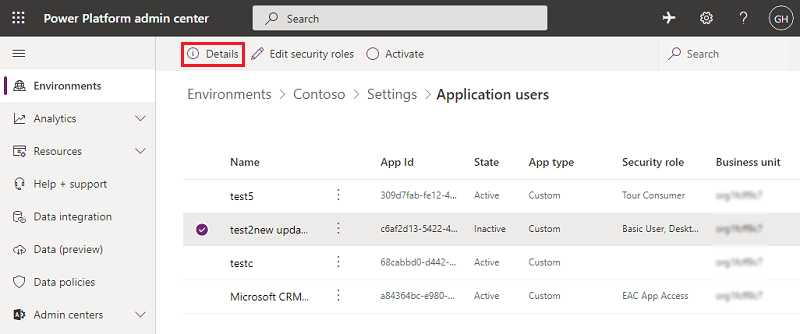
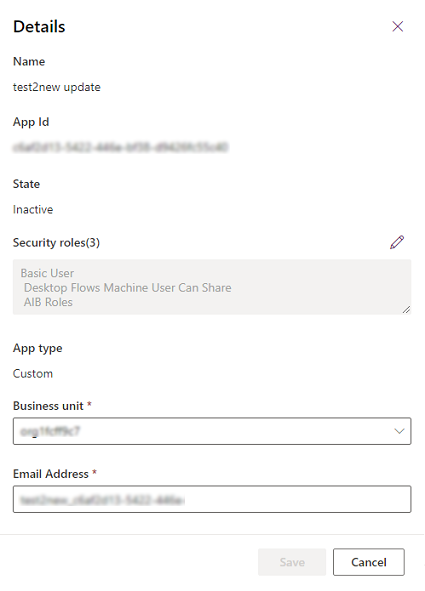
The Details page shows the following properties for the application user:
- Name
- Microsoft Entra application ID
- State
- Assigned security roles
- App type
- Business unit
- Email address
The business unit, email address, and security roles can be edited.
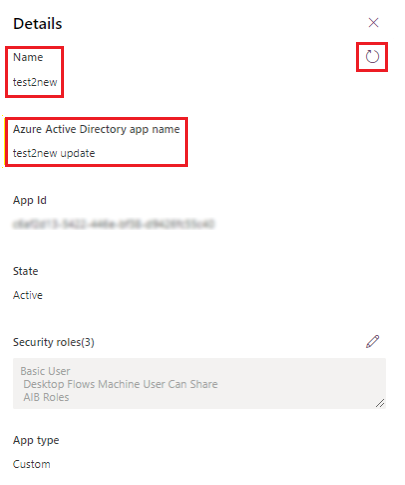
Sync the application user name with the Microsoft Entra application name
When an application user is first created, the username is the same as the name of the registered Microsoft Entra application. The two names can get out of sync when the name of the Microsoft Entra application is changed. You can sync the application user name with the Microsoft Entra application name by selecting Refresh on the Details page.
Note
Refresh and the Microsoft Entra app name are only shown when the two names are out of sync.
Manage roles for an application user
In addition to using the entry point on the Details page to manage roles, you can select Edit security Roles on the menu bar on the Application users page. If the application user has roles assigned already, those roles will appear as selected on the page.
You can select or deselect roles, and then select Save. All selected roles will become the current assigned roles for the application user. Any unselected roles won't be assigned.

Activate or deactivate an application user
On the Application user page, do one of the following:
- To activate an application user, select Activate on the menu bar, and then select Activate in the confirmation dialog.
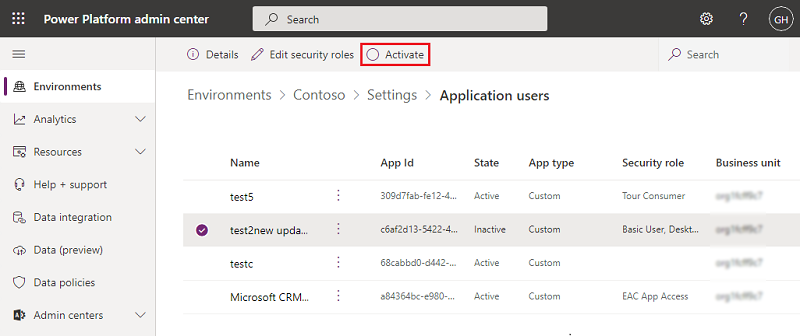
- To deactivate an application user, select Deactivate on the menu bar, and then select Deactivate in the confirmation dialog.
Feedback
Coming soon: Throughout 2024 we will be phasing out GitHub Issues as the feedback mechanism for content and replacing it with a new feedback system. For more information see: https://aka.ms/ContentUserFeedback.
Submit and view feedback for