Set up the Power BI dashboard
The Power BI dashboard provides a holistic overview with visualizations and insights into resources in your tenant: environments, apps, Power Automate flows, connectors, connection references, makers, and audit logs. Telemetry from the audit log is stored from the moment you set up the Center of Excellence (CoE) Starter Kit, so you can look back and identify trends over time.
Watch a walk-through on how to set up the Power BI dashboard.
Which dashboard to use?
You can get the CoE Power BI dashboard by downloading the CoE Starter Kit compressed file (aka.ms/CoeStarterKitDownload). Extract the zip file after downloading - it contains two Power BI template files:
- Use the Production_CoEDashboard_MMMYY.pbit file if your Power Platform inventory data source is retrieved via cloud flows.
- Use the BYODL_CoEDashboard_MMMYY.pbit file if your Power Platform inventory data source is retrieved via Data Export.
- Use the PowerPlatformGovernance_CoEDashboard_MMMYY.pbit file in addition to the above dashboards to gain further actionable governance and compliance insights into your adoption.
Note
- Before setting up the Power BI dashboard, you must have installed the CoE core components solution.
- Before you see data in the dashboard, the core components solution sync flows will need to have completed their runs.
- Before you see data about app usage (ex last launched), you must have installed the Audit Log solution
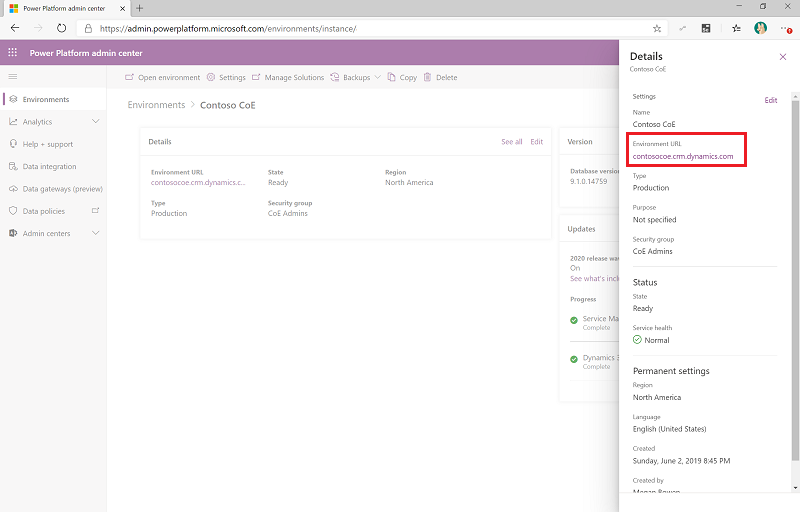
Get the environment URL
You need the environment URL of the Microsoft Power Platform environment the CoE Starter Kit is installed in. Power BI will connect to the Microsoft Dataverse tables in that environment.
Go to the Power Platform admin center.
Select Environments, and select the environment where the CoE solution is installed.
Copy the organization URL in the details window.
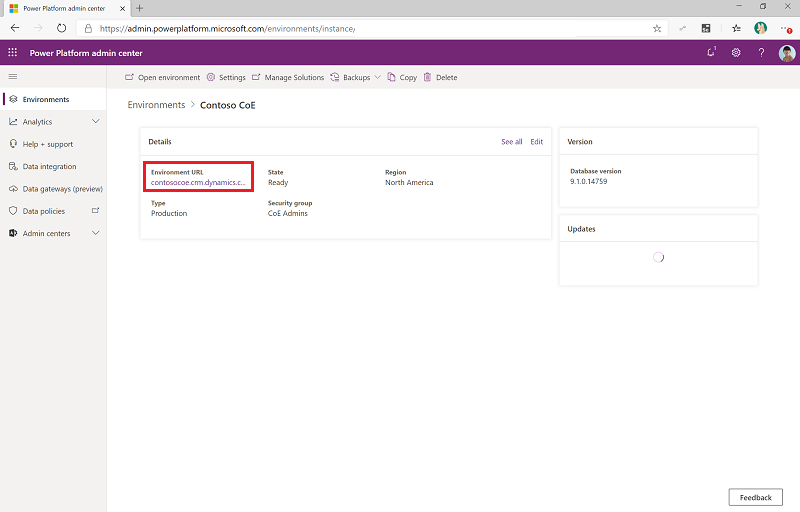
If the URL is truncated, you can see the full URL by selecting See all > Environment URL.
Configure the Production and Governance Power BI dashboard
You can configure and modify the Power BI dashboard by working directly with the Power BI (.pbit) file and Power BI Desktop. Using Power BI Desktop gives you flexibility to modify the dashboard to your own branding, and including (or excluding) pages or visuals you want to see (or not see) in the dashboard.
Download and install Microsoft Power BI Desktop.
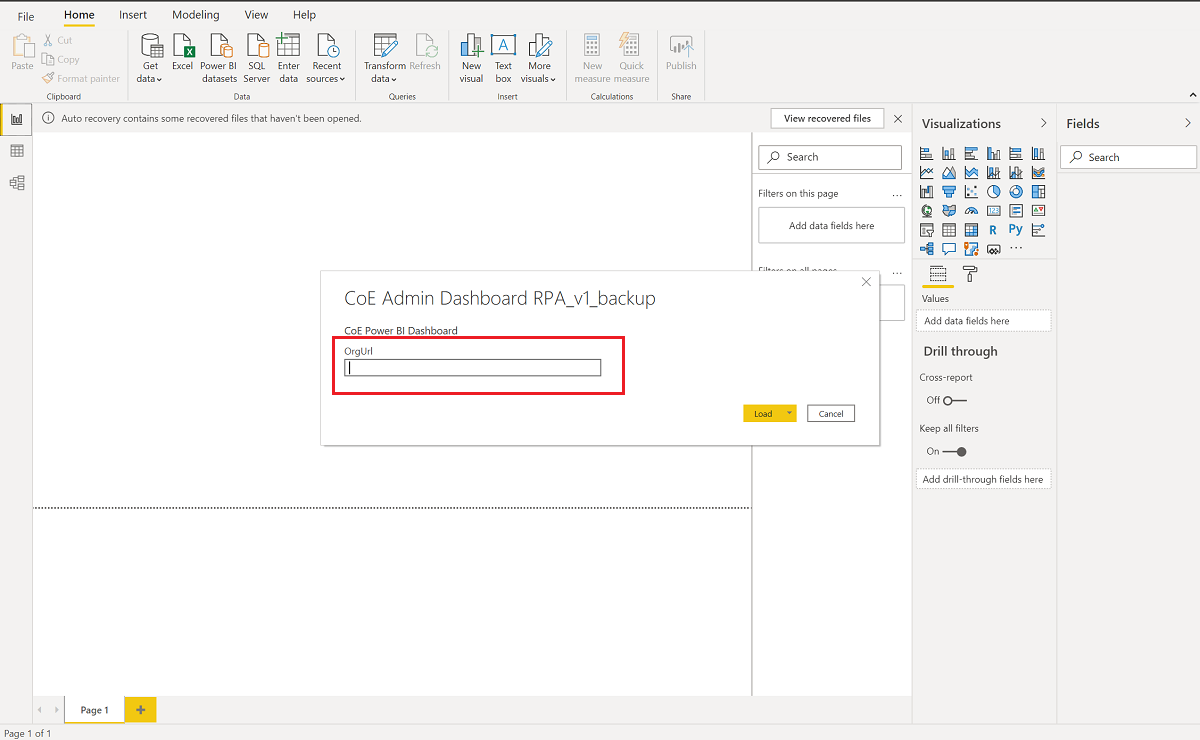
In Power BI Desktop, open the .pbit file, which can be found in the CoE Starter Kit you downloaded from aka.ms/CoeStarterKitDownload.
Enter the URL of your environment instance. If you're using the Production_CoEDashboard_MMMYY.pbit and PowerPlatformGovernance_CoEDashboard_MMMYY.pbit, include the https:// prefix for OrgUrl. If prompted, sign in to Power BI Desktop with your organization account that has access to the environment you installed the CoE Starter Kit in.
Save the dashboard locally, or select Publish and choose the workspace you want to publish the report to.
Configure scheduled refresh for your Power BI Dataset to update the report daily.
You can find the report later by going to app.powerbi.com.
Configure the BYODL Power BI dashboard
Copy Azure Storage Account URL
- Navigate to portal.azure.com.
- Search for or select the storage account configured to receive Data Export data.
- Select Endpoints.
- Copy the Data Lake Storage URL to notepad.
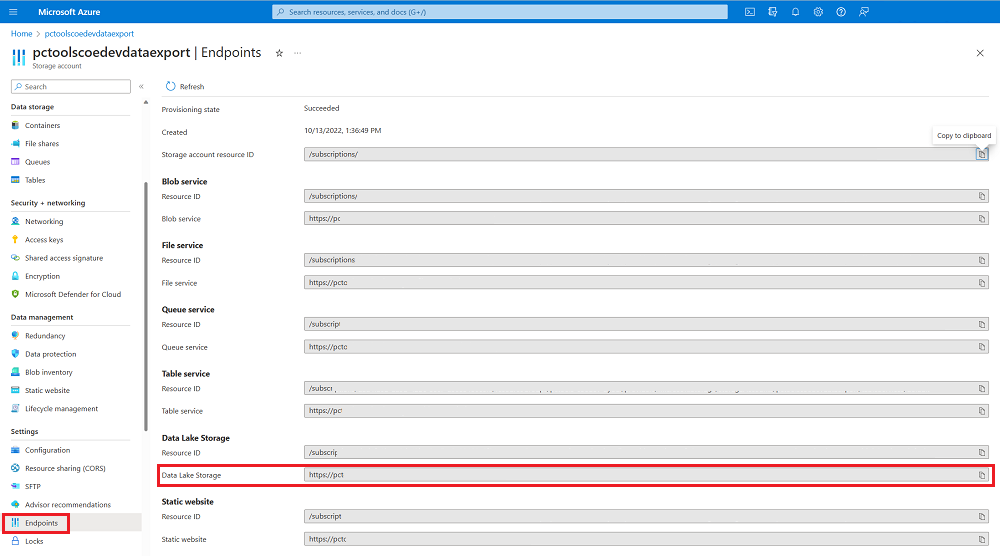
- Append /powerplatform to the URL.
Import Power BI dataflows
Power BI dataflows are used to transform data from the Azure Storage account into tables that are then used by the dashboard. You'll first have to configure the Power BI dataflows.
Navigate to app.powerbi.com.
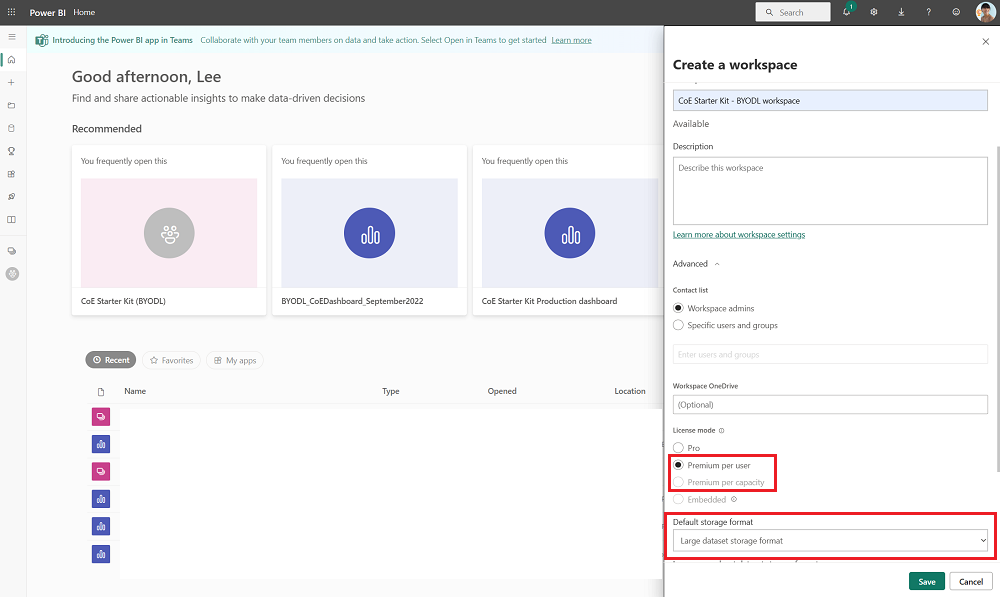
Select Workspaces > Create a workspace.
Provide a name and description, select Advanced and choose Premium per user or Premium per capacity depending on what’s available in your tenant. Select Large dataset storage format. You can also use an existing premium workspace, if available.
Note
A Power BI Premium trial is sufficient, if you are only testing out the integration of the Data Export feature with the CoE Starter Kit.
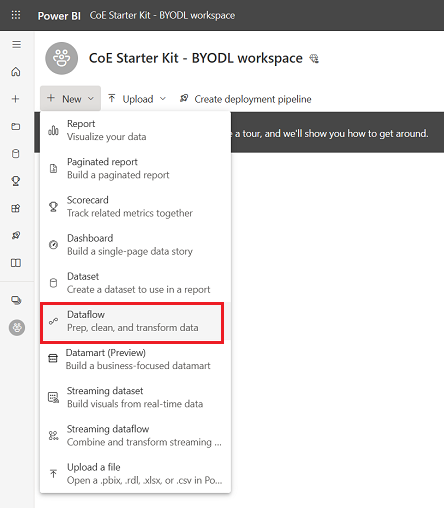
Select + New > Dataflow (if prompted select No, create dataflow instead of datamart).
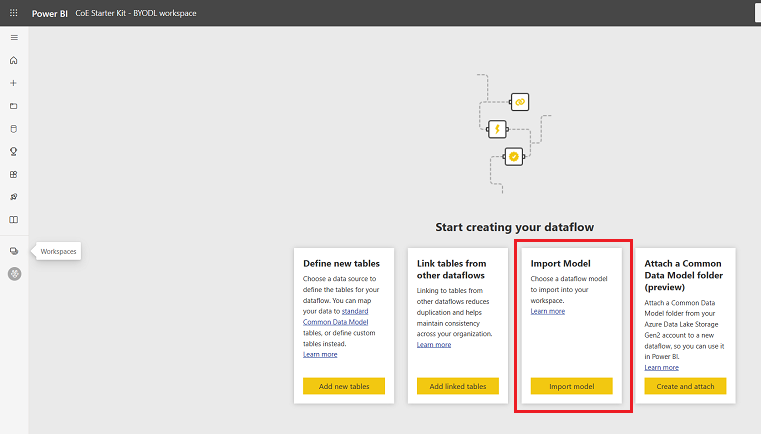
Select Import Model and upload the PowerPlatformAdminAnalytics-DF.json file, which can be found in the CoE Starter Kit you downloaded from aka.ms/CoeStarterKitDownload.
From the workspace, select Datasets + Dataflows to see your imported dataflow.
Edit the dataflow.
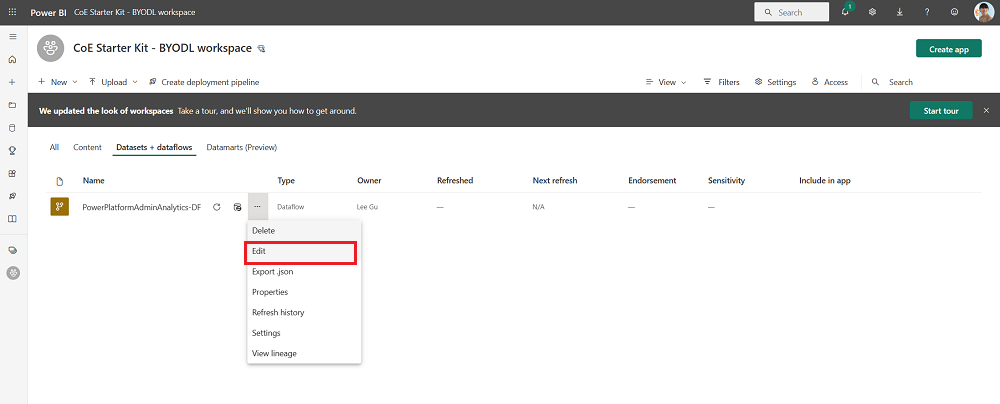
Select Edit tables.
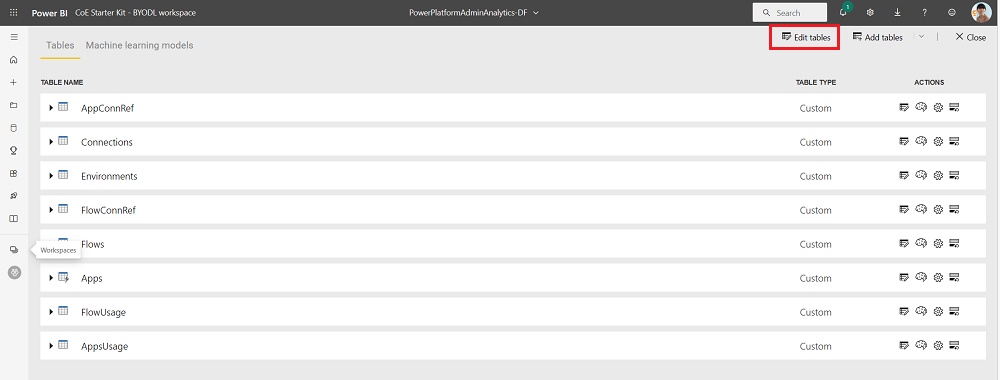
Select the Datalake URL parameter.
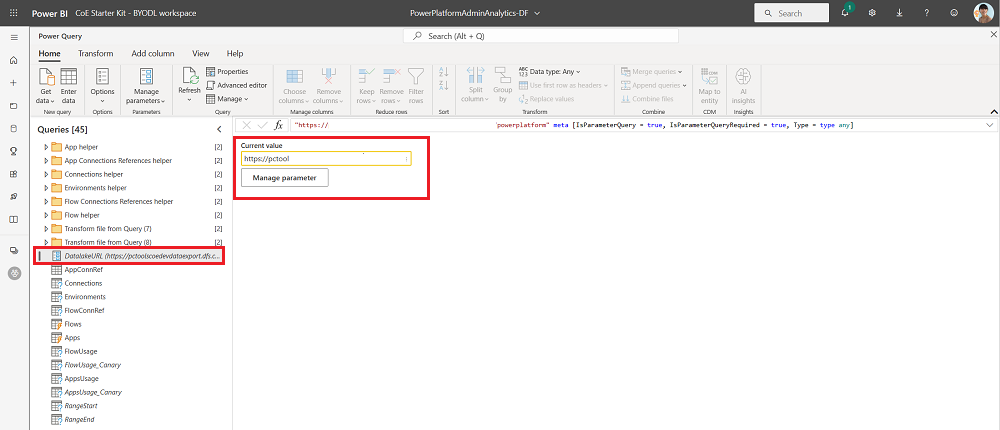
Paste the Azure Storage Account URL and make sure it ends with /powerplatform and doesn’t include a trailing /.
From the Queries view, select one table after the other to configure connections and login with your account. If creating the connection fails, try selecting Source under Applied steps and retry configuring the connection.
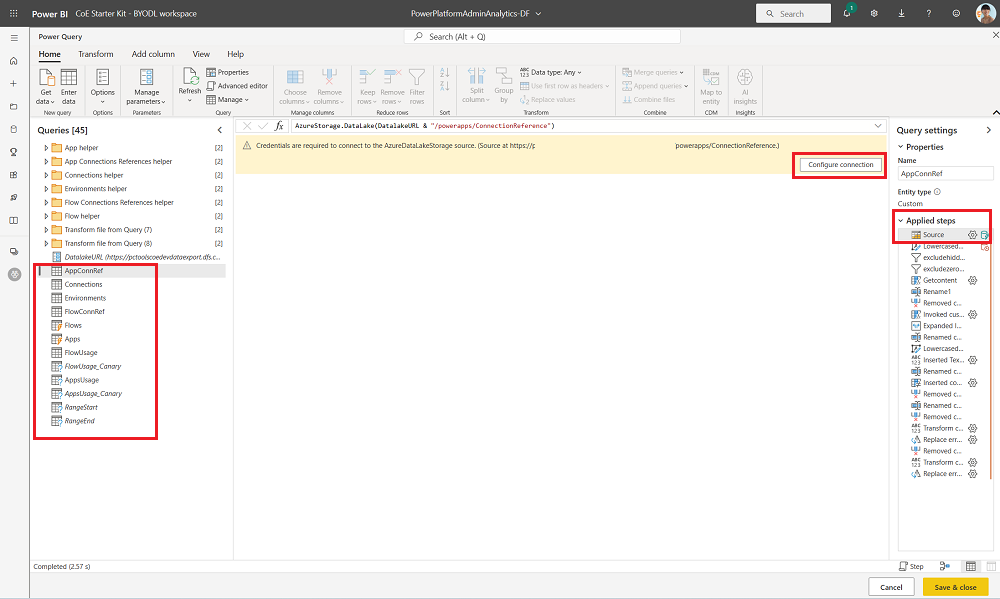
Select Continue when you see a notification about connecting data from multiple sources.
Select Save and Close and wait for the validation to finish.
Select Close to close the edit tables view.
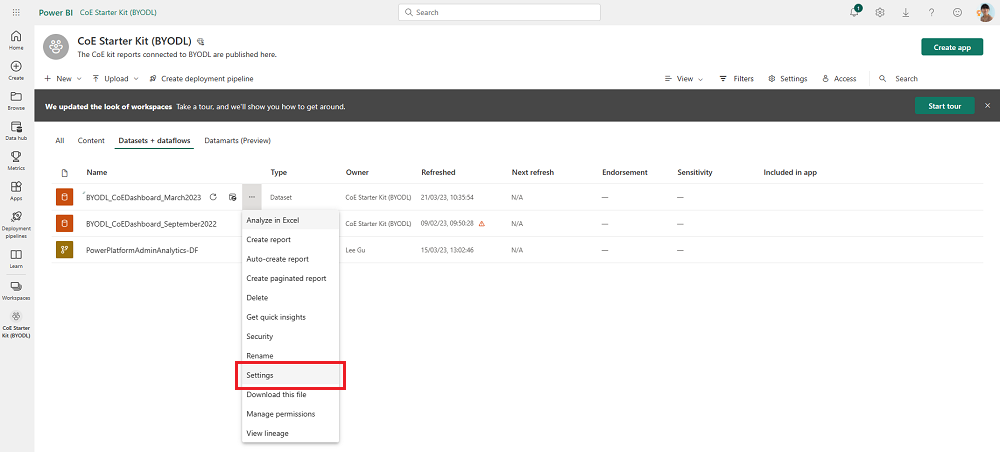
Select … > Settings on the dataflow.
Configure a daily schedule refresh. Check when files are usually written to your storage account by the Data Export feature, and set the daily refresh of the dataflow up for after that. This means the dataflow will run after data is exported to your storage account.

Refresh the dataflow manually. The initial refresh may take 1-2hrs to run, depending on how big your inventory is. Check the Refresh History to see when it completes.
Copy the Power BI workspace and dataflow ID
- Select the dataflow and copy the Workspace ID by looking at the URL copying the GUID after /groups/.
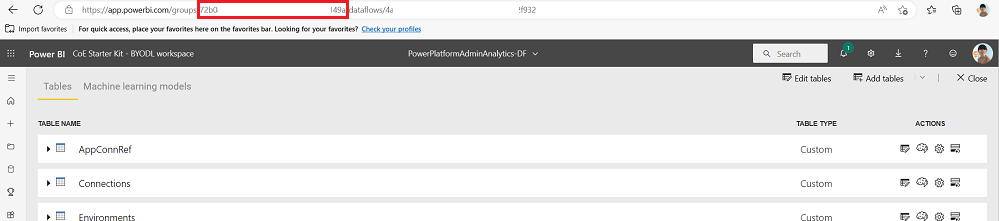
- Select the dataflow and copy the Dataflow ID by looking at the URL and copying the GUID after /dataflows/.
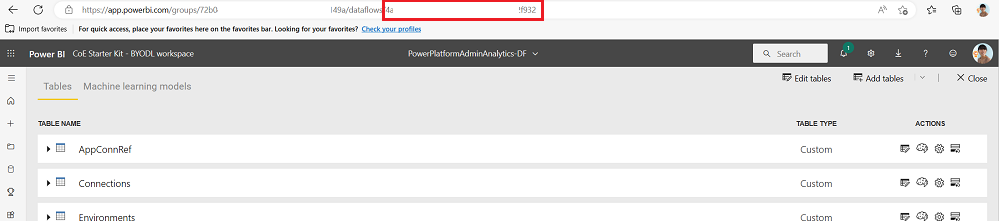
- Select the dataflow and copy the Workspace ID by looking at the URL copying the GUID after /groups/.
Configure the Power BI dashboard
In Power BI Desktop, open the BYODL_CoEDashboard_MMMYY.pbit file, which can be found in the CoE Starter Kit you downloaded from aka.ms/CoeStarterKitDownload.
Enter the URL of your environment instance, including the https:// prefix for OrgUrl. Enter the ID to your Power BI Workspace for Power BI Workspace ID. Enter the ID to your Power BI Dataflow for Power BI Dataflow ID. If prompted, sign in to Power BI Desktop with your organization account that has access to the environment you installed the CoE Starter Kit in.
Save the dashboard locally, or select Publish and choose the workspace you want to publish the report to.
Configure scheduled refresh for your Power BI Dataset to update the report daily.
You can find the report later by going to app.powerbi.com.
Troubleshooting
The Data source error: Information is needed in order to combine data; Information about a data source is required error message when using the BYODL Dashboard means that you have not configured the correct privacy settings for Power BI to combine data from the Azure storage account and Dataverse. Change the privacy level and update the credentials to resolve the issue:
Open Power BI Desktop.
Select File > Options and settings > Options.
Select Global > Privacy and set the privacy level to Always combine data according to your Privacy Level settings for each source.
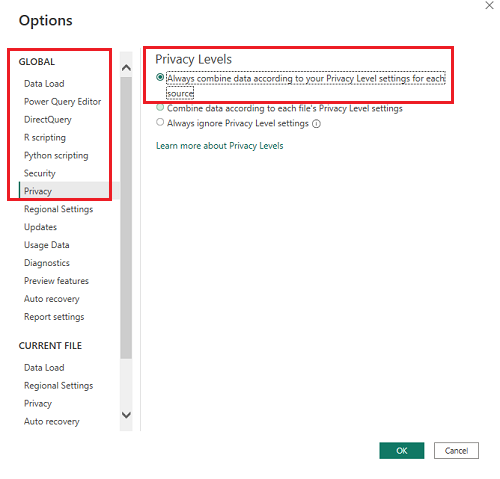
Select OK, and then select File > Options and settings > Options again.
Select Current File > Privacy and set the privacy level to Combine data according to your Privacy Level settings for each source.

Select OK.
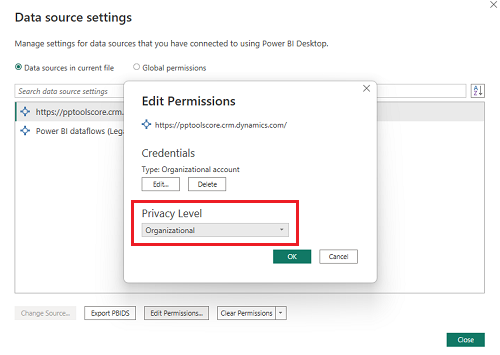
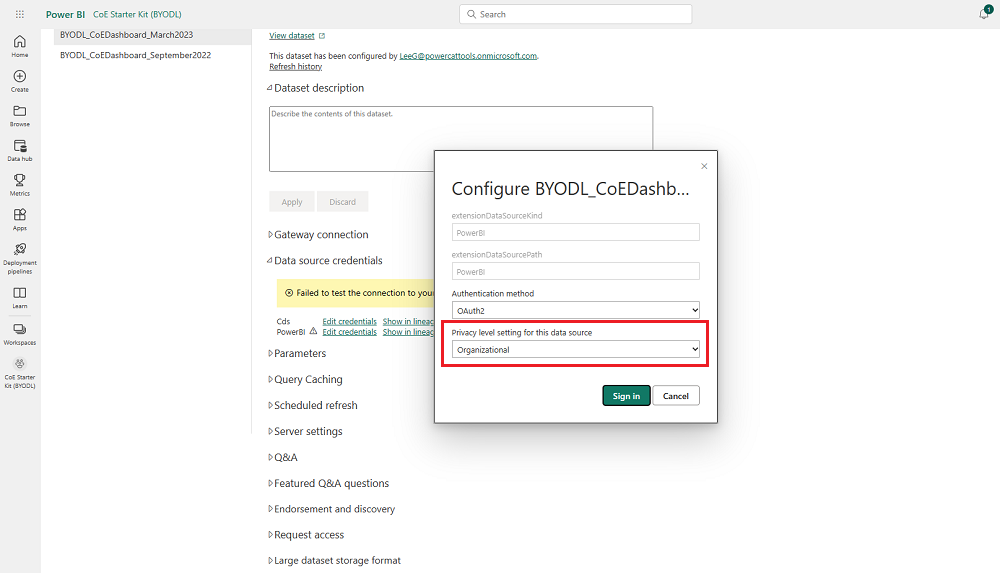
Select File > Options and settings > Data source settings.
Select Edit Permissions and set the privacy level to Organizational for both data sources.
Save the report and refresh it in Power BI Desktop.
Select Publish.
Navigate to app.powerbi.com and select your workspace.
Select Datasets + dataflows.
Select Settings on the dataset.
Select Data Source Credentials.
Select Edit credentials, set the privacy level to Organizational for both data sources, and select Sign in for each data source.
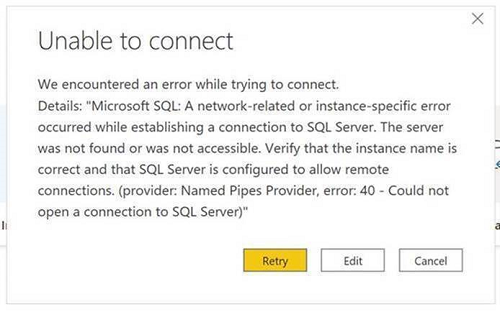
The Unable to connect (provider Named Pipes Provider, error: 40 – Couldn't open a connection to SQL Server) error message means that the connector has failed to connect to the TDS endpoint. This error can occur when the URL used with the connector includes https:// and/or the ending /. Remove the https:// and ending forward slash so that the URL is in the form orgname.crm.dynamics.com.
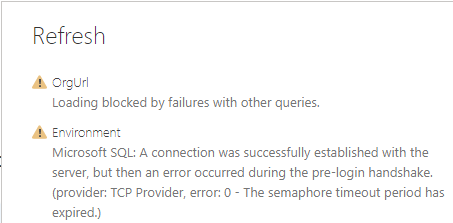
The A connection was successfully established with the server, but then an error occurred during the pre-login handshake error message means that the connector has failed to connect to the TDS endpoint. This error can also occur if the ports the TDS endpoint uses are blocked. Learn more: Ports required for using SQL to query data
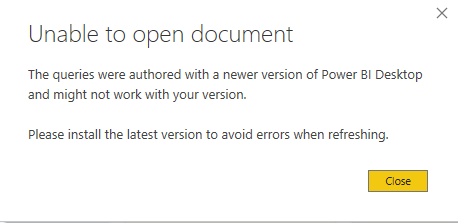
When you see Unable to open document: The queries were authored with a newer version of Power BI Desktop and might not work with your version as an error message and you are on the current version of Power BI Desktop, select Close to continue, and set up the latest version.
When you see sign-in issues, you may have issues with your data source settings being cached to the wrong user or tenant. Here are a few examples of what that might look like:

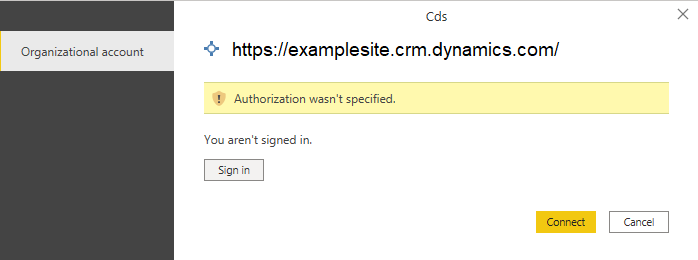
The solution in this case is to clear the permissions:
- Open Power BI Desktop.
- Select File > Options and settings > Data source settings.
- Select the data source you need to connect to (for example, https://mycoe.crm.dynamics.com) and select Clear Permissions.
- Then, try to open the Power BI template file again.
Configure embedded apps in the CoE dashboard
The Production_CoEDashboard_MMMYY.pbit and BYODL_CoEDashboard_MMMYY.pbit dashboards can be configured to use embedded apps to enable you to drive action based on insights you find. With the embedded apps, you can grant yourself access to resources, delete apps and flows, and reach out to the maker through email. You must configure the Power Apps visuals in the Power BI dashboard before you can use them.
In order to configure the embedded apps, you must meet these pre-requisites:
- You must be an owner or co-owner of the Admin – Access this app and Admin – Access this flow apps to be able to embed them.
- Because this app uses Microsoft Dataverse, end-users must have a Power Apps Per User license, the app must be assigned a Power Apps Per App license, or the environment must be covered by pay-as-you-go.
- This app is intended to be used only by admins. Power Platform Service Admin or Global Admin permission is required.
Once you meet these requirements, embed the apps.
Open the CoE Power BI dashboard in Power BI Desktop.
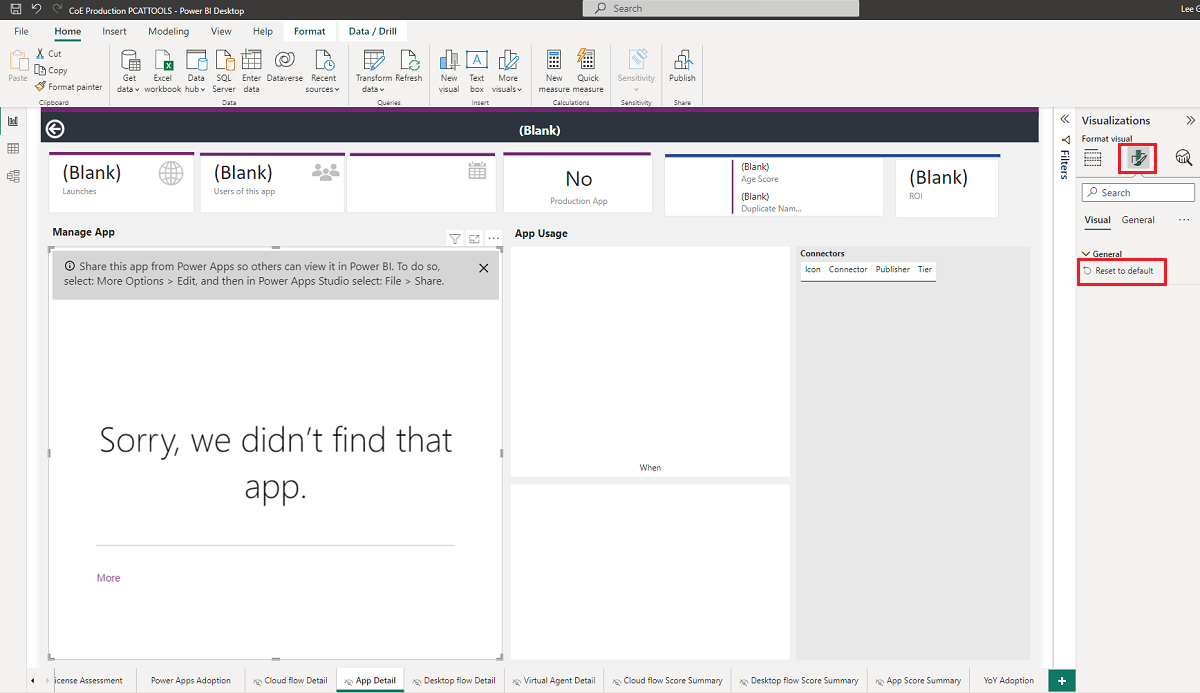
Go to the App Detail page.

Select the existing Power Apps visual, select Format visual and select Reset to default.
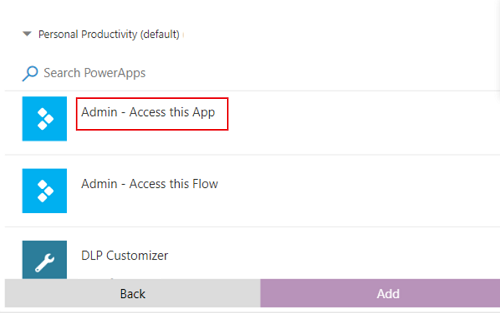
Select Choose app.
Select the environment of your CoE (where you imported the apps to).
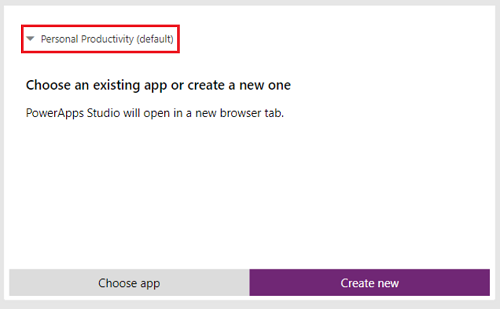
Search for and select Admin – Access this app.
If you see an error like one of these, ignore it. The app will not work when browsing directly to this page, only when an app is sent in via drillthrough


Next, go to the Cloud flow detail tab and repeat the above steps, selecting the Admin - Access this flow app this time.
Republish the dashboard, and view it under app.powerbi.com.
It looks like I found a bug with the CoE Starter Kit; where should I go?
To file a bug against the solution, go to aka.ms/coe-starter-kit-issues.
Feedback
Coming soon: Throughout 2024 we will be phasing out GitHub Issues as the feedback mechanism for content and replacing it with a new feedback system. For more information see: https://aka.ms/ContentUserFeedback.
Submit and view feedback for