Quickstart: Blazor Server Web API sample (C#)
In this quickstart, you create a Blazor Server application to connect to your Microsoft Dataverse environment using the Web API.
You authenticate and use HttpClient to send a GET request containing the WhoAmI Function. The response is a WhoAmIResponse ComplexType . After call completion, the WhoAmIResponse properties are displayed.
Note
This is a very simple example to show how to get connected with a minimum of code.
Prerequisites
- Visual Studio 2022 with the ASP.NET and web development workload.
- .NET 7.0 SDK.
- Familiarity with the Microsoft Azure portal.
- Internet connection.
- Valid user account for a Dataverse instance.
- Administrator access to grant application registrations.
- URL to the Dataverse environment you want to connect with.
- Basic understanding of the Visual C# language.
Note
To authenticate you must have an app registered in Microsoft Entra ID. The registration will happen automatically as part of the template creation, but will require additional updates in the Azure portal.
Create a Visual Studio project
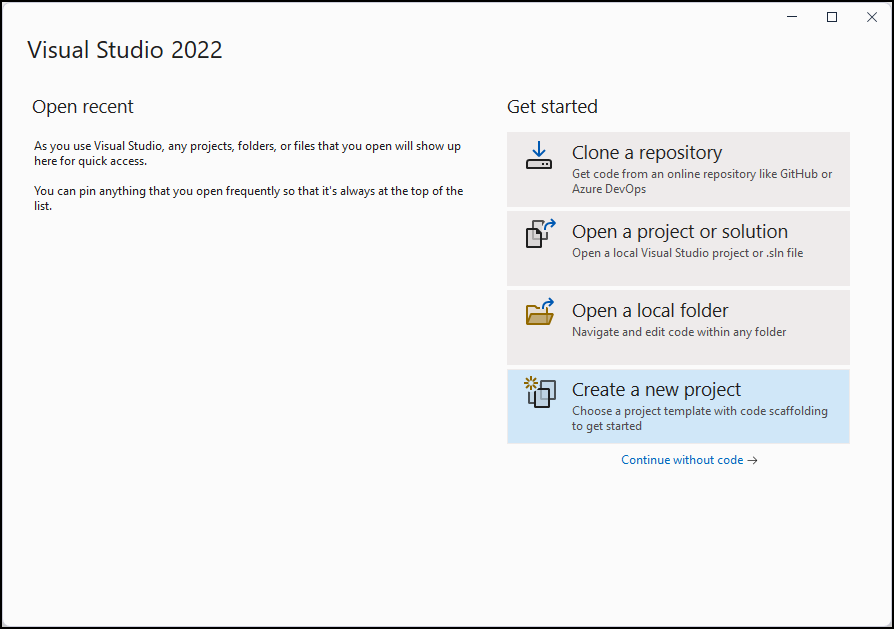
Open Visual Studio 2022 and select Create a new project.
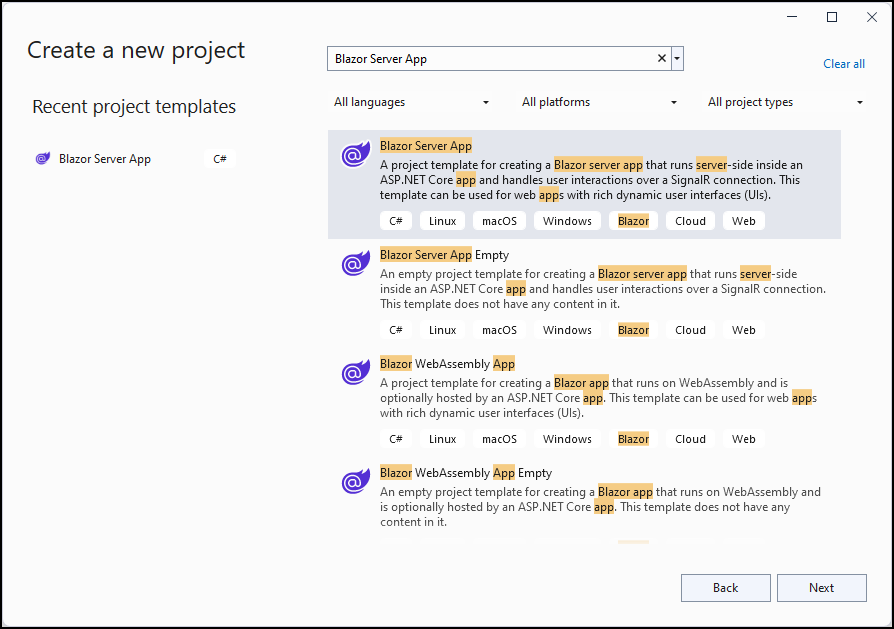
In the Create a new project dialog, search for Blazor Server App. Select the template and select Next.
In the Configure your new project dialog, set the Project name, and Location. Then select Next.
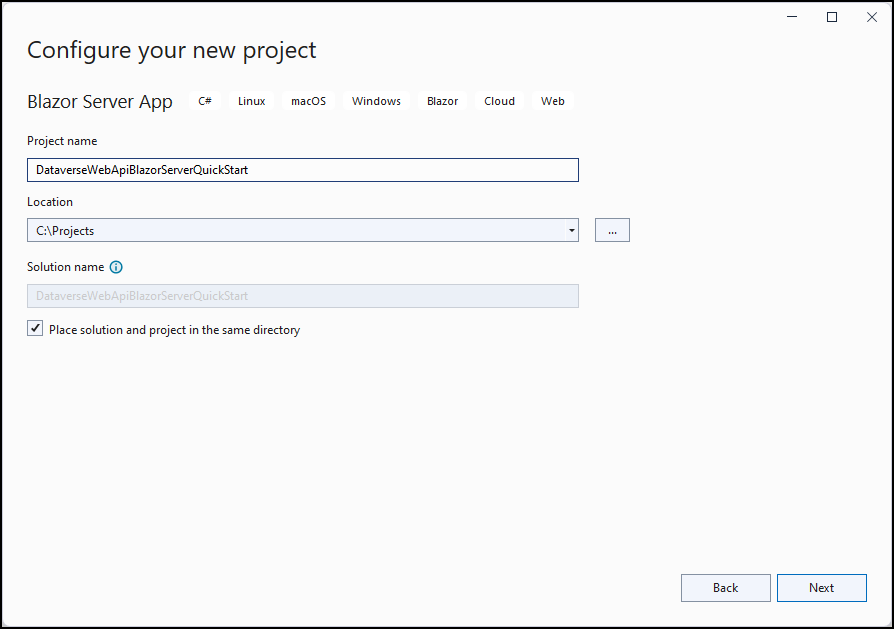
In this example, we'll use DataverseWebApiBlazorServerQuickStart as the Project name.
In the Additional information dialog, specify Framework and Authentication type.
In this example, the Framework is .NET 7.0 (Standard Term Support).
Important
Set the Authentication type to Microsoft identity platform.

Select Create to create the project.
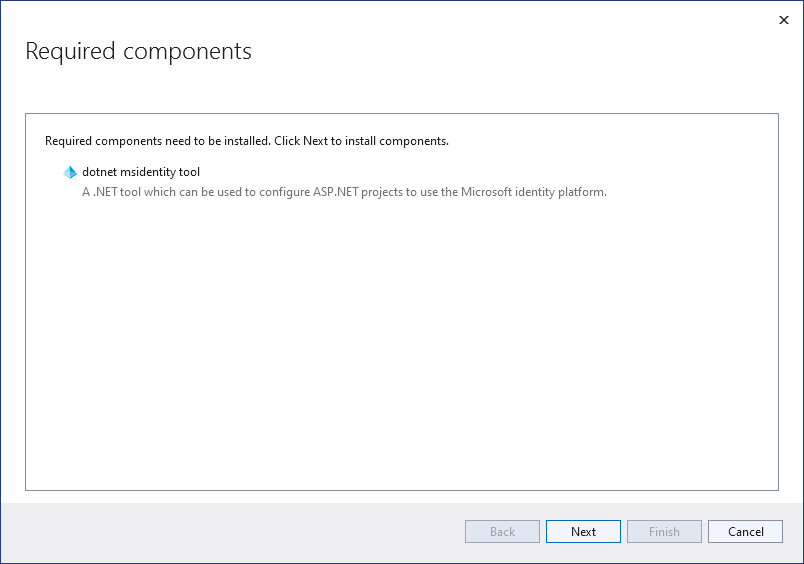
The project template opens a Required components dialog. Select Next.
In the Microsoft identity platform dialog, make sure that the selected Azure account has permissions to manage applications in Microsoft Entra ID and the selected tenant is the one associated with your Power Platform environment.
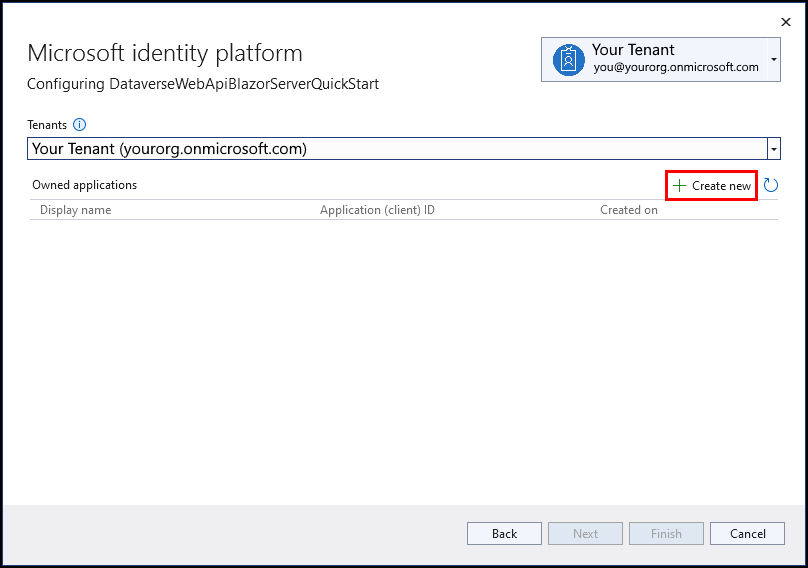
Select Create new.
In the Register an application dialog, set the Display name and select Register to close the dialog.
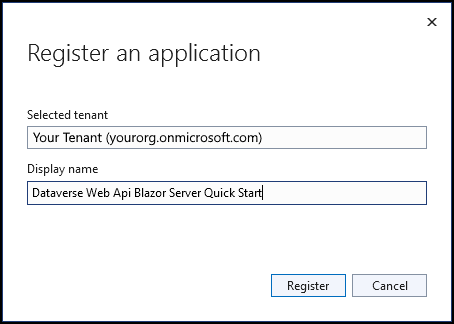
In this example, we're using the name Dataverse Web Api Blazor Server Quick Start. We'll search for the application using this name in a later step.
Select Next.
Note
You don't need to do anything in this step.
This step provides capabilities to connect to Microsoft Graph or another API, but connecting to another API isn't necessary for this quickstart.
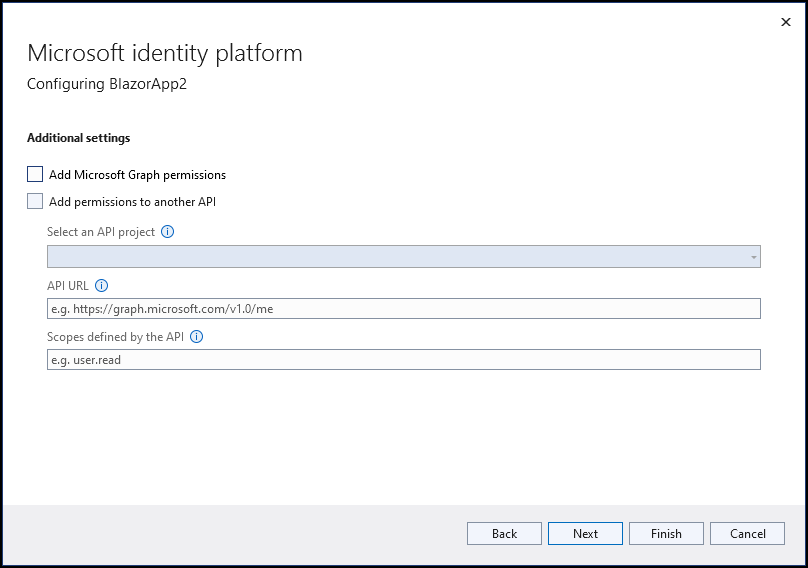
Select Next. This step summarizes the changes that are made to the project.

Select Finish.
The Dependency configuration progress dialog shows the automated steps performed by the template to register the application.
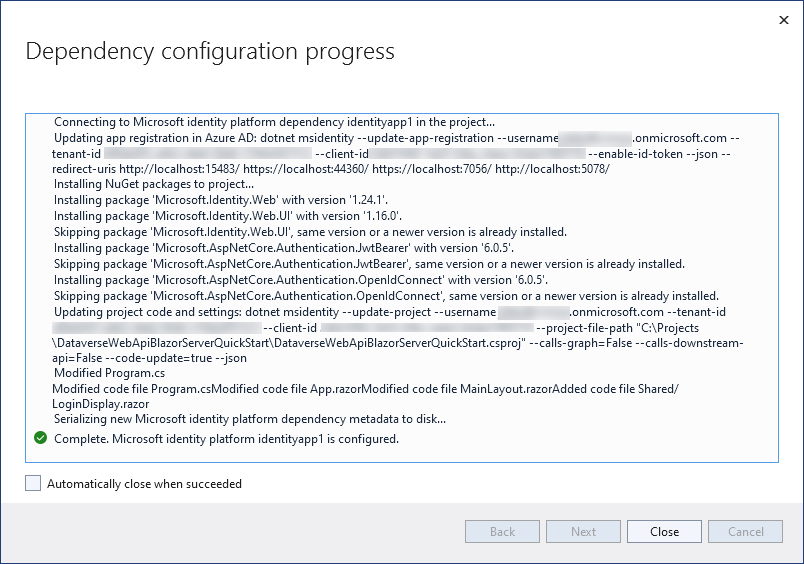
Select Close to close the dialog.
Configure the application in Microsoft Entra ID
The Visual Studio template created a registered application using the information you provided. Connecting to Dataverse requires more permissions.
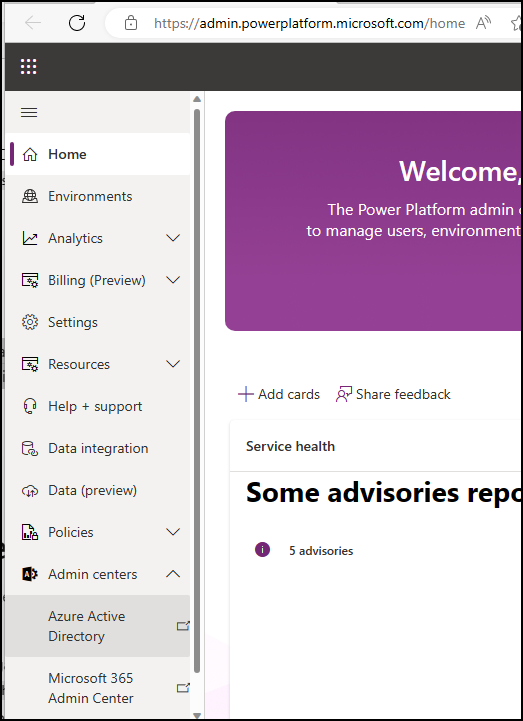
From the Power Platform admin center, select Admin Centers > Microsoft Entra ID.
In the Microsoft Entra admin center, search for the application created by name within App Registrations.

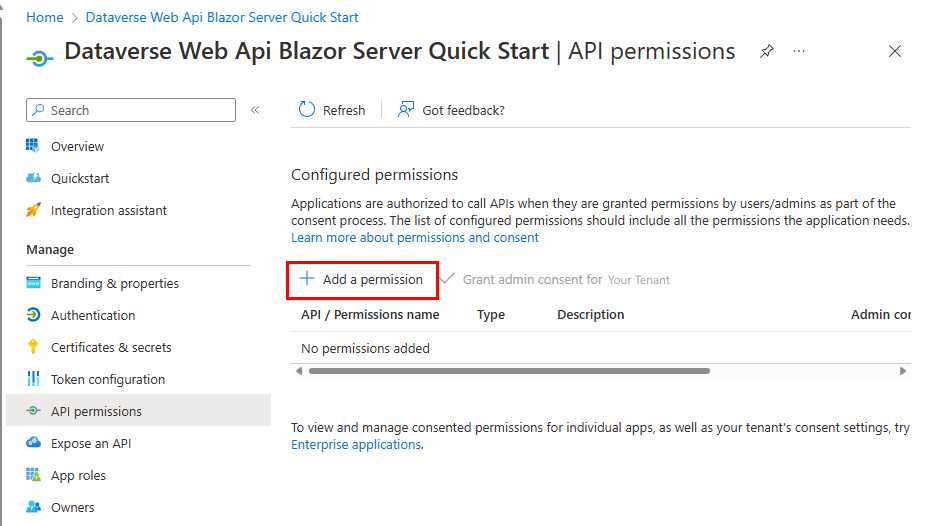
Open the application and select API permissions. Select Add a permission.
In the Request API permissions fly-out, select the APIs my organization uses tab and search for Dataverse.

Select Dataverse, and Dynamics CRM API opens.
Select the
user_impersonationdelegated permission and select Add permissions.
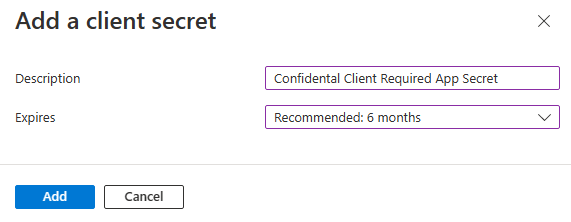
Select Certificates & secrets and select New client secret.

In the Add a client secret fly-out, enter a Description and Expires duration, then select Add.
Important
Copy the secret now. You can't access it after you leave this page.

In Visual Studio, within your Blazor Server app project, open
appsettings.jsonand add an entry forClientSecretwith the secret value. The contents of theappsettings.jsonfile should look like this:{ "AzureAd": { "Instance": "https://login.microsoftonline.com/", "Domain": "<your org>.onmicrosoft.com", "TenantId": "<your tenantid>", "ClientId": "<your clientid>", "CallbackPath": "/signin-oidc", "ClientSecret": "<your secret>" }, "Logging": { "LogLevel": { "Default": "Information", "Microsoft.AspNetCore": "Warning" } }, "AllowedHosts": "*" }
Edit the app
To enable calls to Dataverse, you must edit three files in the application:
- appsettings.json
- Program.cs
- Pages/FetchData.razor
appsettings.json
There are several places in the other files that require a reference to the base uri used to access the Dataverse Web API. Adding this data to the appsettings.json allows you to set this data in one place.
Add the following below "AllowedHosts": "*" where <your org> represents the base url to access the Dataverse Web API. If you aren't sure what this is, see Web API URL and versions.
  "AllowedHosts": "*",
  "DataverseConfig": {
    "BaseUri": "https://<your org>.api.crm.dynamics.com/"
  }
Note
Make sure to :
- Add the comma after
"AllowedHosts": "*"so that the JSON is valid. - End the
BaseUrivalue with "/".
Program.cs
To access the value of the Web API base URI in the settings, add the line below commented with
// Get BaseUri from appsettings.jsonin theMainmethod below the line:var builder = WebApplication.CreateBuilder(args);public static void Main(string[] args) { var builder = WebApplication.CreateBuilder(args); // Get BaseUri from appsettings.json string dataverseBaseUri = builder.Configuration.GetSection("DataverseConfig").GetValue<string>("BaseUri");Add the following two lines below the line:
.AddMicrosoftIdentityWebApp(builder.Configuration.GetSection("AzureAd"))// Add services to the container. builder.Services.AddAuthentication(OpenIdConnectDefaults.AuthenticationScheme) .AddMicrosoftIdentityWebApp(builder.Configuration.GetSection("AzureAd")) .EnableTokenAcquisitionToCallDownstreamApi(new string[] { $"{dataverseBaseUri}user_impersonation" }) .AddInMemoryTokenCaches();- The MicrosoftIdentityWebApiAuthenticationBuilder.EnableTokenAcquisitionToCallDownstreamApi Method adds support for the web app to acquire tokens to call an API. By passing the
user_impersonationscope, the user can consent to the capability to use the Dataverse Web API. - AddInMemoryTokenCaches Method Enables caching the token issued for requests.
- The MicrosoftIdentityWebApiAuthenticationBuilder.EnableTokenAcquisitionToCallDownstreamApi Method adds support for the web app to acquire tokens to call an API. By passing the
Pages/FetchData.razor
The default Pages/FetchData.razor component retrieves some weather forecast data. We're going to replace this completely.
Copy the following code and replace all the code in Pages/FetchData.razor:
@page "/fetchdata"
@using Microsoft.Identity.Client;
@using Microsoft.Identity.Web
@using System.Text.Json;
@inject MicrosoftIdentityConsentAndConditionalAccessHandler ConsentHandler
@inject IHttpClientFactory HttpClientFactory
@inject Microsoft.Identity.Web.ITokenAcquisition TokenAcquisitionService
@inject IConfiguration configuration;

<PageTitle>WhoAmI</PageTitle>

<h1>WhoAmI</h1>

<p>This component demonstrates fetching data from Dataverse.</p>

@if (WhoIAm == null)
{
    <p><em>Loading...</em></p>
}
else
{
    <table class="table">
        <thead>
            <tr>
                <th>Property</th>
                <th>Value</th>
            </tr>
        </thead>
        <tbody>
            <tr>
                <td>BusinessUnitId</td>
                <td>@WhoIAm.BusinessUnitId</td>
            </tr>
            <tr>
                <td>OrganizationId</td>
                <td>@WhoIAm.OrganizationId</td>
            </tr>
            <tr>
                <td>UserId</td>
                <td>@WhoIAm.UserId</td>
            </tr>
        </tbody>
    </table>
}

@code {
    private WhoAmIResponse WhoIAm;
    private HttpClient _httpClient;

    protected override async Task OnInitializedAsync()
    {
        string baseUrl = configuration["DataverseConfig:BaseUri"];

        // Get the HttpClient
        _httpClient = HttpClientFactory.CreateClient();

        // Get the token
        var token = string.Empty;
        try
        {
            token = await TokenAcquisitionService.GetAccessTokenForUserAsync(new string[] { $"{baseUrl}user_impersonation" });
        }
        // Microsoft Identity Web specific exception class for use in Blazor or Razor pages to process the user challenge.
        // Handles the MsalUiRequiredException.
        catch (MicrosoftIdentityWebChallengeUserException ex)
        {
            ConsentHandler.HandleException(ex);
        }
        catch (Exception)
        {
            throw new Exception("Error getting access token.");
        }

        // Set the auth token
        _httpClient.DefaultRequestHeaders.Authorization = new System.Net.Http.Headers.AuthenticationHeaderValue("Bearer", token);

        // Send the request
        var dataRequest = await _httpClient.GetAsync($"{baseUrl}api/data/v9.2/WhoAmI");

        if (dataRequest.IsSuccessStatusCode)
        {
            var jsonString = System.Text.Json.JsonDocument.Parse(await dataRequest.Content.ReadAsStreamAsync());
            WhoIAm = JsonSerializer.Deserialize<WhoAmIResponse>(jsonString);
        }
        else
        {
            throw new Exception("Error sending request.");
        }
    }

    // Used with System.Text.Json.JsonSerializer.Deserialize to deserialize response body
    public class WhoAmIResponse
    {
        public Guid BusinessUnitId { get; set; }
        public Guid OrganizationId { get; set; }
        public Guid UserId { get; set; }
    }

}
Run the program
The application is now ready.
Press F5 to run the program. The first time the program runs you should see this consent dialog:
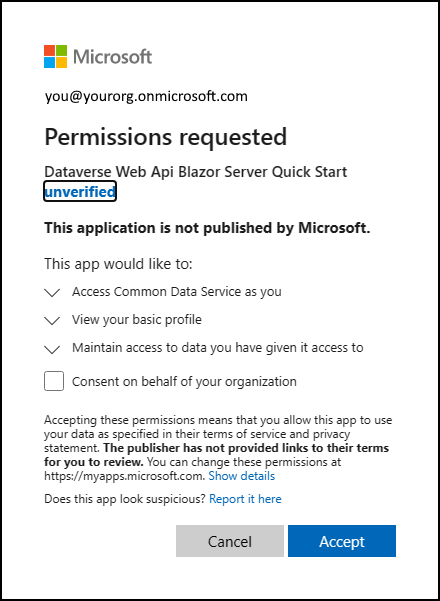
Select Accept.
Select Fetch data.
The output should look like this:

Congratulations! You have successfully connected to the Web API.
This quickstart shows a simple approach to create a Blazor Server web application that connects to data in Dataverse.
Learn more about Dataverse Web API capabilities by understanding the service documents.
See Also
Tutorial: Create an ASP.NET Core Blazor WebAssembly App using Dataverse
Tutorial: Create a Blazor Server app that uses the Microsoft identity platform for authentication
Feedback
Coming soon: Throughout 2024 we will be phasing out GitHub Issues as the feedback mechanism for content and replacing it with a new feedback system. For more information see: https://aka.ms/ContentUserFeedback.
Submit and view feedback for