Create and use dataflows in Power Apps
With advanced data preparation available in Power Apps, you can create a collection of data called a dataflow, which you can then use to connect with business data from various sources, clean the data, transform it, and then load it to Microsoft Dataverse or your organization’s Azure Data Lake Gen2 storage account.
A dataflow is a collection of tables that are created and managed in environments in the Power Apps service. You can add and edit tables in your dataflow, as well as manage data refresh schedules, directly from the environment in which your dataflow was created.
Once you create a dataflow in the Power Apps portal, you can get data from it using the Common Data Service connector or Power BI Desktop Dataflow connector, depending on which destination you chose when creating the dataflow.
There are three primary steps to using a dataflow:
Author the dataflow in the Power Apps portal. You select the destination to load the output data to, the source to get the data from, and the Power Query steps to transform the data using Microsoft tools that are designed to make doing so straightforward.
Schedule dataflow runs. This is the frequency in which the Power Platform Dataflow should refresh the data that your dataflow will load and transform.
Use the data you loaded to the destination storage. You can build apps, flows, Power BI reports, and dashboards or connect directly to the dataflow’s Common Data Model folder in your organization’s lake using Azure data services like Azure Data Factory, Azure Databricks or any other service that supports the Common Data Model folder standard.
The following sections look at each of these steps so you can become familiar with the tools provided to complete each step.
Create a dataflow
Dataflows are created in one environment. Therefore, you'll only be able to see and manage them from that environment. In addition, individuals who want to get data from your dataflow must have access to the environment in which you created it.
Note
Creating dataflows is currently not available with Power Apps Developer Plan licenses.
Sign in to Power Apps, and verify which environment you're in, find the environment switcher near the right side of the command bar.

On the left navigation pane, select Dataflows. If the item isn’t in the side panel pane, select …More and then select the item you want.
select New dataflow, and then select Start from blank.
On the New Dataflow page, enter a Name for the dataflow. By default, dataflows store tables in Dataverse. Select Analytical entities only if you want tables to be stored in your organization's Azure Data Lake storage account. Select Create.
Important
There is only one owner of any dataflow—the person who created it. Only the owner can edit the dataflow. Authorization and access to data created by the dataflow depend on the destination you loaded data to. Data loaded into Dataverse will be available via the Dataverse Connector and requires the person accessing the data to be authorized to Dataverse. Data loaded into your organization’s Azure Data Lake Gen2 storage account is accessible via the Power Platform Dataflow connector and access to it requires membership within the environment it was created in.
On the Choose data source page, select the data source where the tables are stored. The selection of data sources displayed allows you to create dataflow tables.
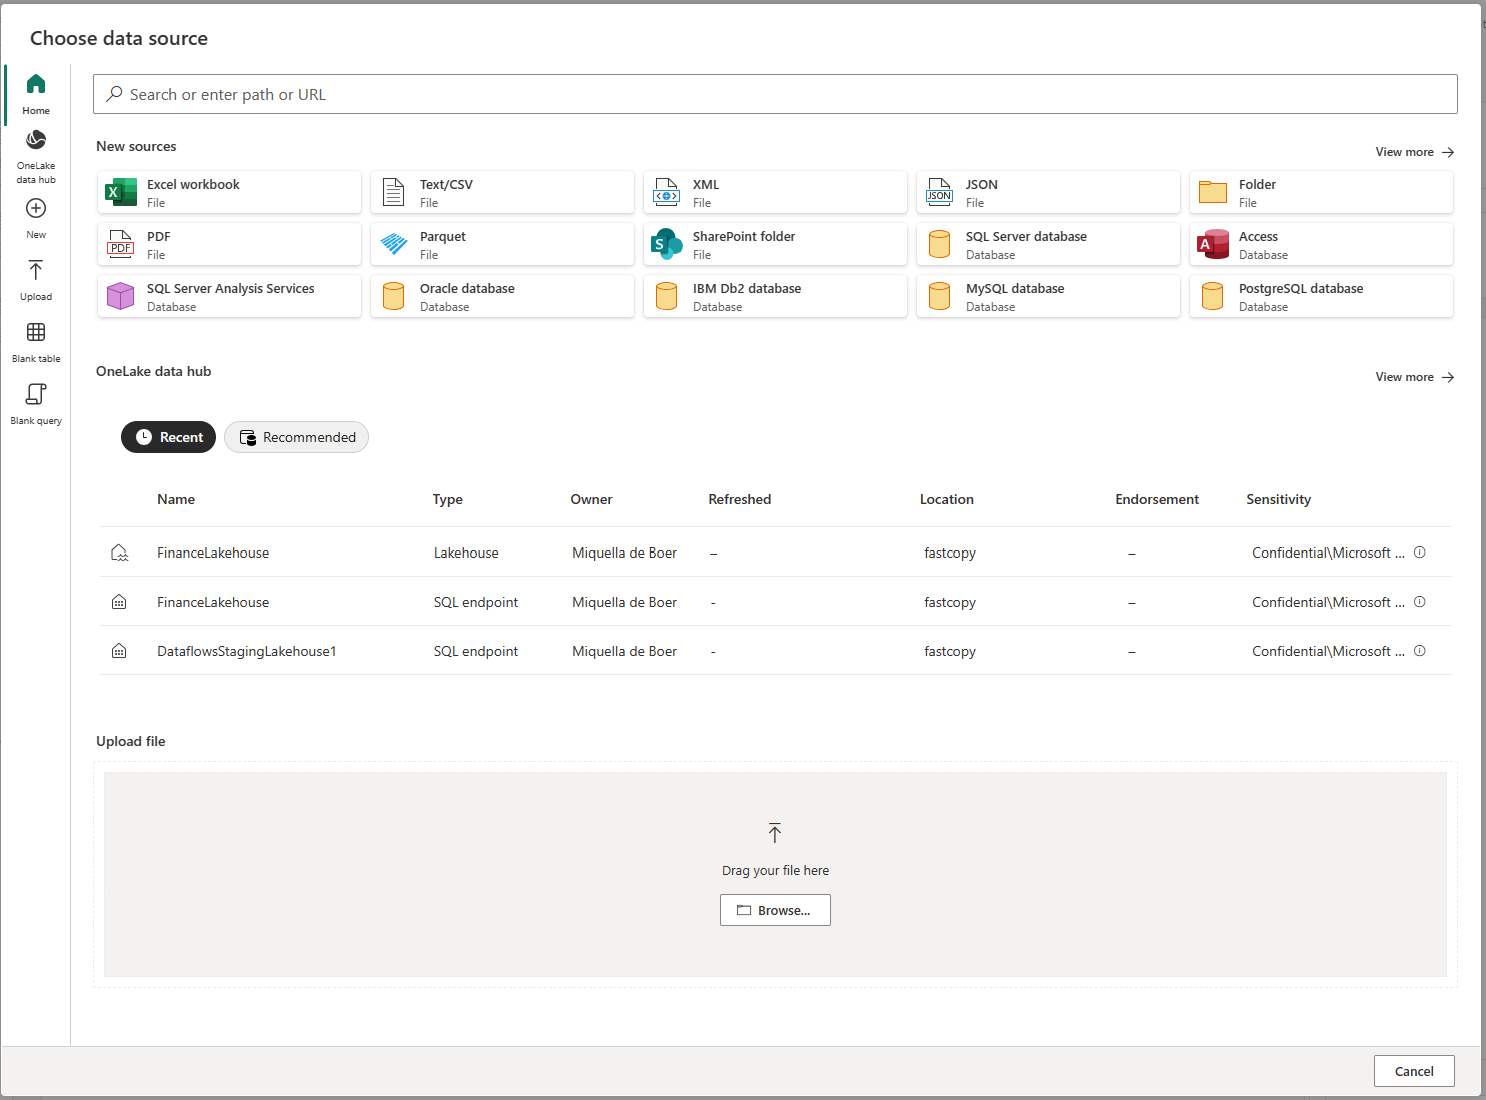
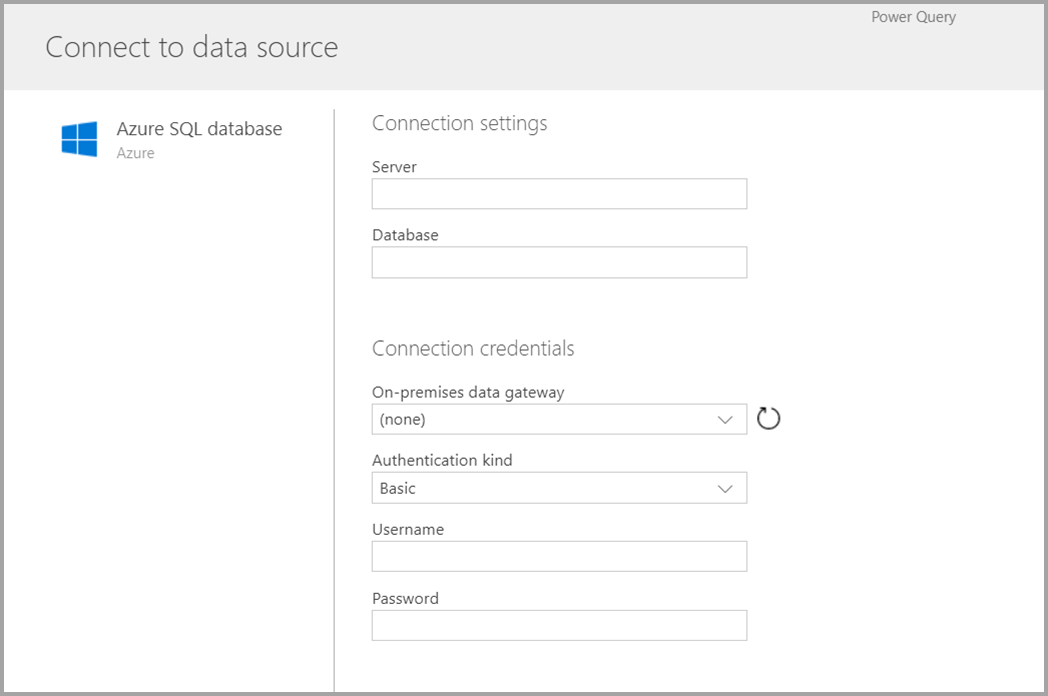
After you select a data source, you’re prompted to provide the connection settings, including the account to use when connecting to the data source. Select Next.
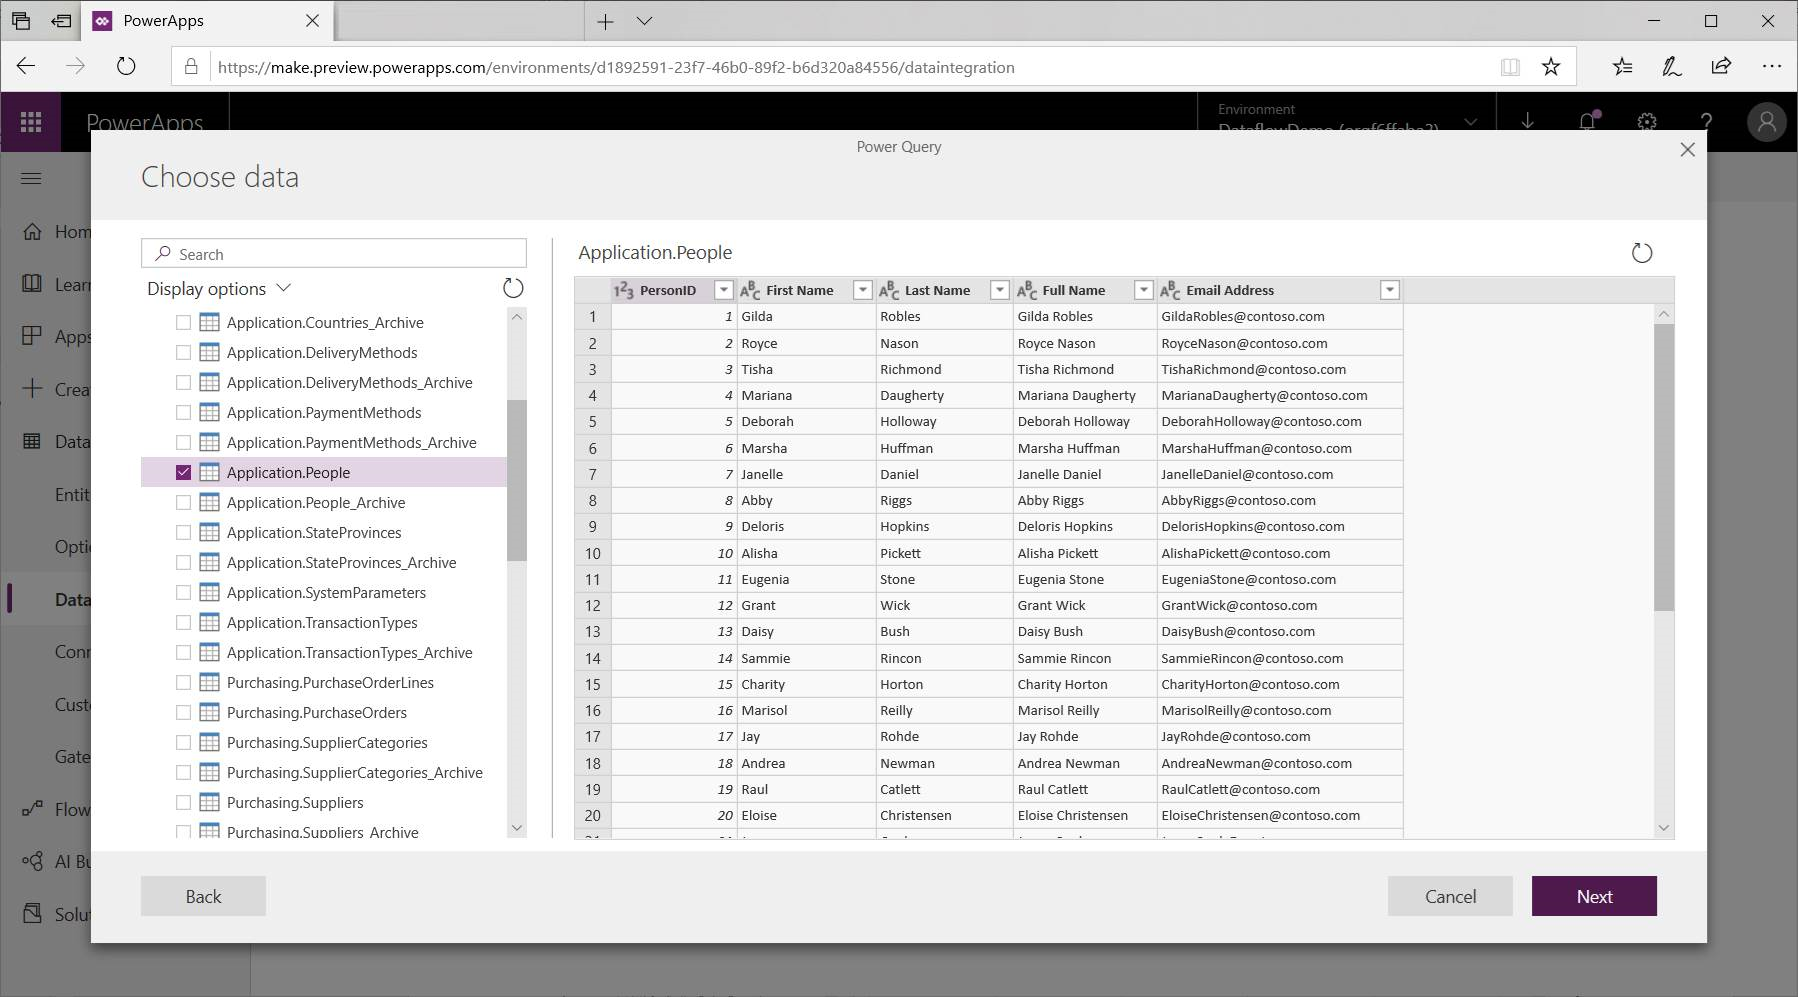
Once connected, you select the data to use for your table. When you choose data and a source, the Power Platform Dataflow service will subsequently reconnect to the data source in order to keep the data in your dataflow refreshed, at the frequency you select later in the setup process.

Now that you've selected the data to use in the table, you can use the dataflow editor to shape or transform that data into the format necessary for use in your dataflow.
Use the dataflow editor to shape or transform data
You can shape your data selection into a form that works best for your table using a Power Query editing experience, similar to the Power Query Editor in Power BI Desktop. To learn more about Power Query, see Query overview in Power BI Desktop.
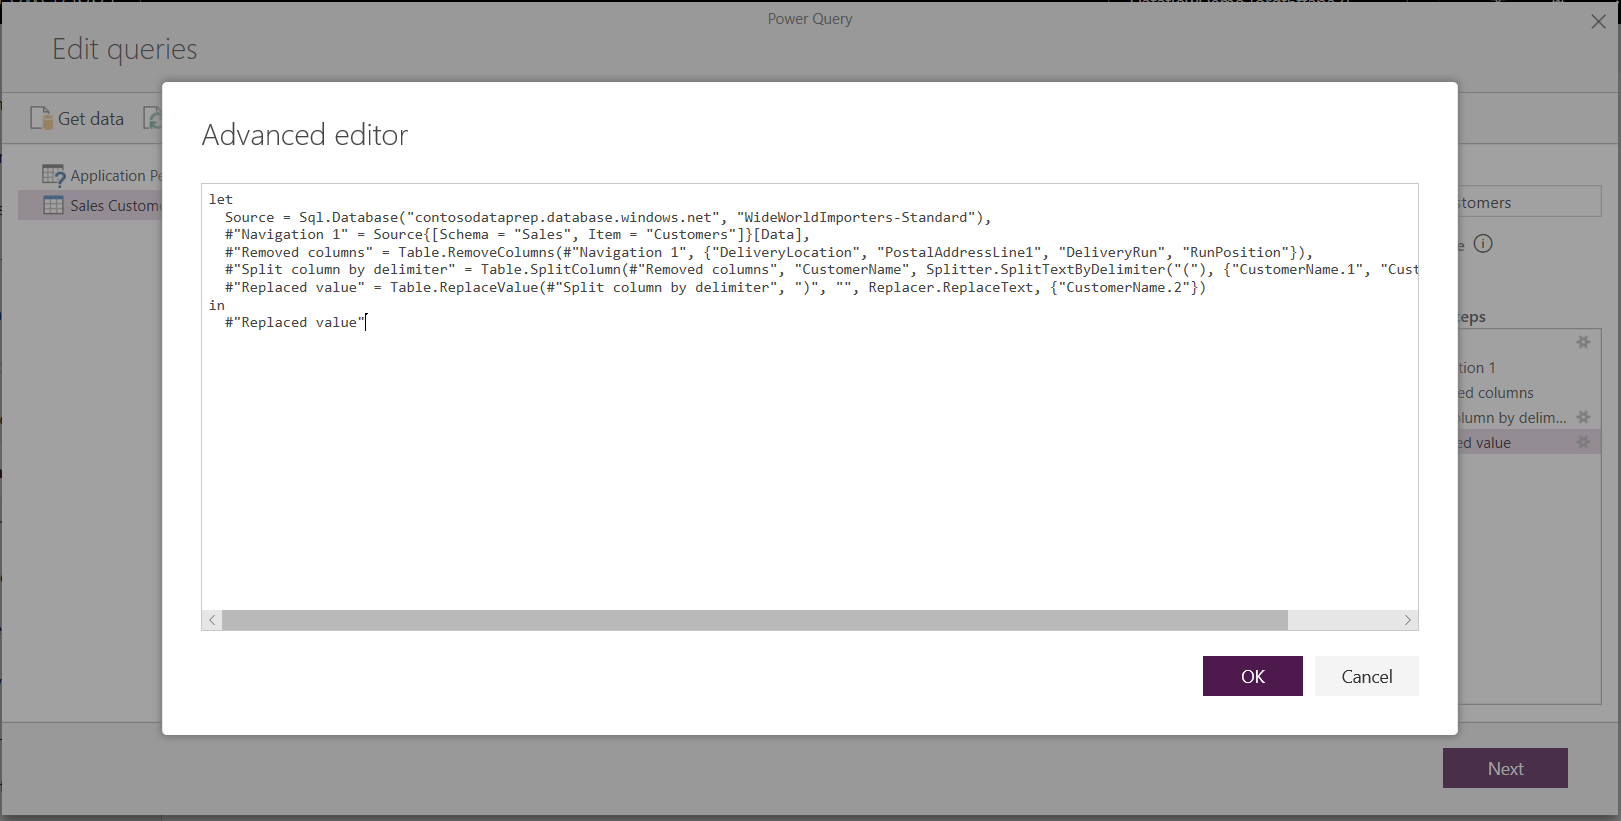
If you want to see the code that Query Editor is creating with each step, or if you want to create your own shaping code, you can use the advanced editor.
Dataflows and the Common Data Model
Dataflows tables include new tools to easily map your business data to the Common Data Model, enrich it with Microsoft and third-party data, and gain simplified access to machine learning. These new capabilities can be leveraged to provide intelligent and actionable insights into your business data. Once you’ve completed any transformations in the edit queries step described below, you can map columns from your data source tables to standard table columns as defined by the Common Data Model. Standard tables have a known schema defined by the Common Data Model.
For more information about this approach, and about the Common Data Model, see The Common Data Model.
To leverage the Common Data Model with your dataflow, select the Map to Standard transformation in the Edit Queries dialog. In the Map tables screen that appears, select the standard table that you want to map.
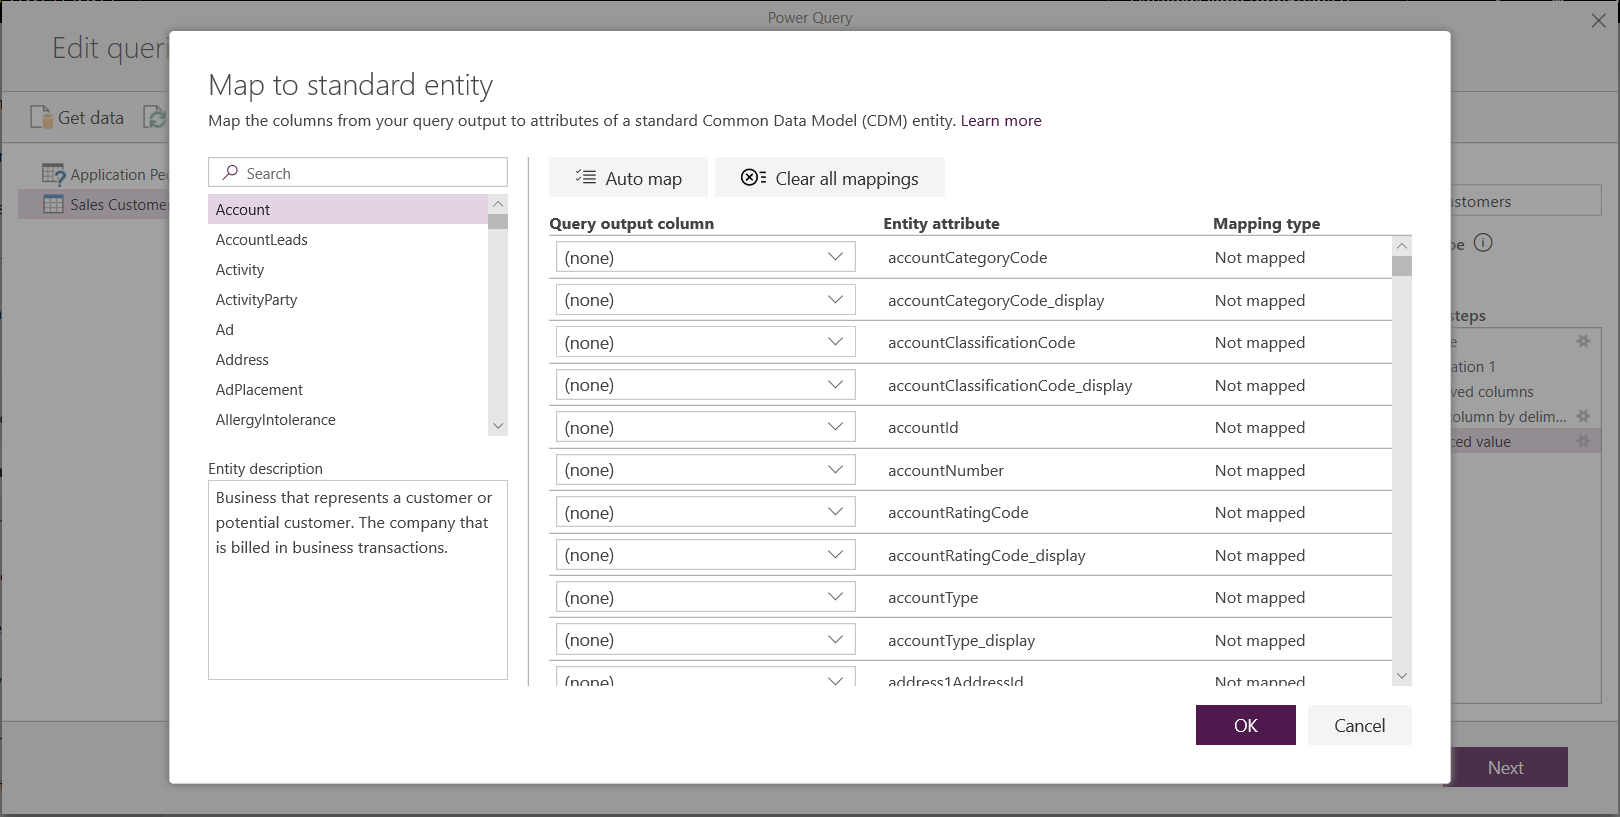
When you map a source column to a standard column, the following occurs:
The source column takes on the standard column name (the column is renamed if the names are different).
The source column gets the standard column data type.
To keep the Common Data Model standard table, all standard columns that aren't mapped get Null values.
All source columns that aren't mapped remain as is to ensure that the result of the mapping is a standard table with custom columns.
Once you’ve completed your selections and your table and its data settings are complete, you’re ready for the next step, which is selecting the refresh frequency of your dataflow.
Set the refresh frequency
Once your tables have been defined, you’ll want to schedule the refresh frequency for each of your connected data sources.
Dataflows use a data refresh process to keep data up to date. In the Power Platform Dataflow authoring tool, you can choose to refresh your dataflow manually or automatically on a scheduled interval of your choice. To schedule a refresh automatically, select Refresh automatically.
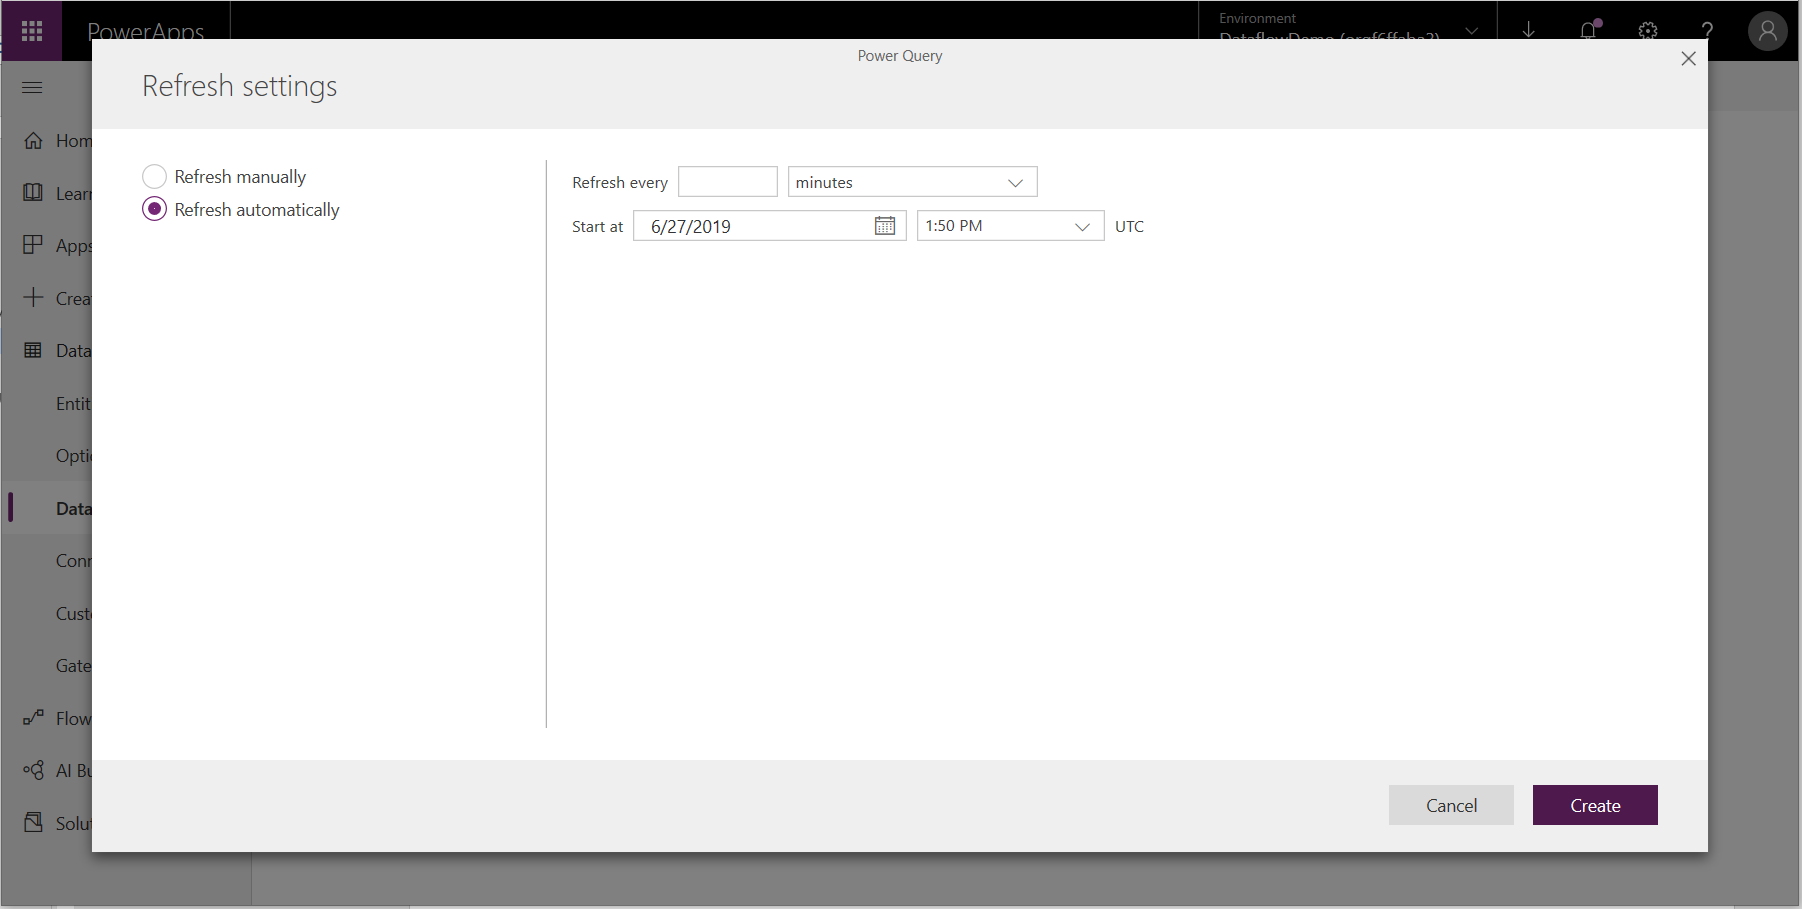
Enter the dataflow refresh frequency, start date, and time, in UTC.
Select Create.
Using dataflows stored in Azure Data Lake Storage Gen2
Some organizations might want to use their own storage for creation and management of dataflows. You can integrate dataflows with Azure Data Lake Storage Gen2 if you follow the requirements to set up the storage account properly. More information: Connect Azure Data Lake Storage Gen2 for dataflow storage
Troubleshooting data connections
There might be occasions when connecting to data sources for dataflows runs into issues. This section provides troubleshooting tips when issues occur.
Salesforce connector. Using a trial account for Salesforce with dataflows results in a connection failure with no information provided. To resolve this, use a production Salesforce account or a developer account for testing.
SharePoint connector. Make sure you supply the root address of the SharePoint site, without any subfolders or documents. For example, use a link similar to
https://microsoft.sharepoint.com/teams/ObjectModel.JSON File connector. Currently you can connect to a JSON file using basic authentication only. For example, a URL similar to
https://XXXXX.blob.core.windows.net/path/file.json?sv=2019-01-01&si=something&sr=c&sig=123456abcdefgis currently not supported.Azure Synapse Analytics. Dataflows don't currently support Azure Active Directory authentication for Azure Synapse Analytics. Use basic authentication for this scenario.
Note
If you use data loss prevention (DLP) policies to block the HTTP with Microsoft Entra (preauthorized) connector then SharePoint and OData connectors will fail. The HTTP with Microsoft Entra (preauthorized) connector needs to be allowed in DLP policies for SharePoint and OData connectors to work.
Next steps
The following articles are useful for further information and scenarios when using dataflows:
For more information about the Common Data Model:
Feedback
Coming soon: Throughout 2024 we will be phasing out GitHub Issues as the feedback mechanism for content and replacing it with a new feedback system. For more information see: https://aka.ms/ContentUserFeedback.
Submit and view feedback for