Edit related table records directly from another table’s main form
There are multiple ways that you can work with related table records on a table form within Power Apps. For example, you can include related tables in read-only mode with a quick view form and create or edit a record using a main form in a dialog.
Another way you can work with related table records is by adding a form component control to another table's main form. The form component control lets users edit information of a related table record directly from another table’s form.
For example, here's the form component on a separate tab on the main account form, which lets the user edit a contact record without leaving the account form.
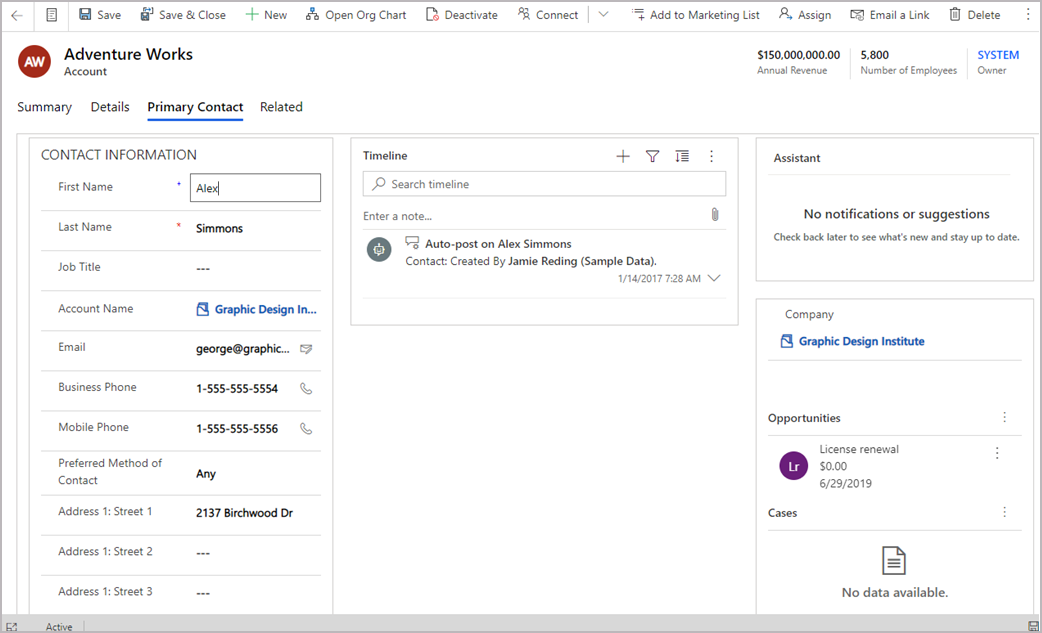
For example, here's the form component on an existing tab on the main account form, which also lets the user edit a contact record without leaving the account form Summary tab.

Add the form component to a table main form
- On the left navigation pane, select Components. If the item isn’t in the side panel pane, select …More and then select the item you want.
- Expand either Input or Display, and then select Form.
On the form component control configuration page, select the properties for the control:
- Select the Lookup column for the form.
- Select the Related form. Depending on the related table configuration for the column:
- If the column is connected to a single table (such as the Created By column), select the Related form to use.
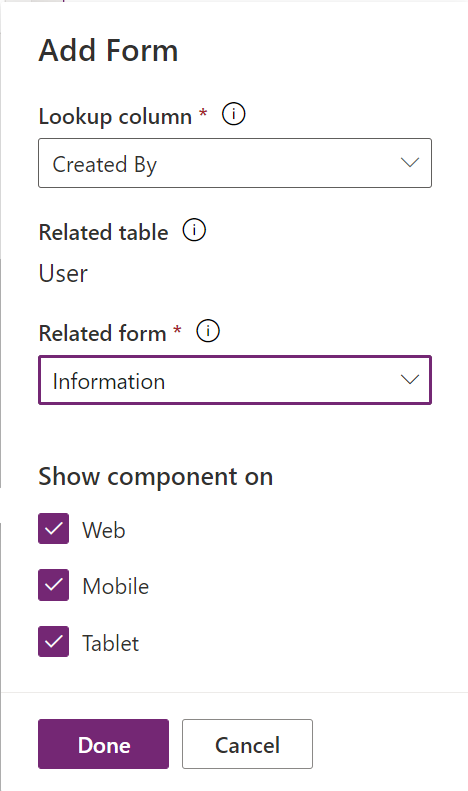
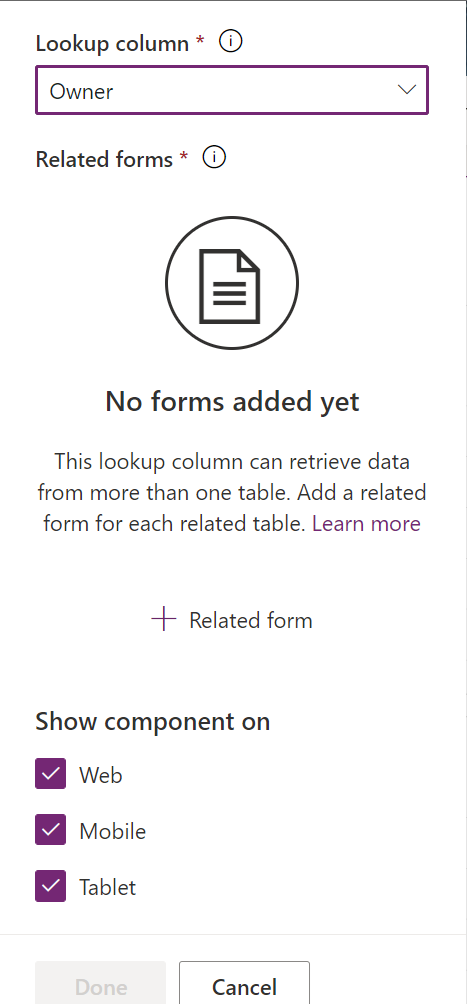
- If the column is connected to multiple tables (polymorphic, such as the owner column), select + Related form and then select Add to add the related form. Continue to select + Related form > Add to add a related form for each related table.
- If the column is connected to a single table (such as the Created By column), select the Related form to use.
- By default, all client app types Web, Phone, and Tablet are enabled to display the form. Clear the client types where you don’t want the form displayed.
- Select Done.
- Save and then Publish the form.
Add the form component using the classic experience
In this example, the Contact standard main form is configured for the form component control that’s added to the account main form.
Important
The way you add a form component control has changed. We recommend that you use the latest experience. More information: Add the form component to a table main form
Sign in to Power Apps.
Select Tables in the left pane. Alternatively, open a solution, and then select a table, such as Account. If the item isn’t in the side panel pane, select …More and then select the item you want.
Select Forms from the components menu.
Select a form with a form type of Main from the forms available.
Select Switch to classic. The classic form editor interface opens as a tab in your browser.
Select the Insert tab. Then, create a new tab and add a new section or add a new section to an existing tab.
In the new section, add a lookup column, such as the Primary Contact lookup column.
Select the lookup column, and then on the Home tab, select Change Properties.
On the Controls tab, select Add Control, in the list of control types select Form Component Control, and then select Add.
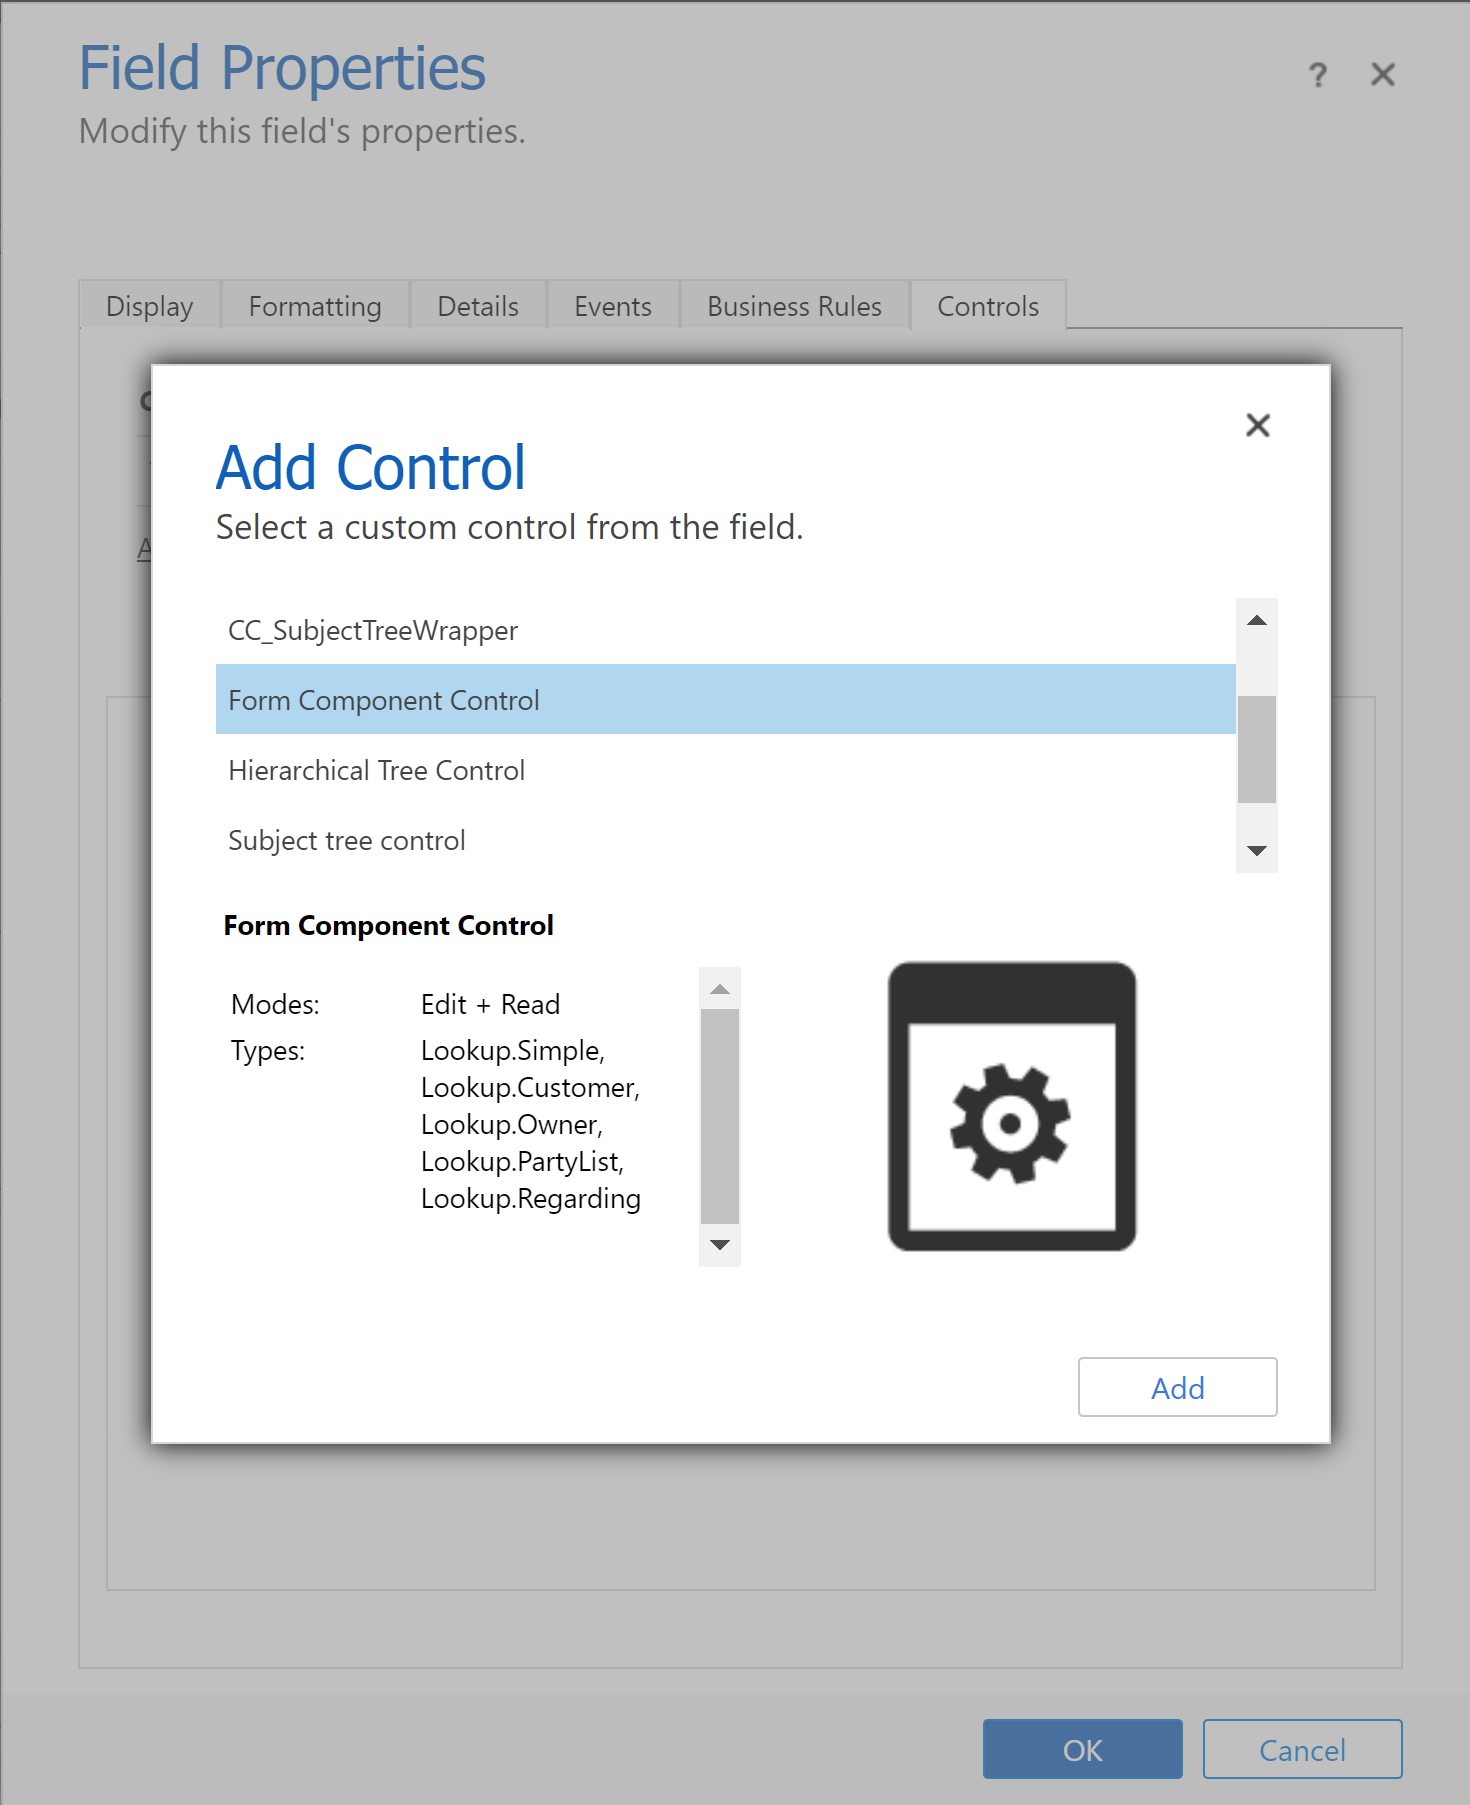
Select Web, Tablet, and Phone for the component.
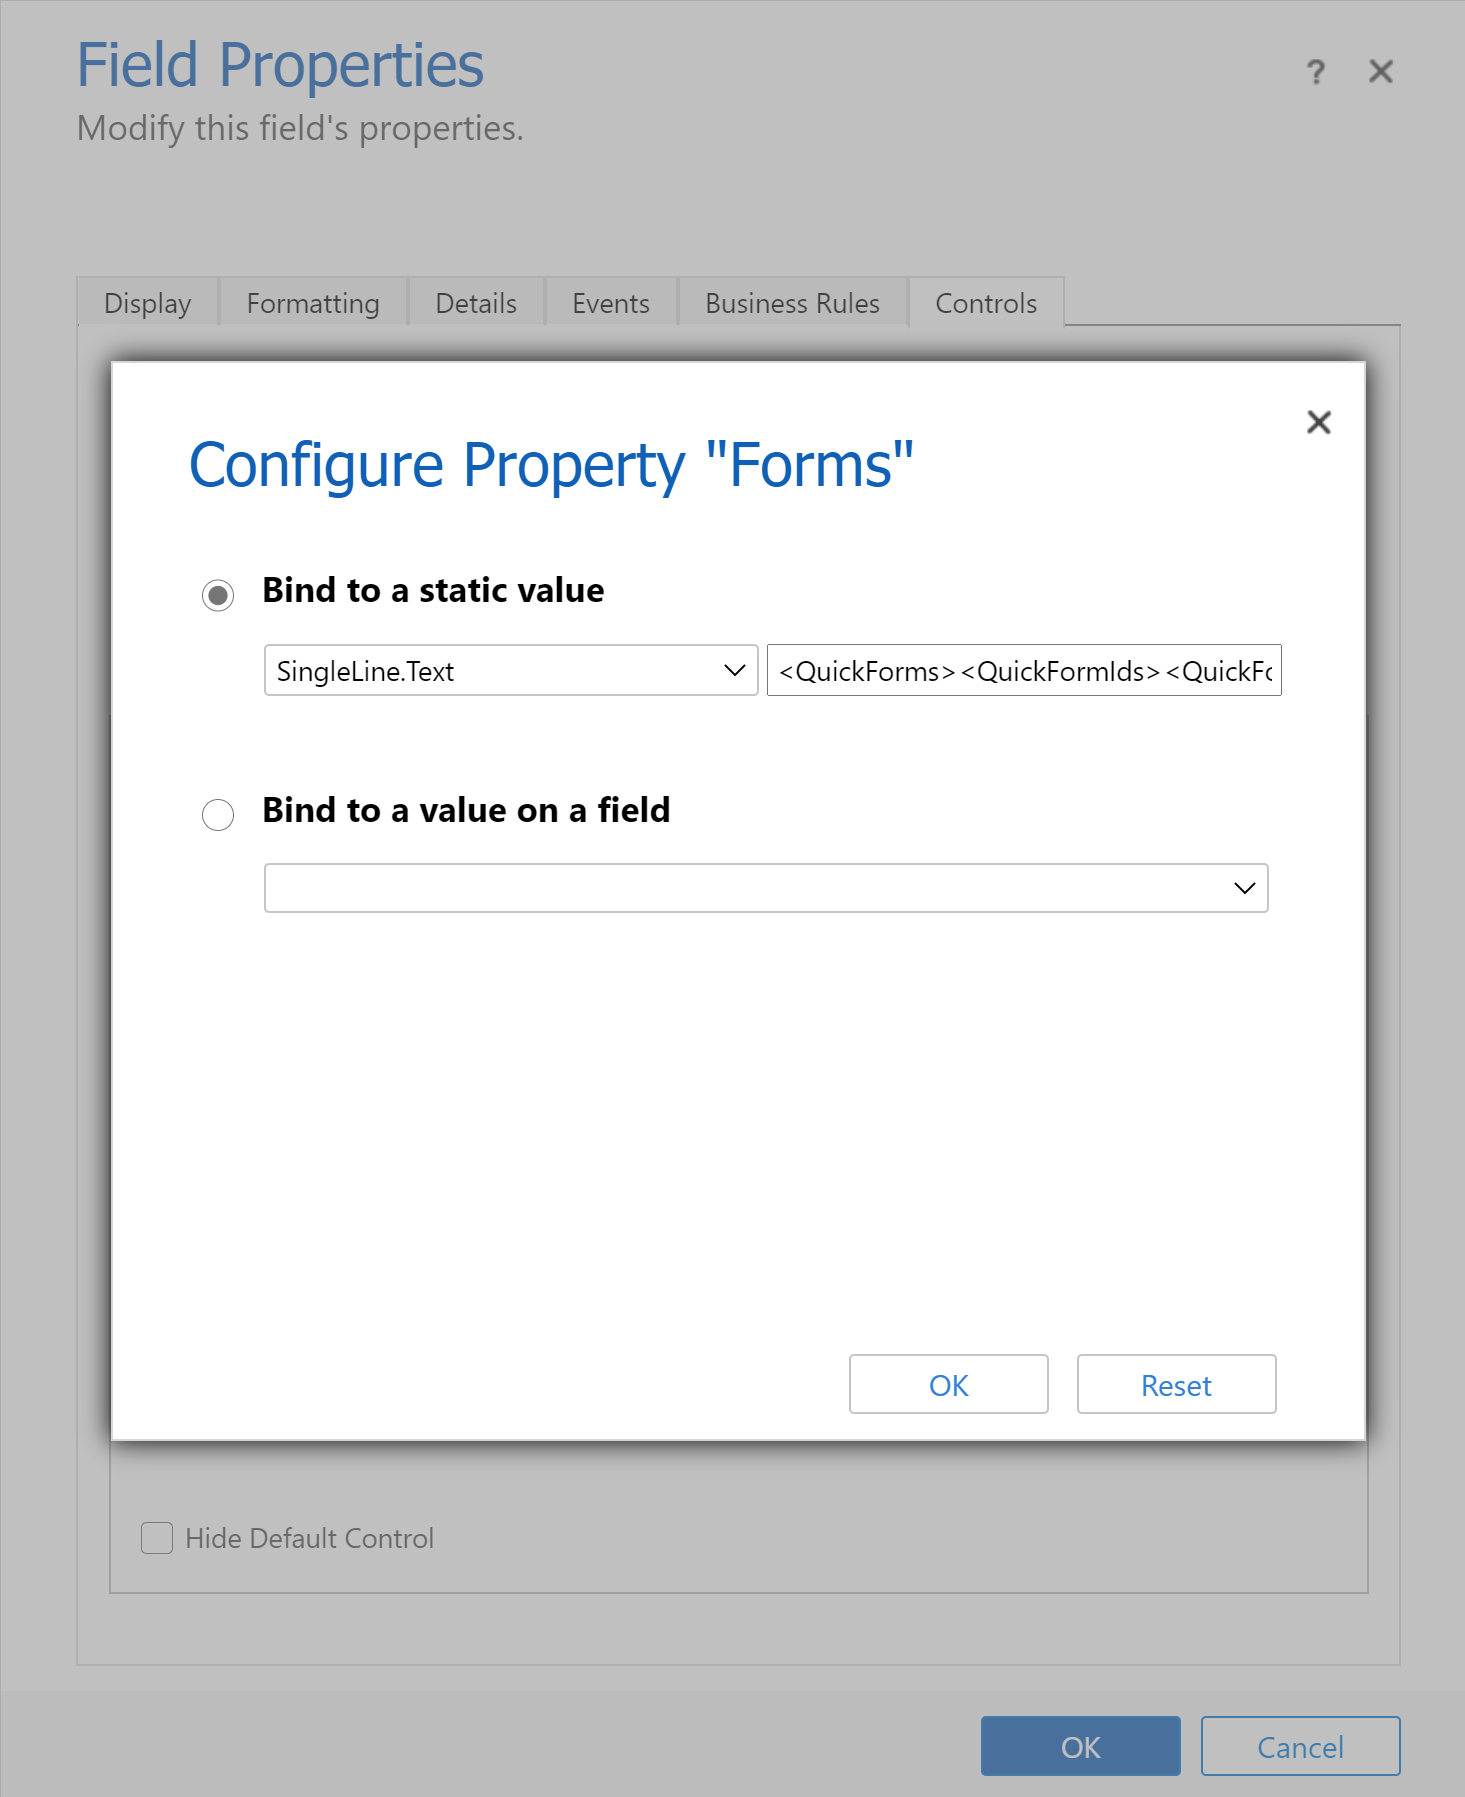
Select Edit (pencil icon) and on the Configure Property dialog box select Bind to a static value and then add an XML entry similar to this where TableName is the table unique name and FormID is the form ID for the main form:
<QuickForms><QuickFormIds><QuickFormId entityname="TableName">FormID</QuickFormId></QuickFormIds></QuickForms>- For example, to render the Contact main form on the account form, use:
<QuickForms><QuickFormIds><QuickFormId entityname="contact">1fed44d1-ae68-4a41-bd2b-f13acac4acfa</QuickFormId></QuickFormIds></QuickForms>
- For example, to render the Contact main form on the account form, use:
Select OK, and then select OK again.
Save and then Publish your form.
Tip
To find the unique name for a table, select the table in Power Apps and then select Settings. The Name appears on the Edit table pane.
The form ID can be found in the browser URL when you edit a form. The ID follows the /edit/ portion of the URL.

In the classic form designer, the form ID follows the formId%3d portion of the URL.
Form component behavior
This section describes form component behavior when used in a model-driven app.
Record selection
In order for the form component control to show a form, the lookup column it's bound to needs to have a value. Otherwise, the control will show the message Source record not selected. One way to set the value is to add to the form a lookup control that is bound to the same lookup column as the form component control. When you use the lookup control to change the lookup column value, the form component control will show a form with the data for the new lookup column value.
Column validation
All columns, both in the main form and in the form component controls, must be valid for data to be sent to Microsoft Dataverse. This is true for both column validation errors, missing required columns, and so on.
OnSave handlers are run for the main form and its form component controls. Any handler can cancel the save for the main form and the form component controls by using preventDefault. This means no save operation can call preventDefault for data to be sent to Dataverse. The order of when the OnSave handlers are called isn't defined. More information: Form OnSave Event (Client API reference) in model-driven apps
Record save
Once the validation stage is passed, data is sent to Dataverse for each record. Currently, each record is updated independently with different requests. The saves aren't transactional, and the order of the saves isn't defined. An error saving one form component won't roll back changes to the main form or other form components. After each save is complete, data is refreshed for all the records on the form.
Notifications
Notifications on the form component are aggregated into the notifications of the main form. For instance, if there are invalid columns in the form component and you try to save, the invalid column notification will appear at the top of the main form rather than in the form component.
Error handling
If there are multiple errors during save, only one error will be shown to the user. If the user can make changes to fix the first error, and saves the next error will be visible. The user will need to continue saving until all errors have been resolved.
Changing records with unsaved changes
If there are unsaved changes in a form for a form component and a user tries to change the lookup column the form component is bound to, the user will be alerted about this change.
Client API
A form context is available for the form component control. It can be accessed via the main form's form context by accessing the control via an API, such as getControl. Before you access data for the related table in the form component control, event handlers should wait for the isLoaded API for the control to return true.
Limitations
Note the following limitations when you add the form component control to a table form:
The form component control only supports rendering main forms. Similarly, support for adding a form component control is only supported with main forms. Other form types, such as quick create, quick view, and card aren't supported.
Forms with a business process flow aren’t currently supported in either the main table form or the related table form. If you have a form with a business process flow, you may encounter unexpected behavior. We recommend that you don't use a form component with a form that uses a business process flow.
The form component control doesn't support embedded form component controls, such as adding a form component control to a form that is used by a form component control.
The form component control doesn't support embedded canvas apps. You might encounter unexpected behavior with these canvas apps.
The form component control will only display the first tab of the form it uses if multiple tabs are included in that form.
Using the same form for different form component controls on a single form isn't supported.
The form that you use with a form component must be included in your app. If it isn't, or if the current user doesn't have access to the form, it will fall back to the top-most main form that is included in the app and available to the user (based on form order).
All components used by the form in a form component must be included in your app. These components include related tables, views, and business process flows. If they aren't, they won't be available in the form or there might be unexpected behavior.
Form component controls have certain limitations when rendered in multi-session apps. If the client API is used to modify the form component control, or if data is entered on the form, the changes might not be persisted when switching multi-session tabs.
You might notice that the timeline wall might not update when a column that is used to set the timeline wall has changed in the form component. When the page is refreshed the timeline wall will update as expected.
On mobile, the timeline control doesn't currently appear in the form component control.
For subgrids, the See all records and See associated records command buttons won't be available if they're rendered inside a form component.
Form component controls aren't supported in bulk edit dialogs. They won't appear in the form in the bulk edit dialog by default and any changes made to related table records with them won't be saved.
See also
Use custom controls for model-driven app data visualizations
Feedback
Coming soon: Throughout 2024 we will be phasing out GitHub Issues as the feedback mechanism for content and replacing it with a new feedback system. For more information see: https://aka.ms/ContentUserFeedback.
Submit and view feedback for